
Are you ready to chat IKEA kitchen design?!
The time has come to give you an update on kitchen progress. If you read our review about the IKEA kitchen planner, then you already know we have the kitchen cabinetry installed. In fact, it has actually been installed for a couple of weeks at this point. To be honest, I was planning on releasing one long post once the kitchen was completely finished (similar to the post about the main bathroom), however, there is just so much to share about the kitchen renovation, I figured why wait!?
IKEA kitchen design questions: a daunting list
Kitchen projects/renovations always have a daunting feel- probably due to the sheer number of decisions that must be made. What is the most functional layout? Do I want more drawers or more cupboards? What countertop material should I get? The decisions go on and on, ideas get changed and then changed again- it’s all part of the process. In addition, the kitchen is the heart and focal point of the home. This can leave you feeling stressed when it comes to design and layout.
Yet, for as much work as it is to plan and construct, kitchen renovations are one of the biggest improvements you can make to a home. Now that we can finally see the light at the end of the tunnel, I thought I’d take you through the steps (and planning tools) we used for our IKEA kitchen design.
Before pics
To give you a refresh- the kitchen looked like the photos below when we took possession of the house.
In the one on the right you can already see us mapping out potentially island sizes- maybe a bit premature, but we were too excited to wait.
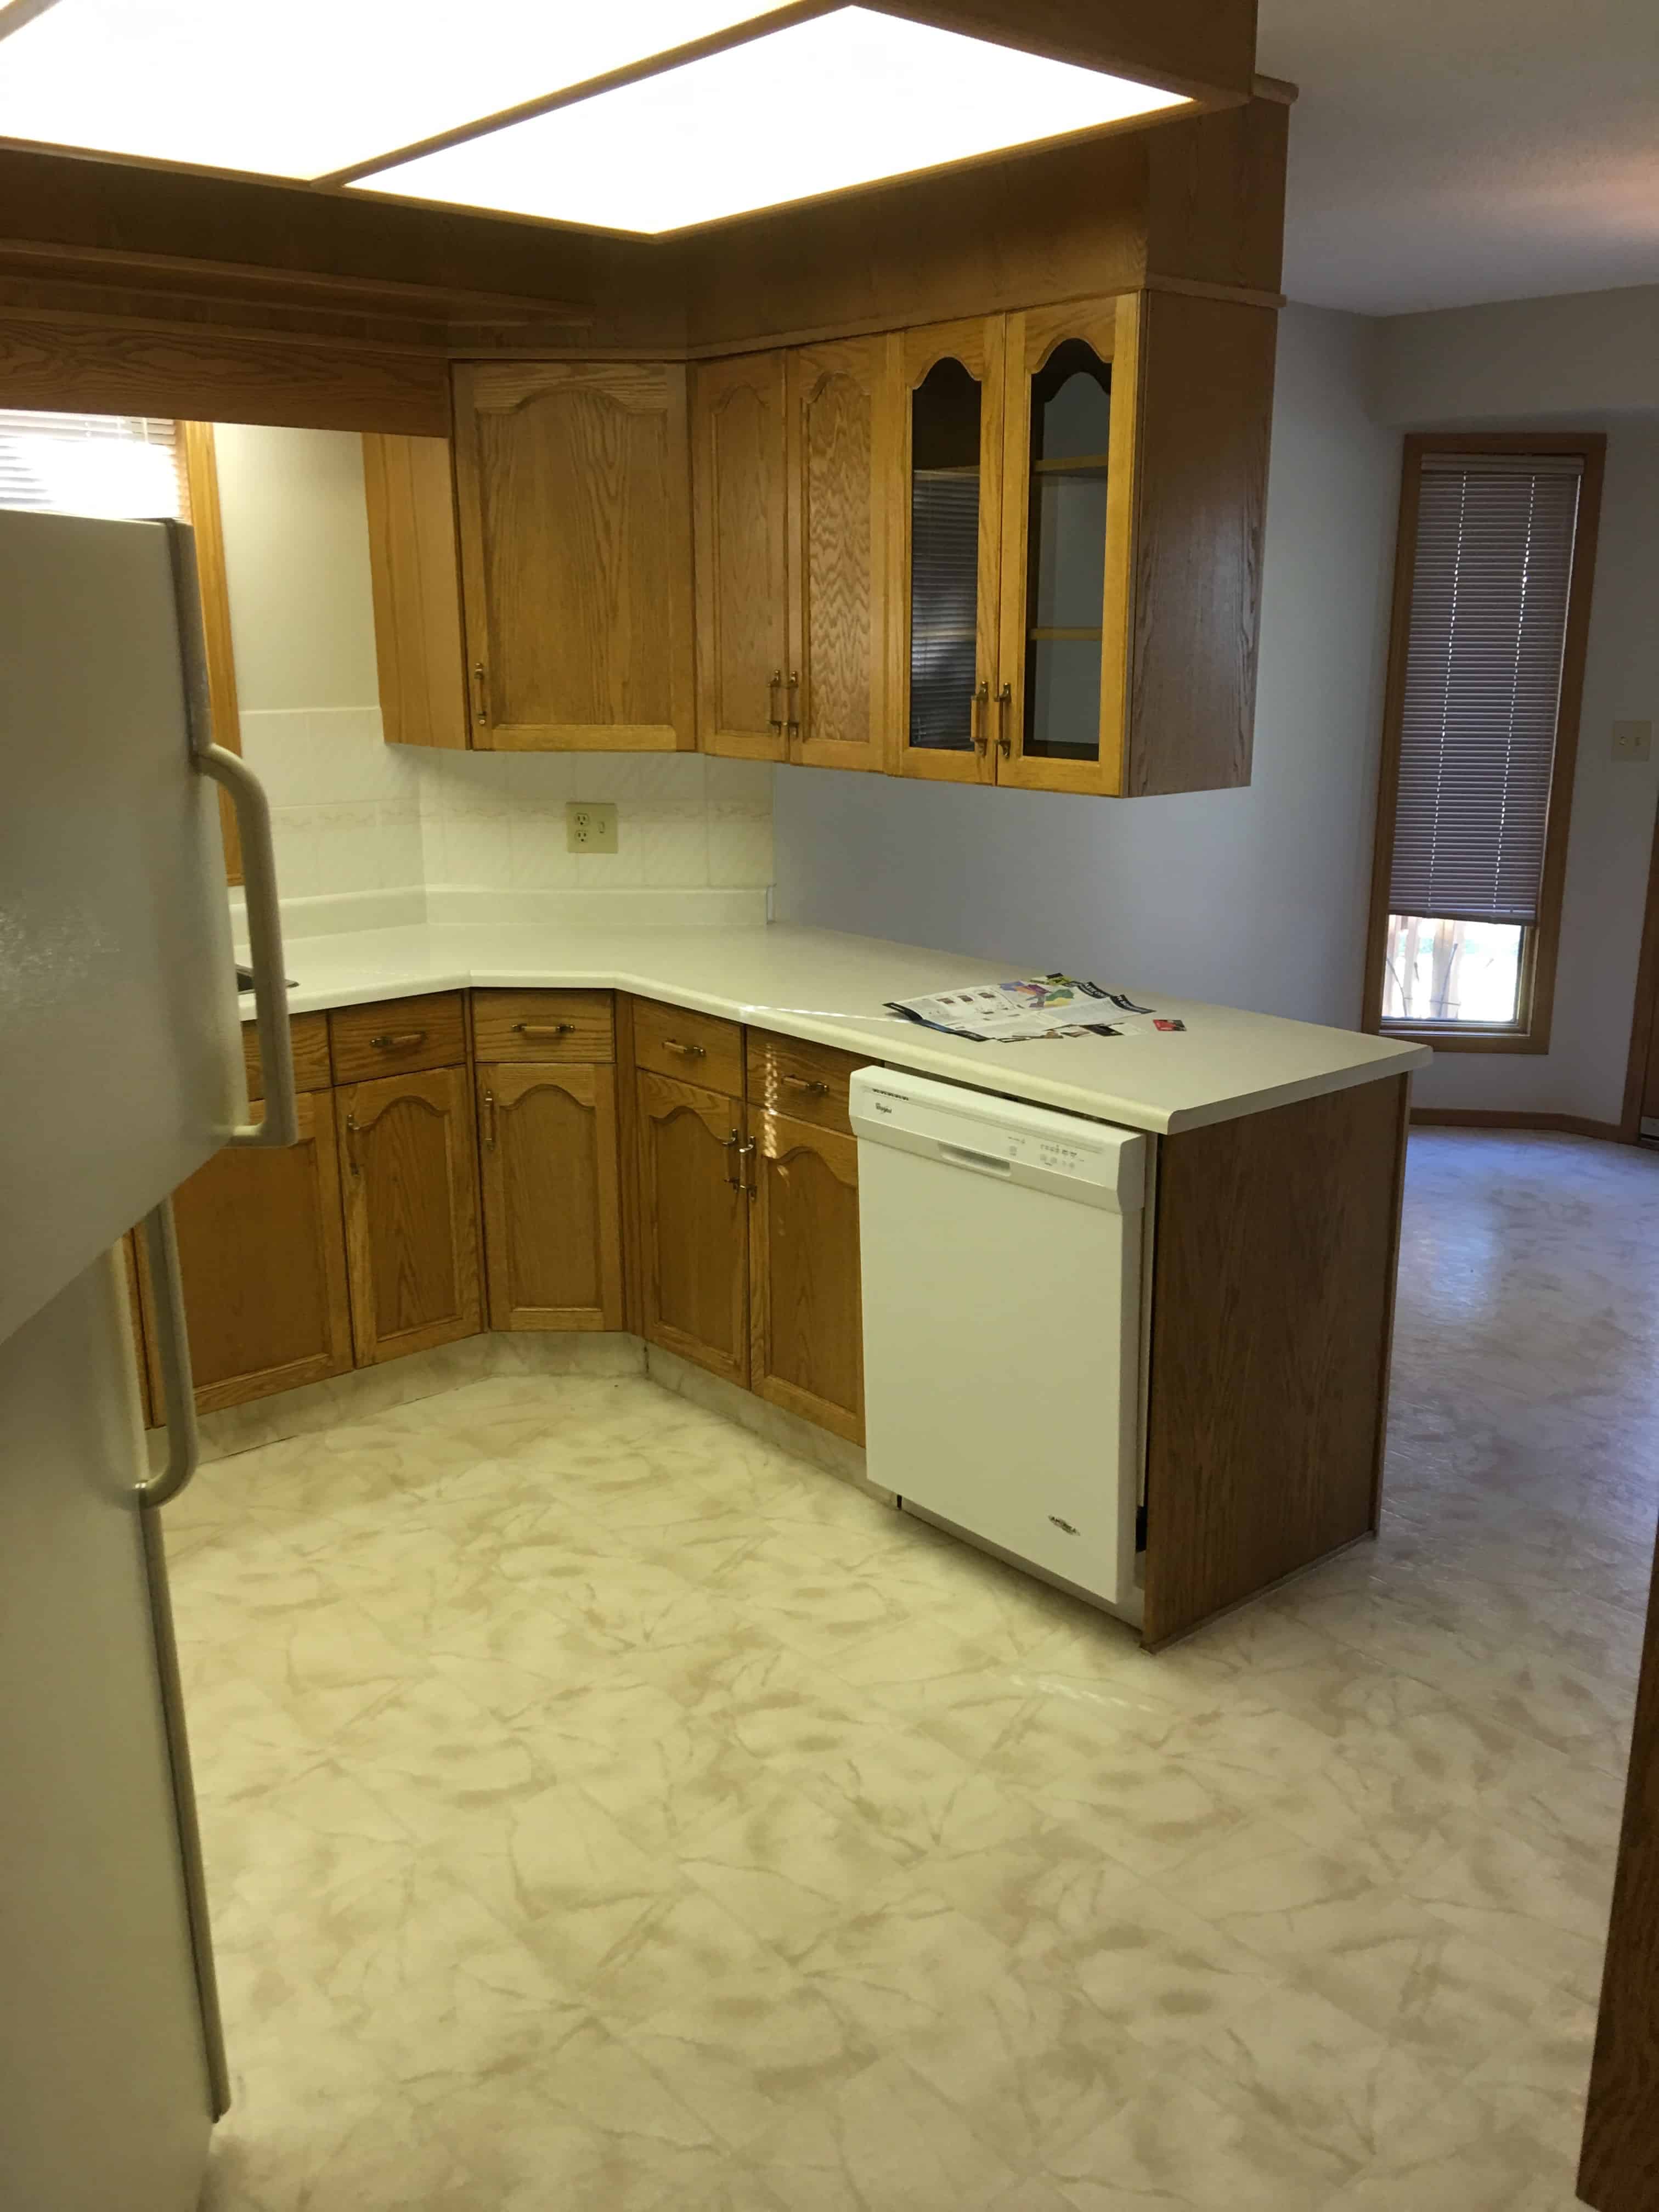
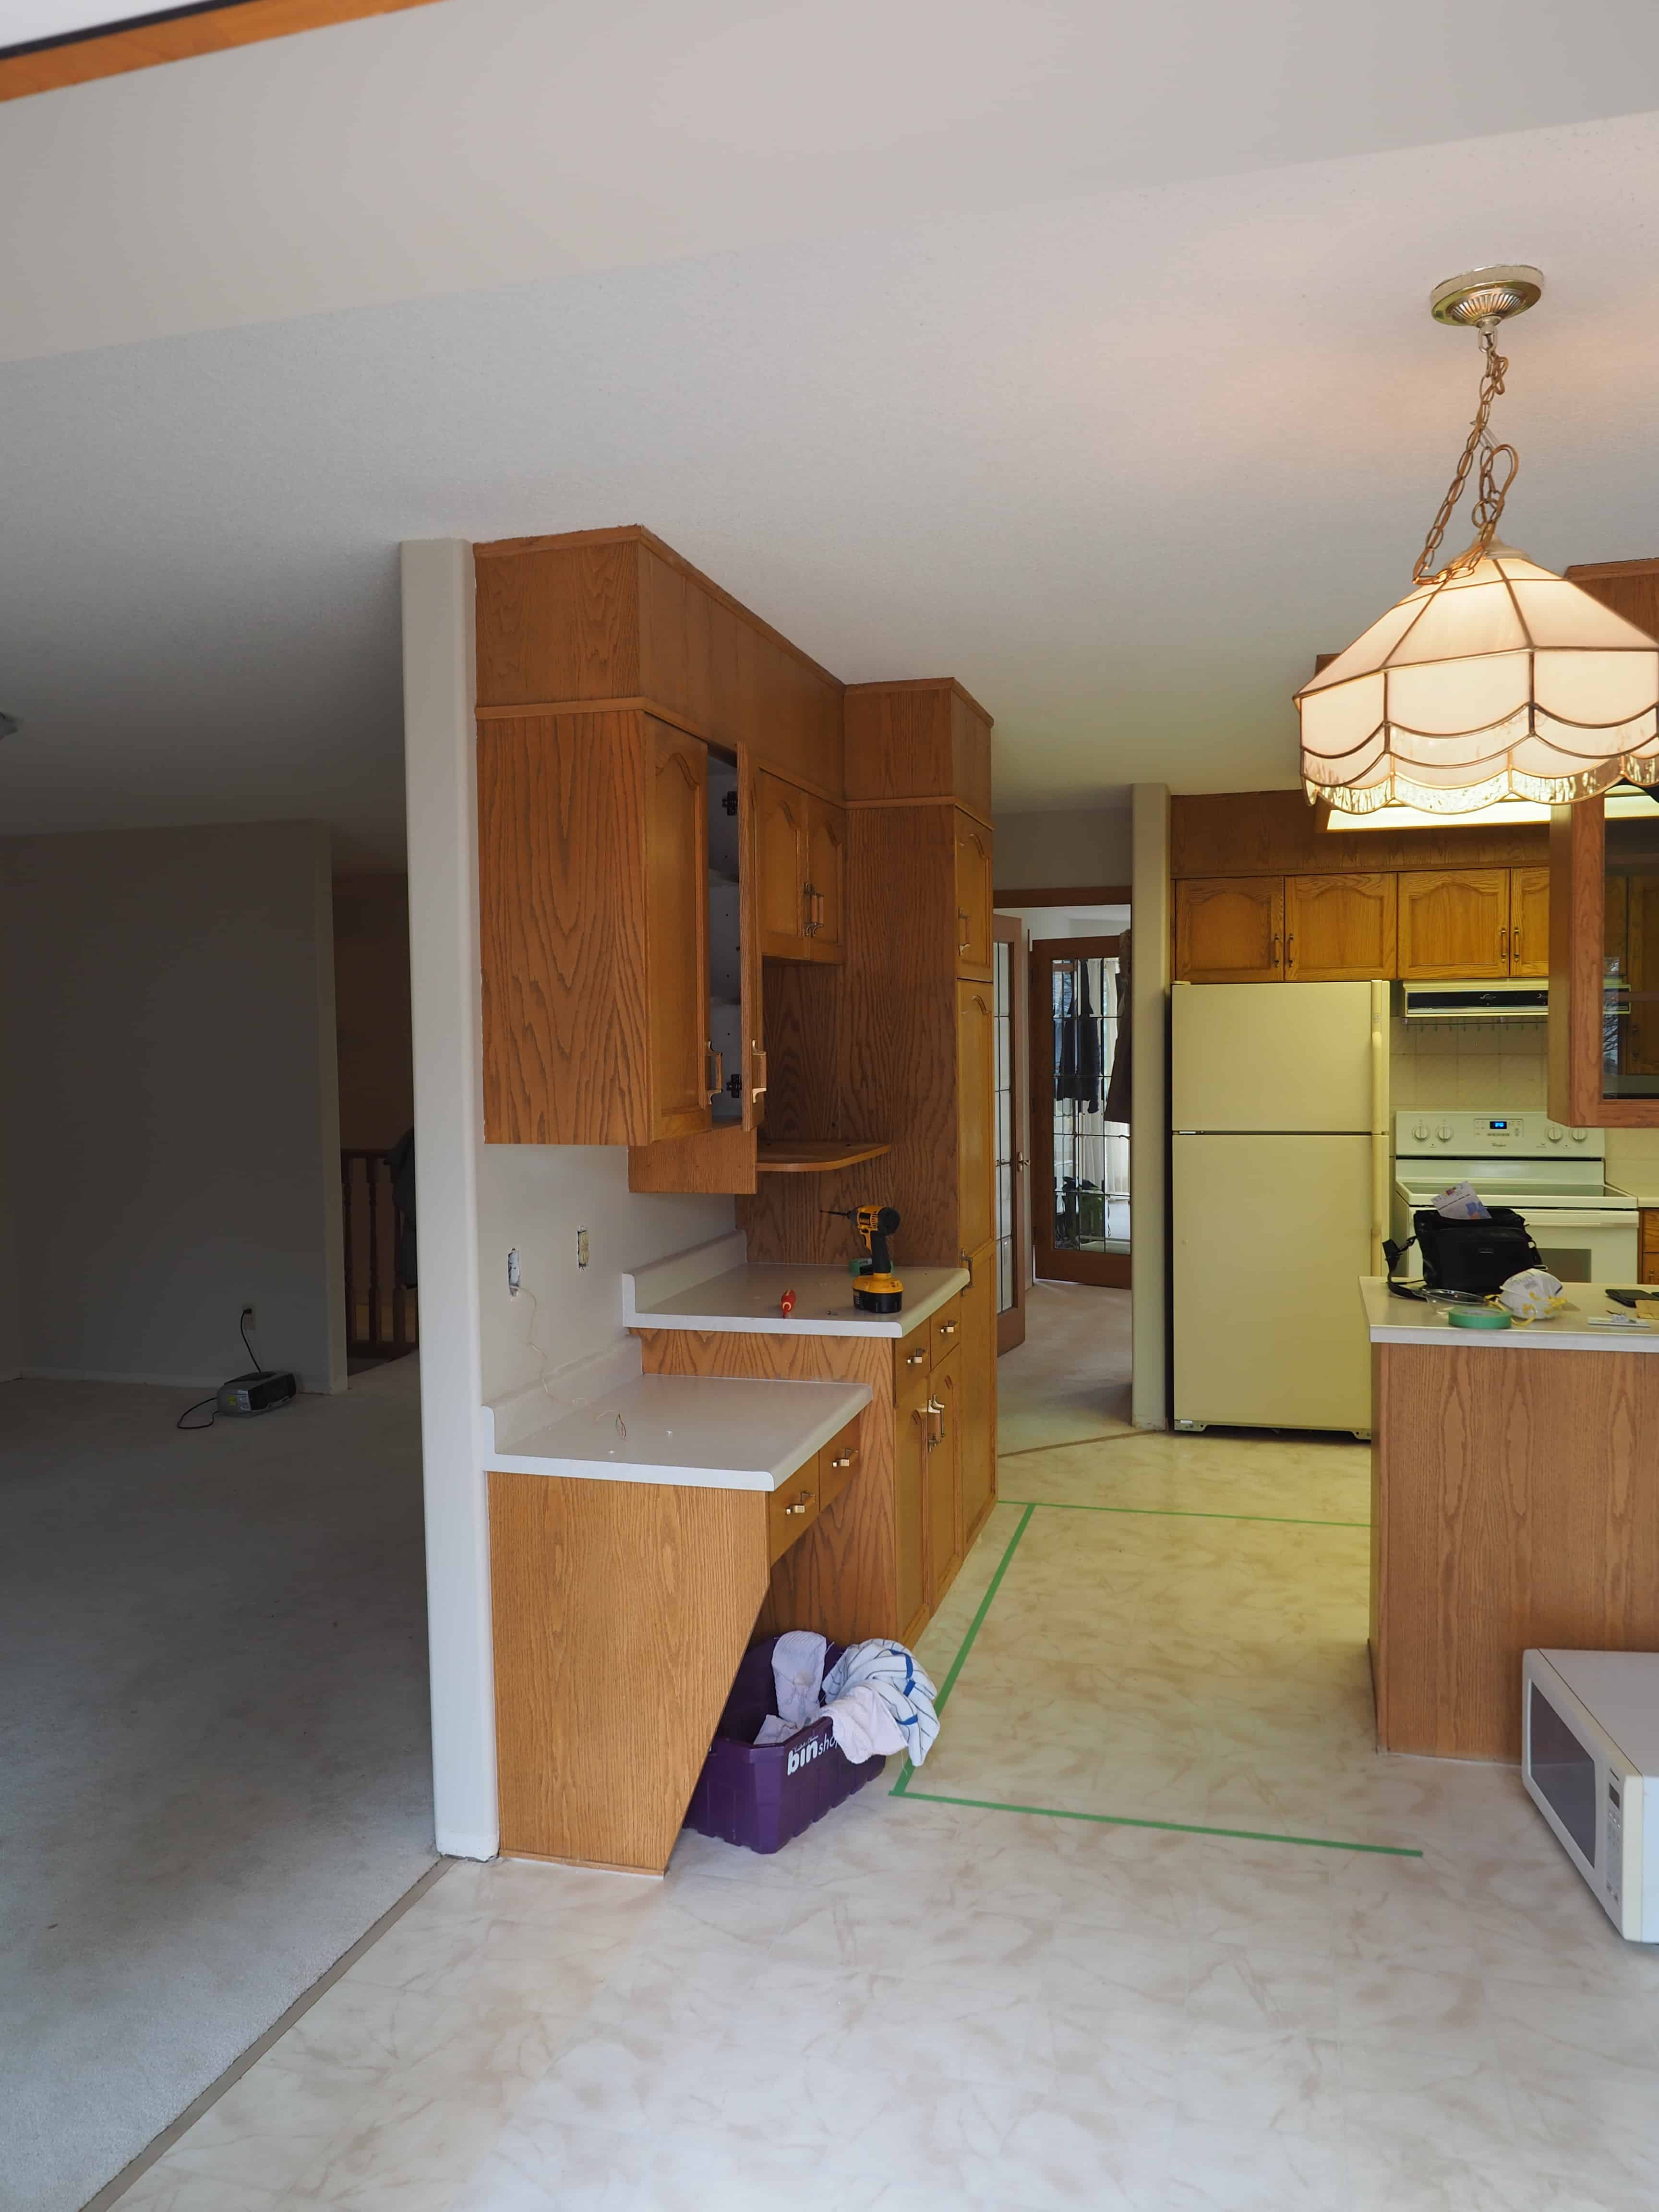
As you can see from the photos, the layout wasn’t great- the stove was sandwiched between the fridge and the corner, the dishwasher was far away from the sink, and the entire space was cut in half by the peninsula and hanging upper cabinets.
The IKEA kitchen design
So let’s dive in. Much like a professional designer or engineer, now is the time I show you the architectural drawings we made of each potential layout….who am I kidding, the plans were actually scribbled in a spiral notebook.
When the layout failed to pass a specific requirement or it just didn’t feel right, it was scratched out, the page was flipped, and we started again. I figured what better way bring you into our project, then do the same with you!
Planning tools
Now that we finally knew what the footprint of the kitchen space was going to be, we got started on designing the cabinetry layout and style. We made the decision to use IKEA cabinets, so we turned to their free 3D kitchen planner to get started. On a side not, if you missed our reviews about IKEA’s kitchen planning service, you can check out review 1 HERE, and then please read the updated review 2, HERE.
It isn’t my favourite interface to use, but with a little patience it will do everything you need it to- plan your space in 3D and provide you with a complete list of items for ordering.
IKEA kitchen design note:
We completely customized our IKEA kitchen design to give it a built in look without the added cost of custom cabinets.
In the end we had a L-shaped kitchen and centre island. We placed cabinets only on the kitchen side of the island, leaving the other half as an eating area with leg room under the countertop.
Now: There are a couple things to keep in mind when looking over the designs;
- The cabinet legs/kicks have all been removed which makes the cabinets look shorter than what they will be once installed
- I remove their generic butcher block countertop.
The first reason is because I don’t actually want the legs or kicks when placing the order (I custom built the kicks out of 2×6’s ripped down to the correct height) and the second reason is just a personal preference.
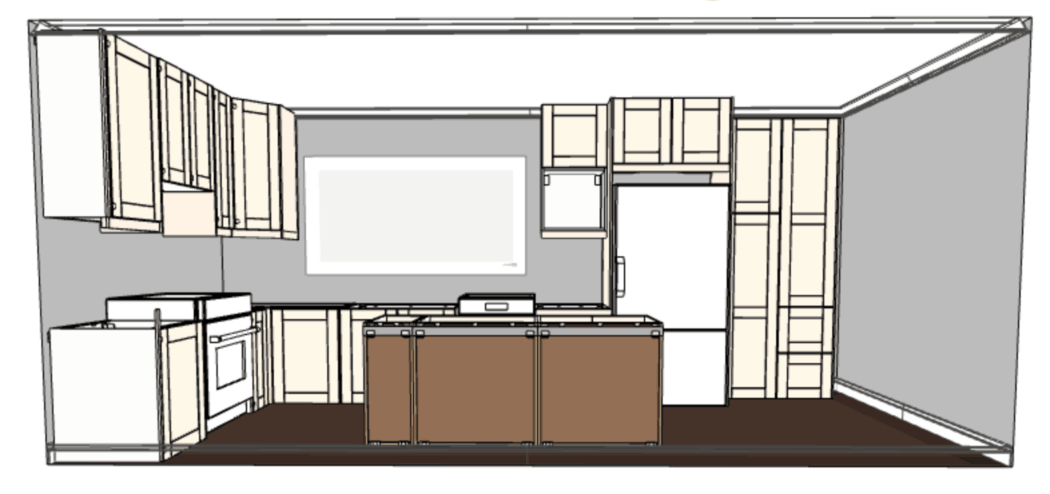
Photos from IKEA kitchen planner
The first few images give you an idea of what the kitchen will look like once the cabinets are installed. Keep in mind this is just the starting point.

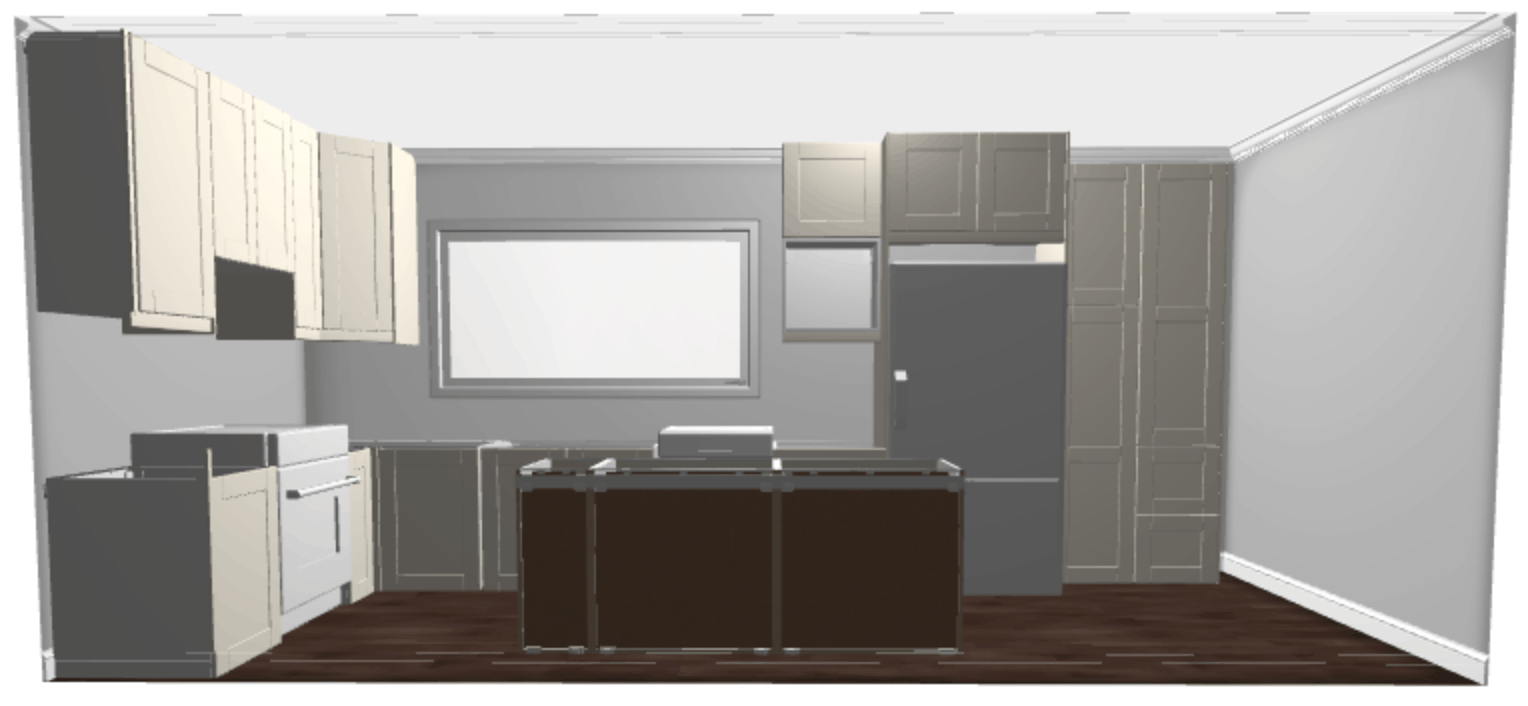
The following image is a top down view of our kitchen space. When we were designing the layout, we were making a conscious effort to think about how the kitchen will be used.
Remember it’s not only about looks, a beautiful kitchen that lacks functionality will just get annoying. In our case, we want the to make sure the stove and sink were close enough for preparing and cooking. I would say the only downside we could see at this point was how far away the fridge felt from the rest of the kitchen.
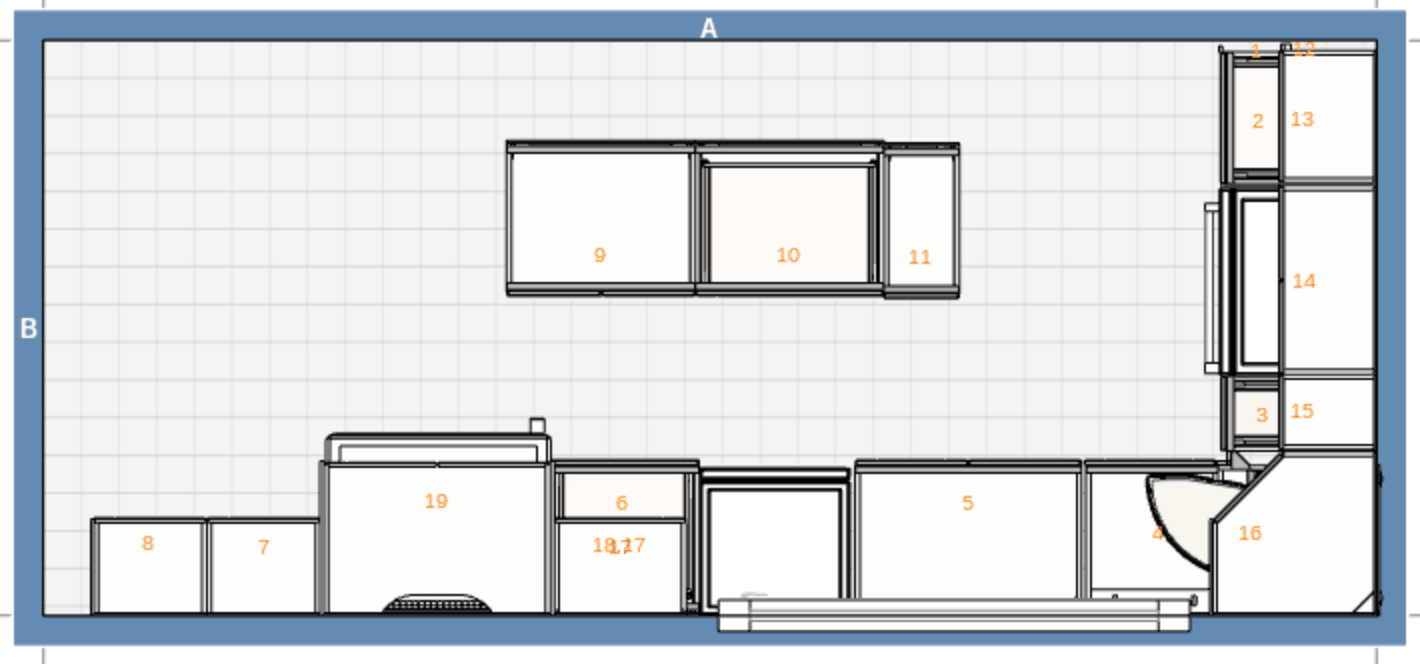
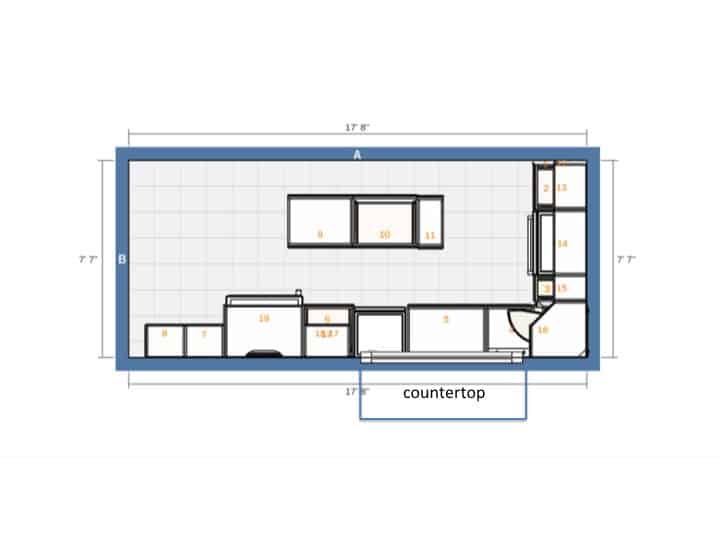
Lastly, these images are somewhat misleading. There is actually an extended piece of countertop behind the kitchen sink to the back wall (the area where we squared off the alcove). In reality, the layout would look more like this:
There are definitely a few caveats with IKEA’s software- you can’t import any products that aren’t theirs (lighting, appliances, etc), you are stuck with their room shapes (would have been awfully hard to plan had we not removed the alcove behind the sink), and it doesn’t allow you to add custom framing (like we were planning to do for the island).
Regardless, the tool is great for it’s planned use- ordering your kitchen cabinets.
Map it out
Of course, before we went ahead and ordered everything, we mapped it all out in the physical space (we used green masking tape).
Take the time to map out everything and then move about the space to see how it feels. In our case, we tried 3 different distances between the island and main countertops, we started with 40″ which felt tight, then tried 48″ which felt too far apart, before finally settling on 44″ as the ‘right’ amount of space. You can research as much as you want about the ‘right’ distances, blah blah blah, but in the end only you can decide what is right for your space.
It is also pretty hard to get an idea of the finishes in these renderings. We wanted our IKEA kitchen design to feel timeless and classic- which is why we opted for IKEA’s Grimslov off-white shaker style cabinet doors. For the backsplash we chose to go with standard 3×6″ white subway tiles, balanced with winter grey grout in between. This will also help provide some continuity within the house as they are similar to the tub tile in the main bathroom.
We hadn’t fully decided on pendants for above the island, but we were tinkering with the idea of mostly glass to keep the room feeling open and airy. As for appliances, we went with a Jenn-air induction range, Miele dishwasher, and LG 36″ counter depth french door refrigerator. I am not fussy about matching appliances from the same manufacturer/line. I’d much rather have the best tool (within budget) for the job.
So that’s where the design and planning stopped and construction began (which you know is already well under way). Be sure to check back for Chapter 2, with an update on construction, countertop selection, and progress shots.
Thank you for your great information.