
Extra organization in the kitchen is one of the most requested “must haves” for their new space. Toe-kick drawers are a great way to sneak in extra storage, no matter the size of the space.
In our modern basement bar project, I included a toe-kick drawer as extra hidden storage area. Admittedly, not exactly necessary for a basement bar. But, I have had a few clients request toe-kick drawers in their designs and walking through a build tutorial seems like a worthy cause.
Once again if you prefer video over the written word, here it is.
Determine toe-kick size
The first step is to build the toe-kicks before you begin building the toe-kick drawer(s). With IKEA cabinets, I rip 2×6’s down to 4.5″ tall. This will make the finished countertop height 36″ off the floor.
This is a great stage to determine where you want to include a toe-kick drawer in your space. For this area, skip the front portion of the toe kick. In the basement bar design, I included the toe-kick drawer in the center of my two 21″ cabinets.
Determine toe-kick drawer size
Once you have established the location of the toe-kick drawer, it’s time to do some math. It is a good idea to have the drawer rails on hand to get the final measurement of the actual drawer size. I find it easiest to leave roughly 1/16″ spacing in the final drawer measurement.
Build toe-kick drawer
I’ll be the first to admit I am by no means a professional cabinet builder. Therefore, I opted for a simple plywood box design. I used pocket screws, as well as wood glue to keep the box square and strong.
The bottom of the box is 1/4″ plywood. It is slid into place via a dado slot I cut using my table saw. One trick I did pick up from carpenters far better than myself was to never glue in drawer bottoms or door panels. Wood will always change with humidity and temperature, and glued inserts will inevitably bust out. There are space balls that can be inserted in dado or routered grooves that prevent rattle and maintain pressure on the insert.
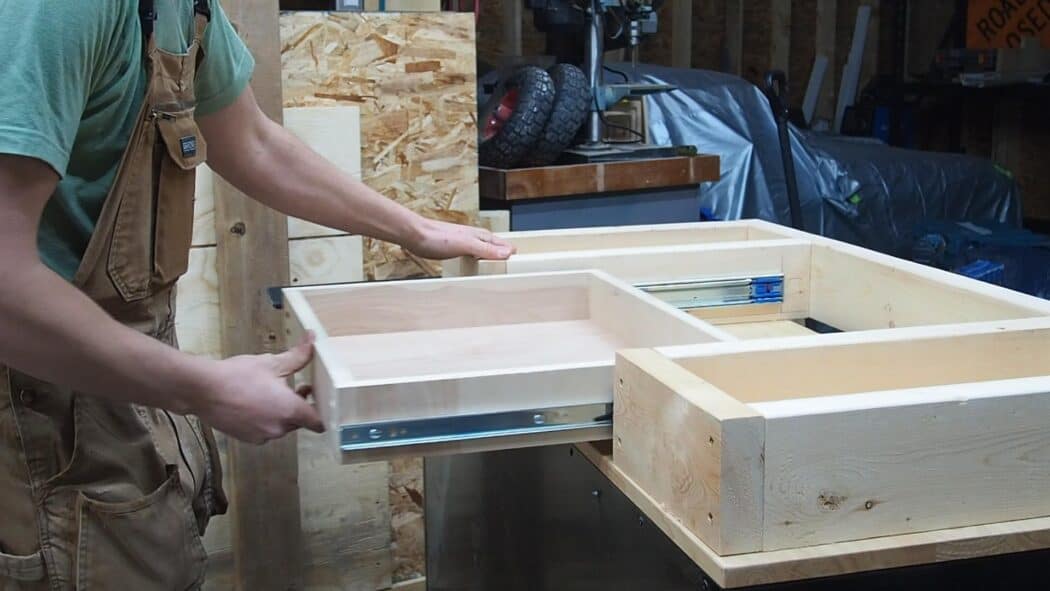
Assemble final toe-kick drawer
I used a combination square and wood spacers to ensure the drawer rails were height matched on each side of the toe-kick. This worked well for a single drawer, however, if I was doing more cabinetry work I would invest in a Kreg slide jig.
No Comments