
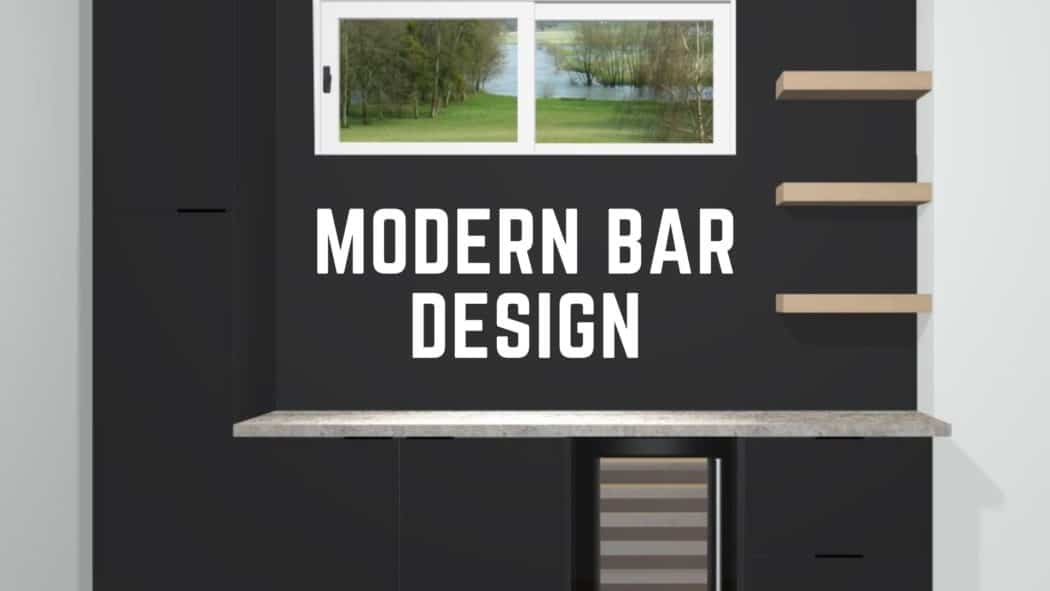
It seems like almost every renovation includes some sort of bar feature. Our latest project, a townhouse basement renovation, is no different. In this project I include a built-in modern home bar.
Over the next few weeks we will walk through the complete design and construction of this modern bar space. If the written word is not your cup of tea, fear not, we will make videos for every step of the way as well.
Designing a home bar
The first part of this project focuses on design. More importantly, the design process I like to use for smaller projects like these.
Measurements
The first part of any good design is getting the required measurements and ensuring accuracy. There are a few measurements that are needed:
- complete width and height of the space
- window/door sizes
- window/door placement (how far from the wall(s)/floor)
- are any architectural elements present (beams, bulkheads, columns, etc.)
For this specific project, I also needed to take into account that the measurements were taken without drywall in place. This means, all of my measurements will change by 1/2″ per wall.
Design
Once the measurements are taken, I can insert them into the design software. I am using ProKitchen Software, however, many similar programs exist and even something like the IKEA home planner can be used to create designs.
Step 1: Design around the ‘must haves’
Every design includes elements that we have to include. For example, kitchen designs require appliances, a sink, some sort of pantry. In this home bar I need to include a pantry style storage cabinet and a bar fridge.
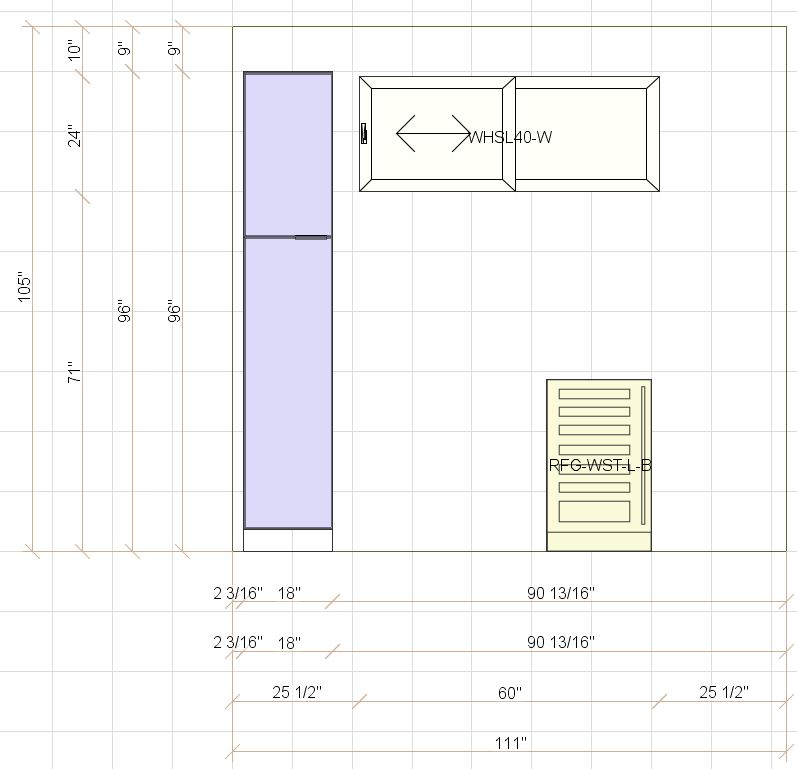
The specific location of these two elements are based on room layout and planned usage of the space.
Step 2: Add in surrounding cabinetry
Once the main elements are placed, I can begin filling in the gaps with the remaining cabinetry. The exact type of cabinetry (drawers vs. doors) is rather subjective. Our post discussing planning a functional kitchen layout covers this in more detail.
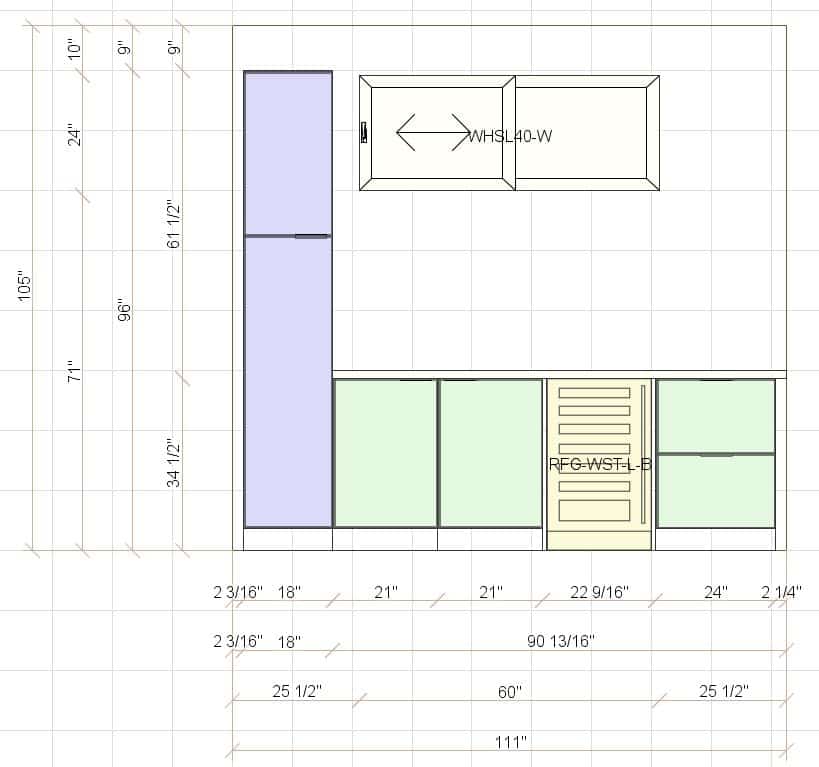
This should be a fluid process. Try to keep elements somewhat mobile, leaving the ability to alter their location by a few inches here or there. This isn’t possible with every element, but it is especially important when working with off-the-shelf cabinetry systems like IKEA’s.
Step 3: Add in ‘balance’
At this point in the design process, there is guaranteed to be a visual imbalance. This was fully on display in this home bar design (above image). The design was dominated by the large pantry cabinet on the left, with nothing to balance it out on the right.
In order to create the visual balance I was after, I needed to include something up the right hand side. I am personally not a fan of standalone wall cabinets, therefore floating shelves seemed to be the perfect solution for this bar.
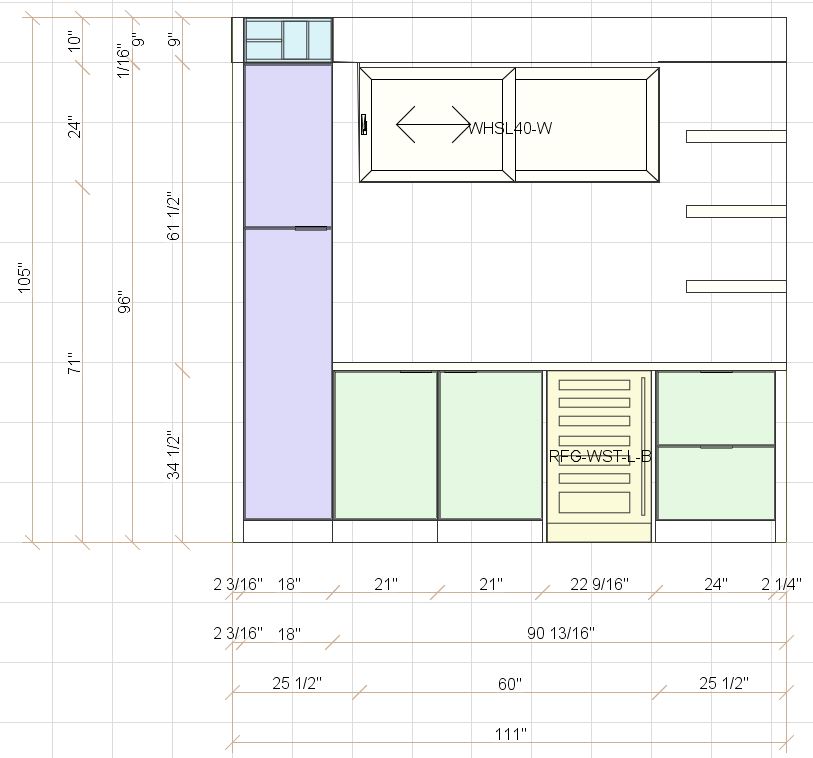
Step 4: Add the final touches
The final touches are what taken any design from okay to exceptional. These final touches include:
- countertops
- backsplash
- cabinet hardware
- faucets
- lighting
It can even include wall finishings such as wallpaper. Although these elements generally don’t impact the functionality of the space, they are important to the design and personality.
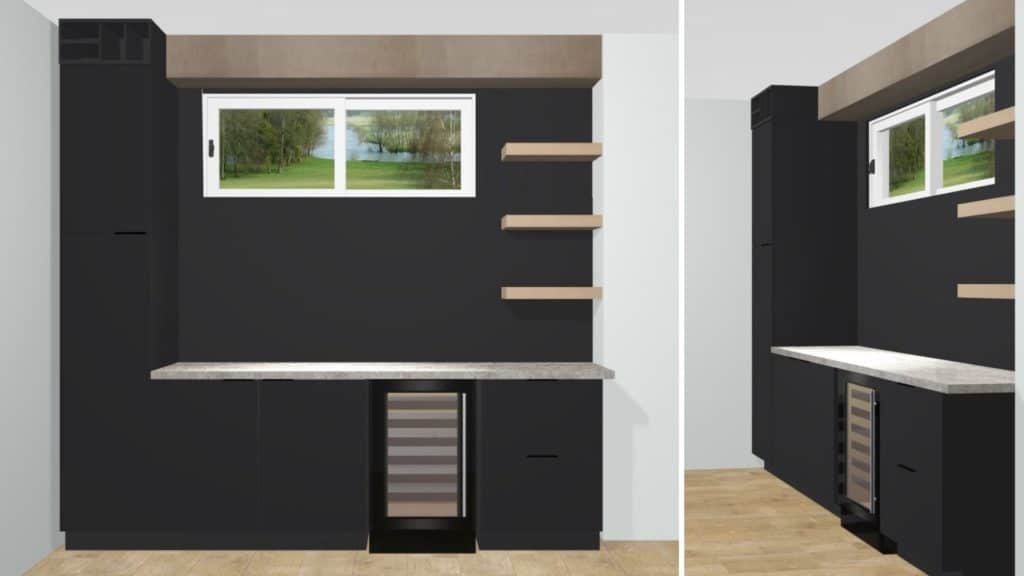
For this home bar, I opted for concrete-like finished countertops and hidden matte black door pulls to complete the industrial/modern aesthetic. I also needed to add a bulkhead to cover a rather unsightly air duct, and decided to tie it in with the floating wood shelves for a rounded look. Finally, to add some character that reflects the homeowners, I plan to create a mountain motif using black hexagon tiles on the backsplash.
To top it off, I will also be including some hidden storage elements you aren’t going to want to miss. So be sure to join our community here and on our Youtube channel.
Sounds easy, right?
If not, don’t worry. Find out how Homestud Studios can help with your next home renovation project.
No Comments