
We are so excited about the IKEA cabinets!
After hours of designing and planning our IKEA kitchen, watching it take shape has been so rewarding. This is when you realize exactly why you wake up everyday to do this over and over again.
Hopefully by now you have realized that we renovated the kitchen at The Beige Bungalow. A few days ago we shared our process for layout design and planning. Planning on paper or with green tape on the ground is one thing, but it’s a whole different beast when it comes to real life. If you have been following the blog, it was during this process that I became rather unhappy with our IKEA kitchen planner.
The goal
The kitchen is by far the biggest renovation project in the house to date. Our goal was to tackle everything as DIY as possible, only hiring out the quartz countertop installation.
Well the best laid plans can’t always be in stone, and we ended up hiring an electrician to do the kitchen electrical. This was done largely to save time and speed up the process. They added 6 recessed LED pot lights, 2 boxes for island pendants, all new wiring for under cabinet lighting, as well as all new countertop plugs. The best part is it was complete in a day and a half, far quicker than we would have completed it ourselves.
Before photos
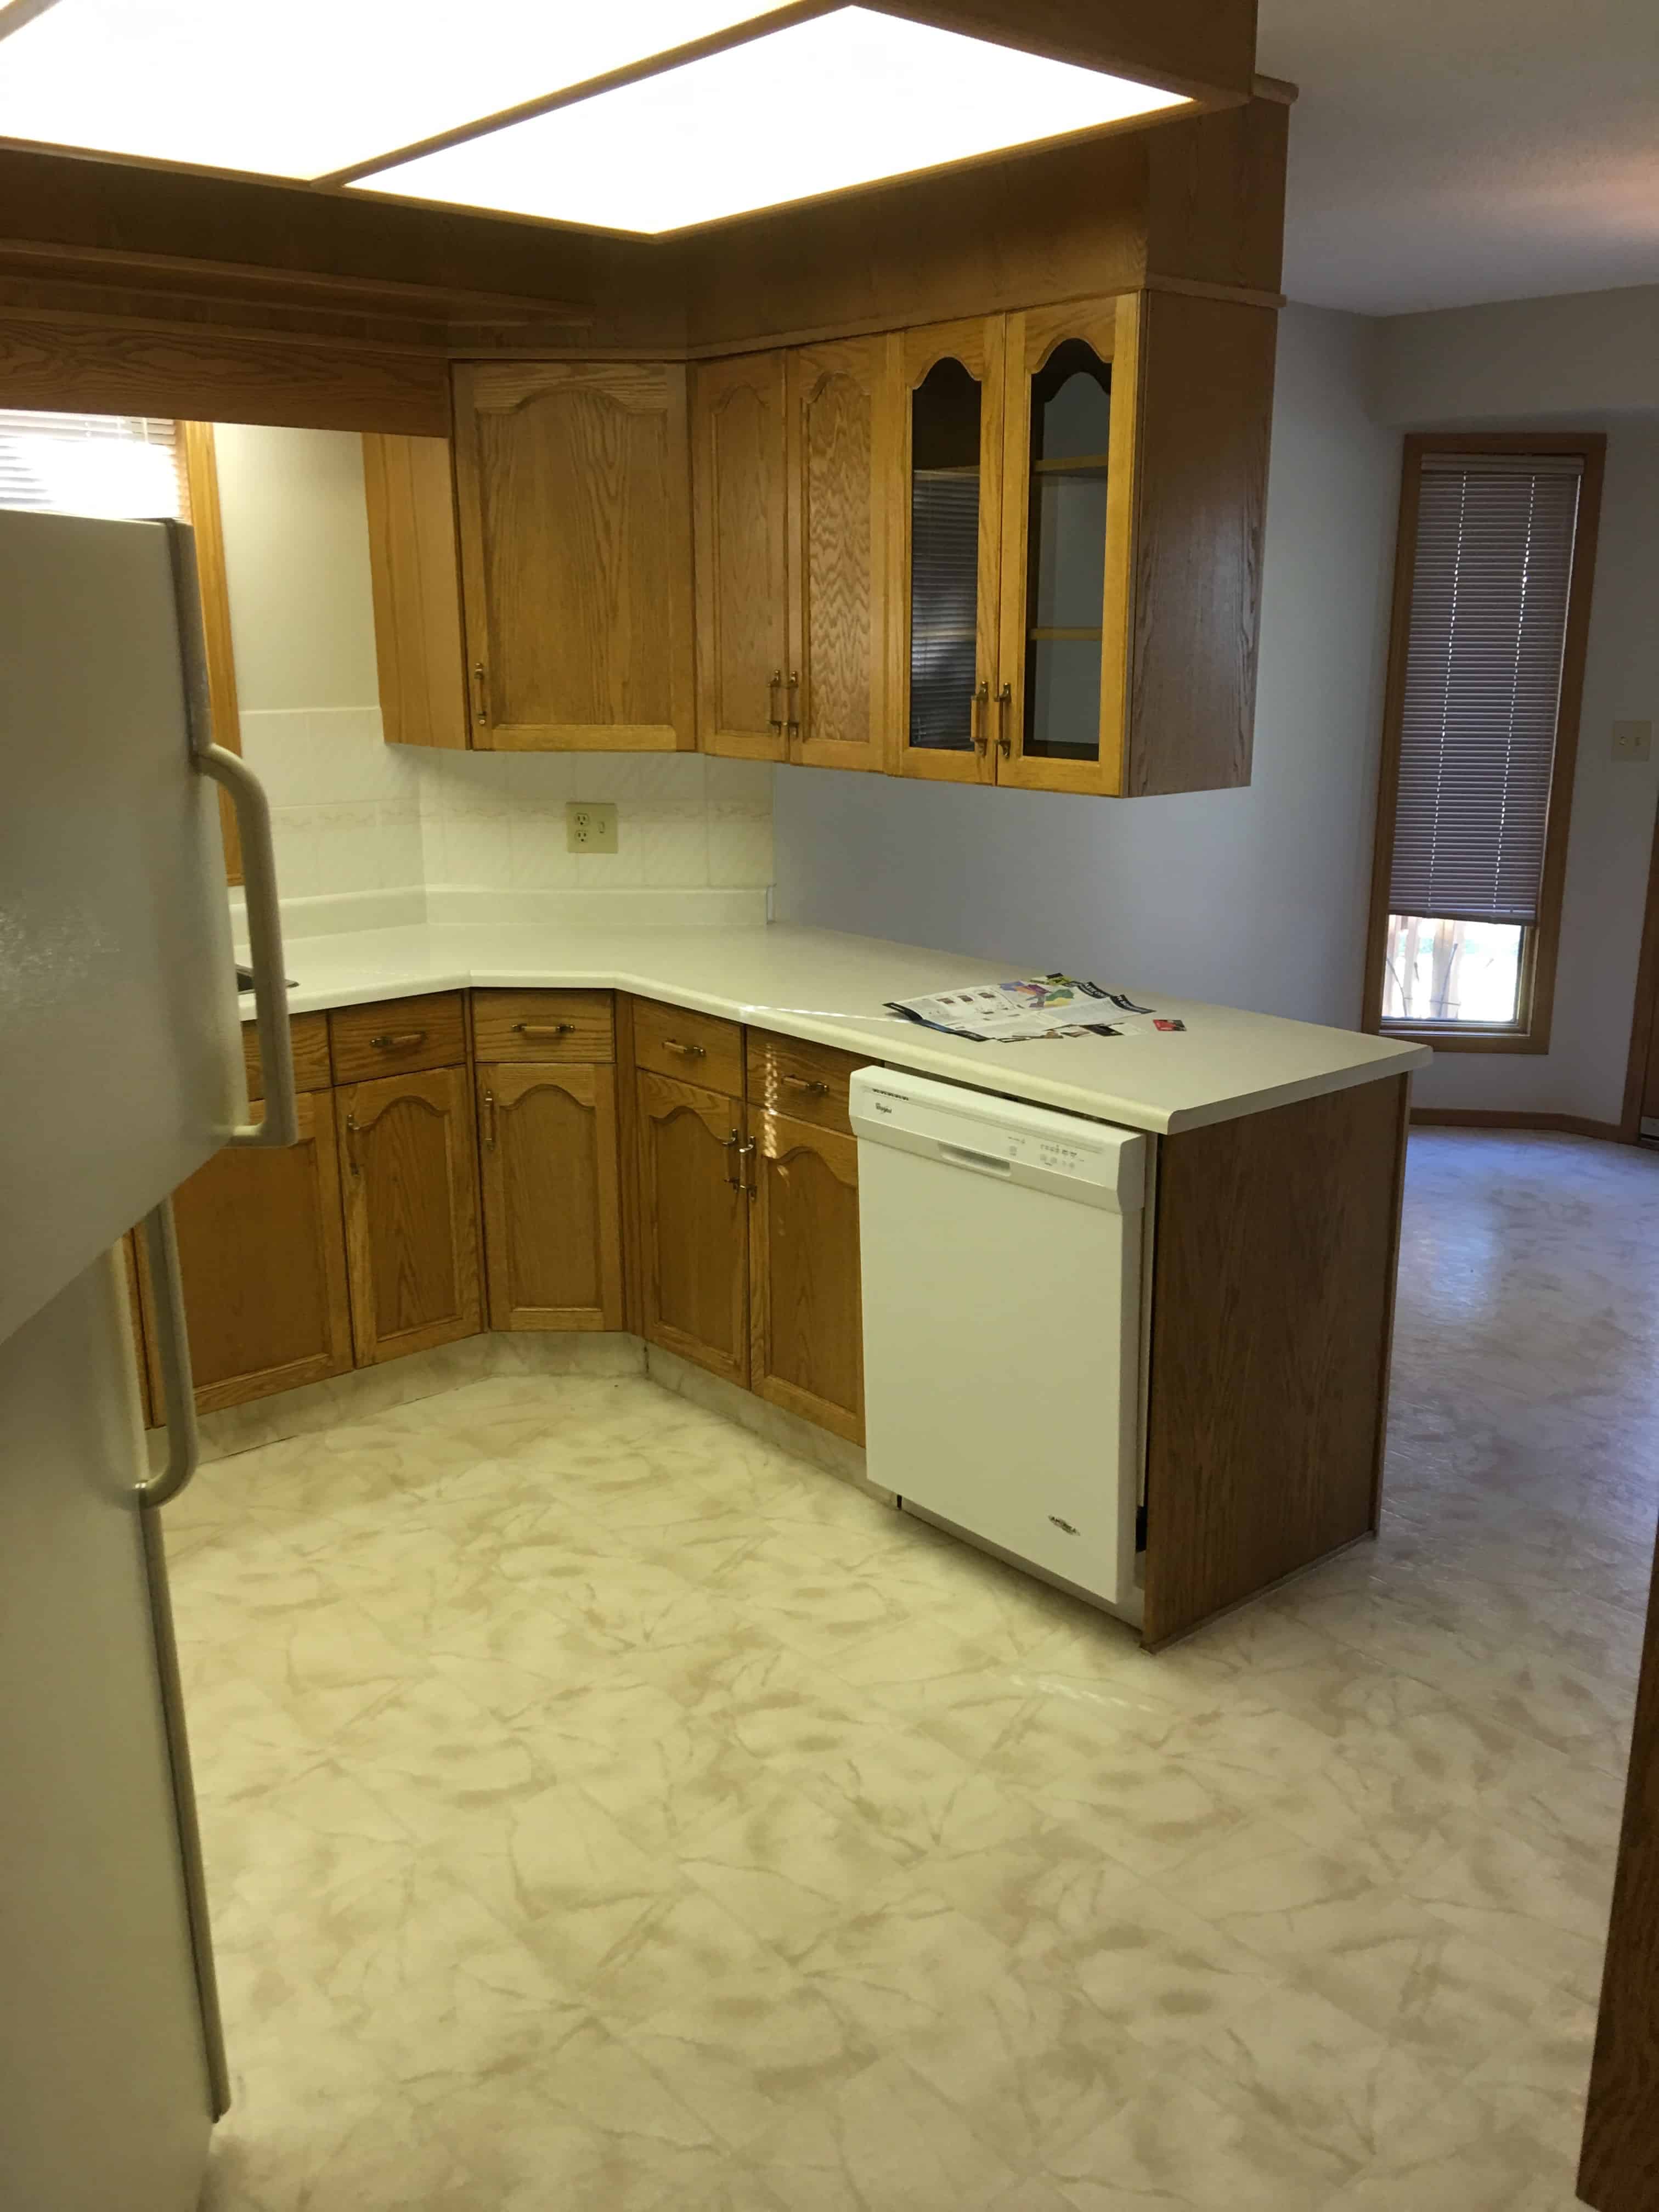
First some before photos. The first is looking at the kitchen/family room from the back entrance to the house. This really highlights the wall we removed in order to open up the space.
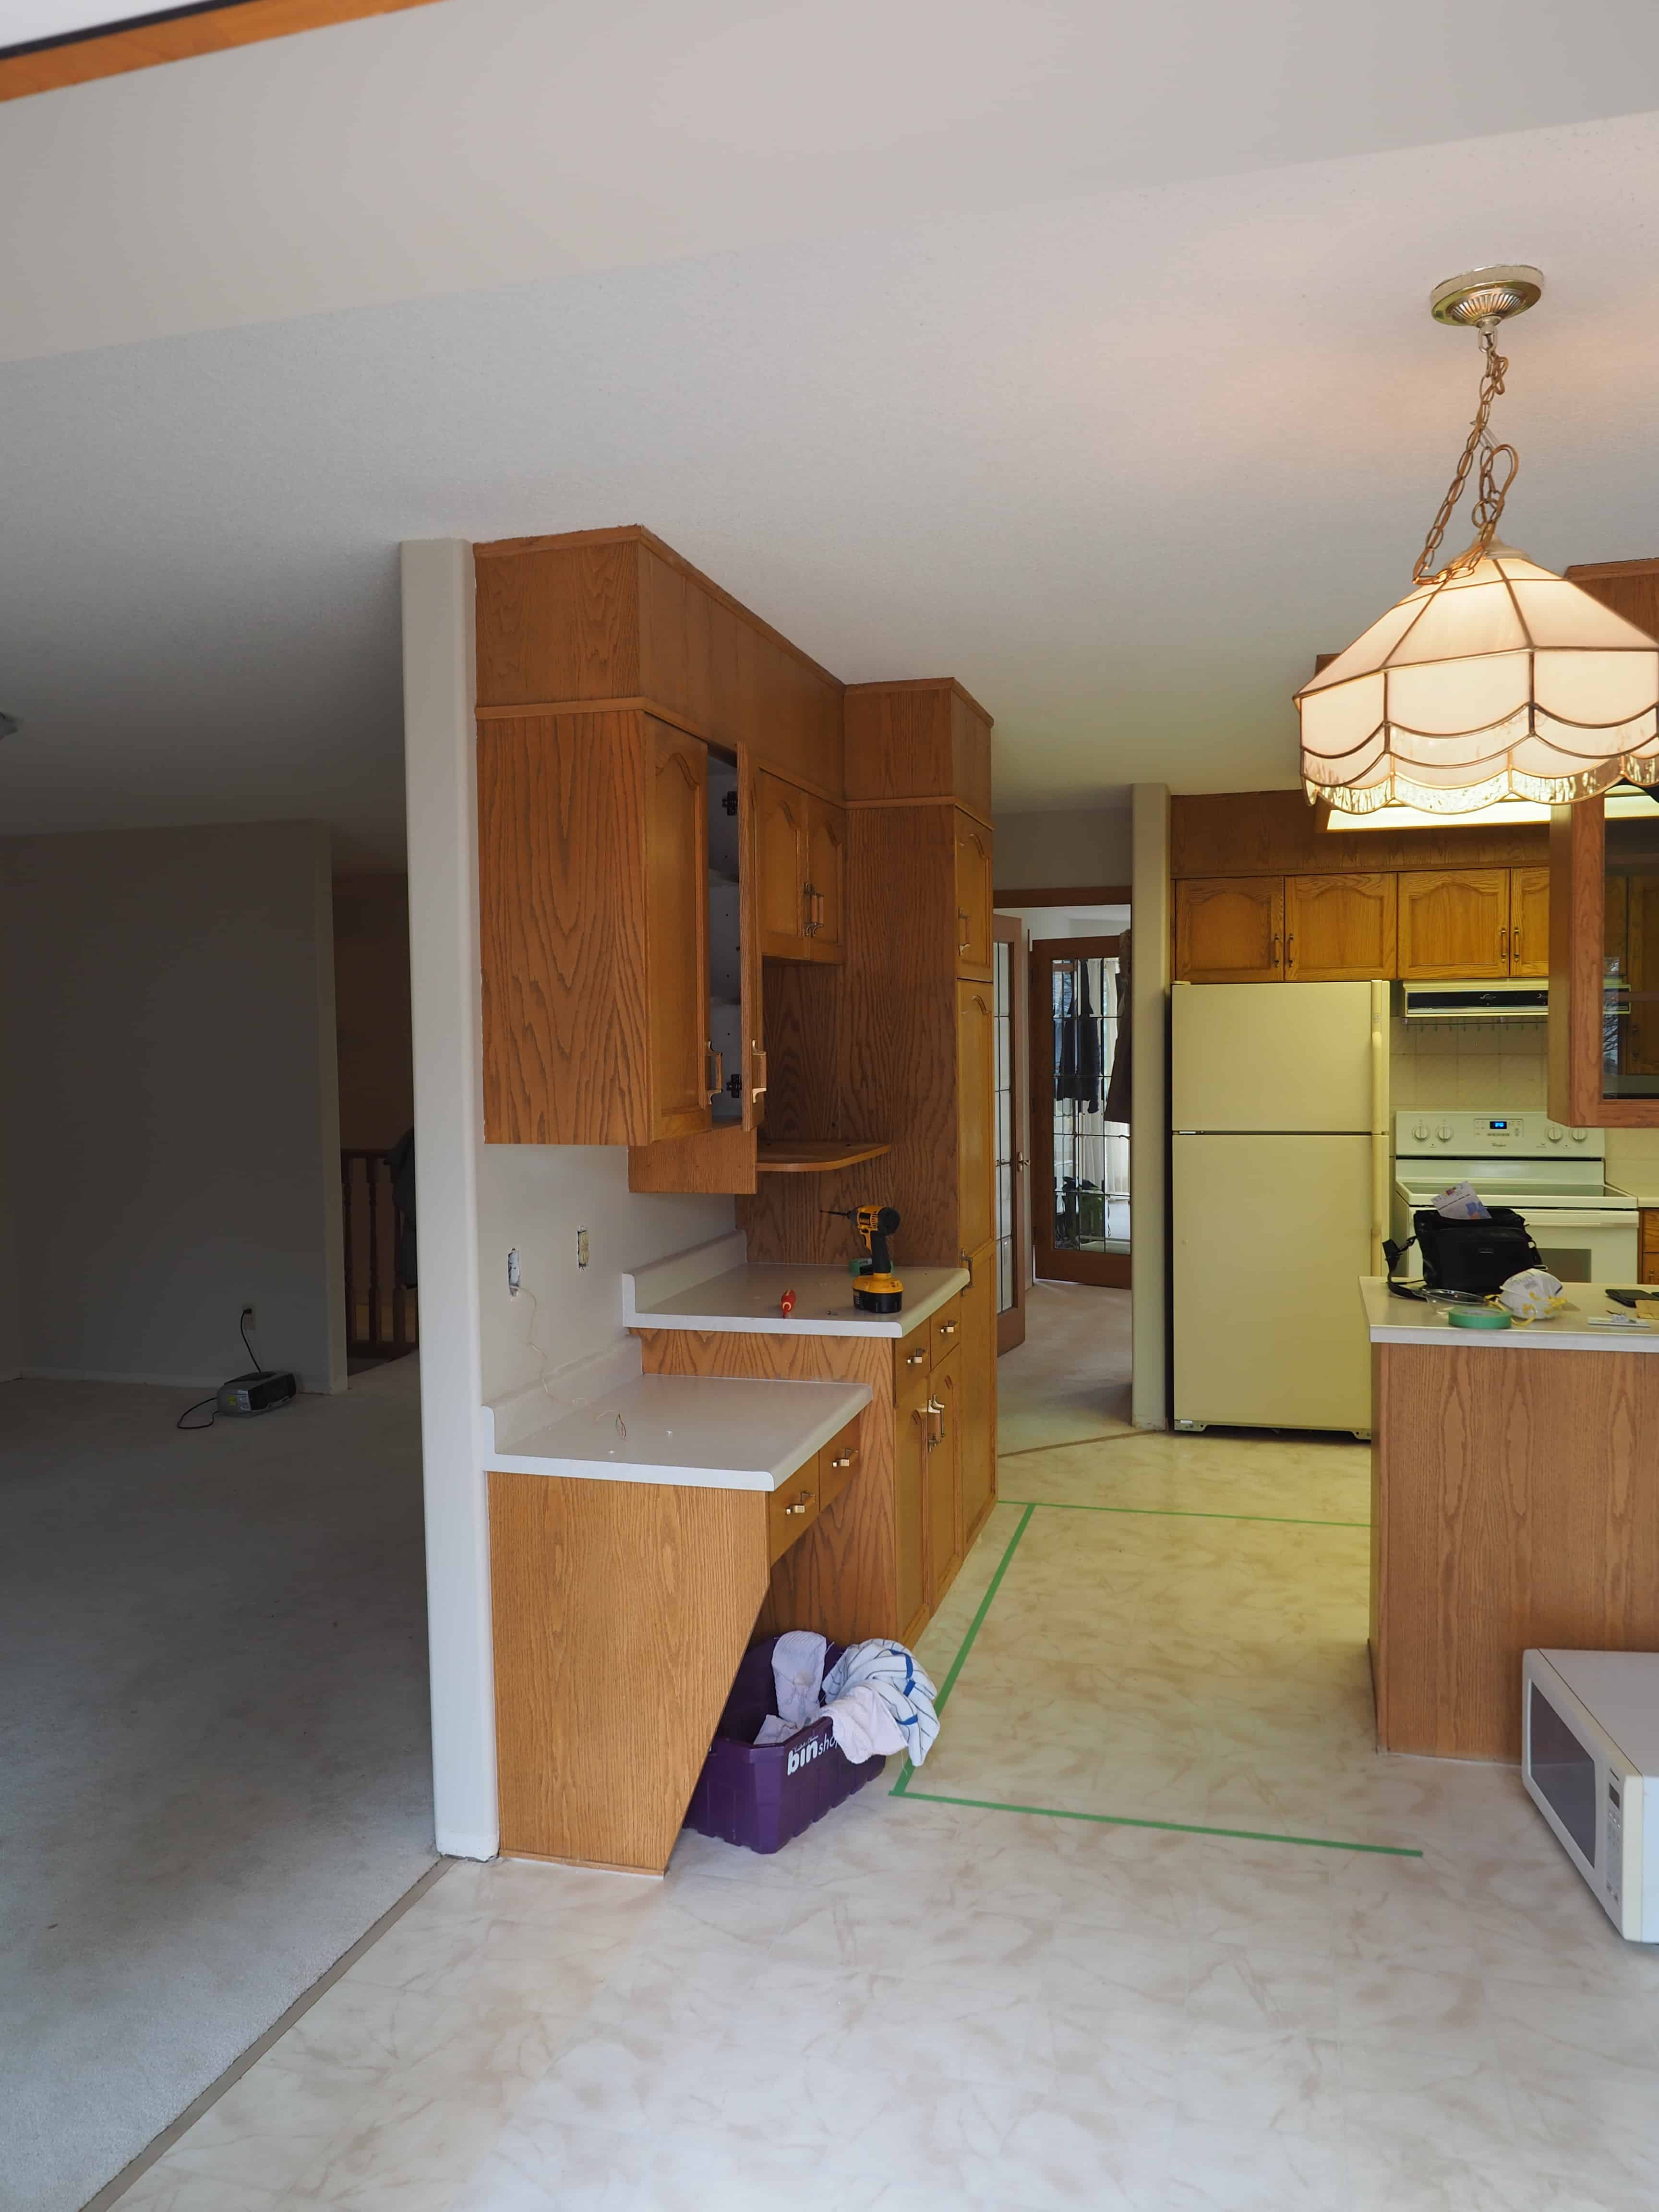
The second view is from the entry to the dining room looking back into the kitchen. In short you can see the hanging overhead cupboards, the peninsula, and the large overhead light that was all removed during demolition. As much as I appreciate a solid wood cabinet, these just had to go. Really. I can’t stress enough how happy I was to take these down.
As you know from the last post, the floor plan we ended up going with involved removing the separating wall to create an open space between the kitchen and the living/family room. Shortly after taking possession we confirmed it wasn’t load bearing and didn’t think twice about knocking it out. I don’t want to talk to much about the demo portion, because all the fun is in putting it back together!

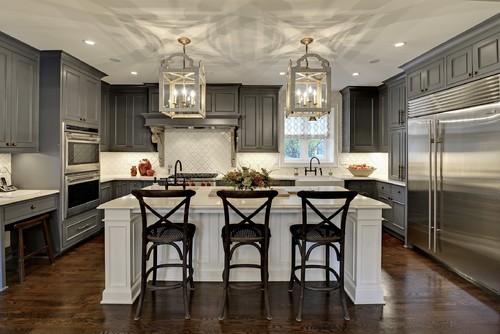
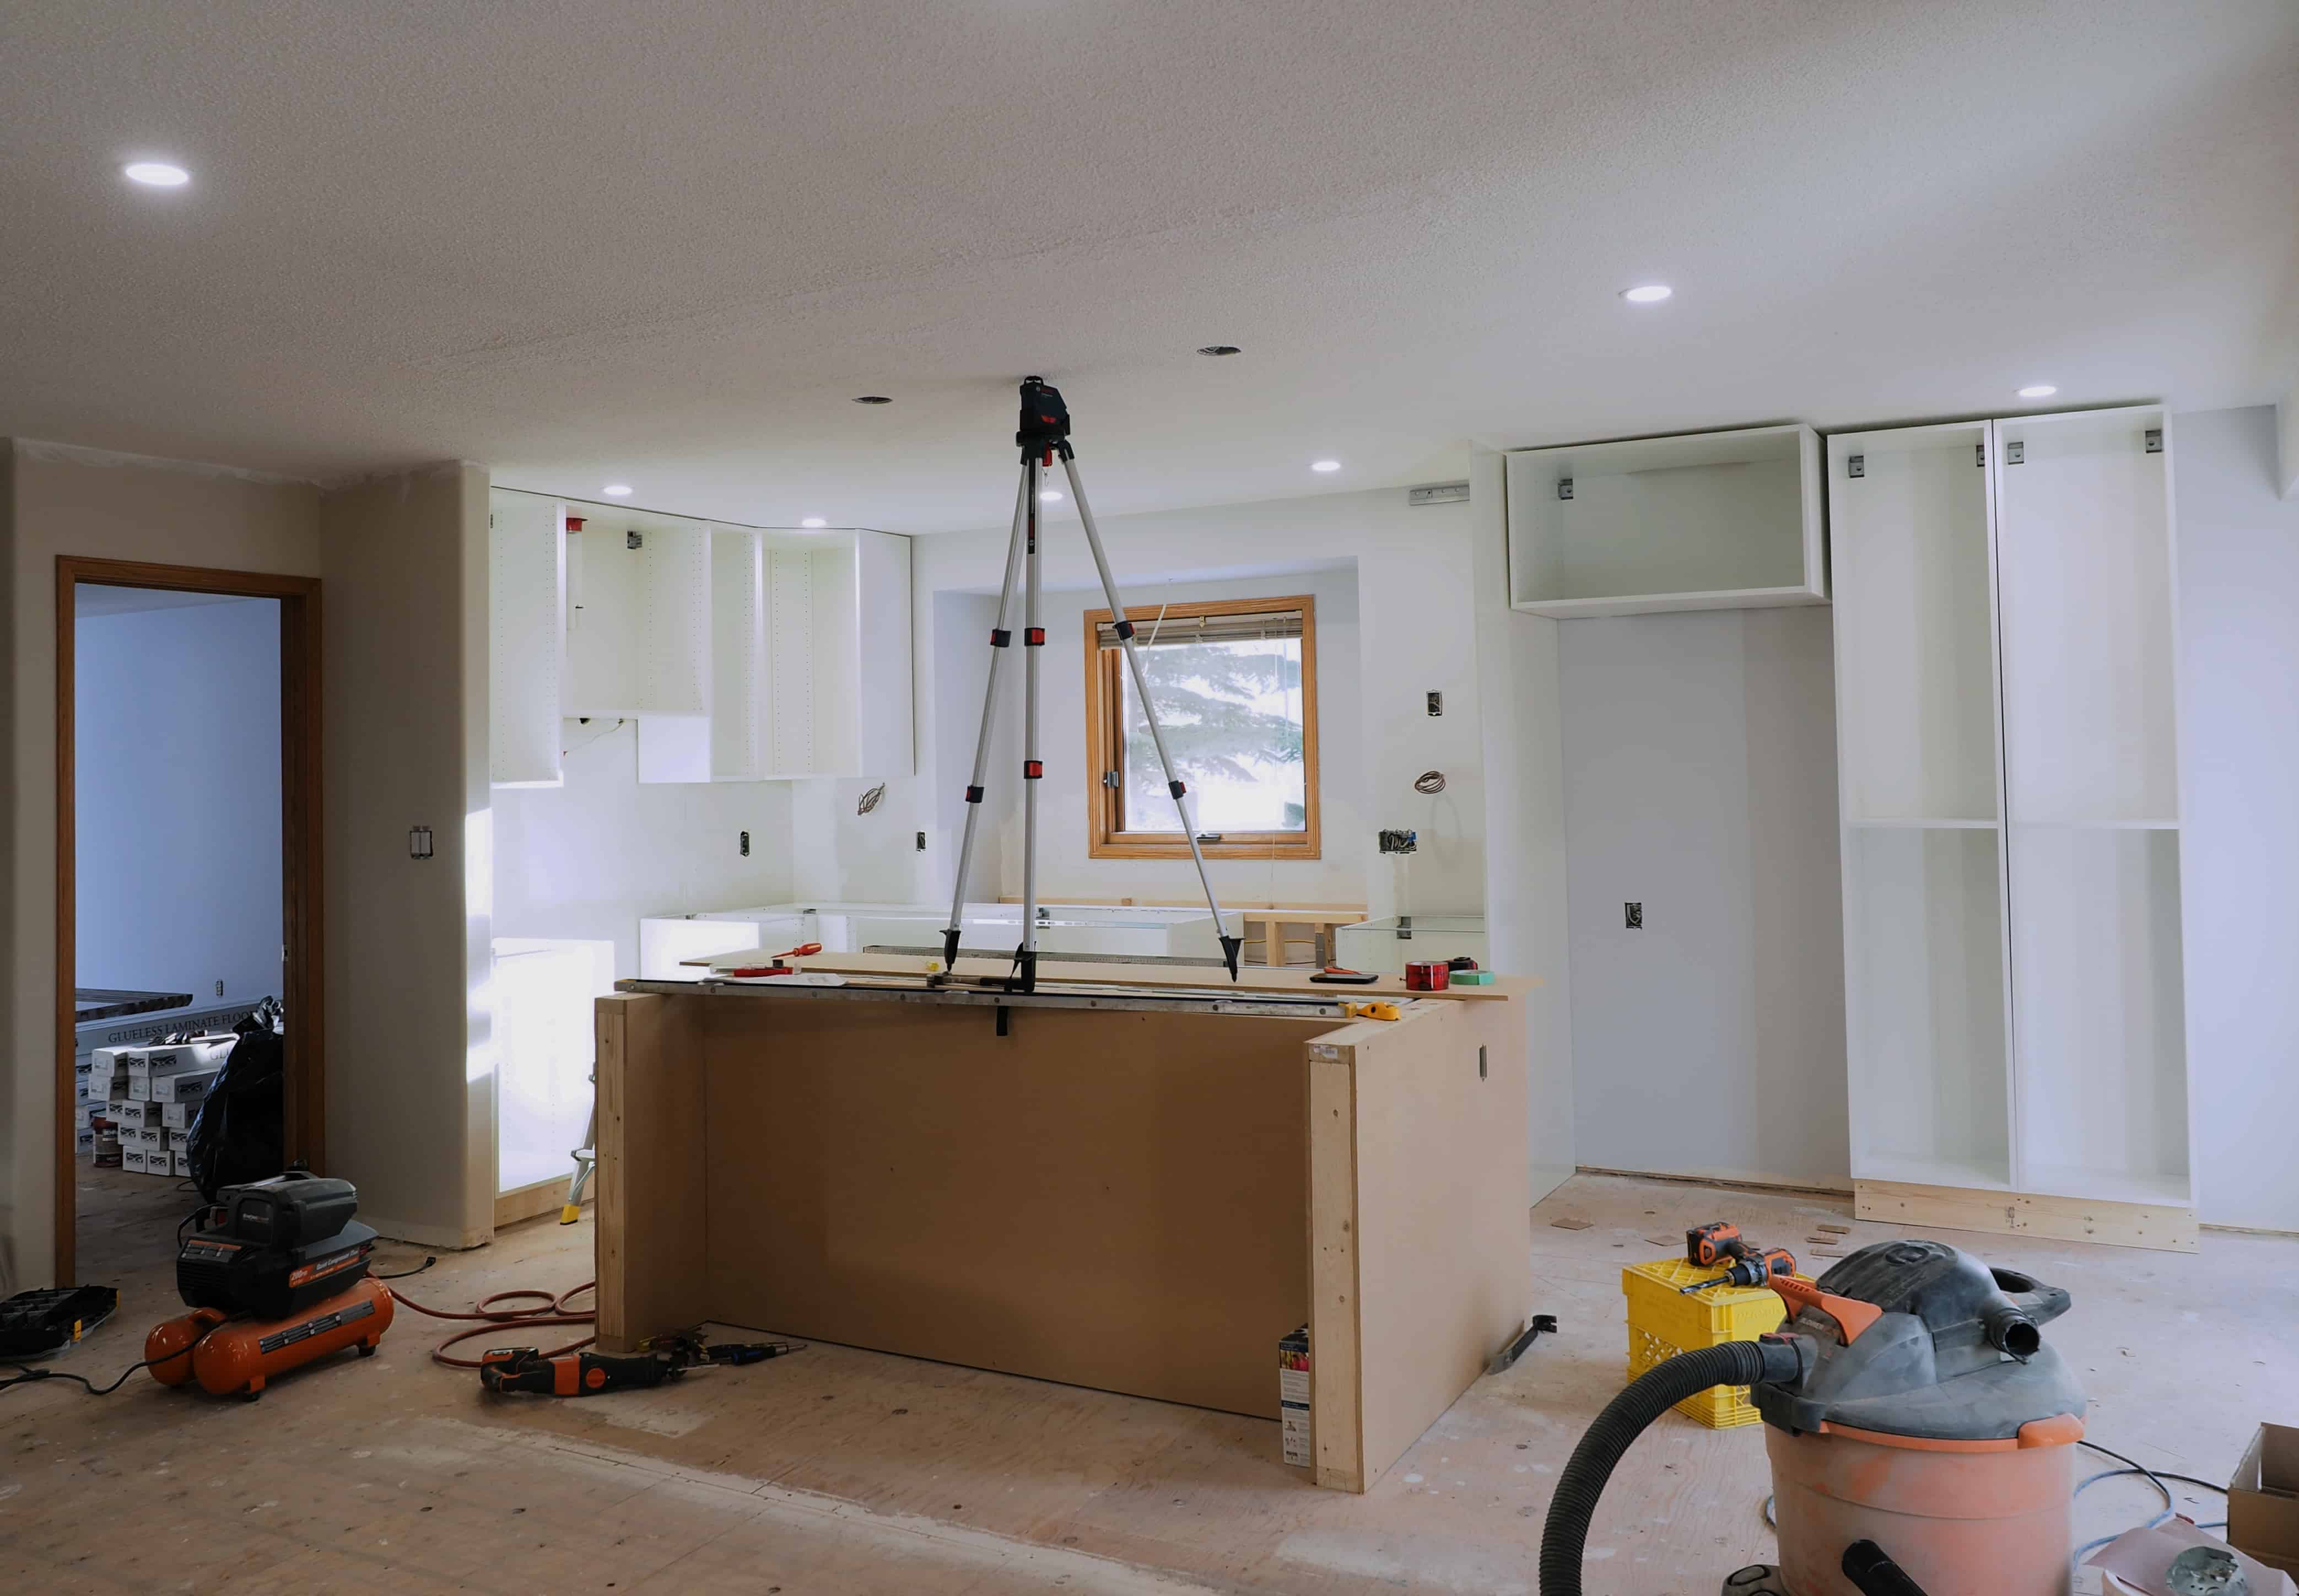
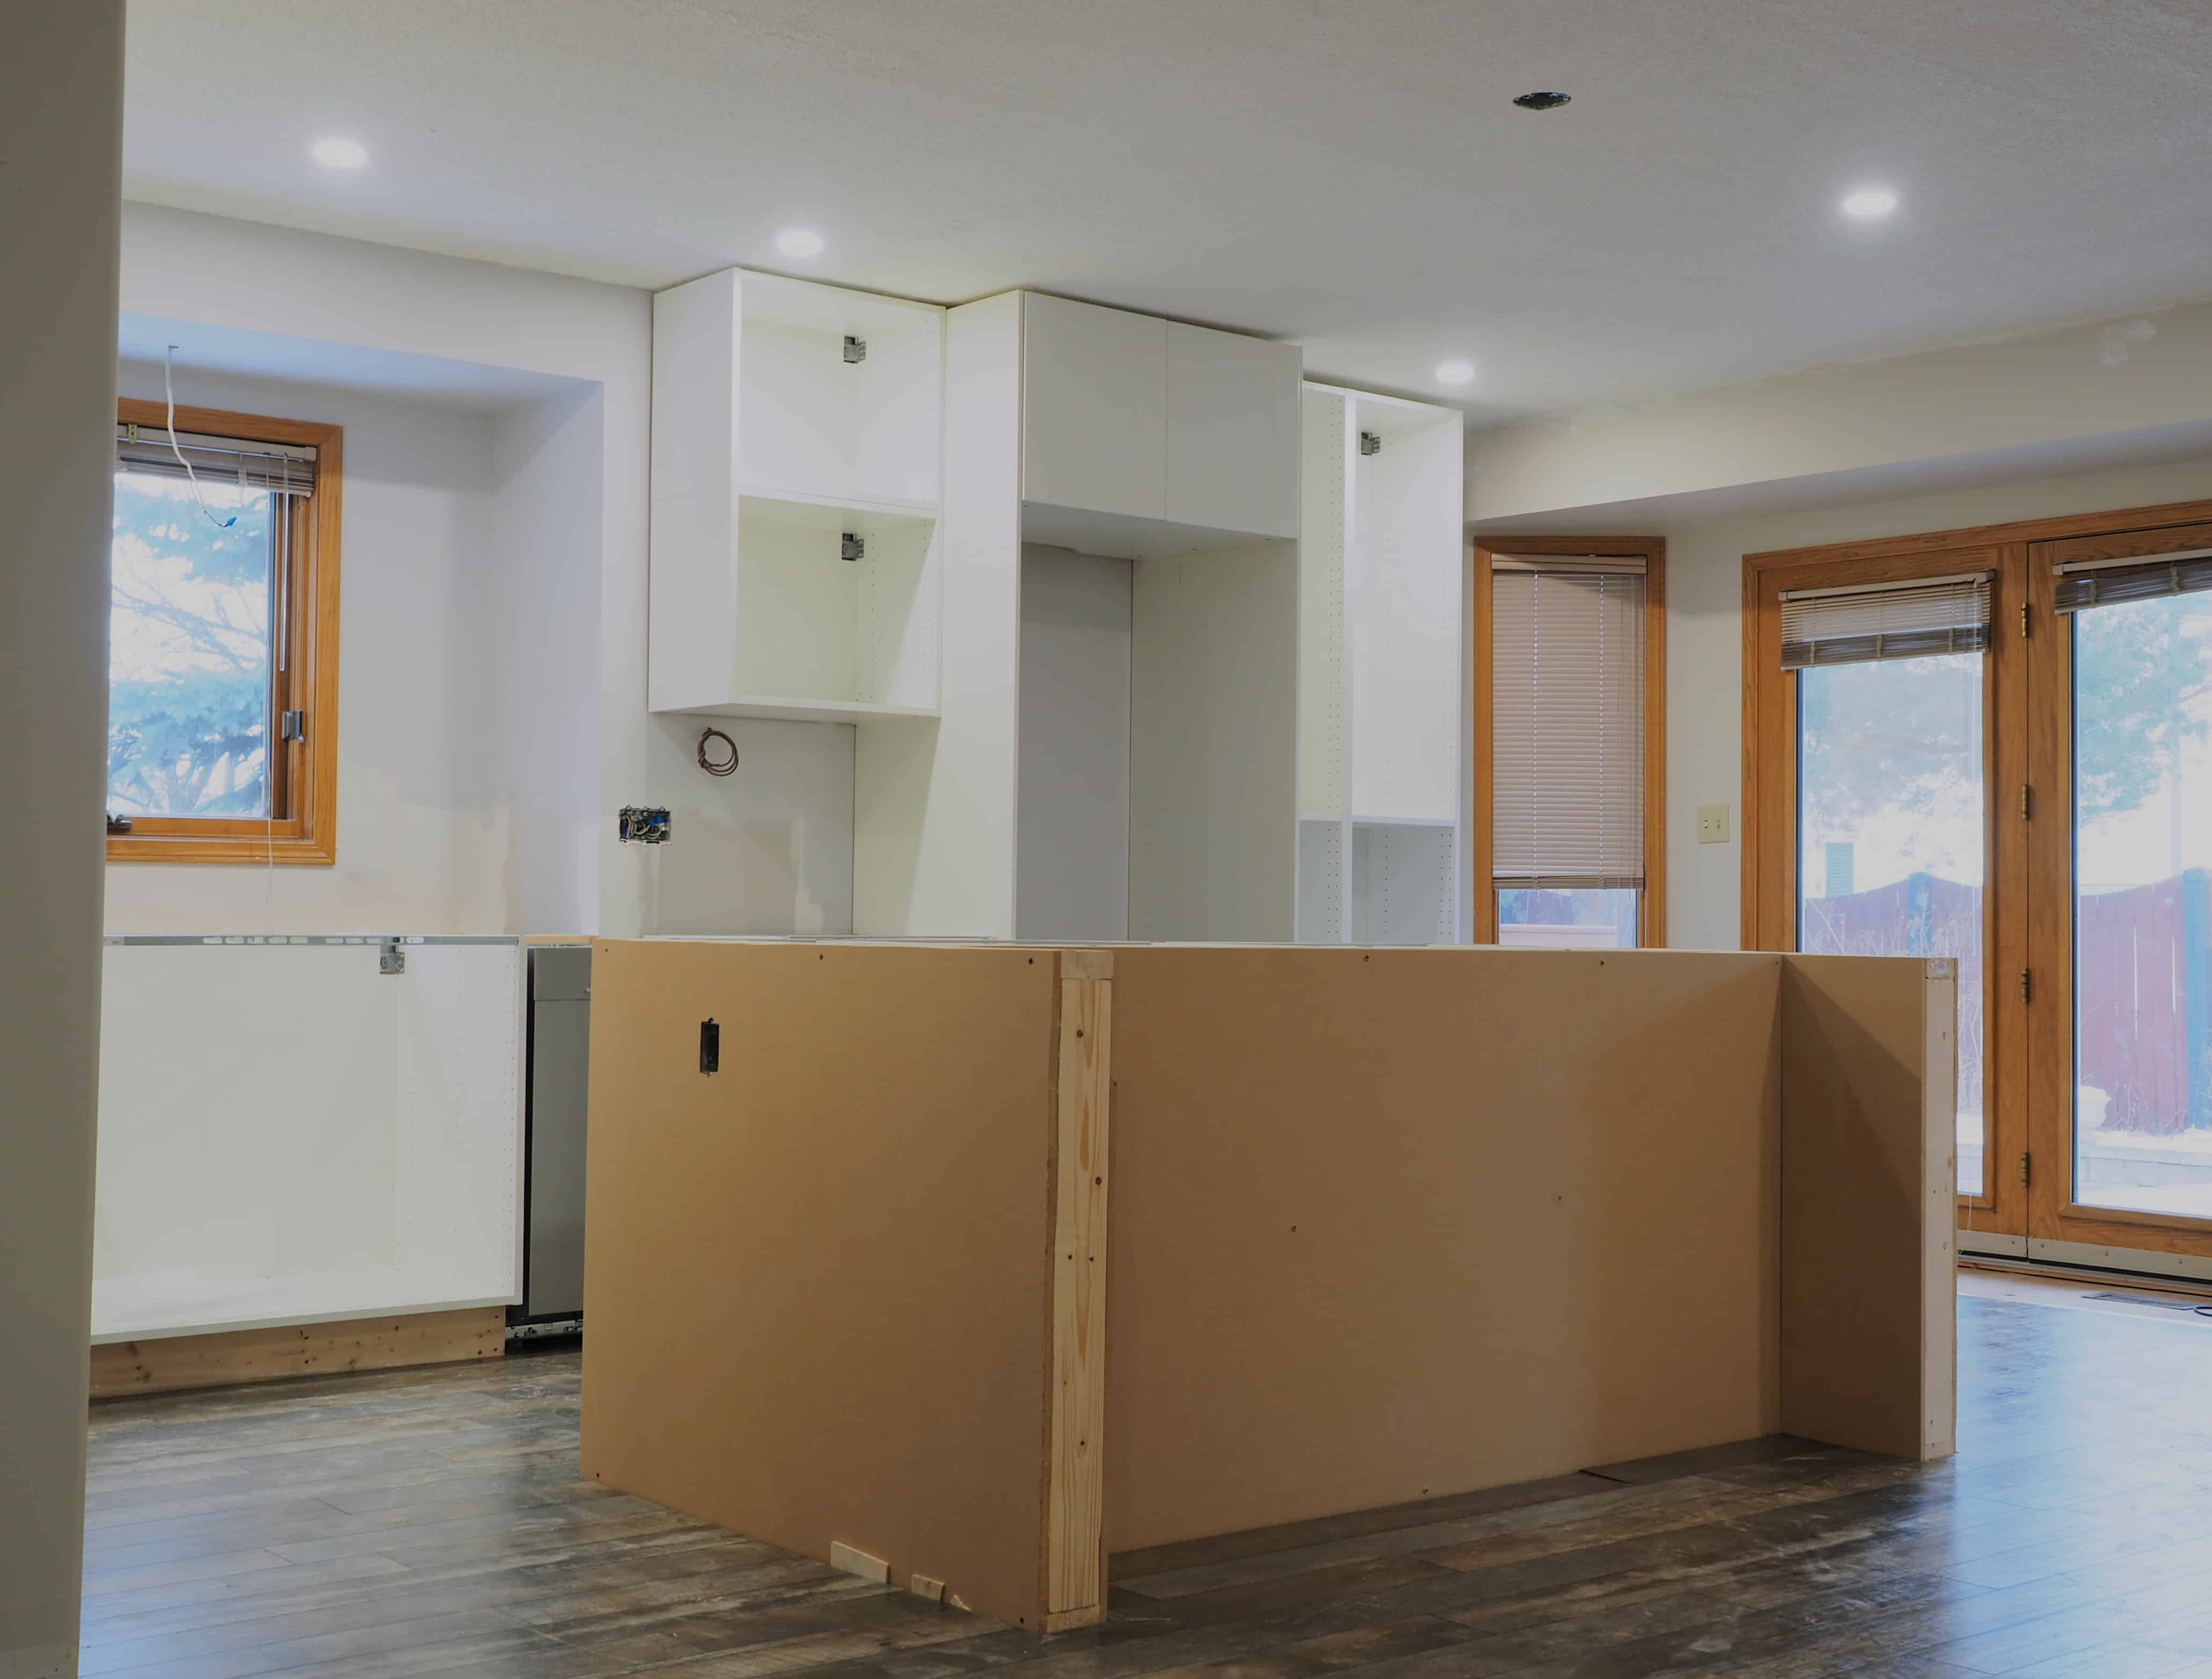
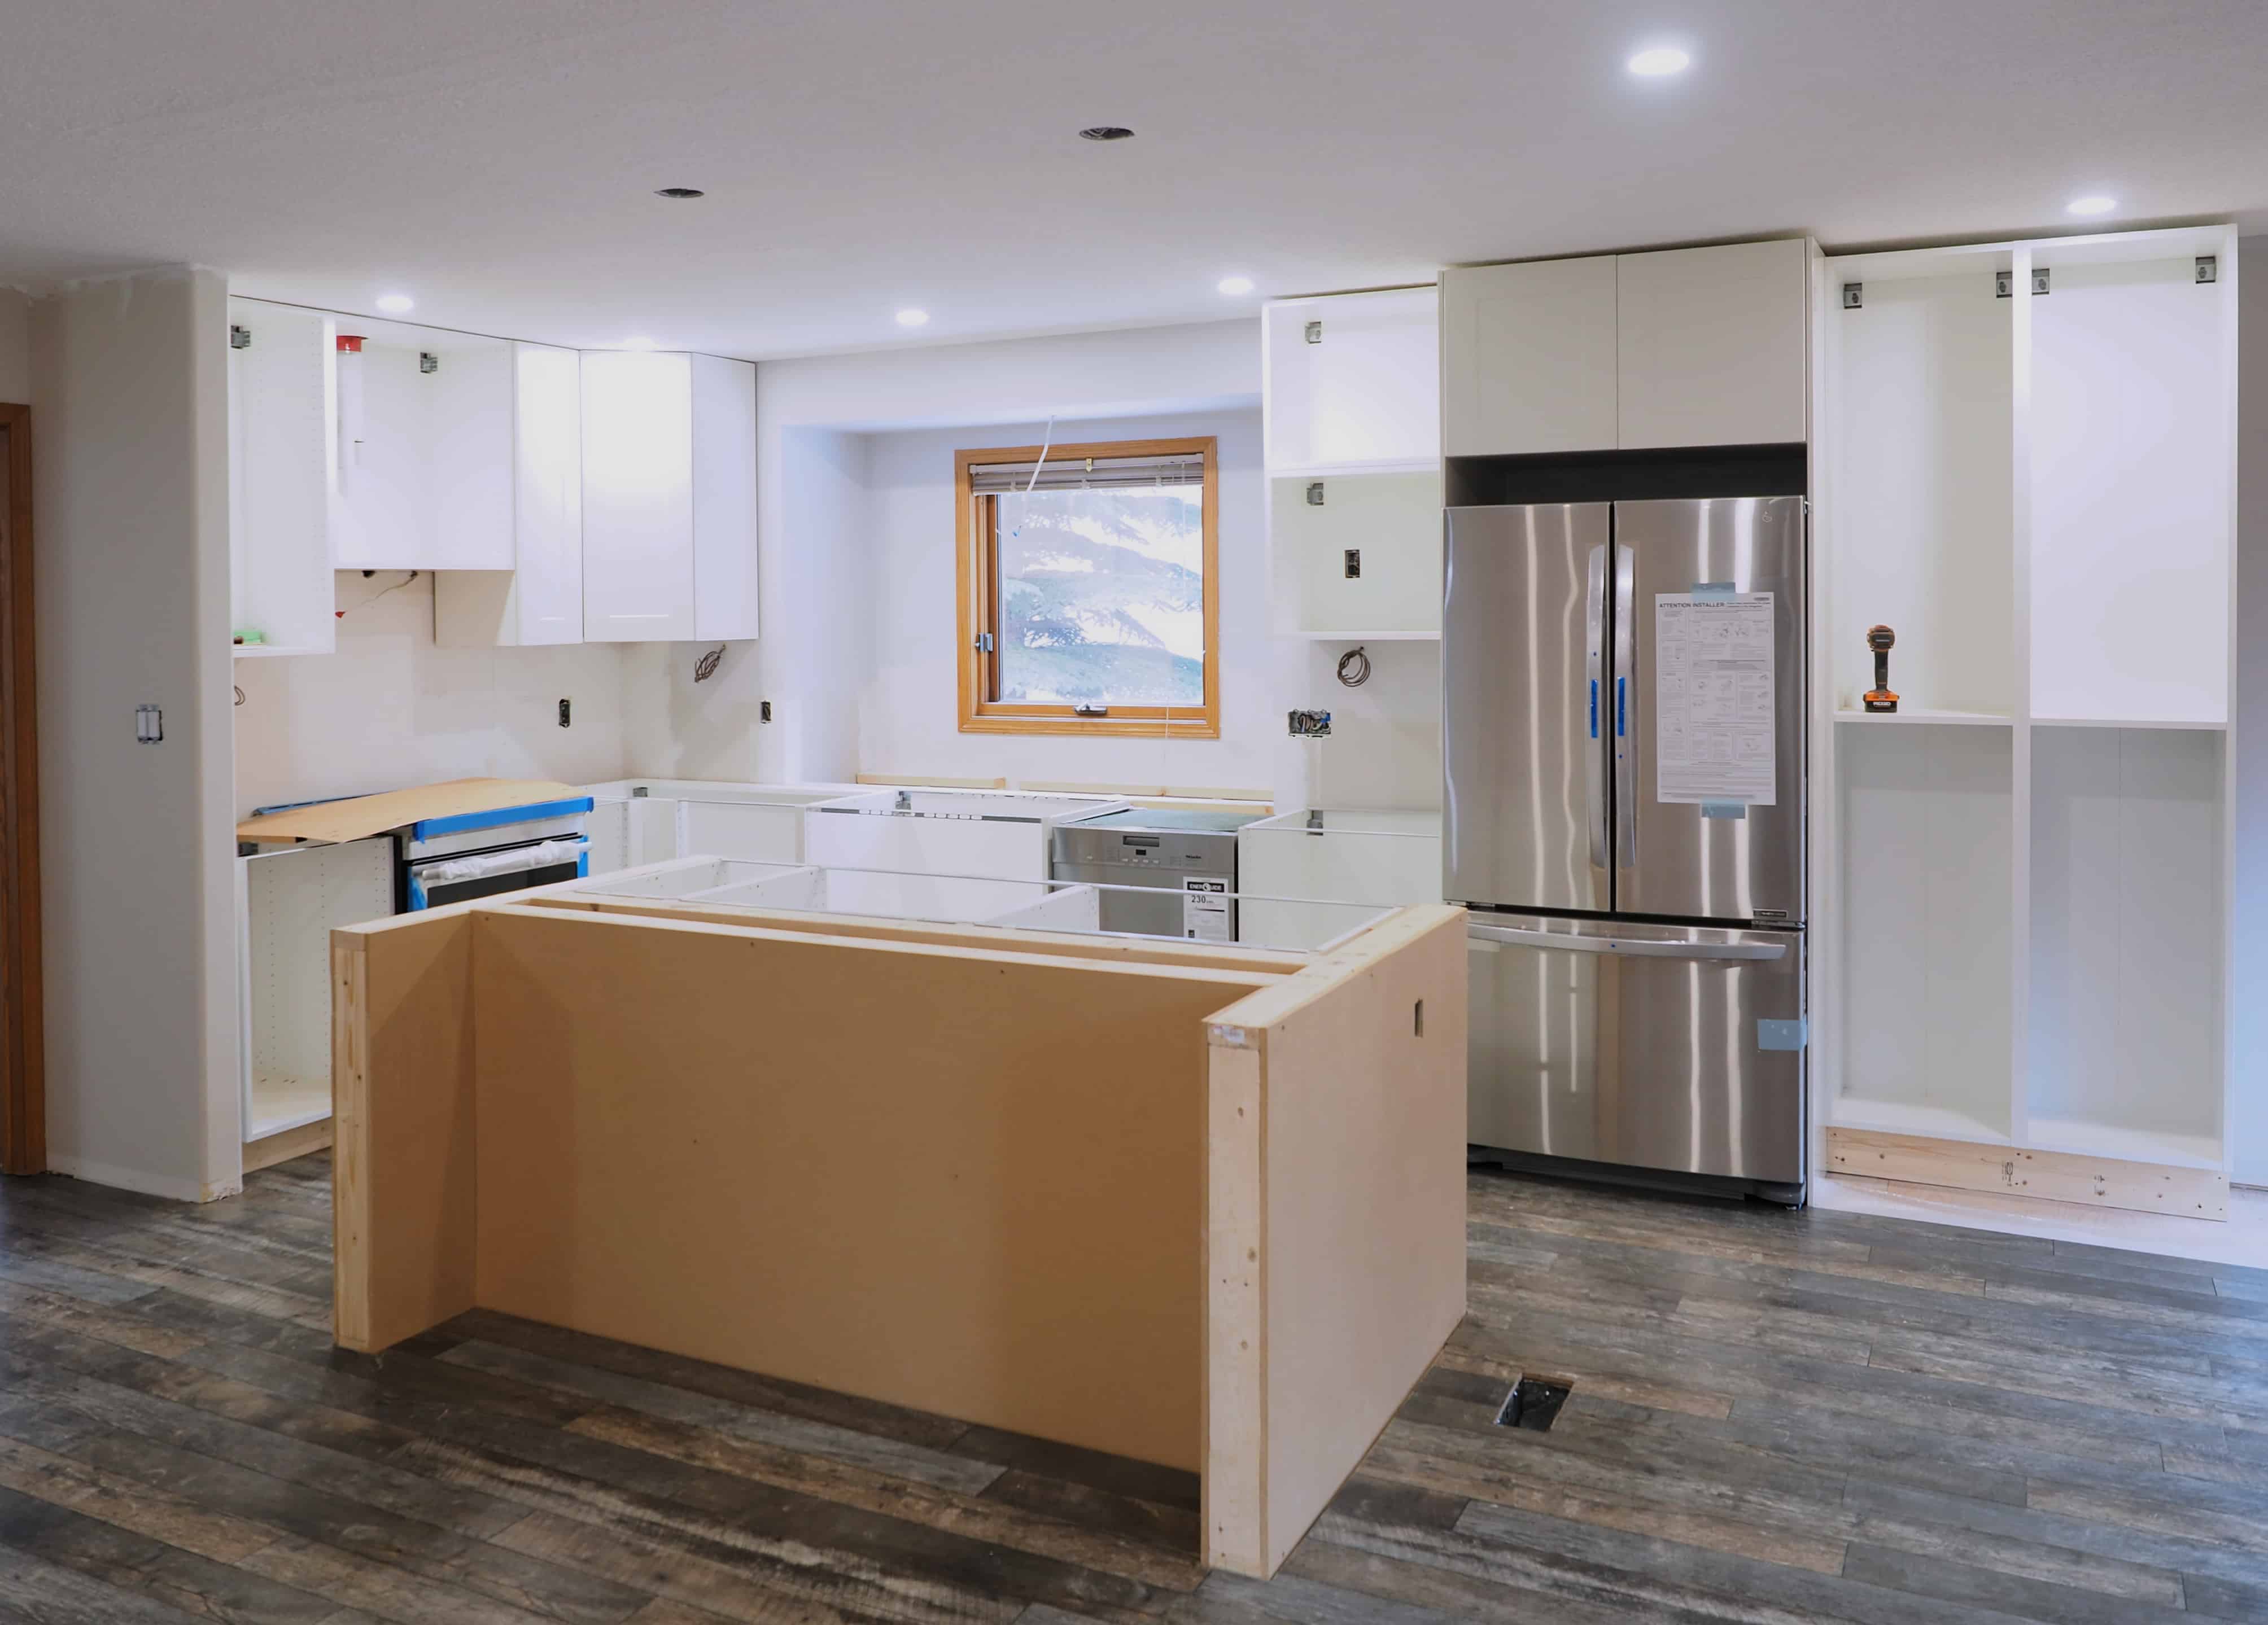
Framing the island the way we did allowed us to nest IKEA cabinets in the side facing the kitchen while leaving the back side open for seating. When we were planning the kitchen we were aiming for an island design that looked something like these:
We are working on the island trim work right now, so that will get revealed in the final Chapter #3 kitchen post, along with the finished quartz counters and backsplash tile.
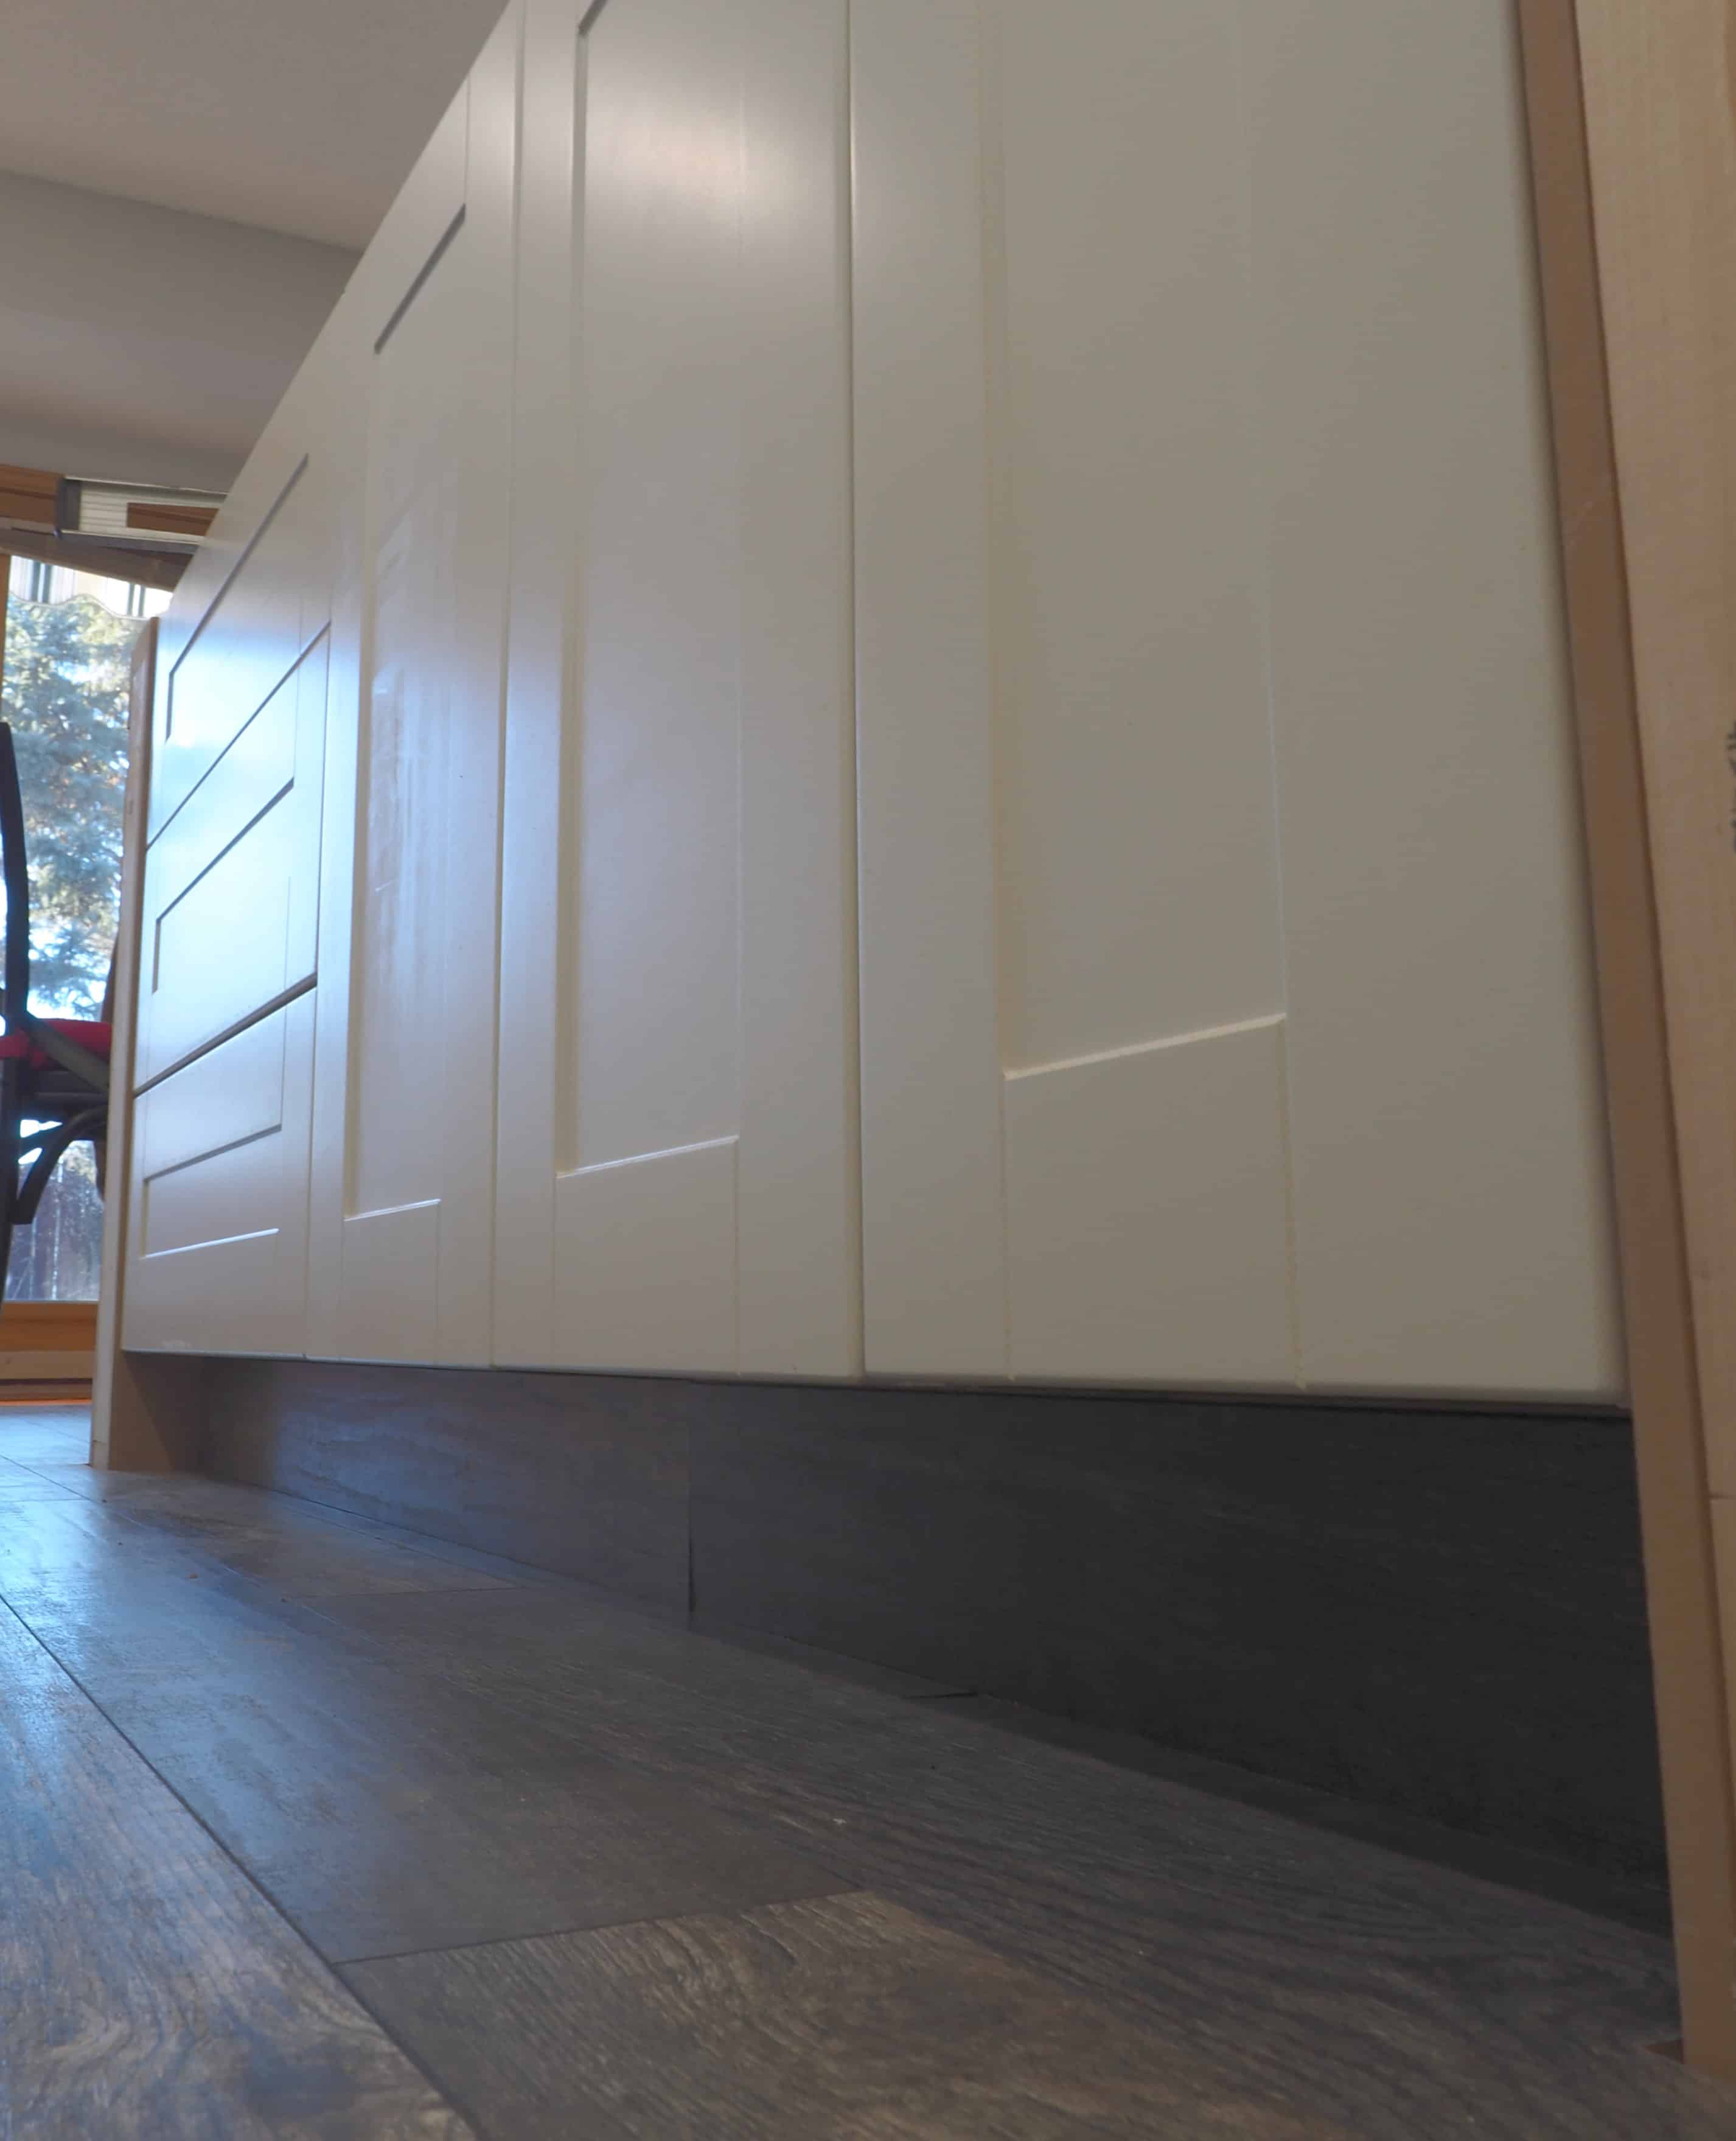
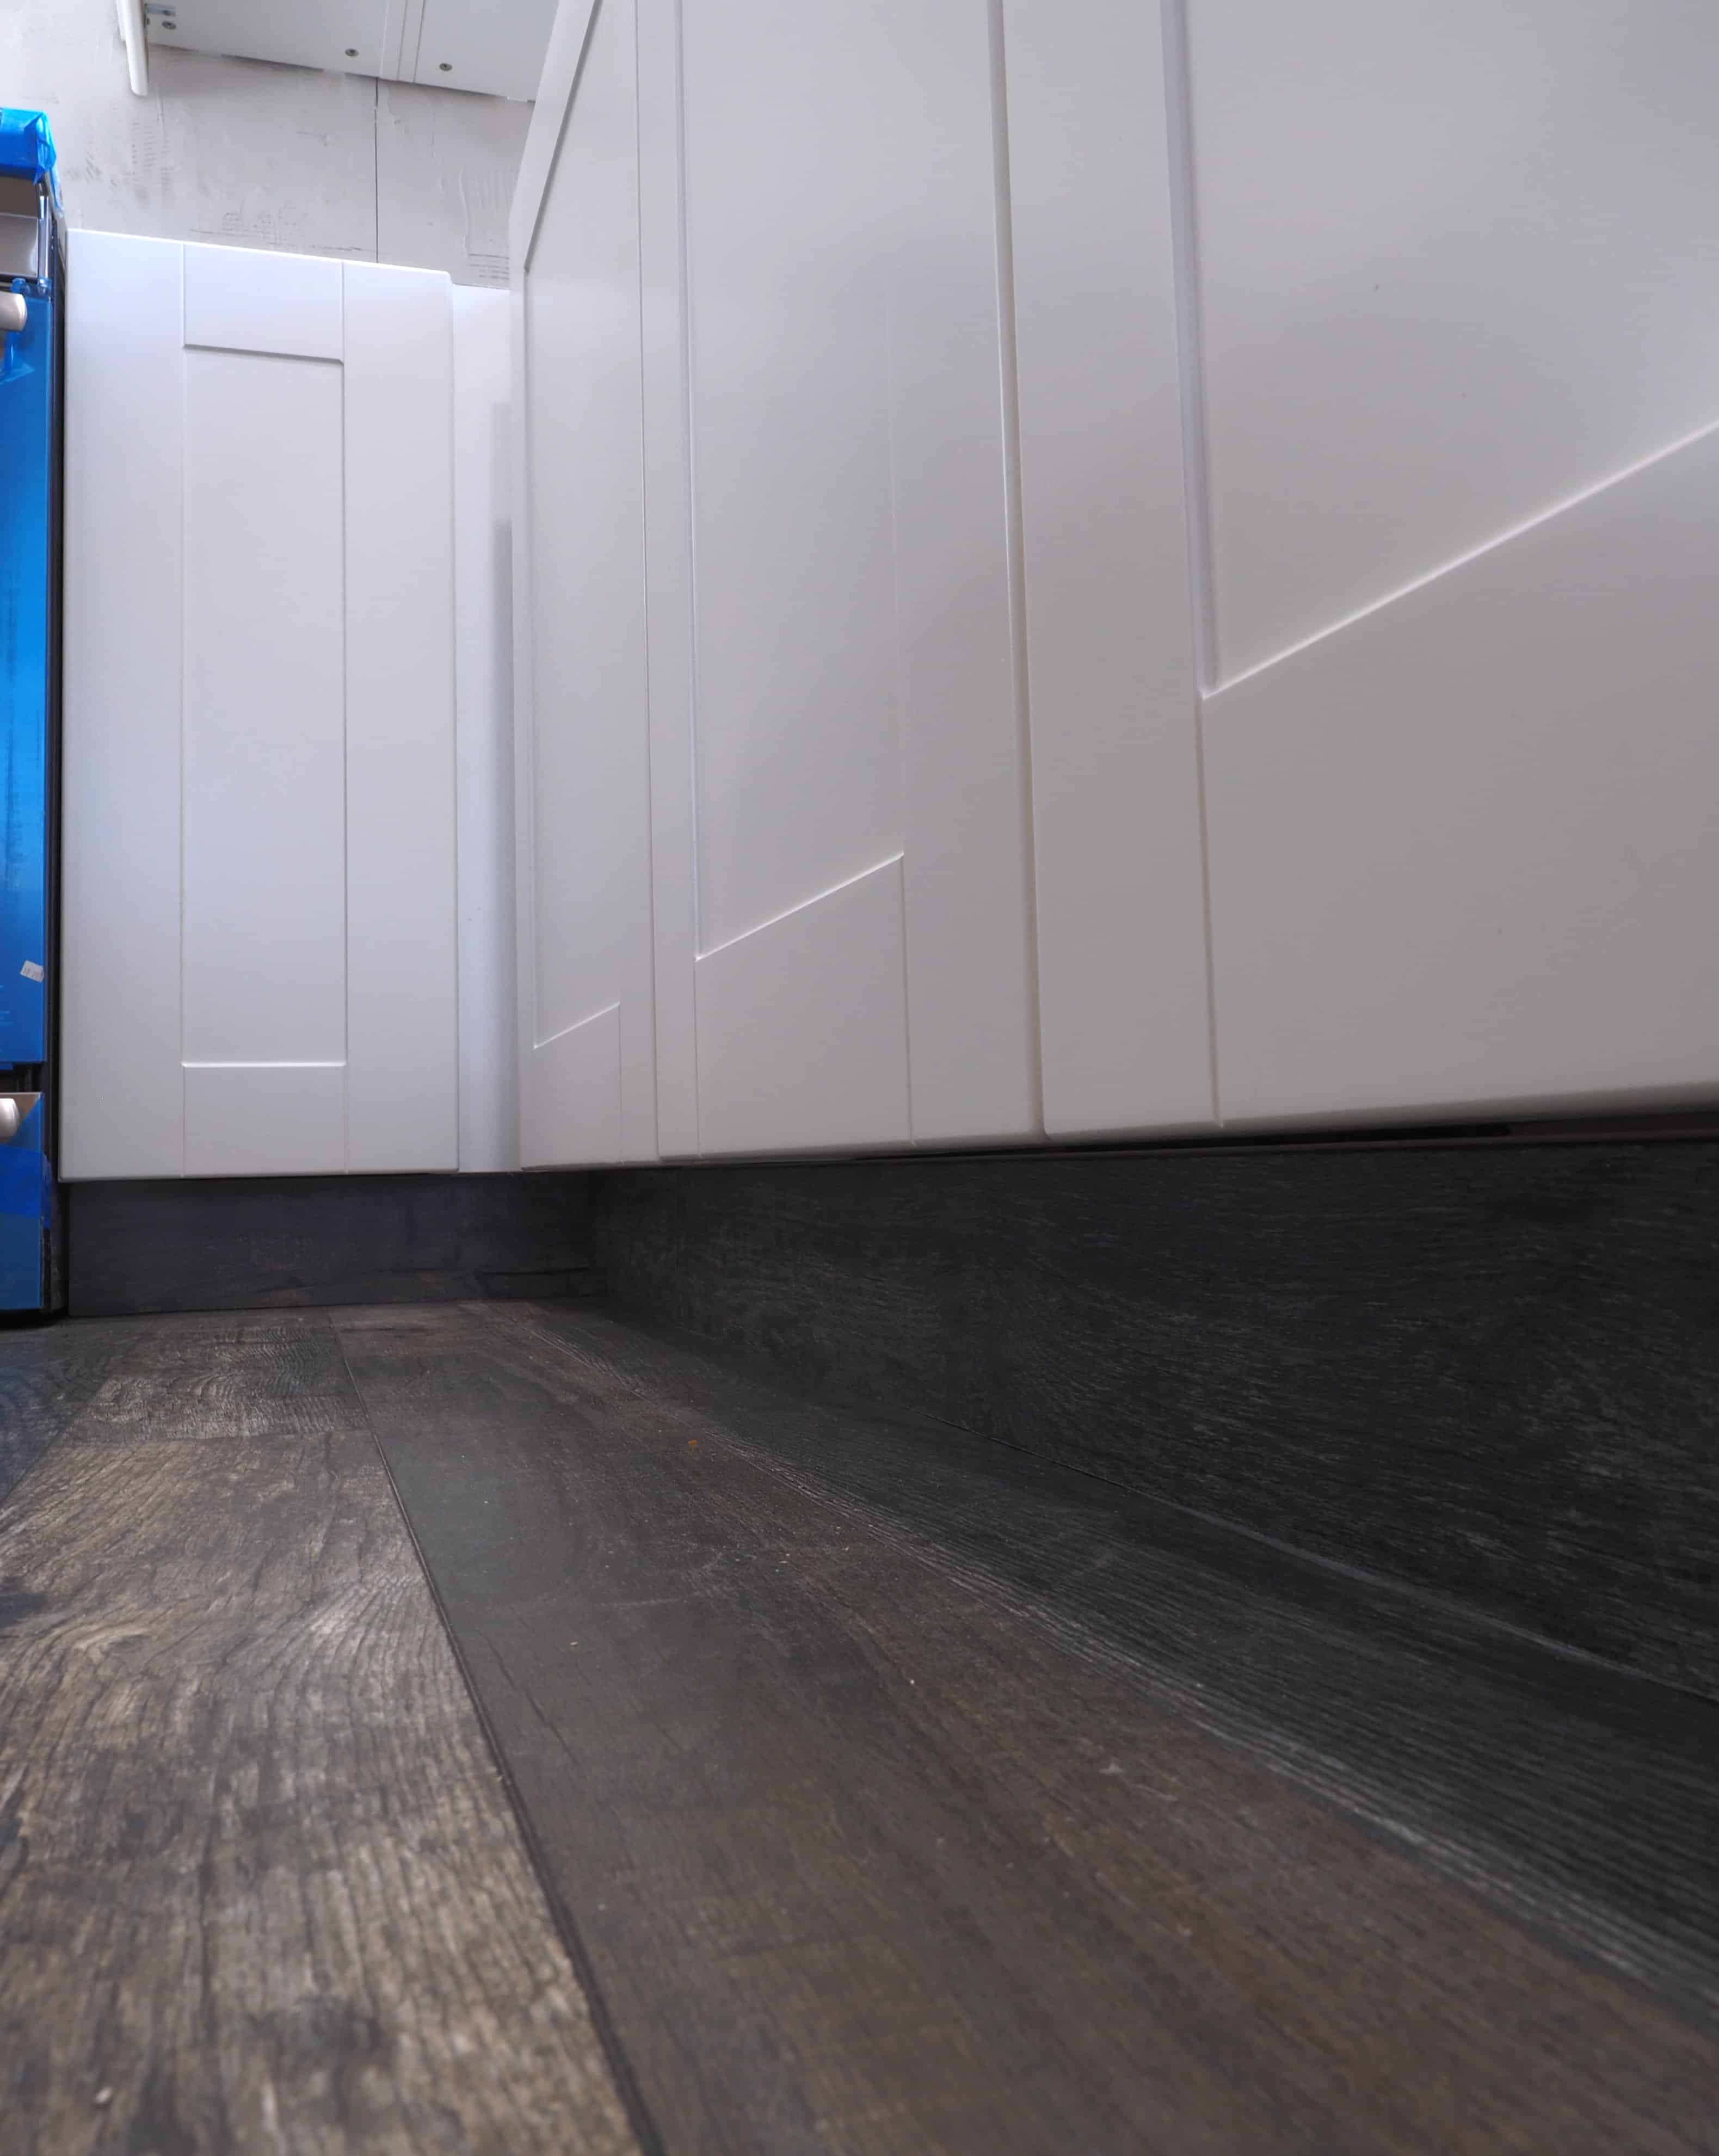
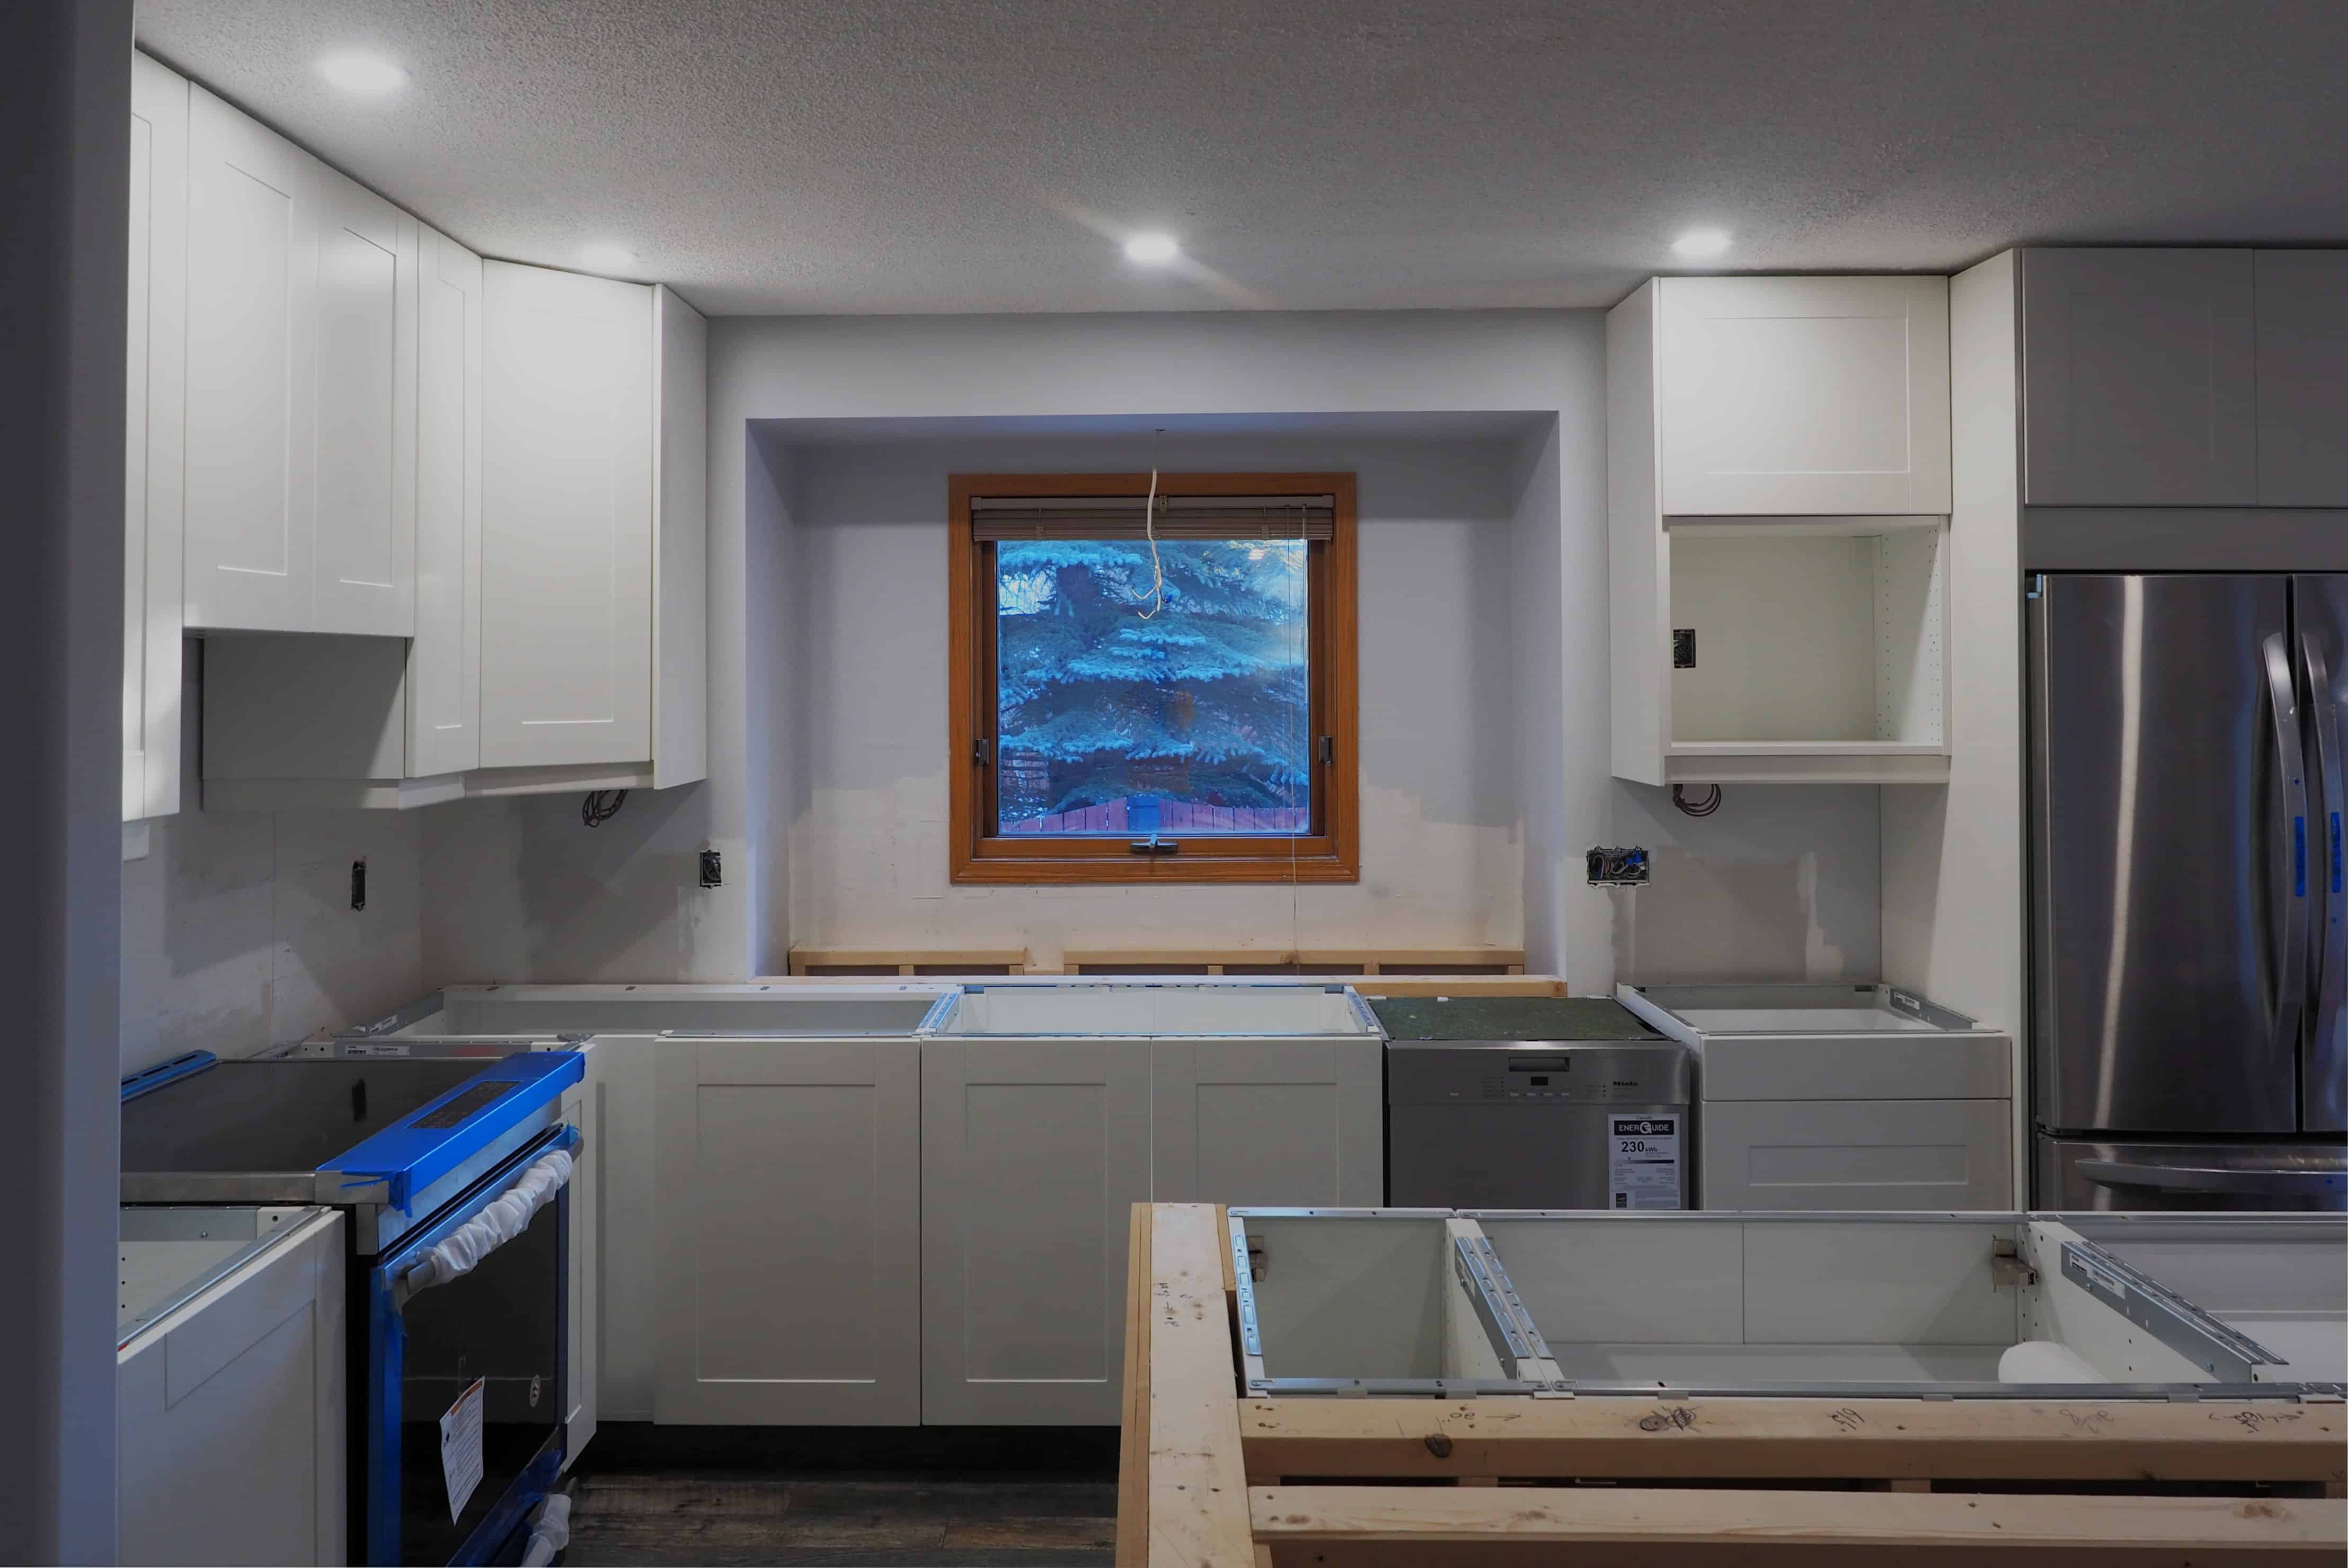
After framing, we put up the drywall, and painted the area around the kitchen window. Finally, it was time to start installing the new IKEA cabinets…well almost! In the last post I talked about how I ordered the cabinets without legs and kick plates. The reason being we were building our own from 2×6’s cut to the correct height. There is another reason for going this route- I find IKEA cabinets legs weak and the kick design rather poor. The custom built kicks are strong and can be secured to the floor to help carry the weight of heavy stone countertops, plus they provide a great backing for finishing. If you read the updated IKEA kitchen planner review and were paying attention to the photos, you will have noticed that I like to finish the cabinet kicks with the same material as the flooring. It provides the perfect transition from floor to cabinets giving off a custom seamless look. When they are all complete they look just like the photo below.
The process
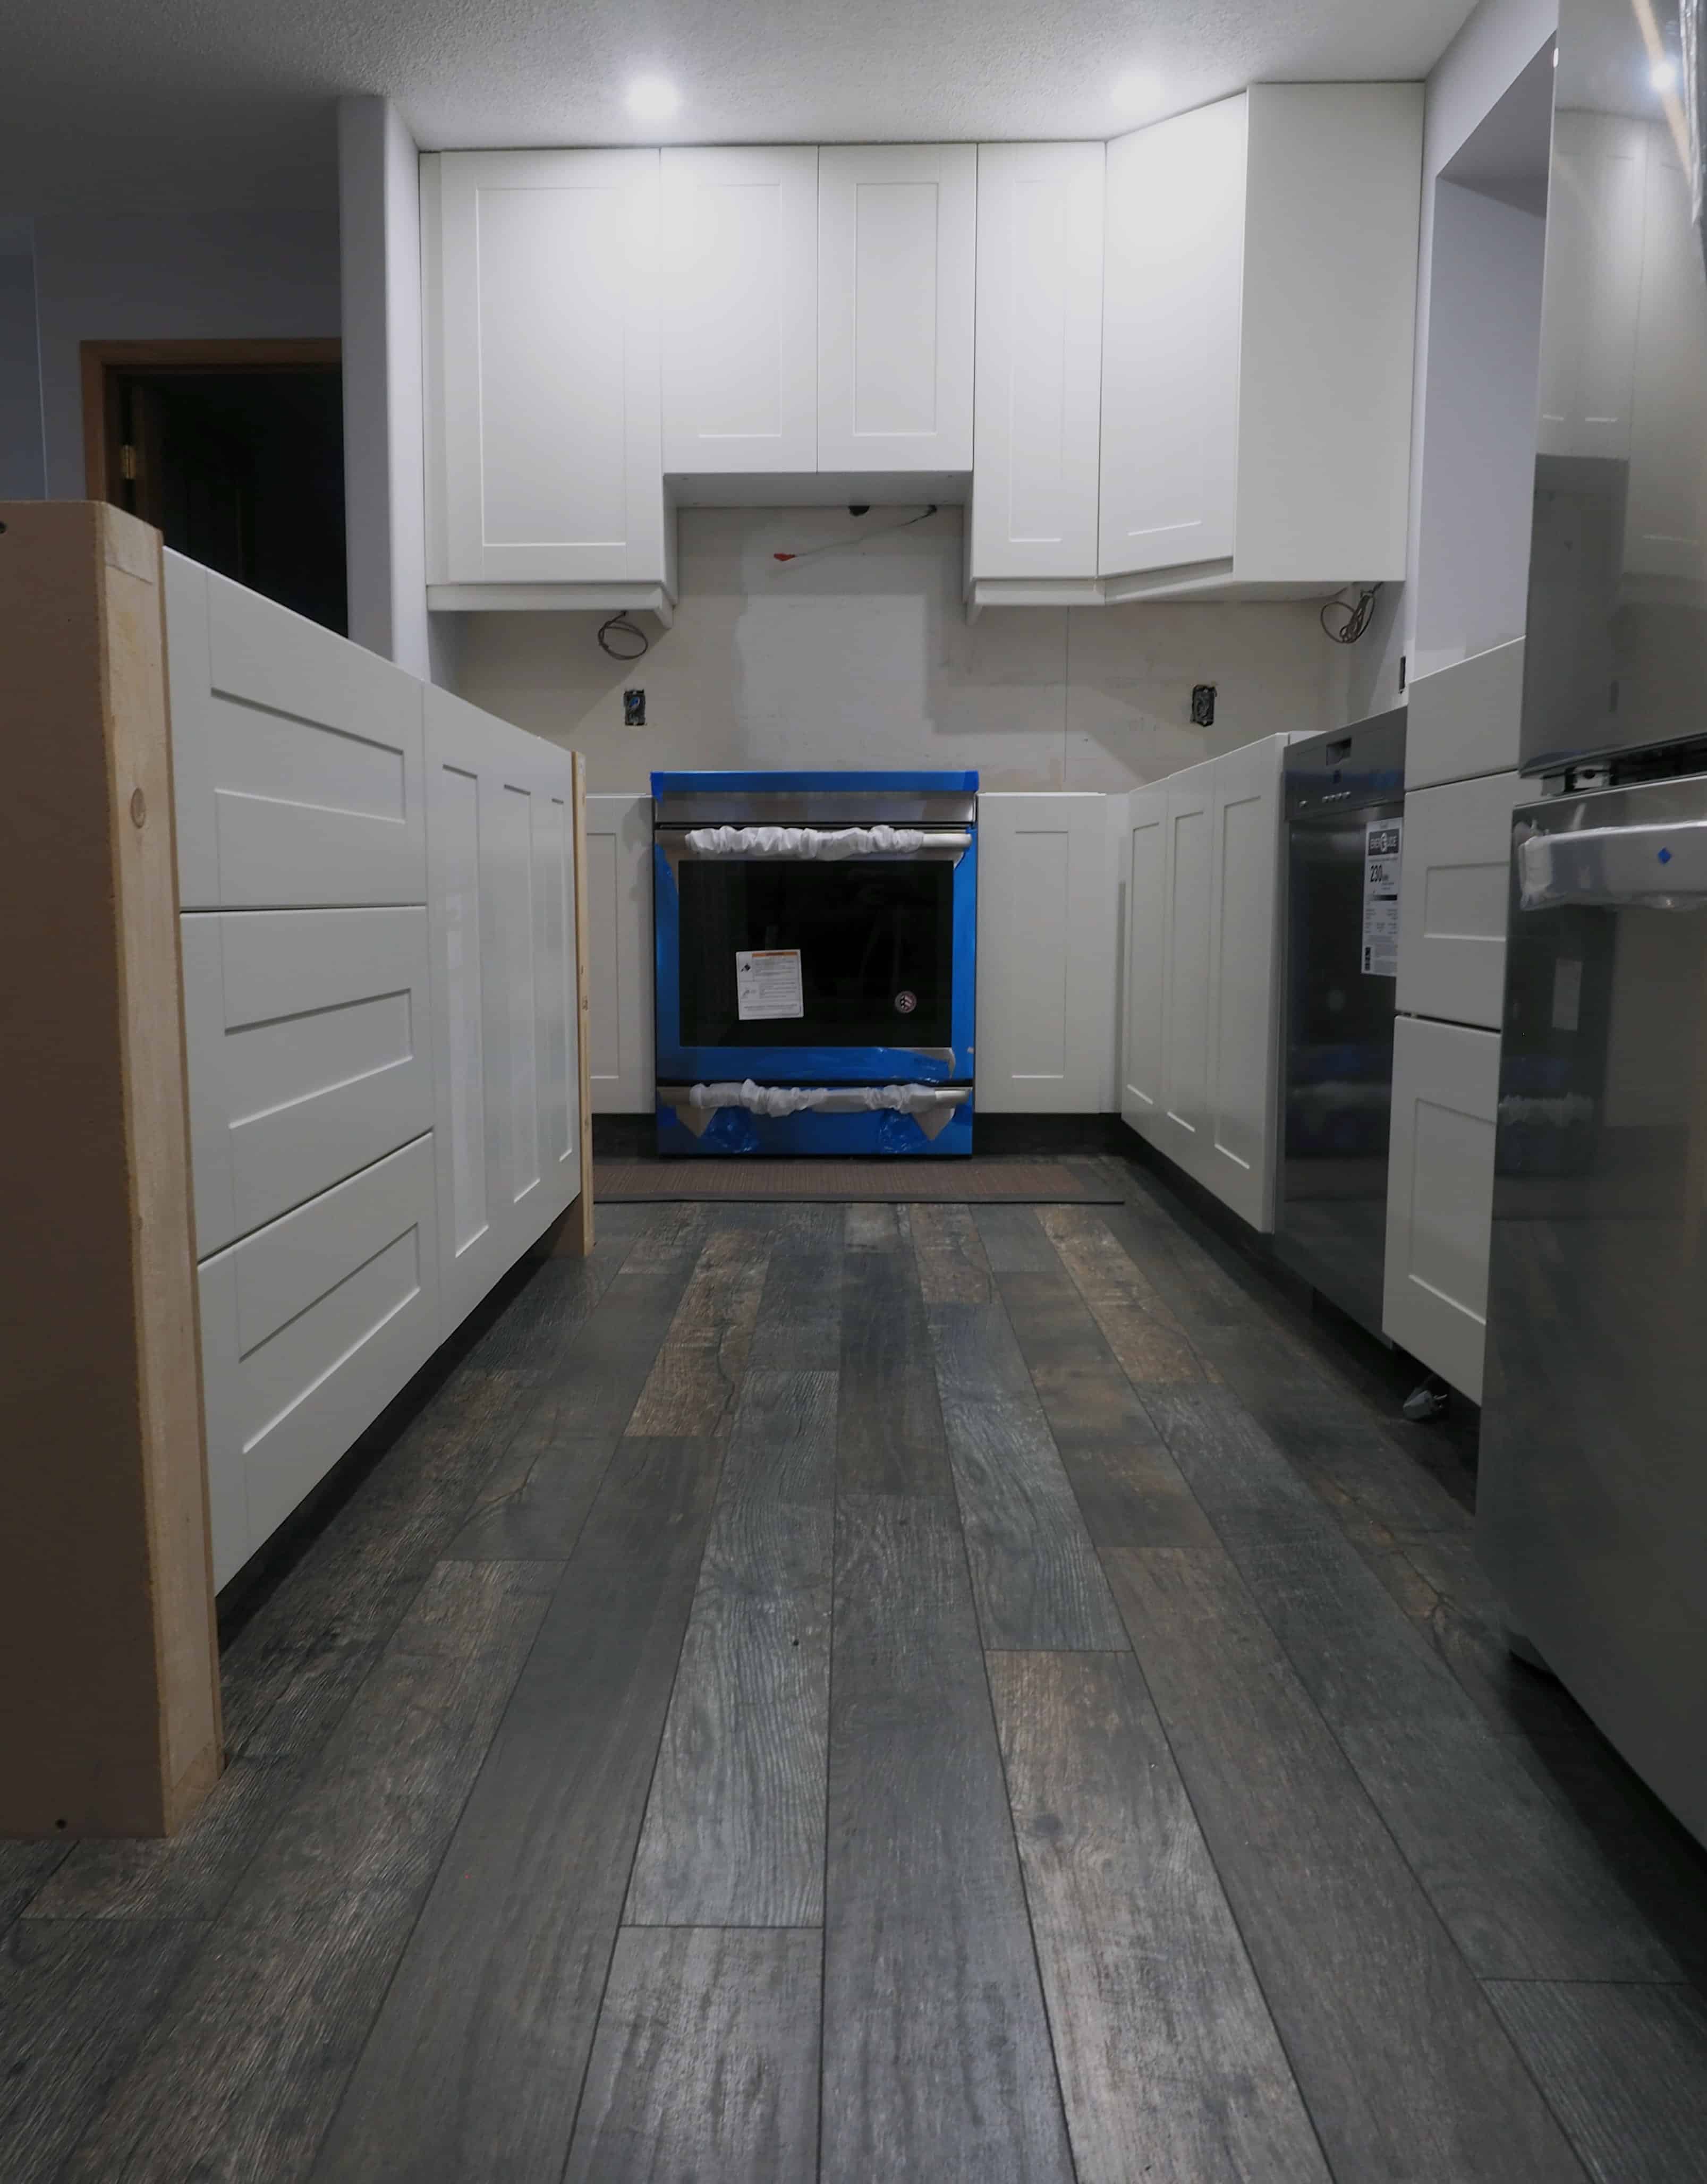
Alright alright, no more delays. It is time for the IKEA cabinets to be installed. When the kitchen was delivered, we were sure there were more boxes than there was supposed to be. But sure enough one by one, they were all installed into their respective space. The beauty of IKEA cabinets lie in their rail design- installing and levelling each cabinet can’t get any simpler.

The floors!
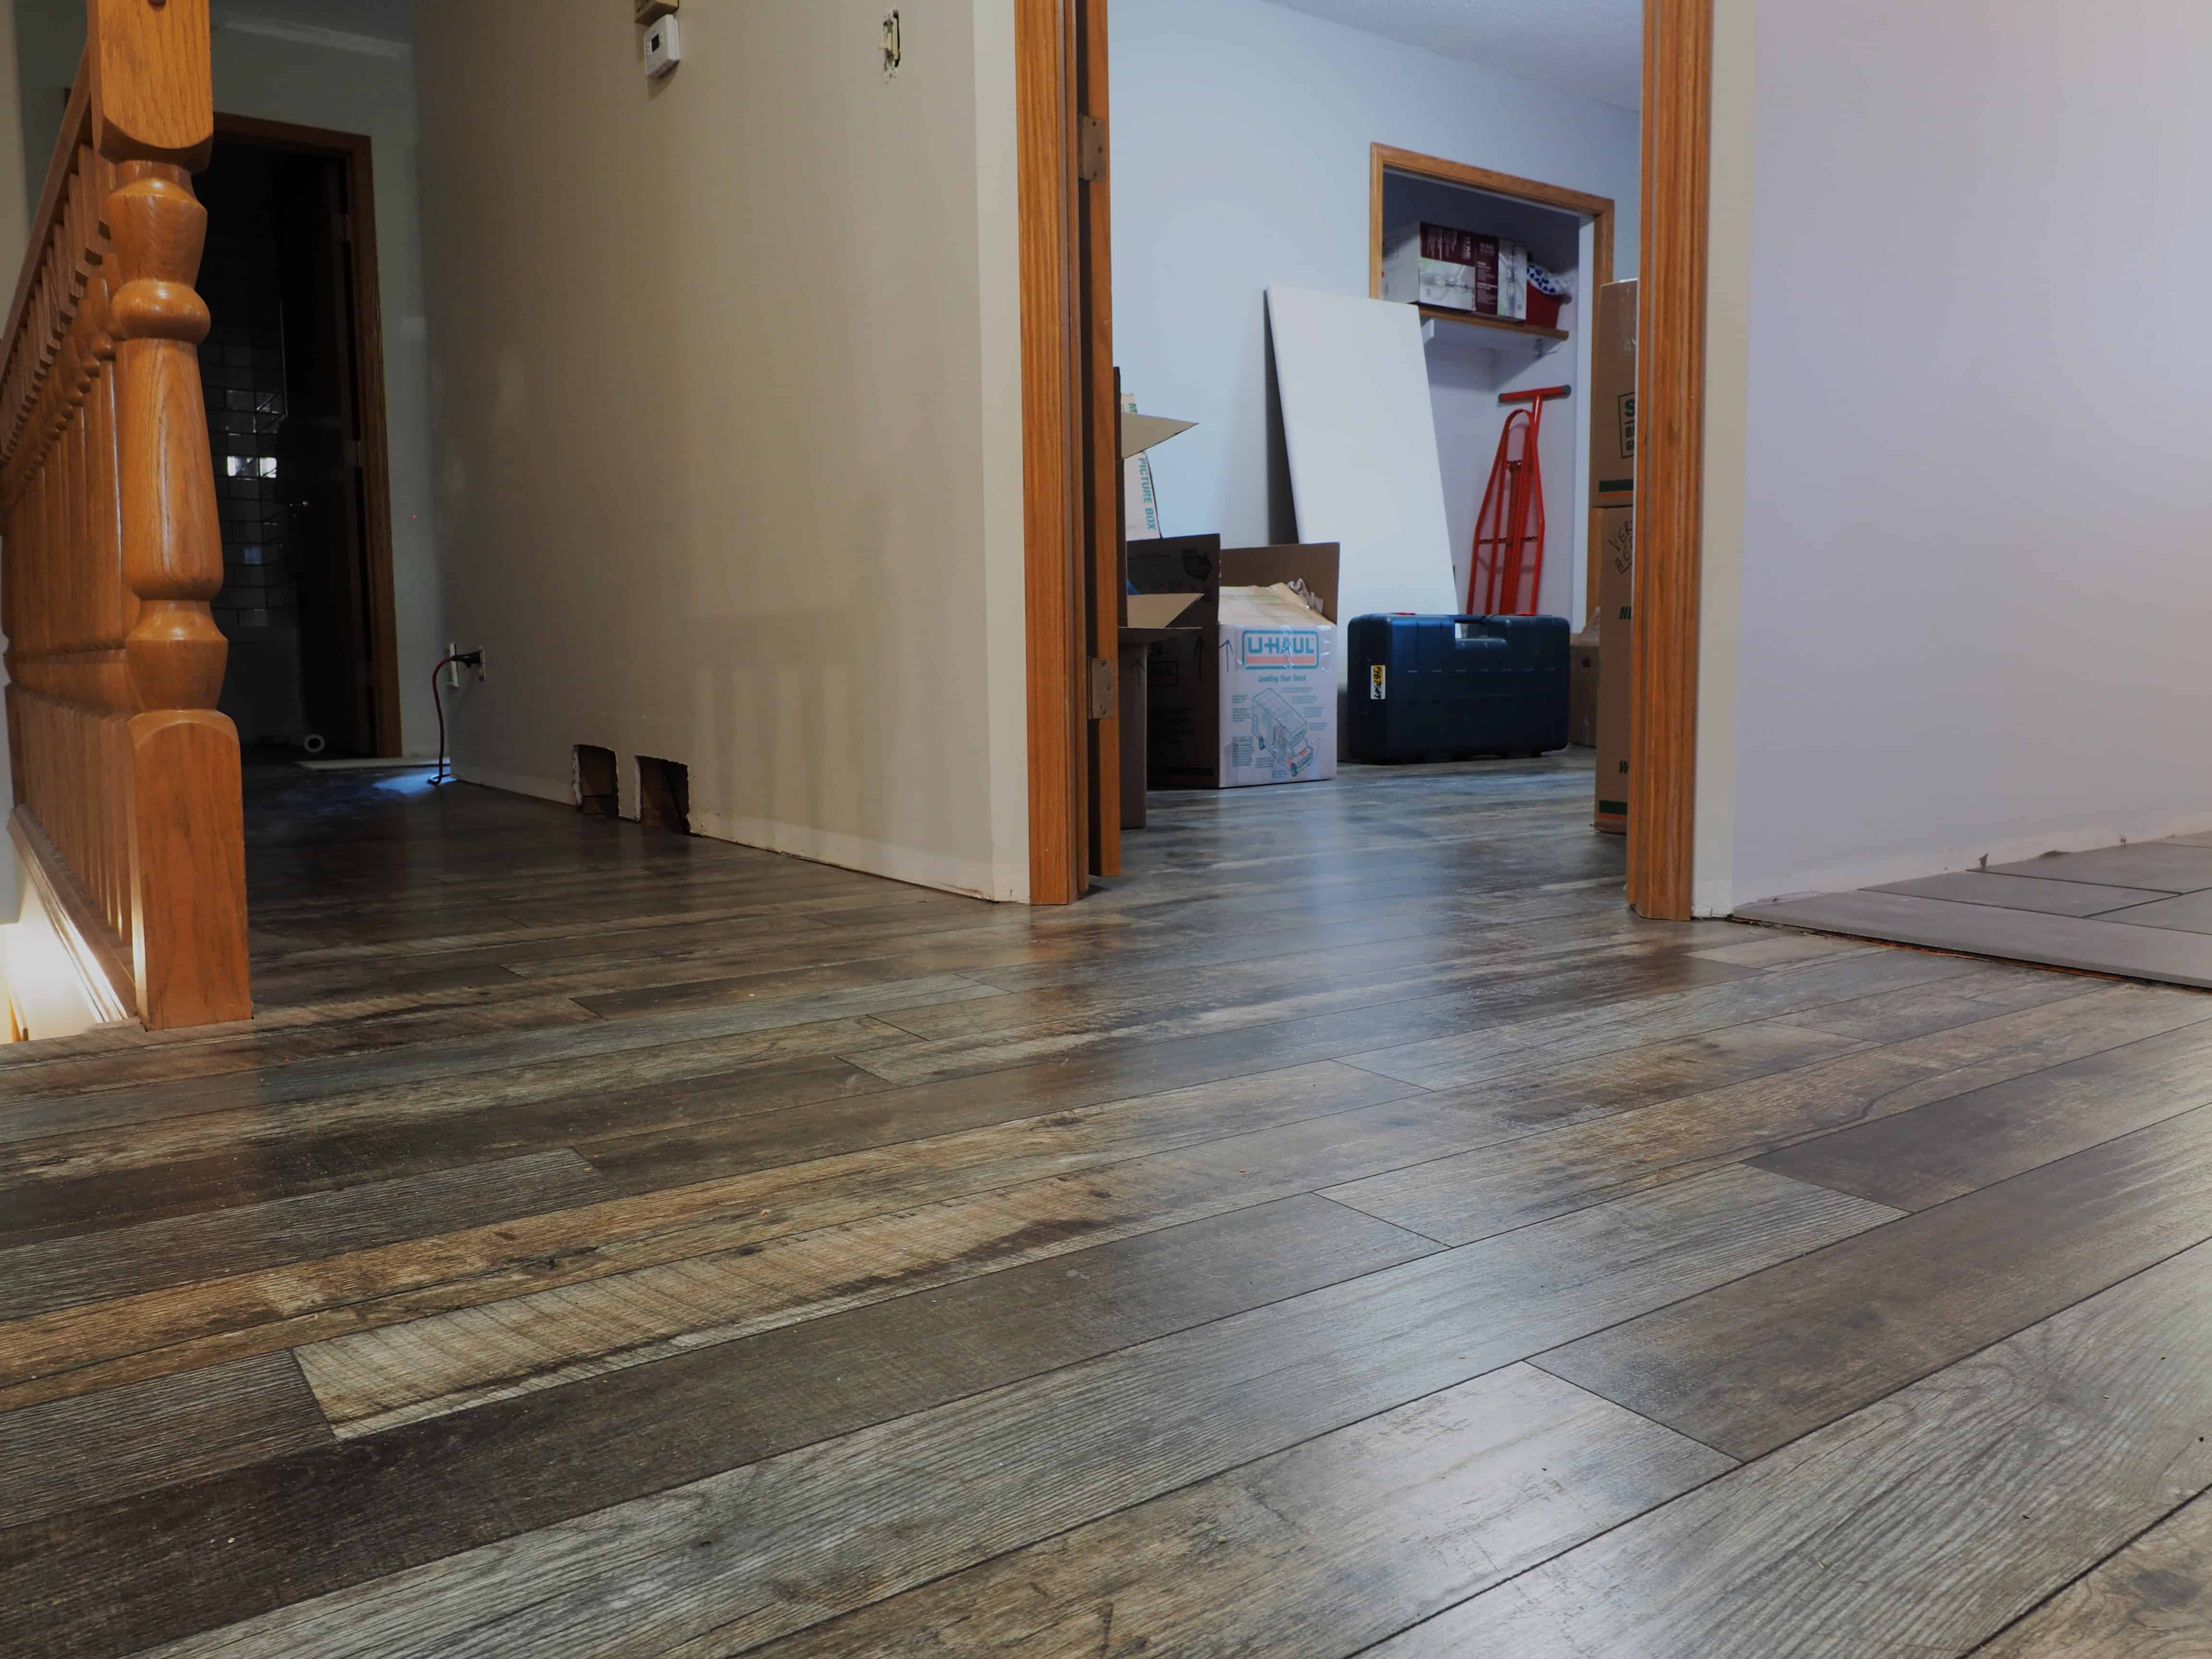
The beige bungalow finally has a room that resembles a kitchen! And oh the floors! Let’s talk about floors for a second. We have been walking around on plywood for the better part of 6 weeks and were super excited to finally be getting some proper floors in the place. We opted to go with a high quality laminate throughout the entire main floor of the house. There were a few reasons for this decision- 1) If you have dogs, I’d highly recommend avoiding the hardwoods of today. All you will see is scratches on those new floors in no time flat. 2) If you choose the right design and size, they can look just like a hardwood floor. In this house, we chose a darker laminate with a variegated barn wood look (find them HERE). We knew this flooring was going to be running throughout the house and wanted to make sure we chose the right now. It took some time to find it, but in the end we are extremely happy with how the flooring has turned out.
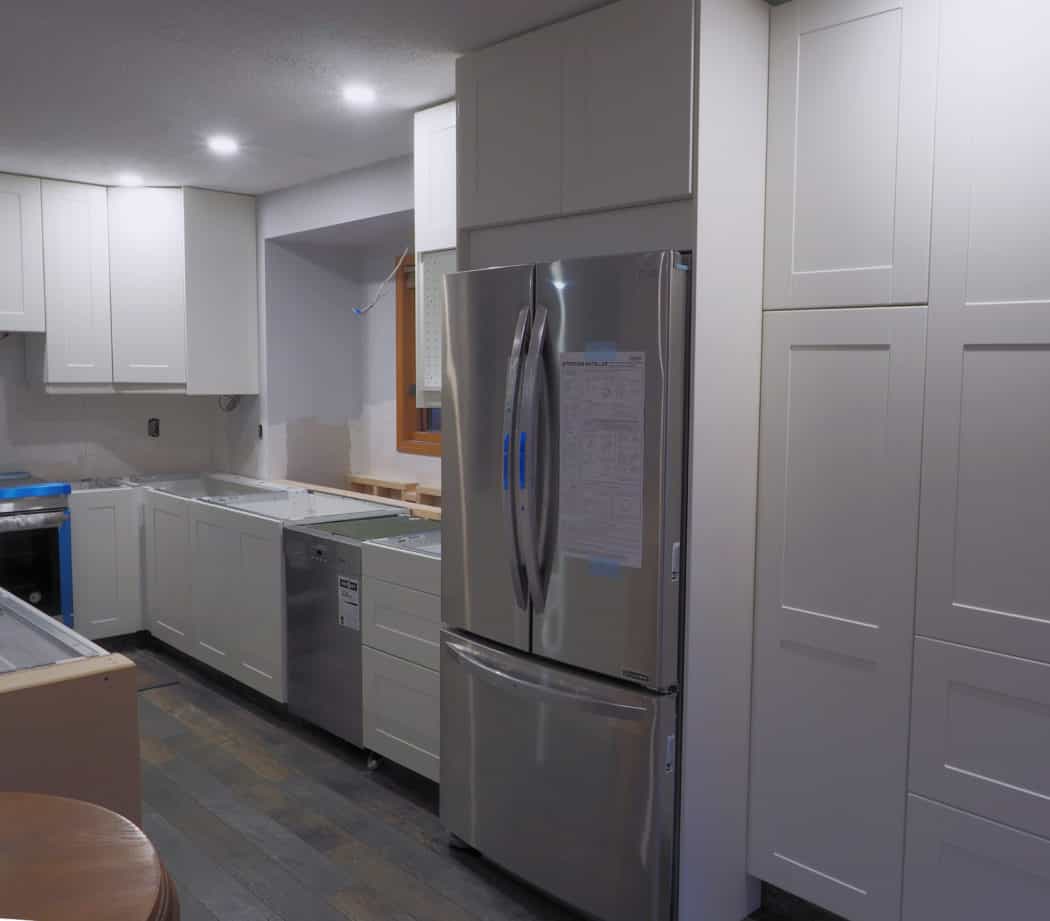
Okay enough with the tangent about floors- back on track about the kitchen! After the IKEA cabinets were hung, squared and screwed together, it was time to jump into the custom work. This is where we get rid of the plain IKEA cabinet look and give it a built-in feel. A couple things that help do this are using deco strips to cover the under cabinet lighting, as well as using IKEA cabinet gable panels.
The gables are one of the more expensive purchases when ordering your IKEA kitchen, but are essential to finishing. Long story short, about a day and a half later the kitchen was complete to where it currently sits now. The appliances are in, IKEA cabinets are finished, and we are waiting on the countertops to be installed next week.

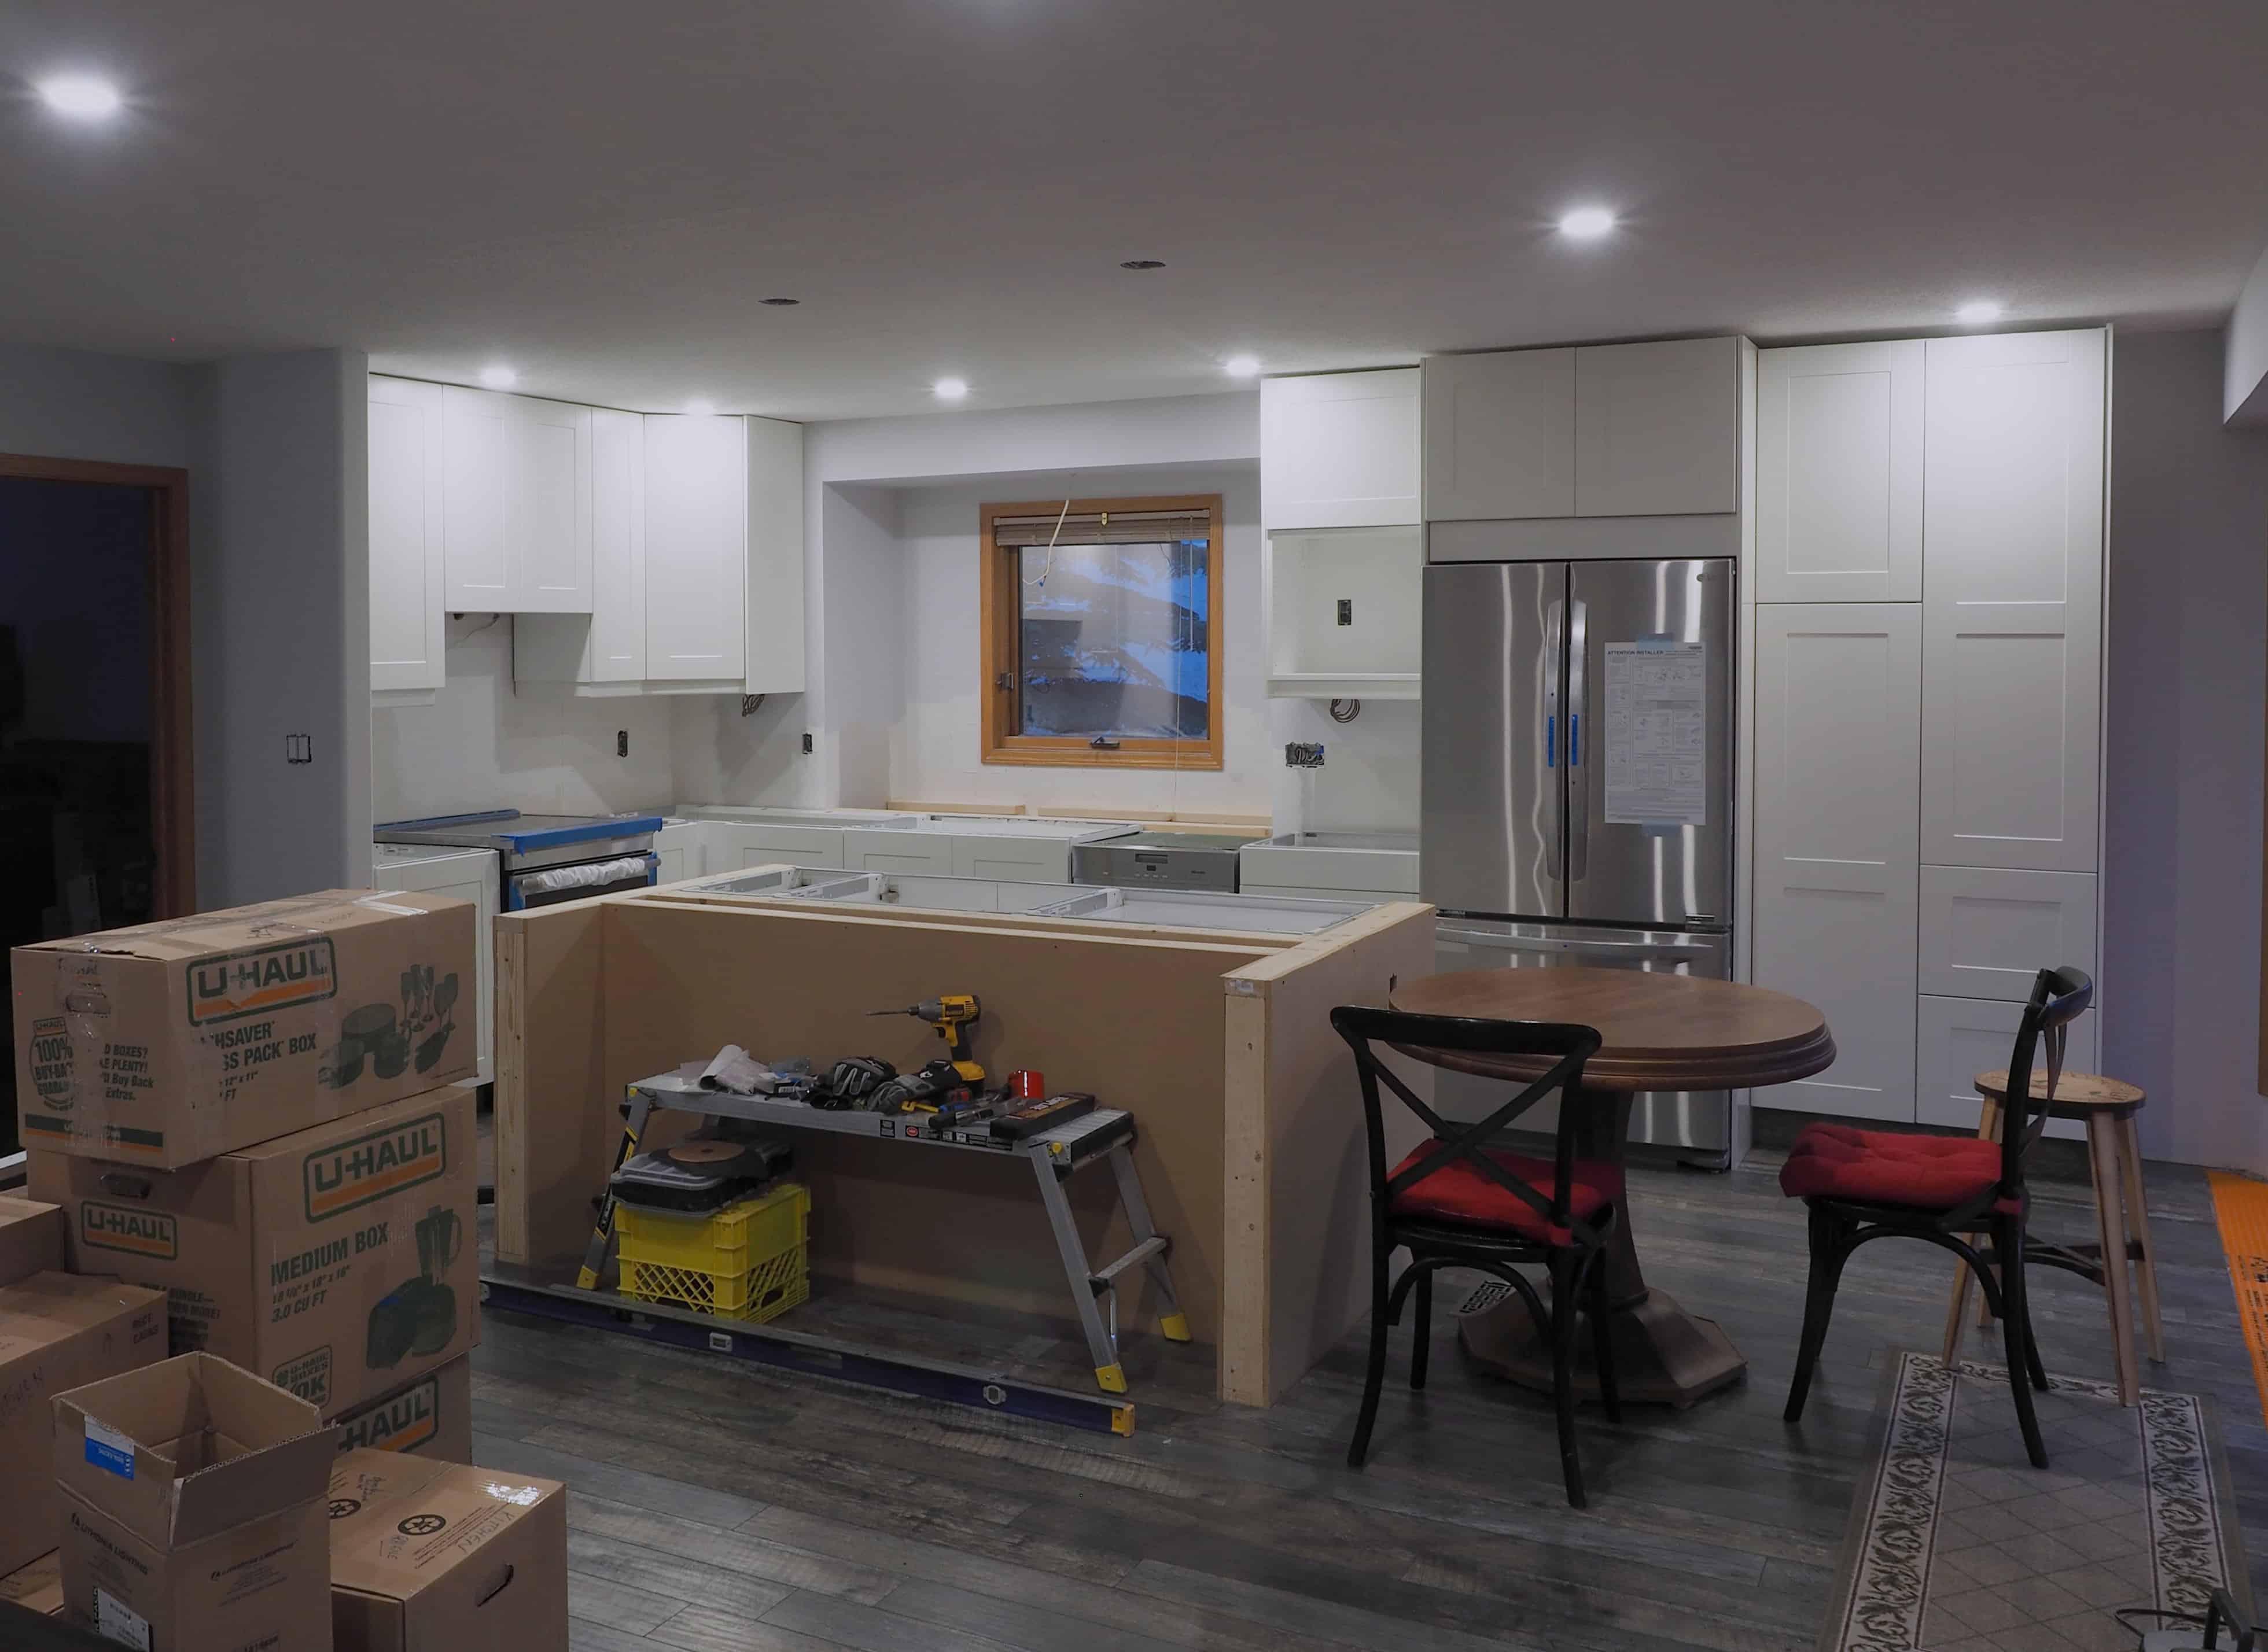
Walkway between the island and main countertops. This photo also shows the deco strips under the cabinet to hide the lighting. With that, we’ll leave Chapter #2 right here. The ‘photos and videos to be shared’ folder is bulging with stuff, in particularly the custom work on the island.
As always, be sure to join our community and share your reno and DIY adventures.
No Comments