
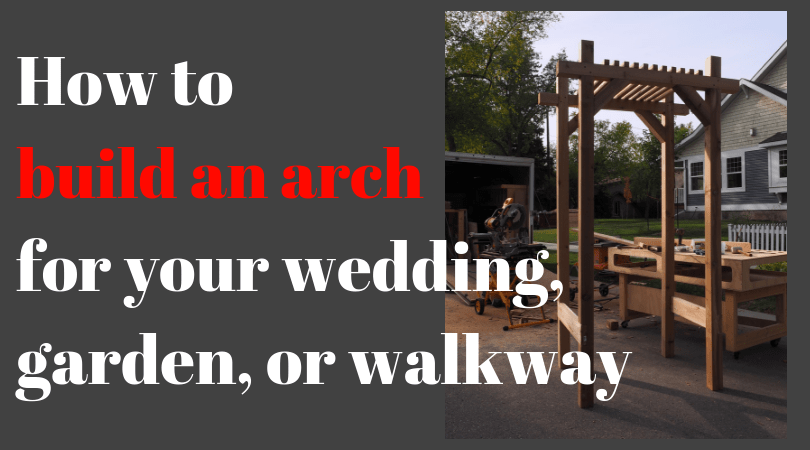
What’s going on guys and gals! If you haven’t noticed from the many different posts in the last week, I am getting married! I had the idea a few months back that it would be a great idea to build a DIY wedding arch for our ceremony. It would be a unique meaningful piece, that could then be repurposed in our garden afterword. So that’s exactly what I did, and I figured I’d share exactly how I built the wedding arch with all of you.
The materials
For this project I decided to use natural western red cedar. I love the look of cedar, even as it ages to grey and somewhat weathered looking. This project doesn’t require much in the way of material:
- 8′ 4×4″ cedar posts (5)
- 10′ 4×4″ cedar post (1) – I bought a 10 footer because I wanted the width of my wedding arch to be about 54″
- 10′ 2×6″ cedar board (2)
- Pack of 2 1/2″ wood screws (had in the shop)
- Pack of 4″ wood screws (had in the shop)
- Decorative black wood screws – This is your choice, but I chose to use them on the front face, where they would be visible. (I also had these in the shop)
Everything is readily available at your local hardware store. I picked up everything from Home Depot for a shade under $200. Keep in mind that’s in Canadian dollars. So prices will obviously vary depending on your location.
DIY wedding arch build steps
Step 1: Cut the main arch posts and cross members to length
Even though I bought 8′ posts, they are not always identical. I started off by cutting all of my posts to exactly 8′. The length of your cross members will depend on the width you want your wedding arch to be. I decided on 54″ wide- I knew I wanted about 3 feet of internal space between my beams, and 54″ would give me that.
The best tool for this would be a standard mitre saw (I still love with my Dewalt DWS780 as much as the day I bought it).
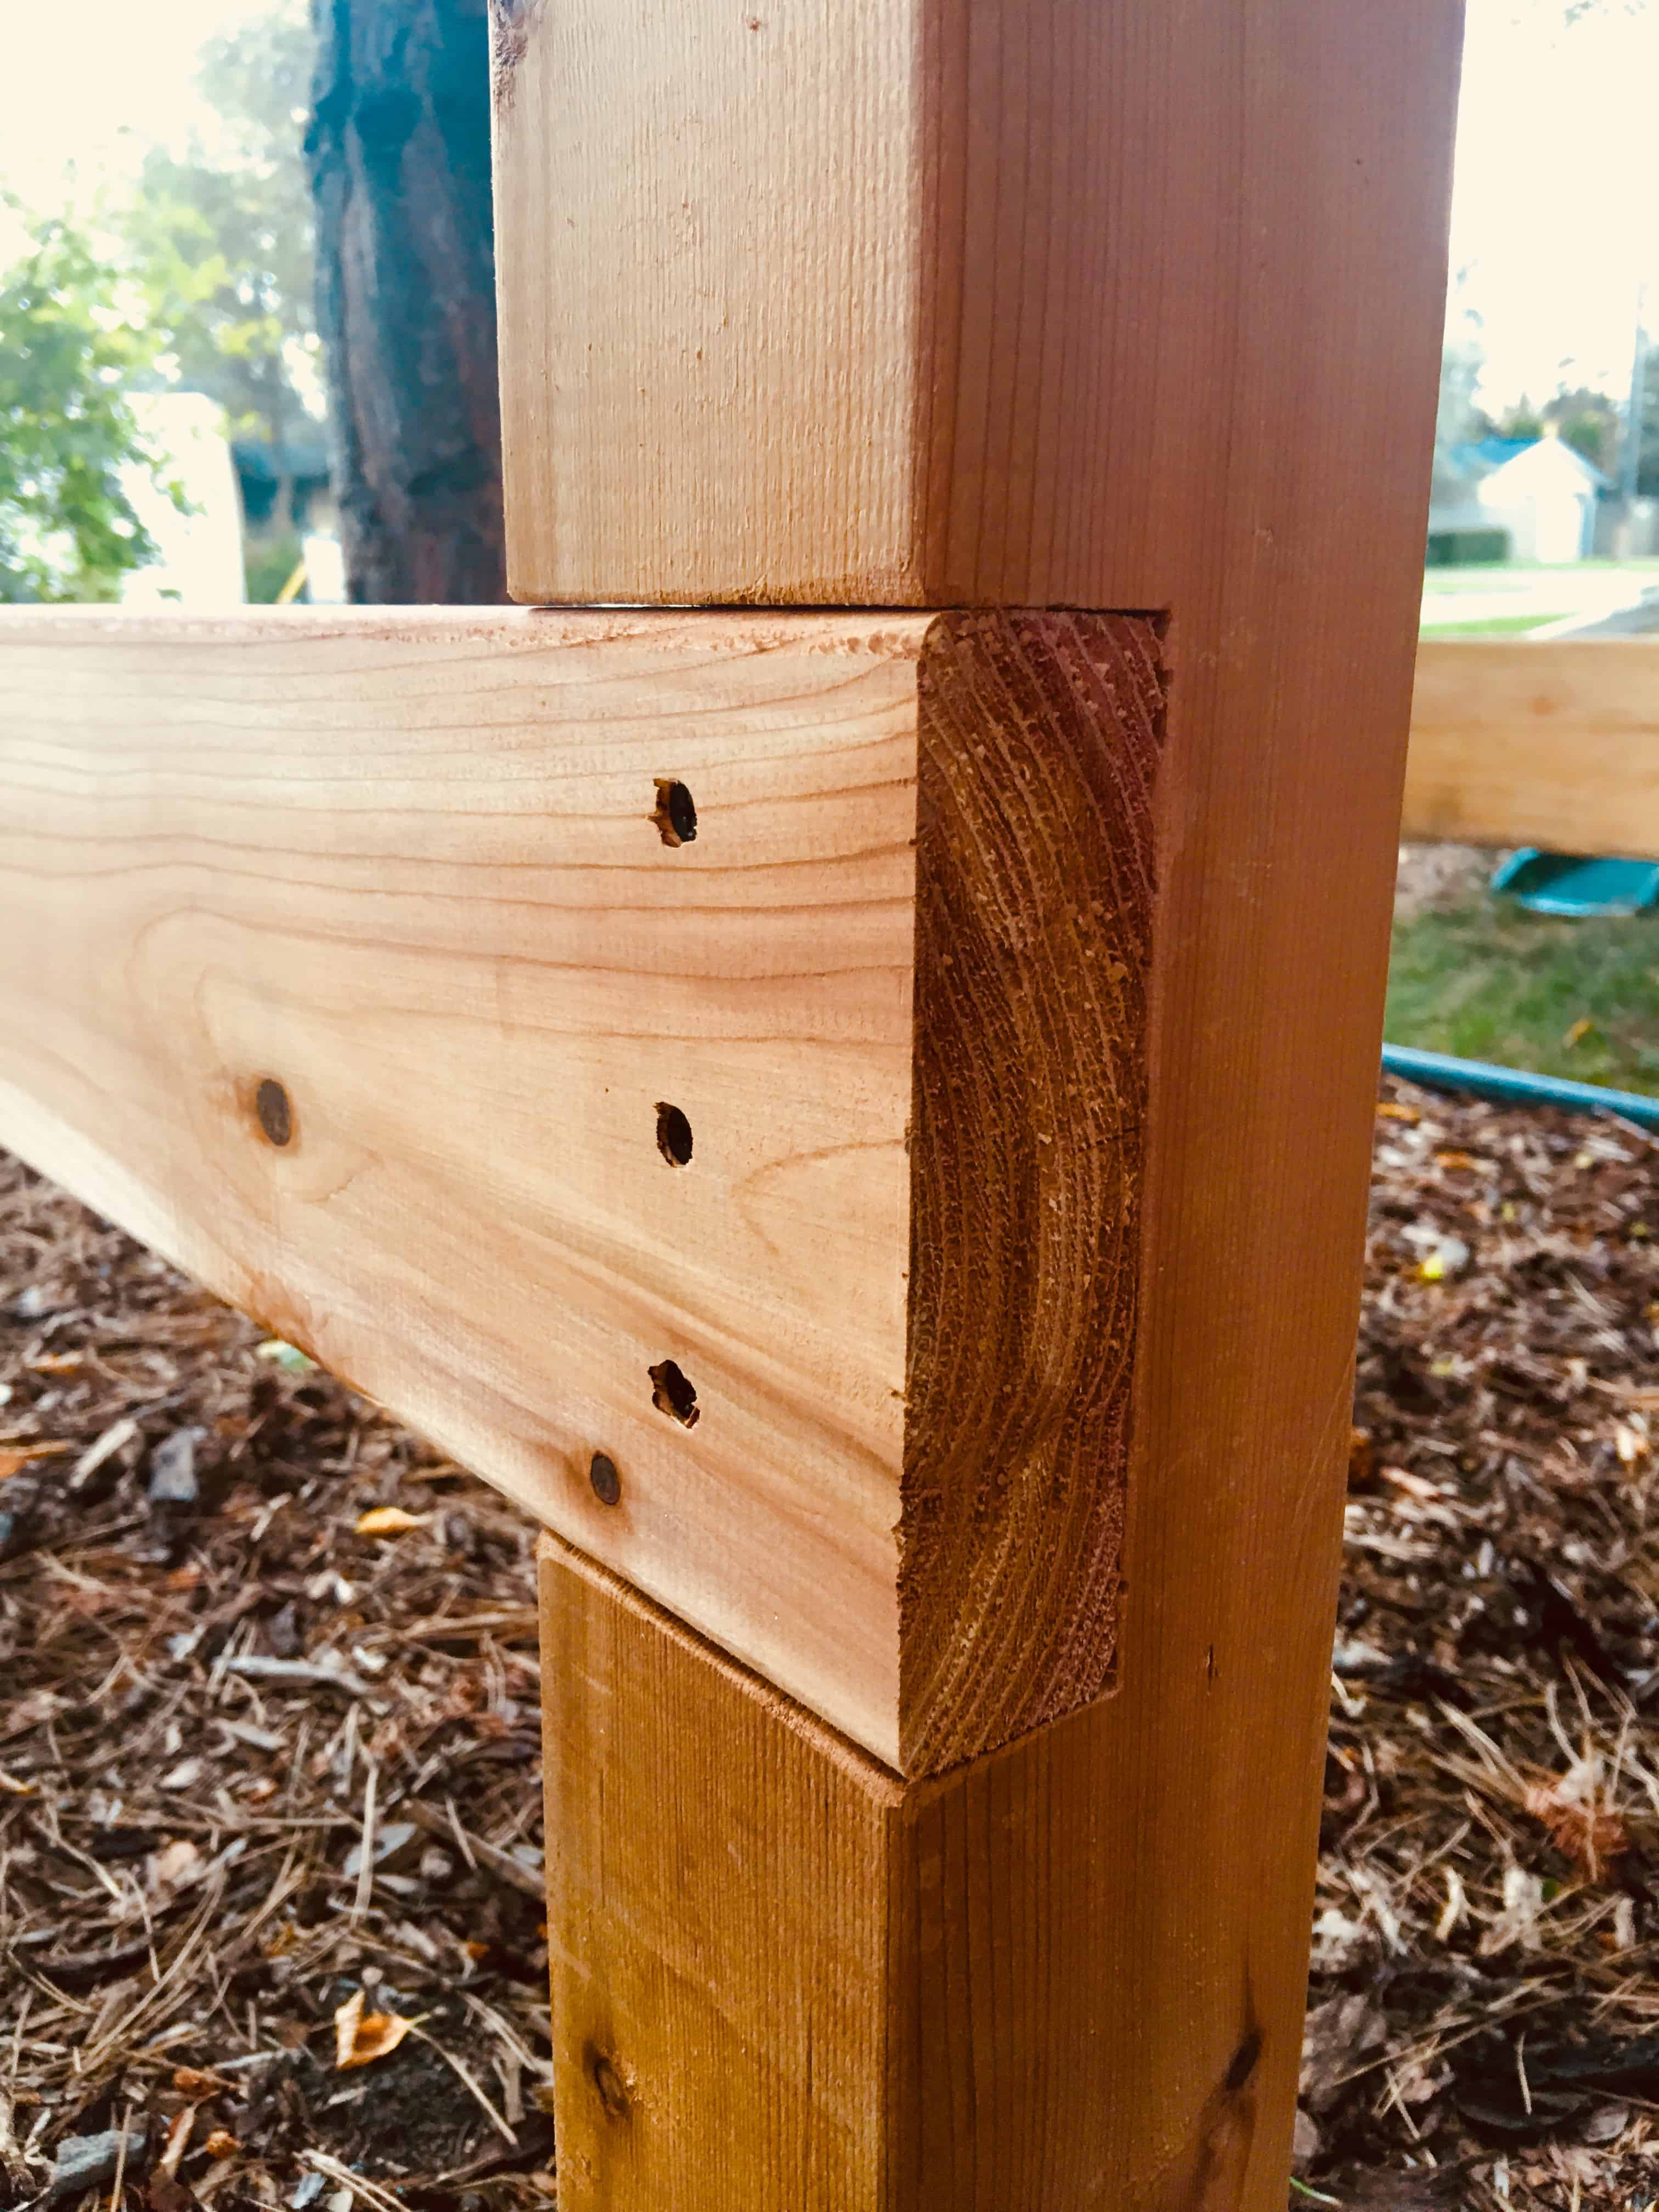
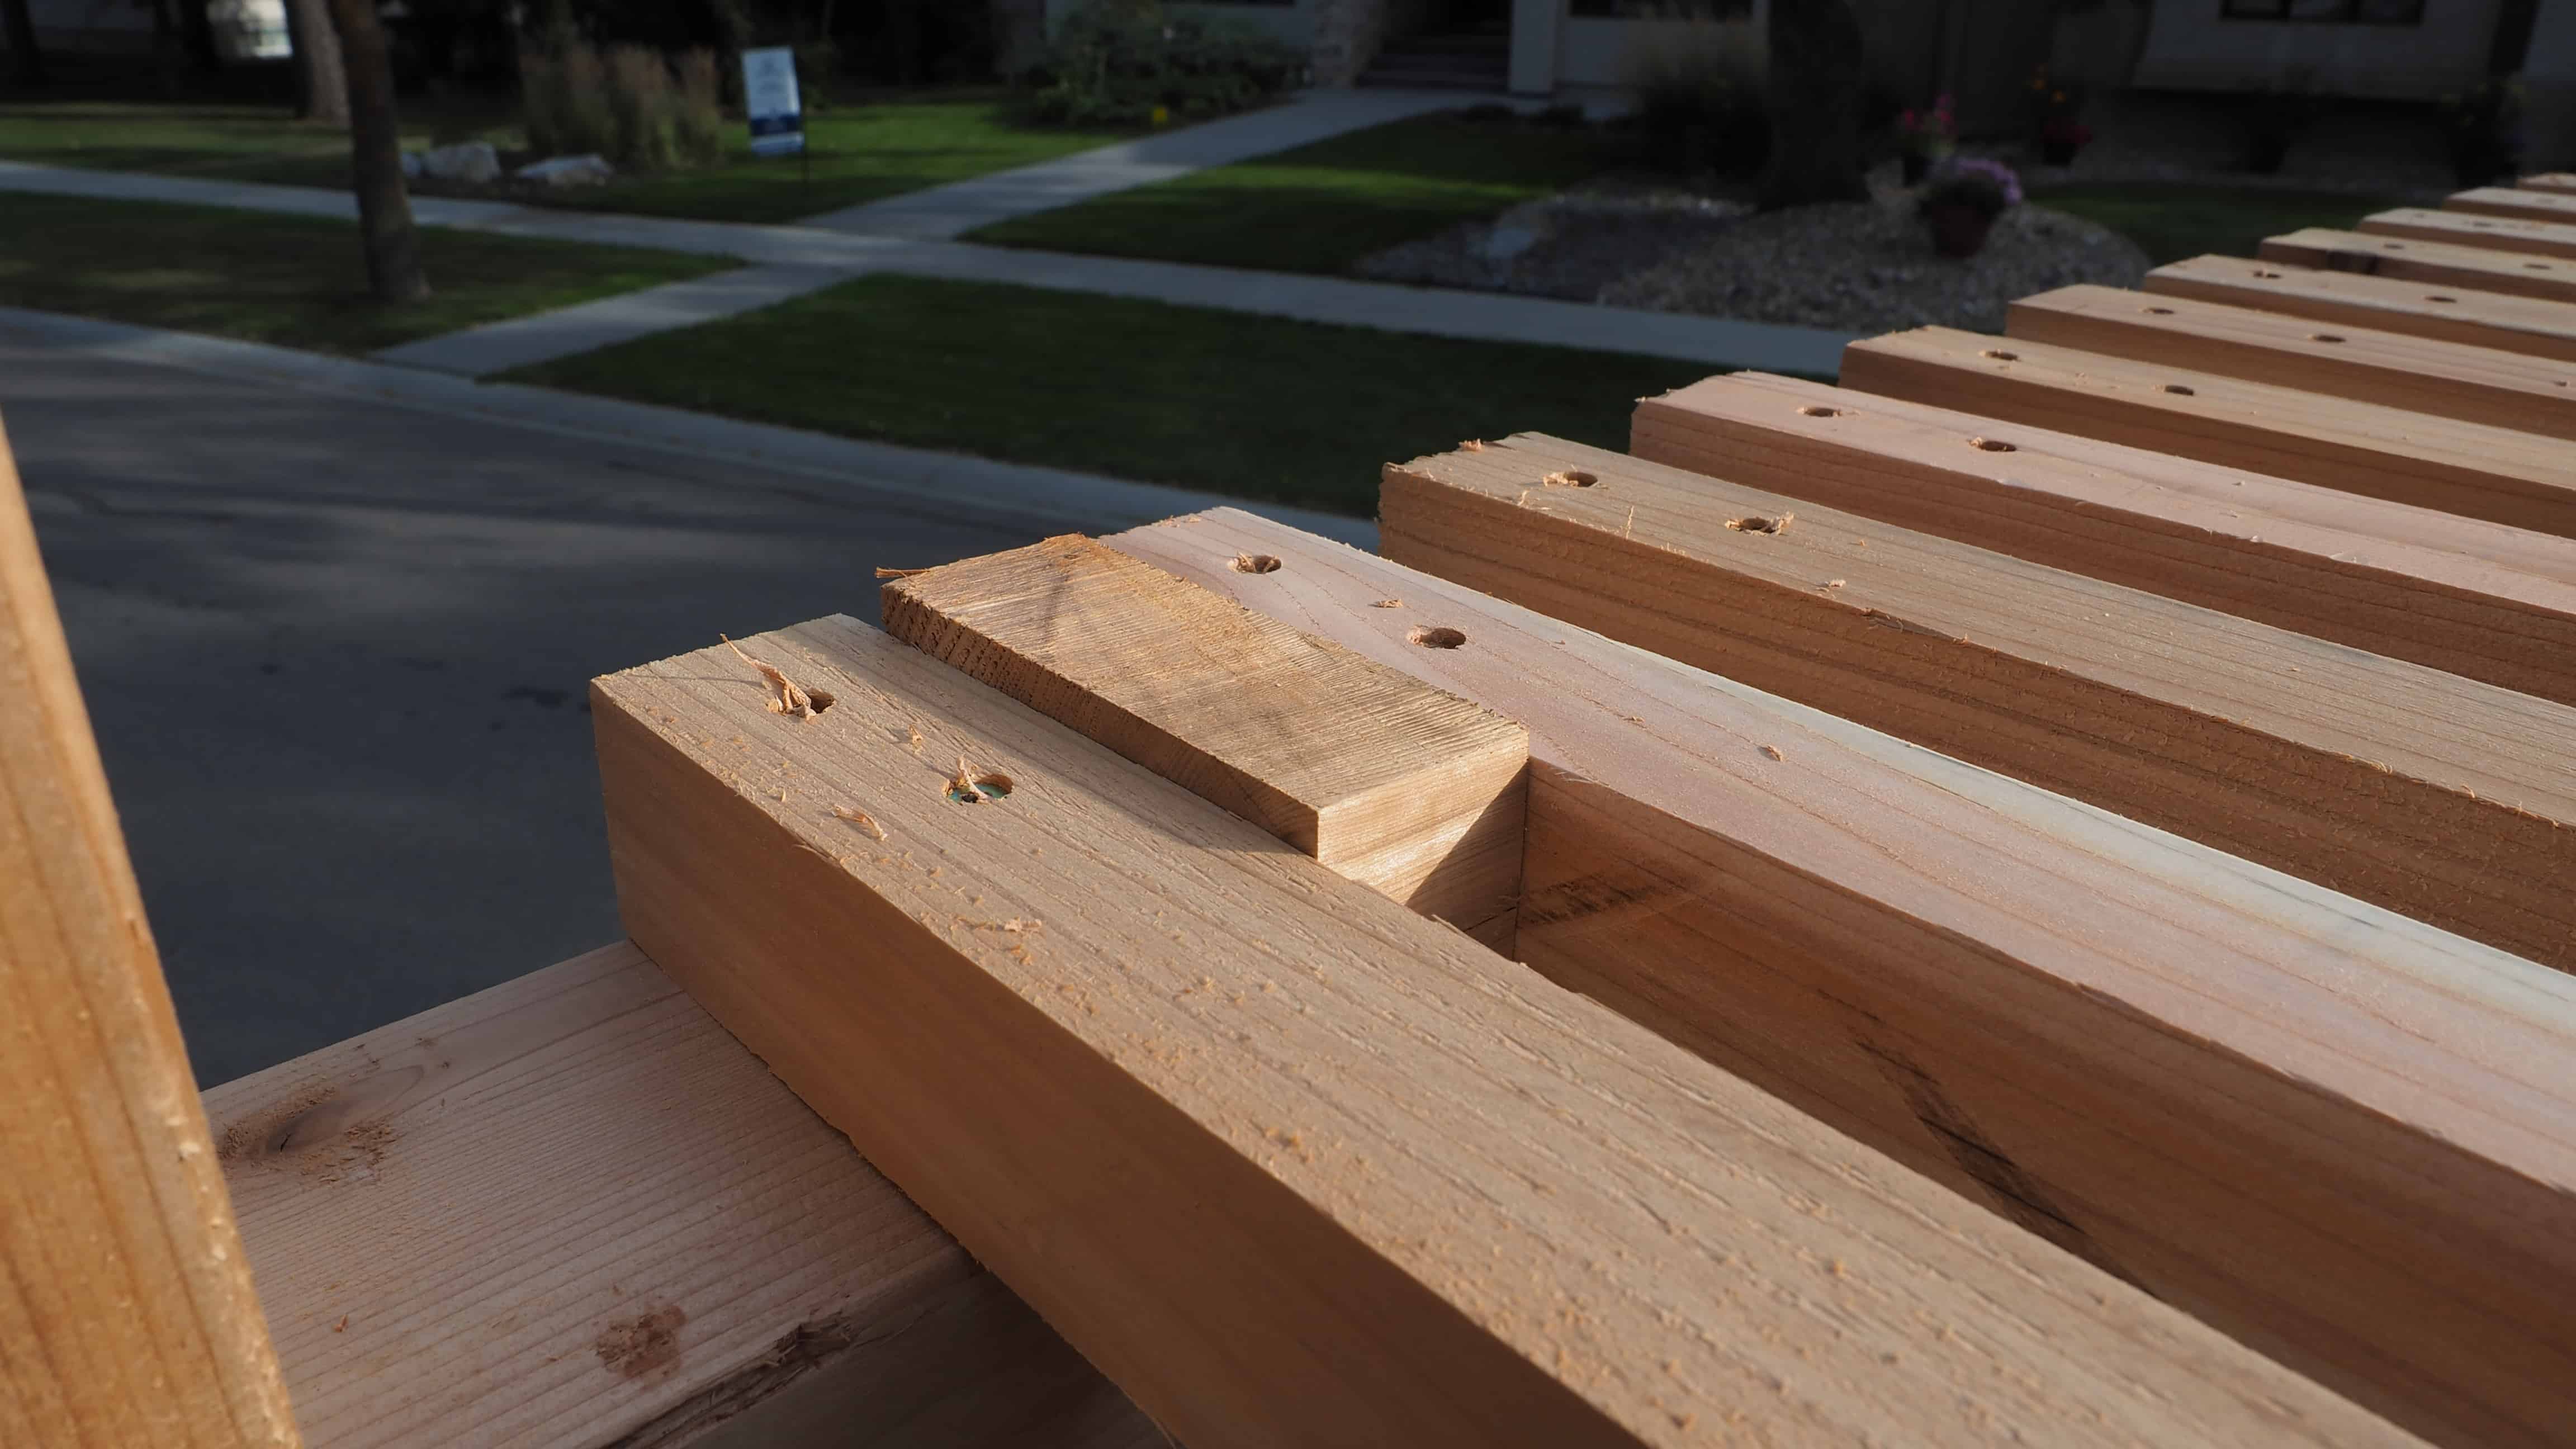
Step 2: Mark out the U-notches for your wedding arch (creating lap joints)
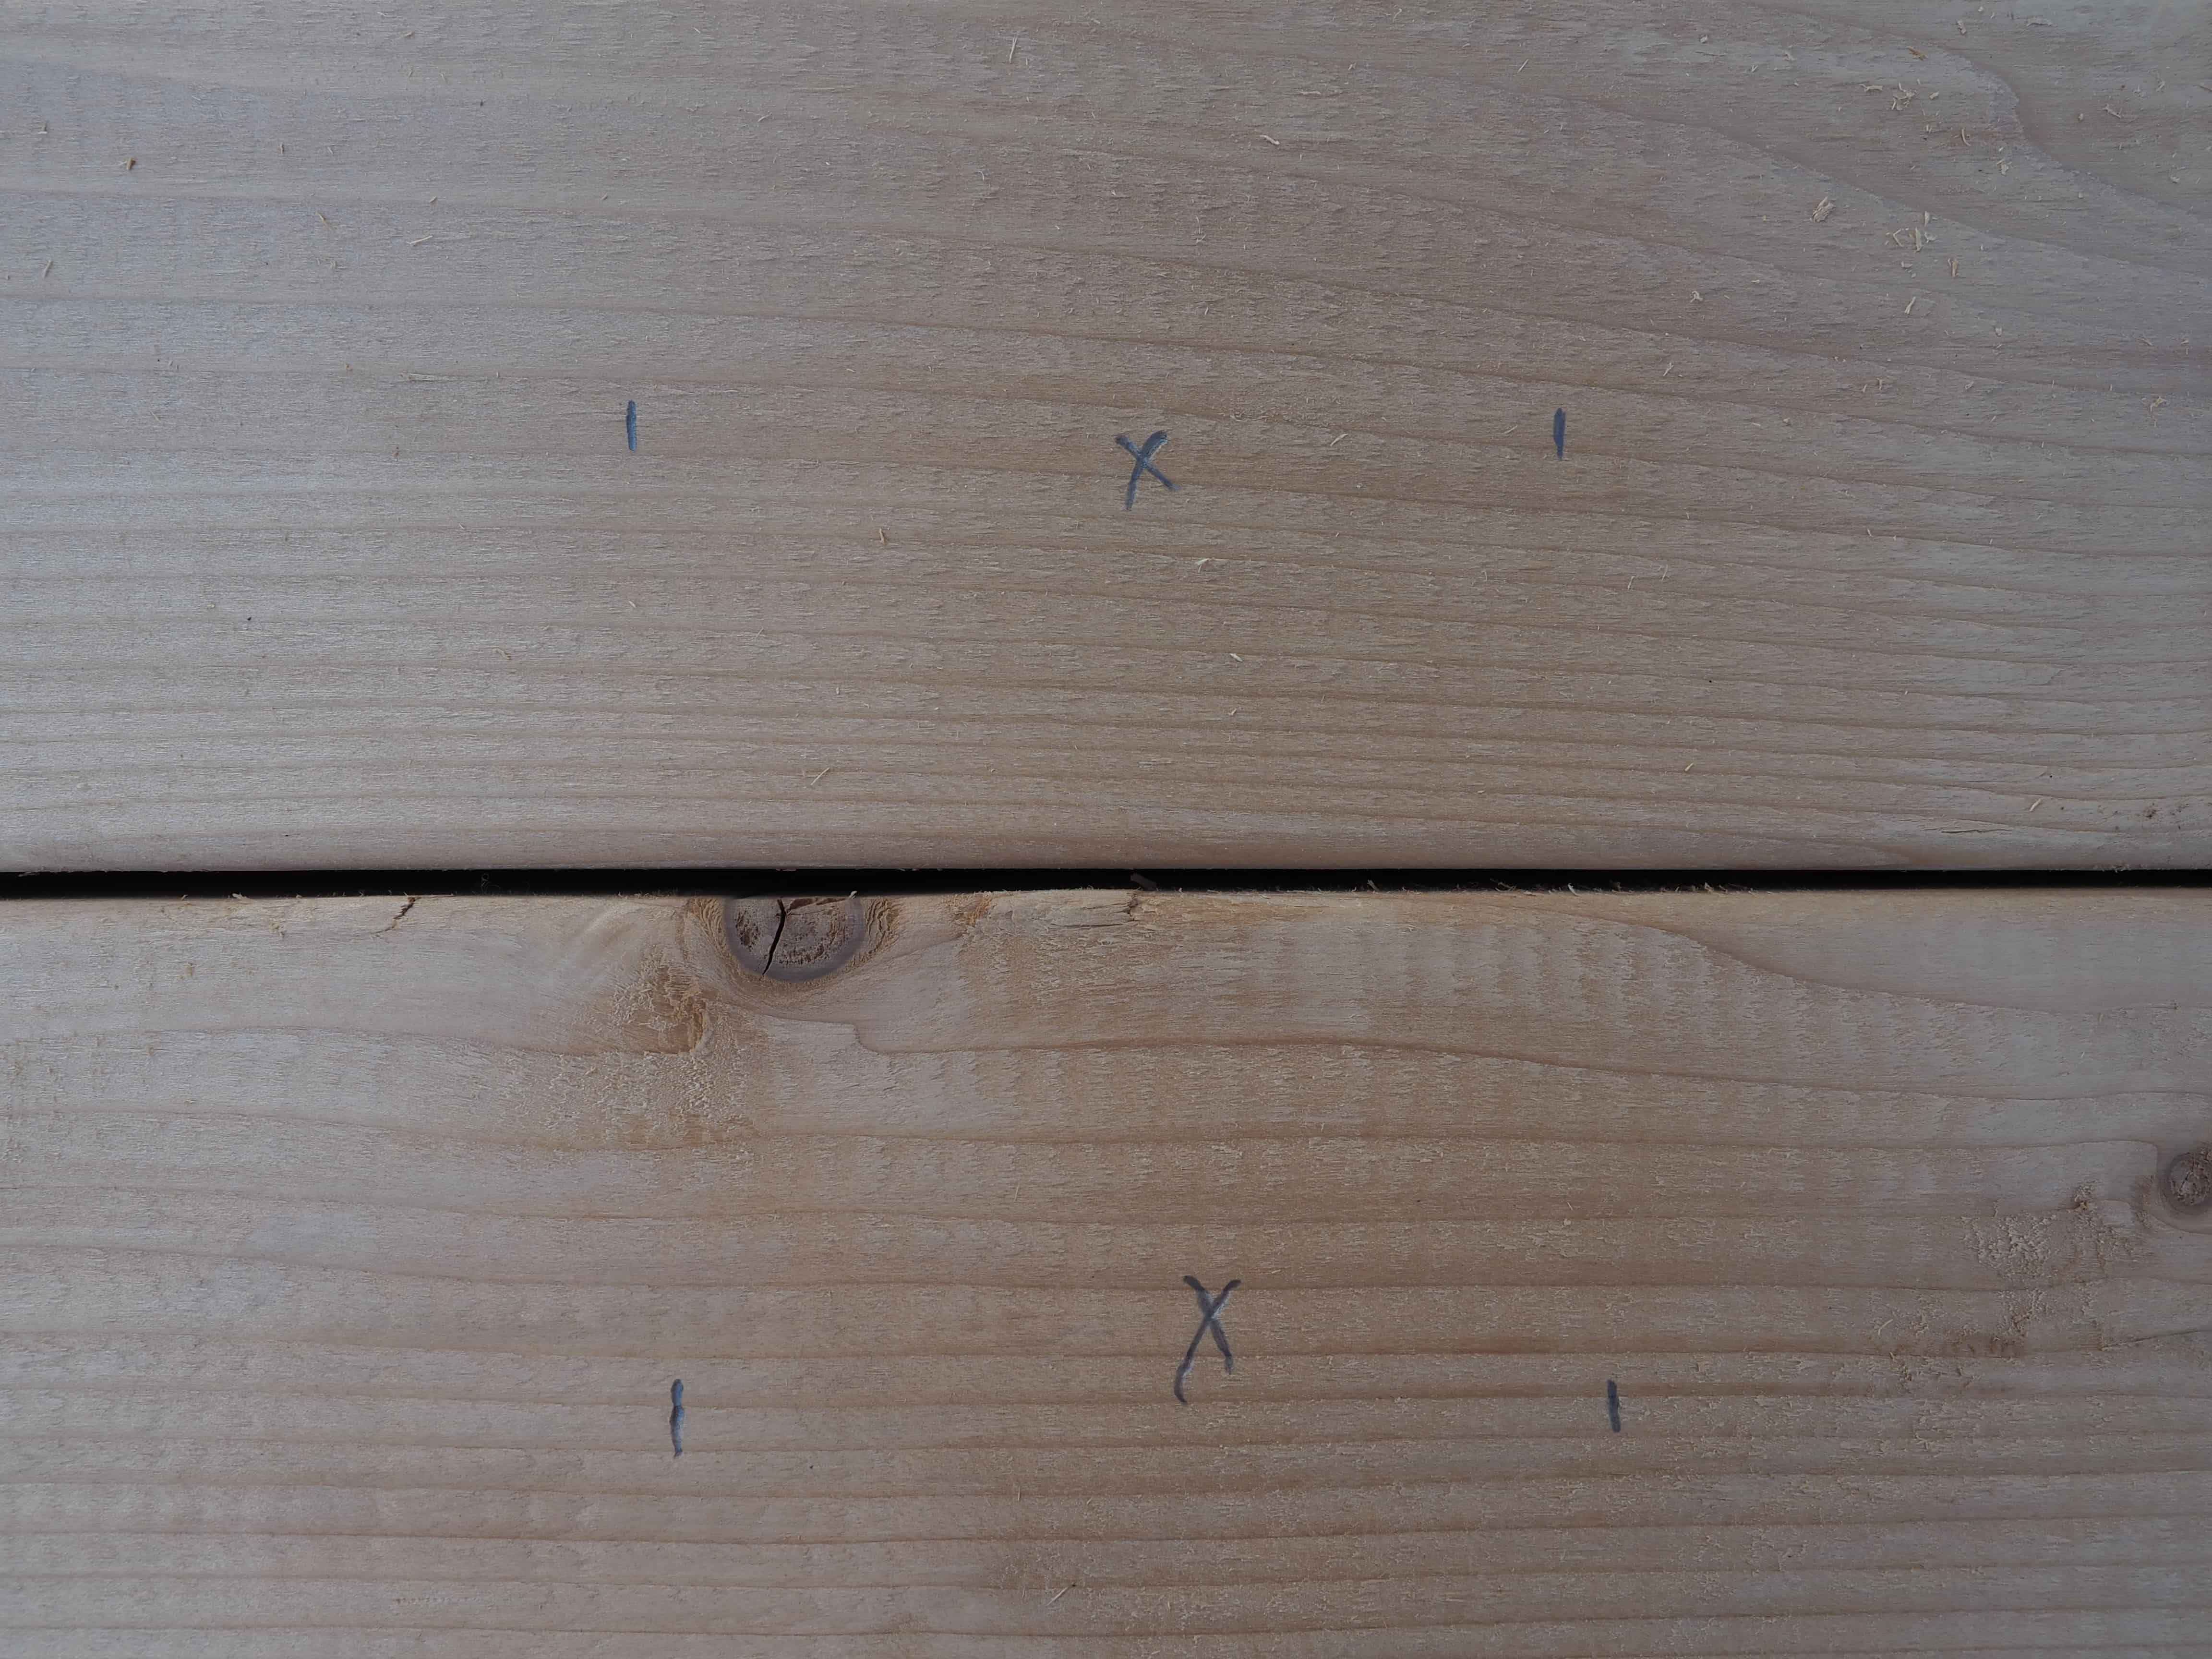
This is one of those times where having a plan makes the whole project much easier. For example, I knew I wanted 6″ of overhang on all of my posts and cross members. This meant that my notches would all begin 6″ inward from the end of the 4×4. There are many ways in which you can cut out your notches (lap joints)- I find a mitre saw to be one of the quickest and most accurate. A mitre saw allows you to cut accurately, and almost all of them will a have depth gauge you can set to prevent you from cutting to deep.
Tip: You will notice in the photo that I have little X’s inside of my markings. I ALWAYS make a small x where I intend to do the cutting. This is a simple trick to remind you of where the cut(s) need to be made.
Check out my video to see how I made my U-notches (lap joints):
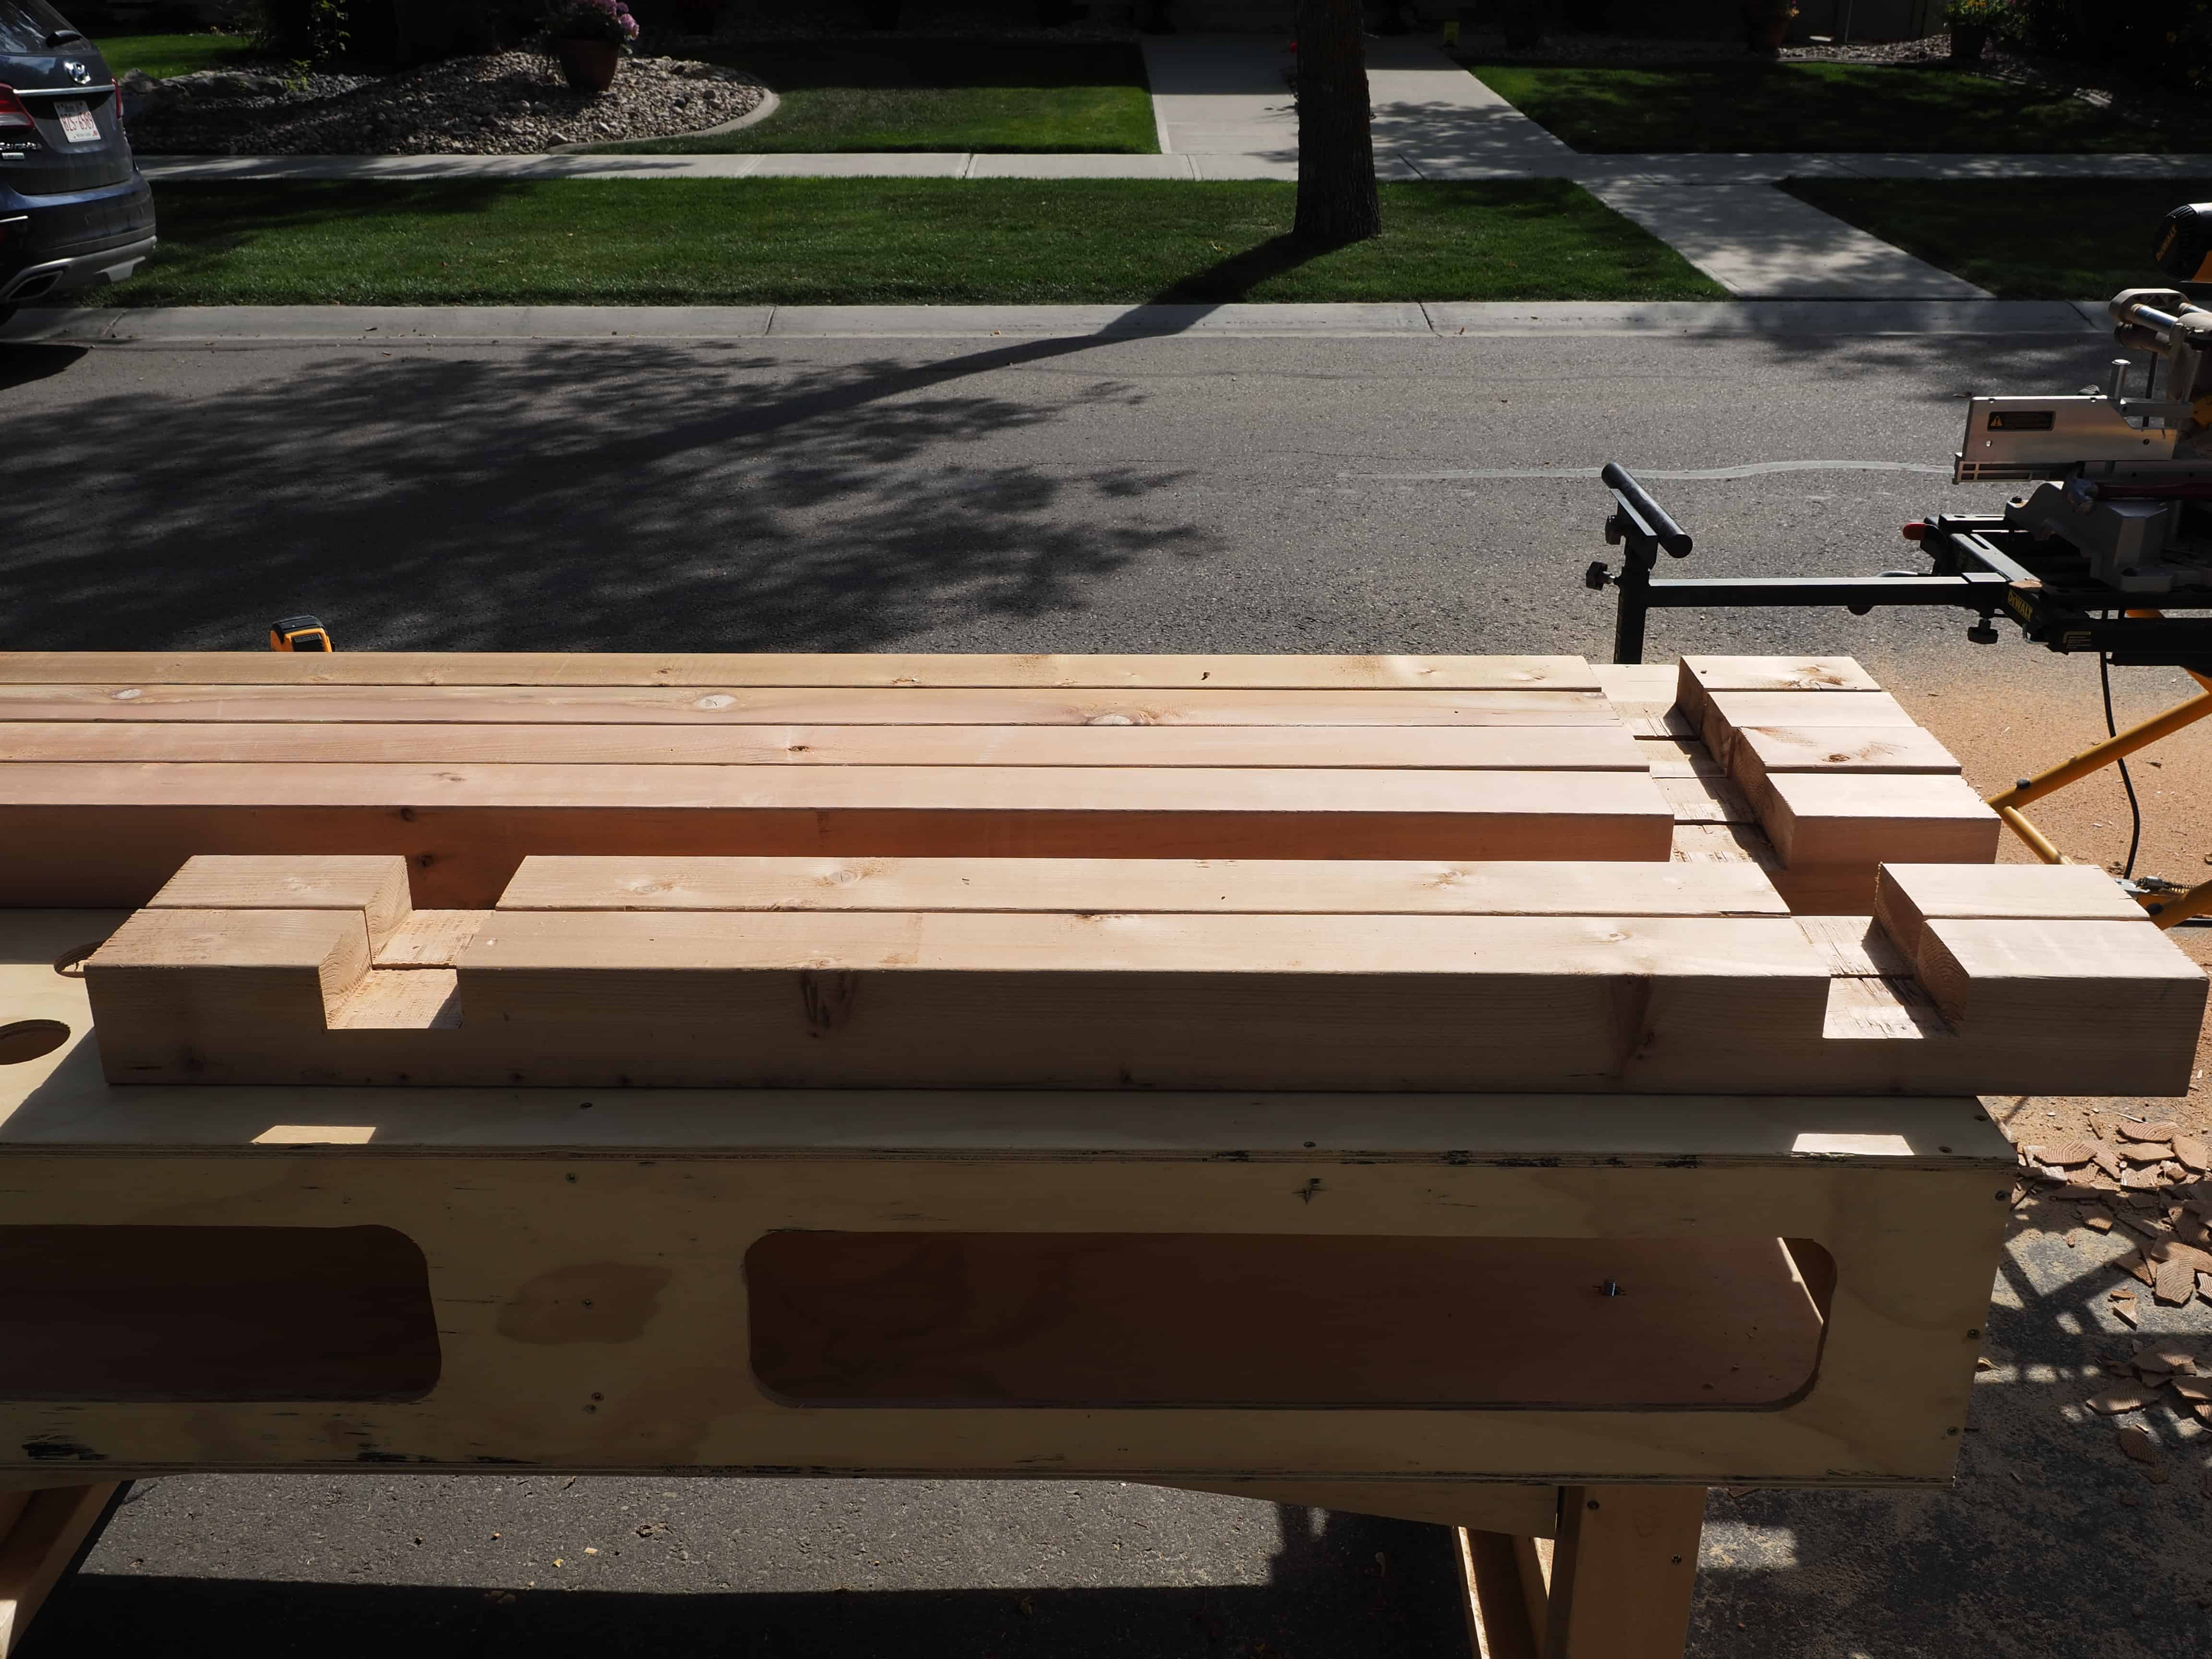
Once all of your lap joints are complete, they should look something like the photo below. You will notice how my cross members have two notches in them- one for each post!
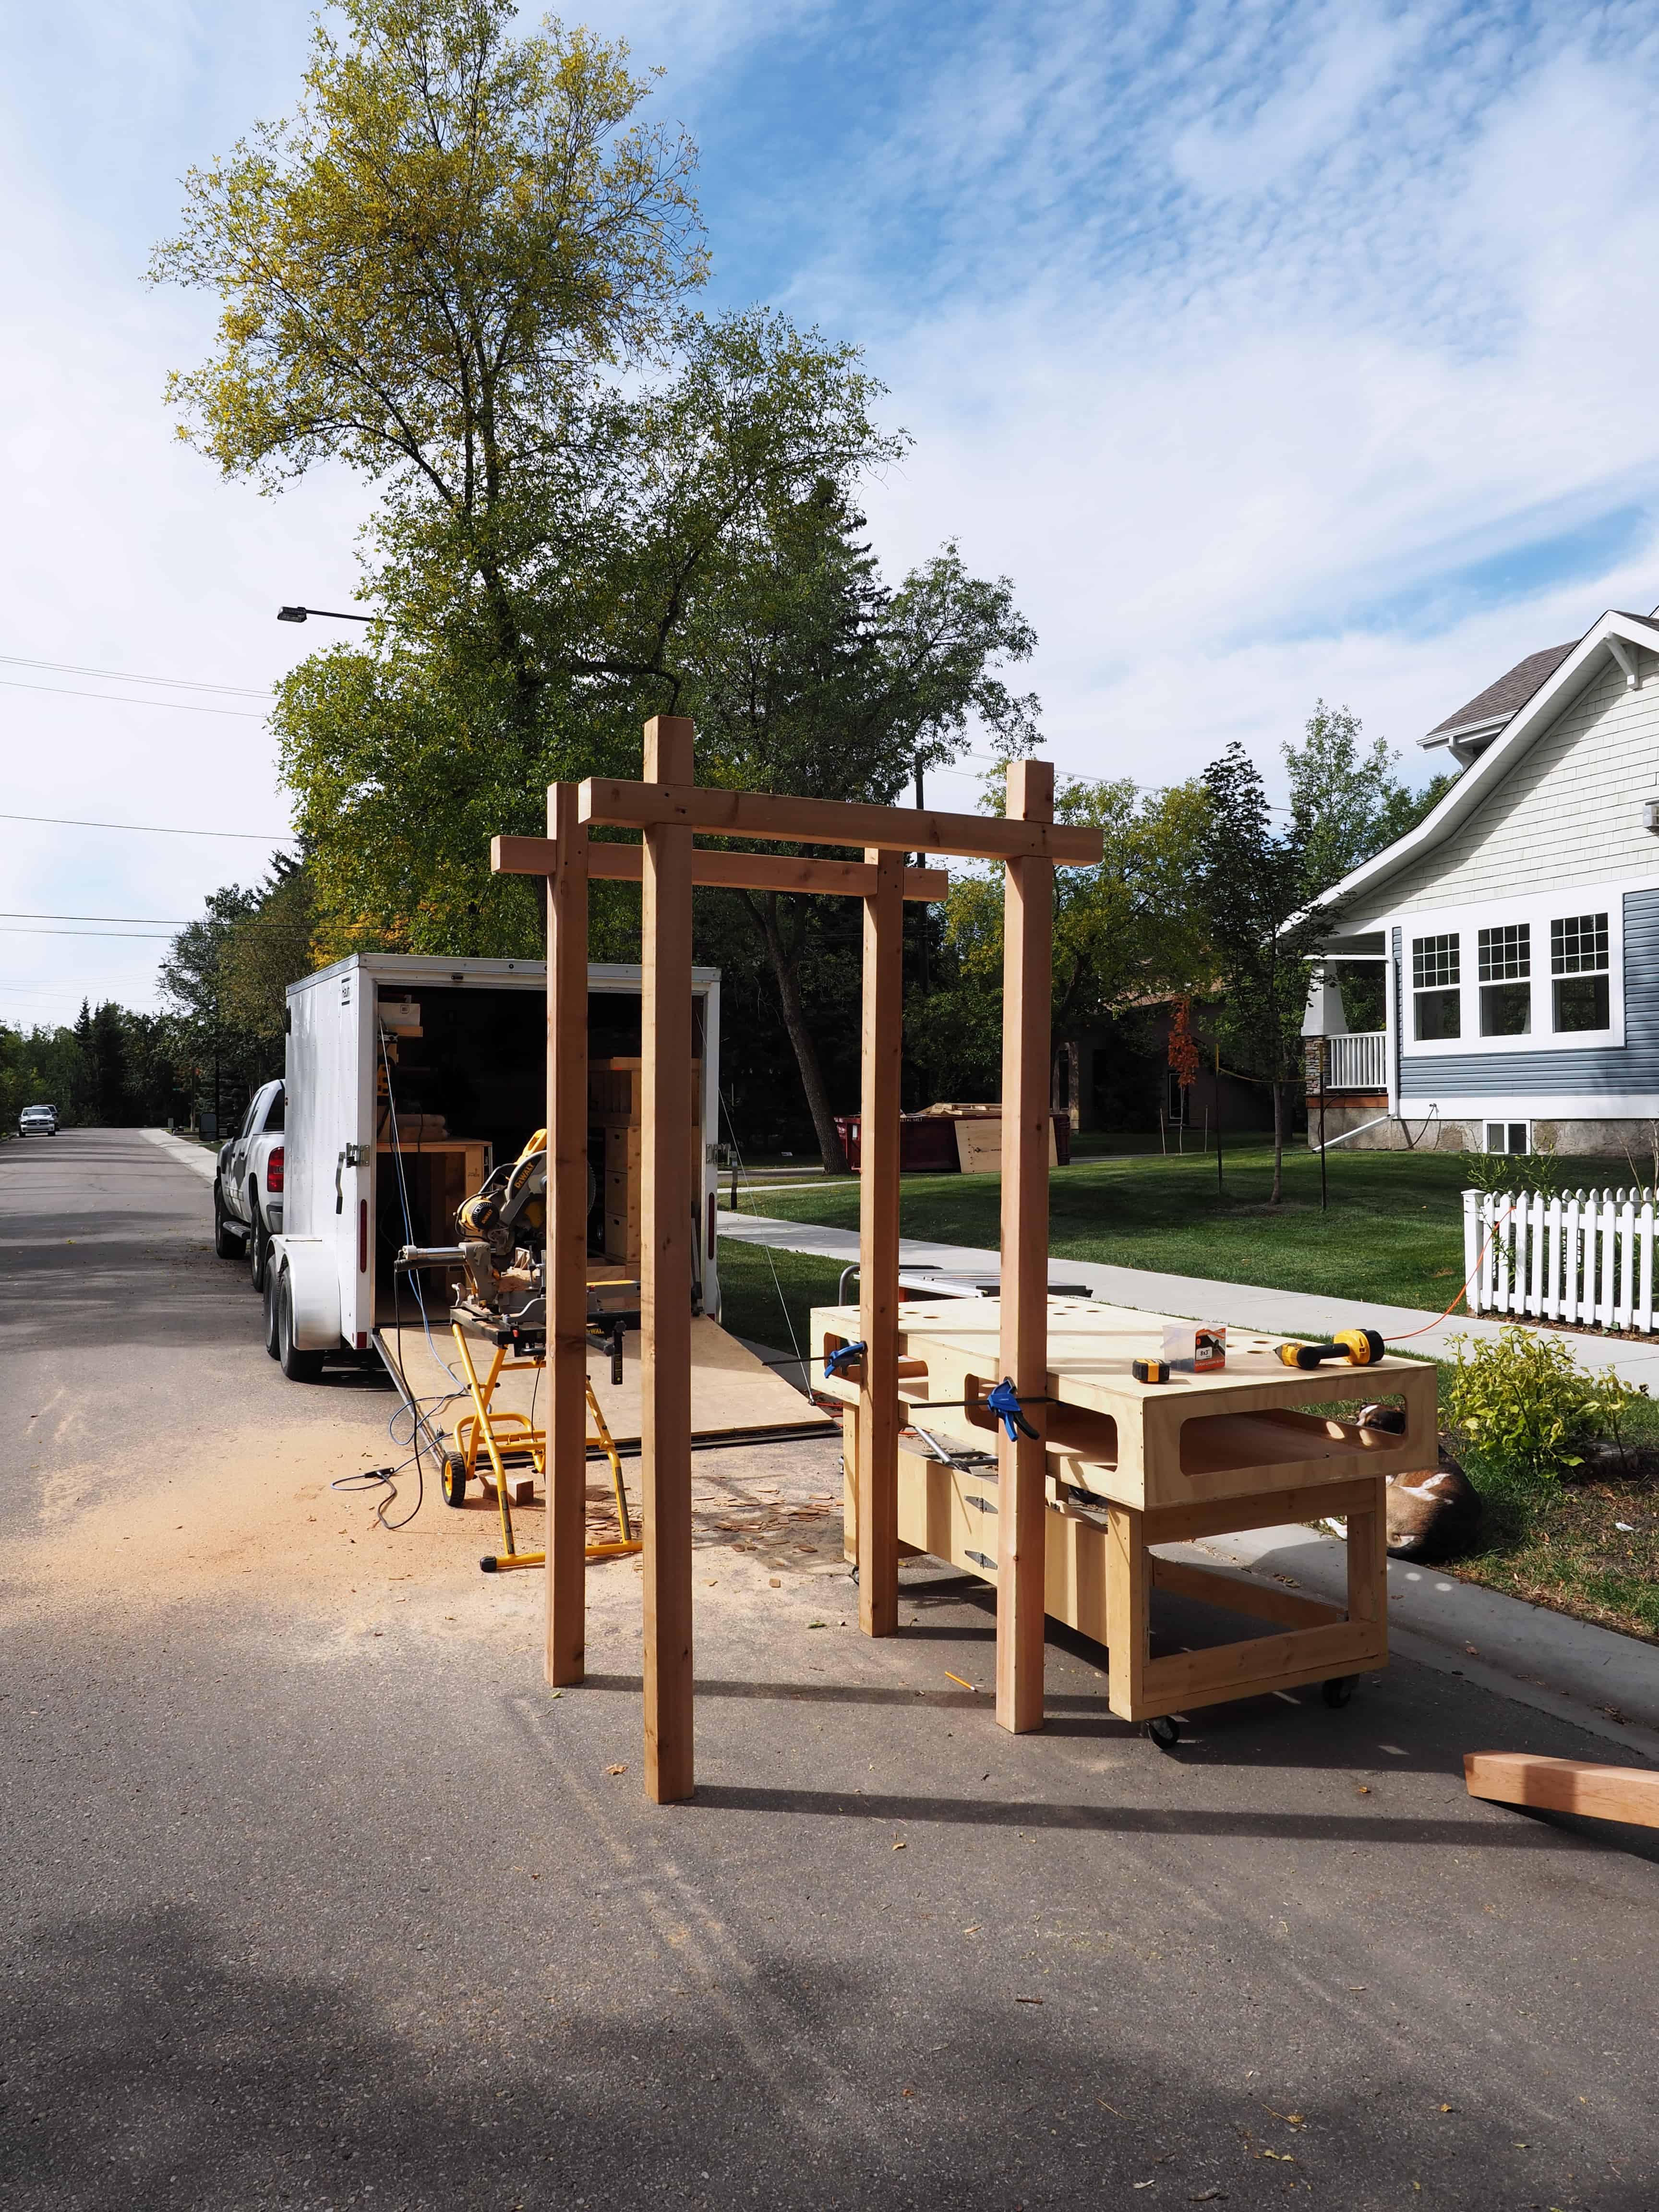
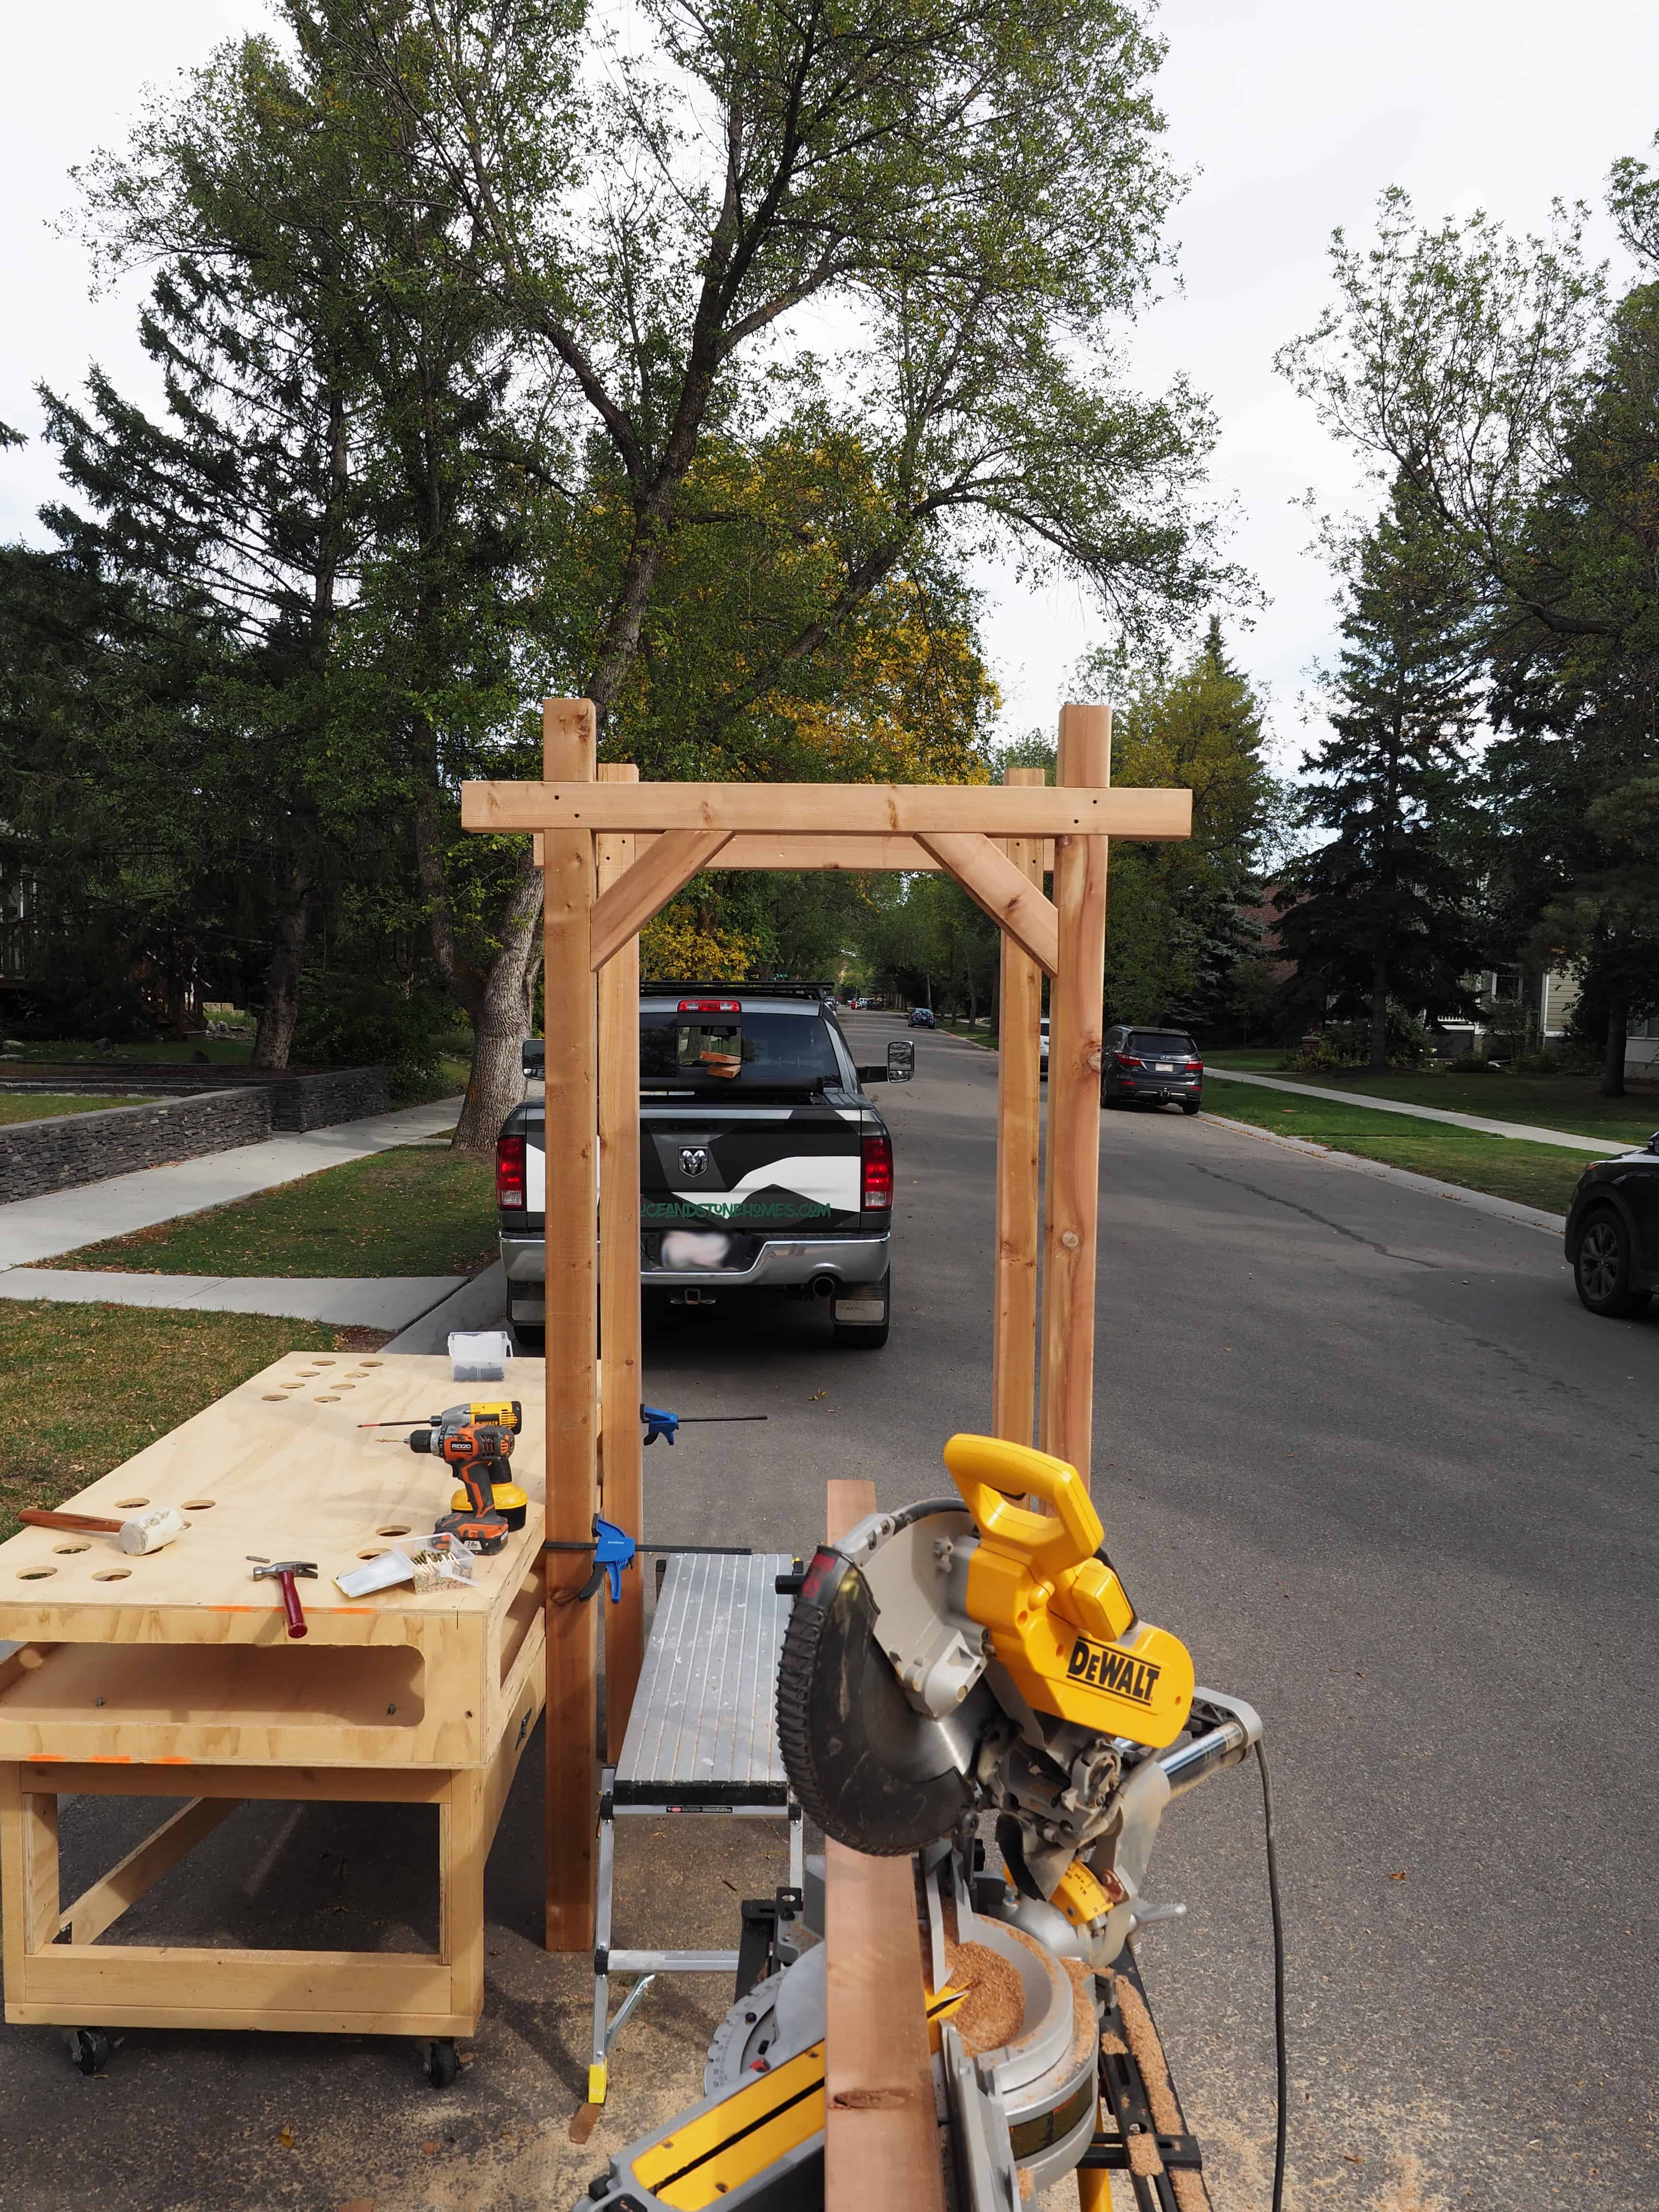
Step 3: Assemble the posts and cross members
Assuming all of your notches were cut accurately, this should be relatively easy. I laid my posts on the ground and then inserted my cross member (u-notches facing one another). You may need to use a rubber mallet if your notches are on the tighter side. Once they are fit together, fasten them with either a wood or decorative black screw. This is where you will start to see your wedding arch take shape. Once fastened, I stood my posts up and used a trigger clamp to hold them to my work bench.
Step 4: Cut the angle braces for the top corners
This step not only creates some added visual interest, but it also helps brace your posts and cross members, helping to keep them square. I opted for 4×4’s with a mitred 45 degree cut. I know everything is square when all of my edges fit flush together.
There are many options for creating angled braces. I went with 4×4’s but you could also use 2×6’s with a straight or rounded cut. It all depends on what look or design you are after. Here are a few examples of other angle braces that can be made.

a. This is the simple angle brace that I used. Not only do I like the clean square look, but it will go best with the theme of our wedding, as well as our house afterword.
b. Similar to the straight 4×4 angle brace, however, this time they have included a curved edge with sharp straight ends.
c. A much more decorative example of an angle brace. Beautiful but requires the right build if order for the design to work.
d. A complete rounded angle brace. This will soften the look of the whole arch/arbor/pergola and can make for a stunning statement.
Step 5: Determine the width of your wedding arch and cut your cross piece
Because we were planning to use ours as a wedding arch, I didn’t want it to be too deep. I ended up going with an overall depth of 35″. I used 2×6’s for the main cross piece at the bottom of the arch. My plan was to keep the sides of our wedding arch as open as possible and I knew a 2×6 near the bottom of the posts, plus the slats across the top would be enough bracing to keep my wedding arch strong and square.
Originally, I just planned on screwing this piece to the sides of my post, but decided to change my mind on the fly (I tend to do that mid project….). I thought that just screwing the 2×6 to the side of the posts took away from all of the notching I had done in the 4×4’s at the top of the arch. Therefore, I decided to notch out the 4×4 to accommodate the 2×6 as well. In the video you will see how I used a circular saw to make these notches after the fact. If I had know this was the plan from the start, I would have used my mitre saw to make these notches as well.
Step 6: Cut the slats for the top of the wedding arch
If you have ever gone and looked at 2×2″ lumber you will know they typically look like a dog’s hind leg (that’s really warped for the non dog people out there). This is where the rest of the 2×6’s come into play. I started by cutting 35″ lengths (the width of my wedding arch). From there I took the pieces to my table saw and ripped 1.5″ wide pieces. This gave me a 1.5″x1.5″ slat, or the equivalent to a 2×2″. However, unlike buying 2×2’s, mine are all straight and solid.
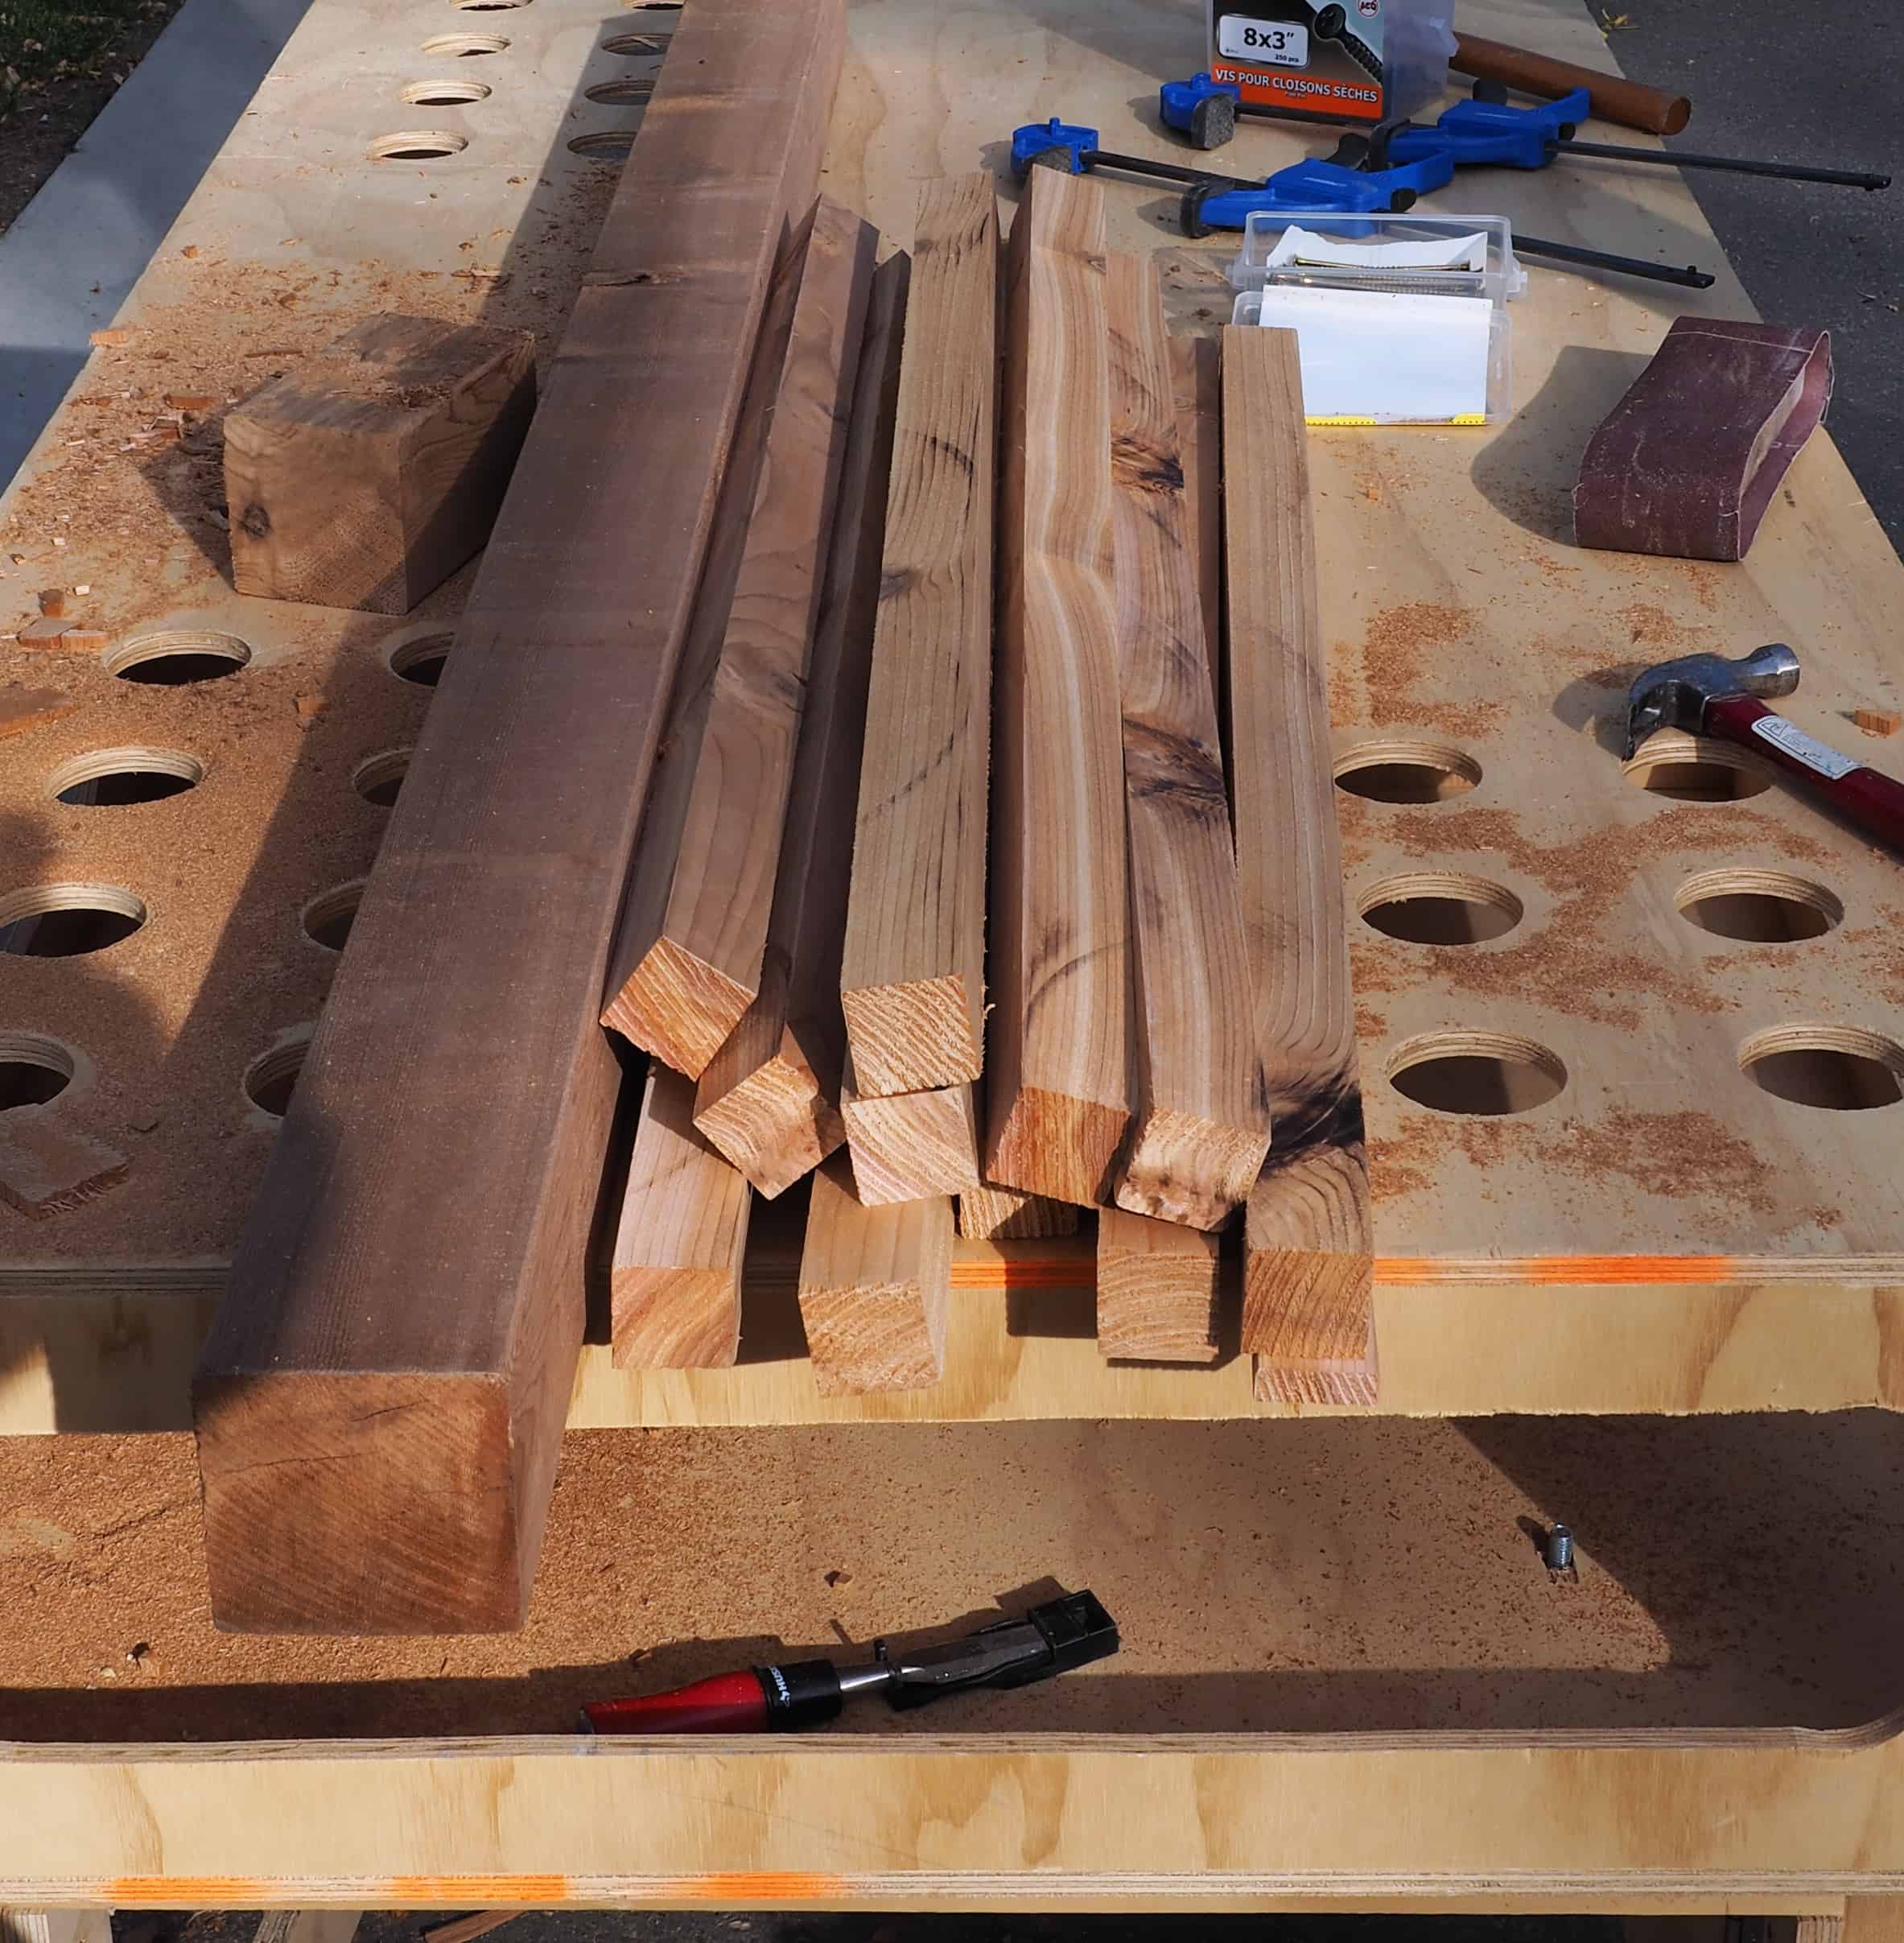
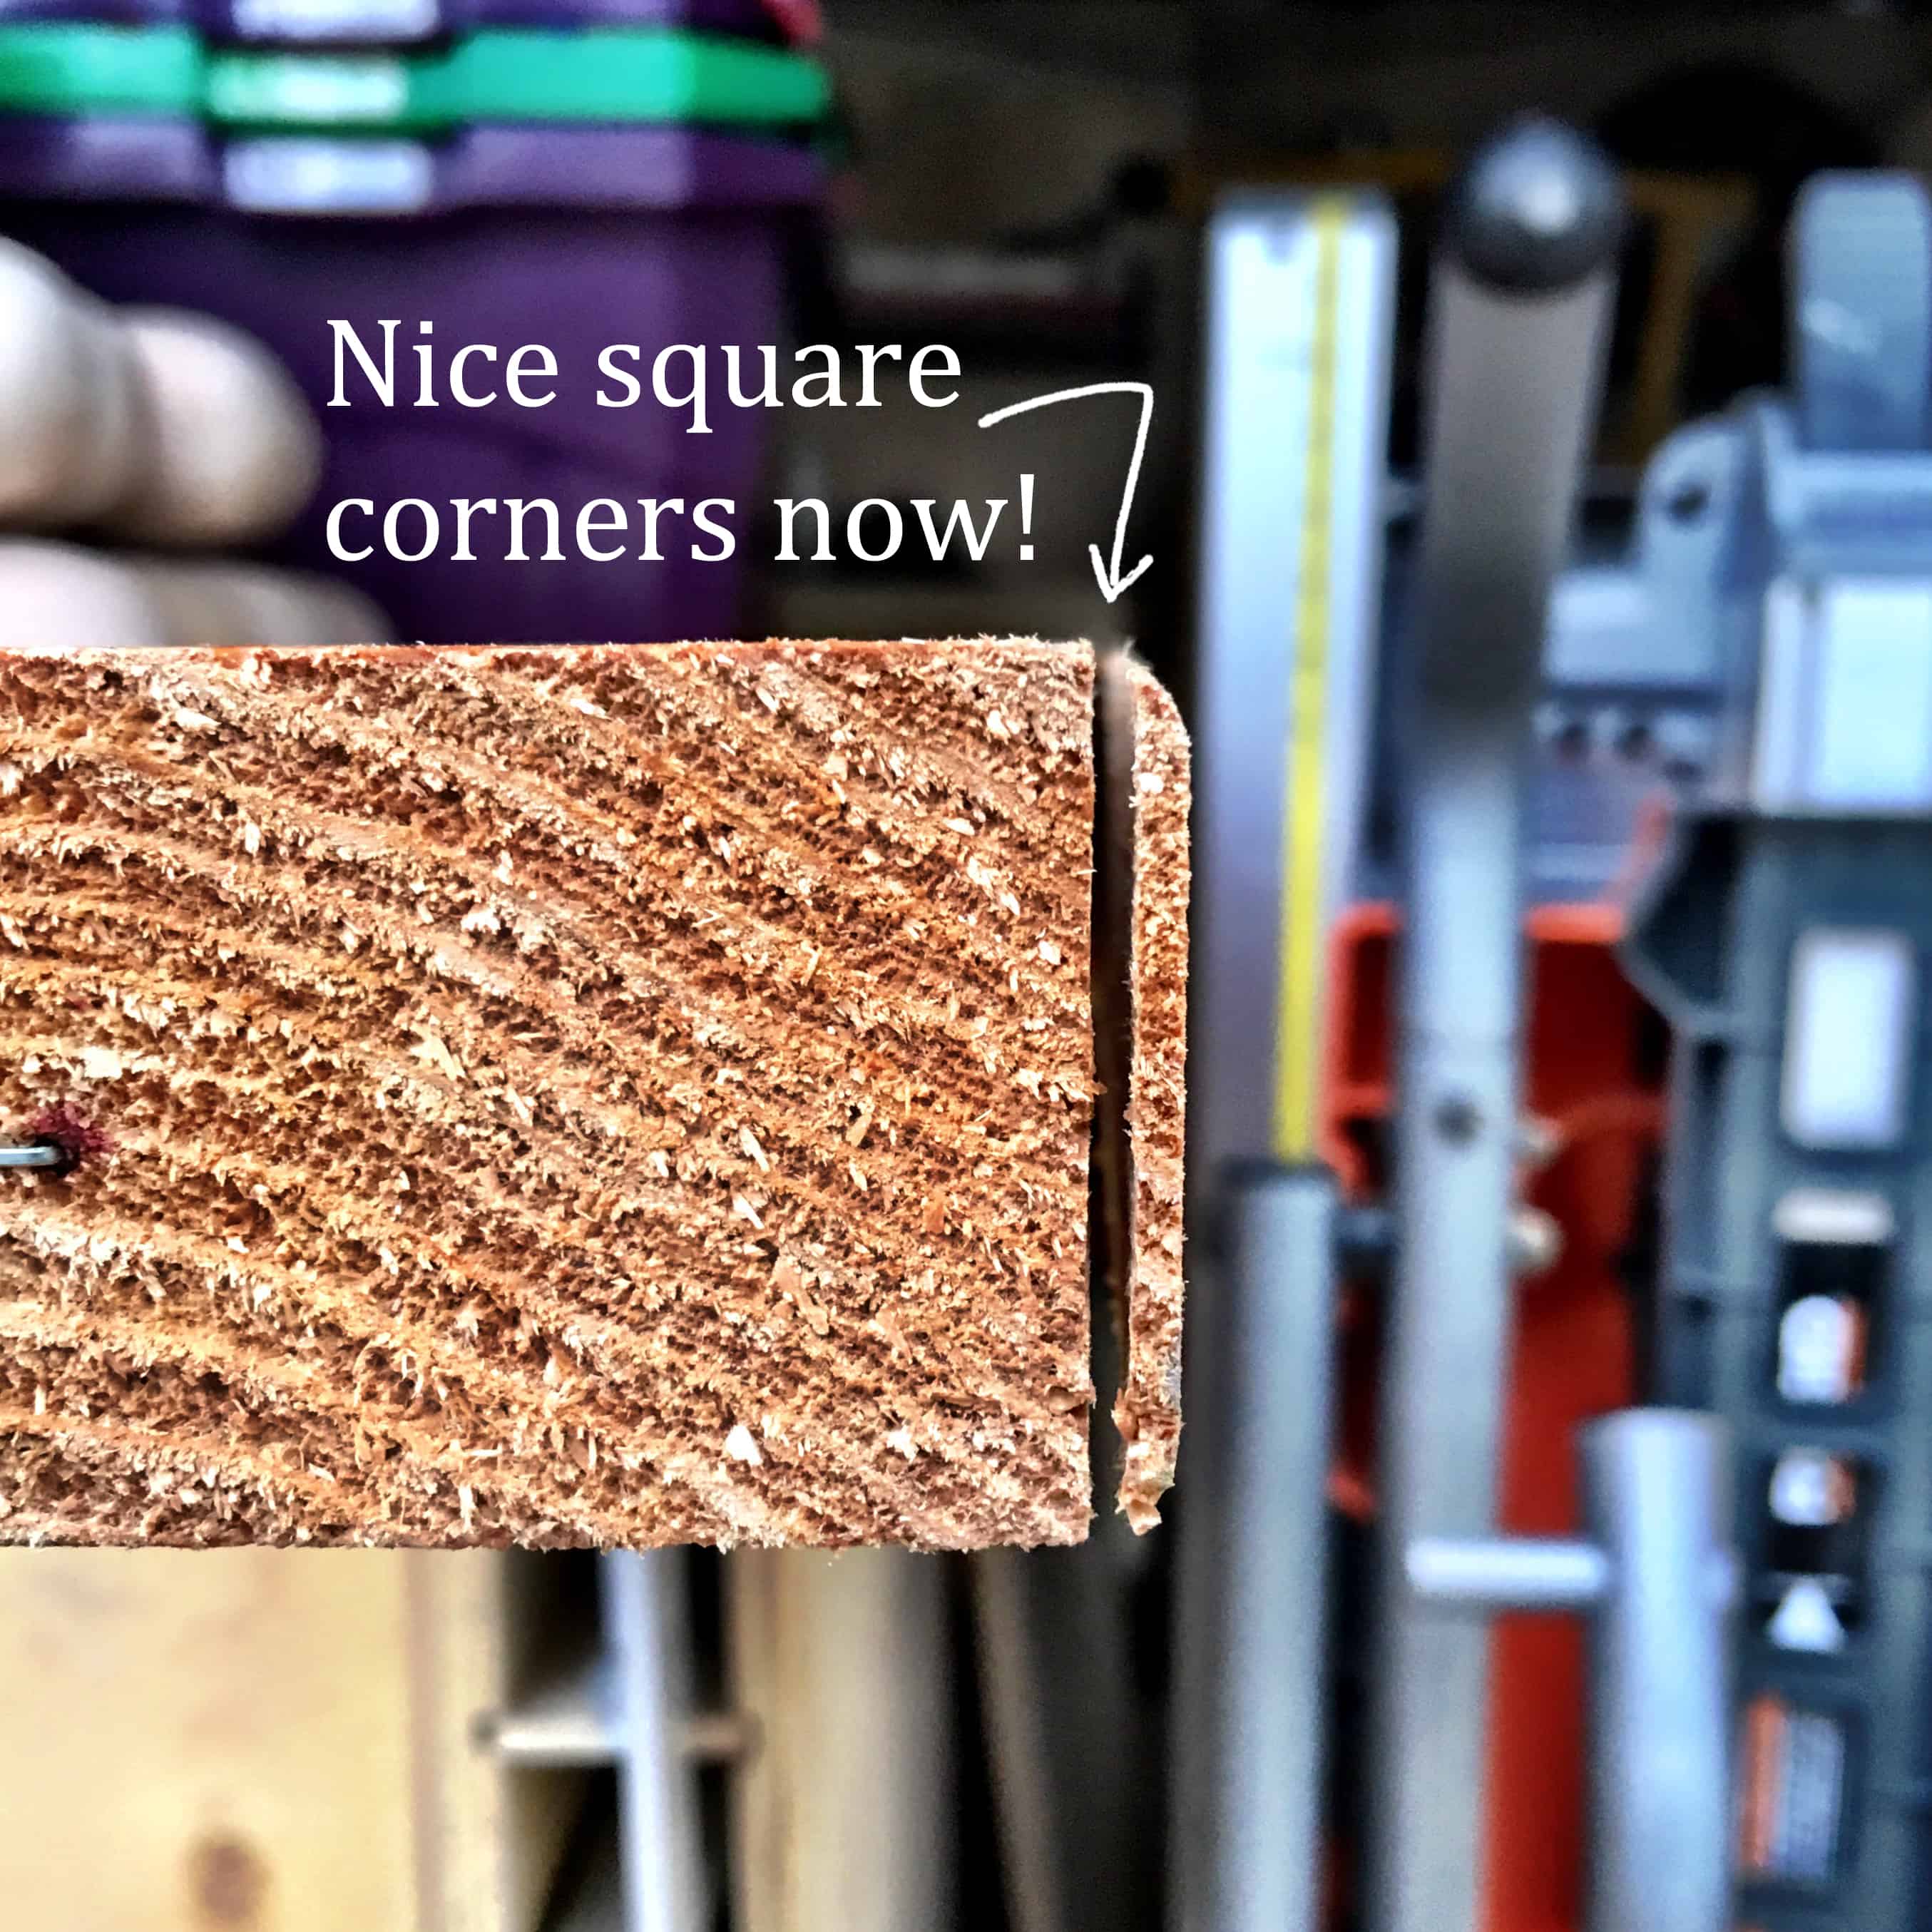
Tip: Dimensional lumber always has a rounded edge from the mill. So before you start ripping your final pieces on the table saw, set your fence to 5.25″ away from your blade and remove a 1/4″ from the length of your 2×6. This will give you a square corner to start from.
If you find that the 2×2’s in store look great (or you don’t want to make your own) go ahead and add them to the materials list. Just remember to alter the number and length of 2×6’s accordingly. If I had bought 2×2’s for this project, I would have needed six 8′ pieces and only one 8 foot 2×6. However, I would have also had a lot of scrap wood leftover afterword.
Step 7: Install the slats atop the arch
The last step to building your very own wedding arch (kind of). Find the centre of your arch and mark it with a pencil. Next, mark the centre of one of your slats. Line up these two marks as and install the first slat atop your cross members.
Tip: Pre-drill these holes with a standard drill bit to prevent the slats from cracking when your screw them in.
Bonus tip: Instead of trying to measure and mark every place you want to install your slats. Take a second and make yourself two identical spacers (mine were 1.25″ thick). Place these spacers in between your slats for an identical space each time. I made mine out of some scrap 4×4’s from the an earlier stage in the project.
Once you have the centre slat installed, install the rest working toward to outer edge of your wedding arch. You will also notice that I placed two screws at each end of my slats. This may seem like overkill, but because I only have one lower side brace at the bottom of the arch, I needed the slats to have some strength. Two screws at each end also prevents the wedding arch from twisting as it gets moved between locations.
Step 8: Seal your arch
If you want to keep that beautiful reddish cedar colour, you are going to need to seal the wood. Depending on your area, you will need to re-seal every couple of years. Any standard wood sealer will get the job done. In our case, I don’t mind the wood turning grey over time and don’t intend to seal it.
If you are new to building and DIY projects, be sure to read our post on the best power tools for your DIY projects.
Let’s be honest, not everyone needs a wedding arch. If you are still interested in completing this project for your yard, head over to our post about designing and planning your landscape before beginning your project.
You’re awesome jeff