
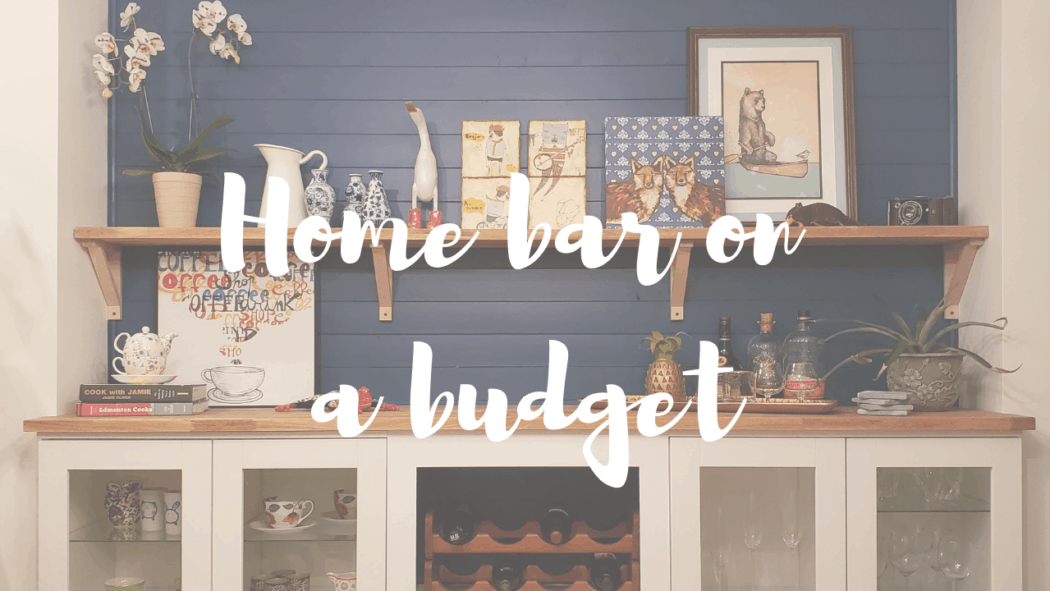
Every now and then I get a chance to tackle a project that really means a lot. This home bar was one of those projects.
One of our best friends had just recently purchased a new house, and like many other new houses it looked great. BUT…..it lacked character and needed some help to give it personality and make it feel like a home, and less like a brand new house. Fast forward a few weeks or maybe even months and there was a small gap in which she was heading out of town, giving us the perfect opportunity to surprise her with a home bar when she got back.
Before reading on, enjoy the build video and watch the project come to life!
The plan
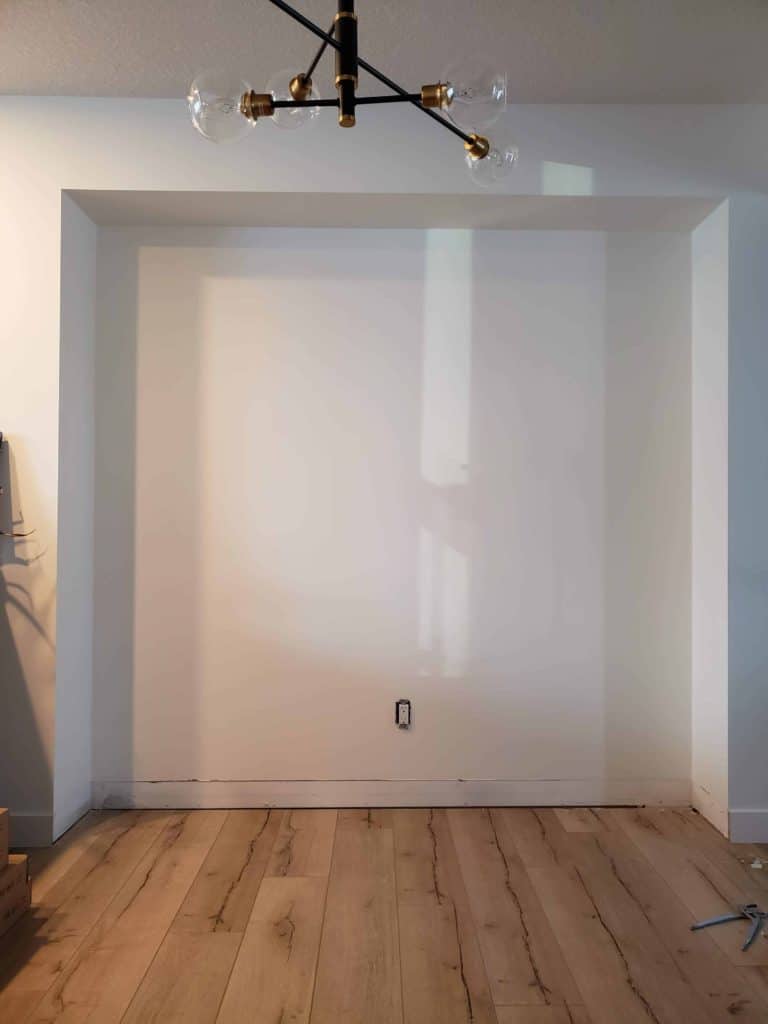
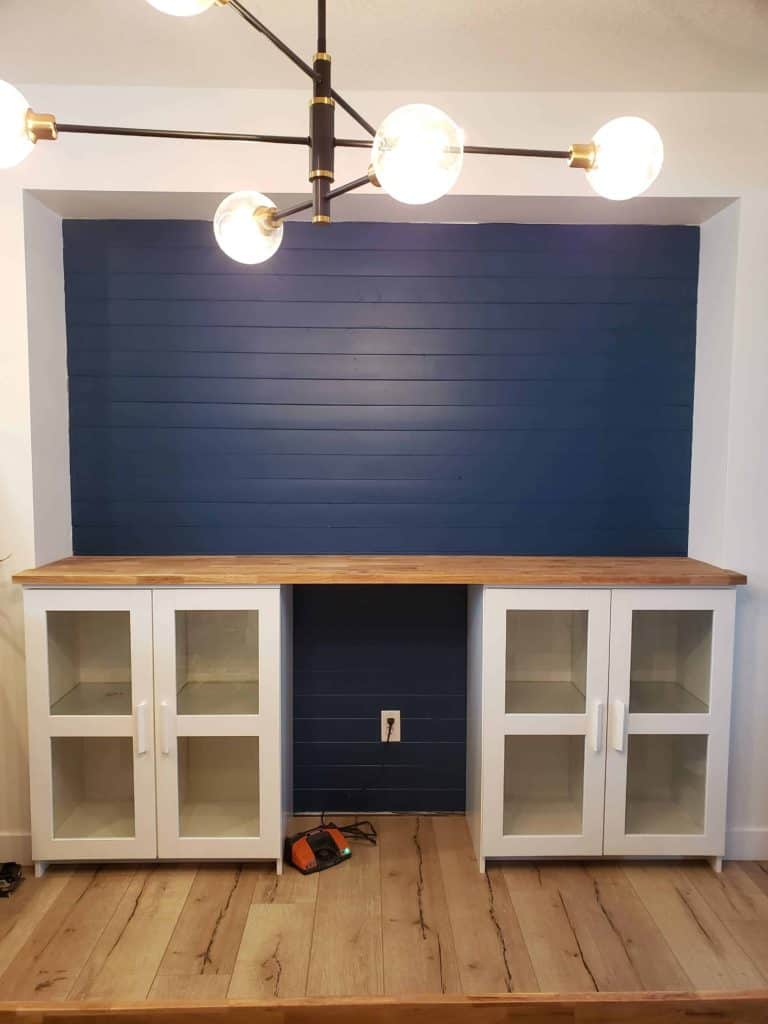
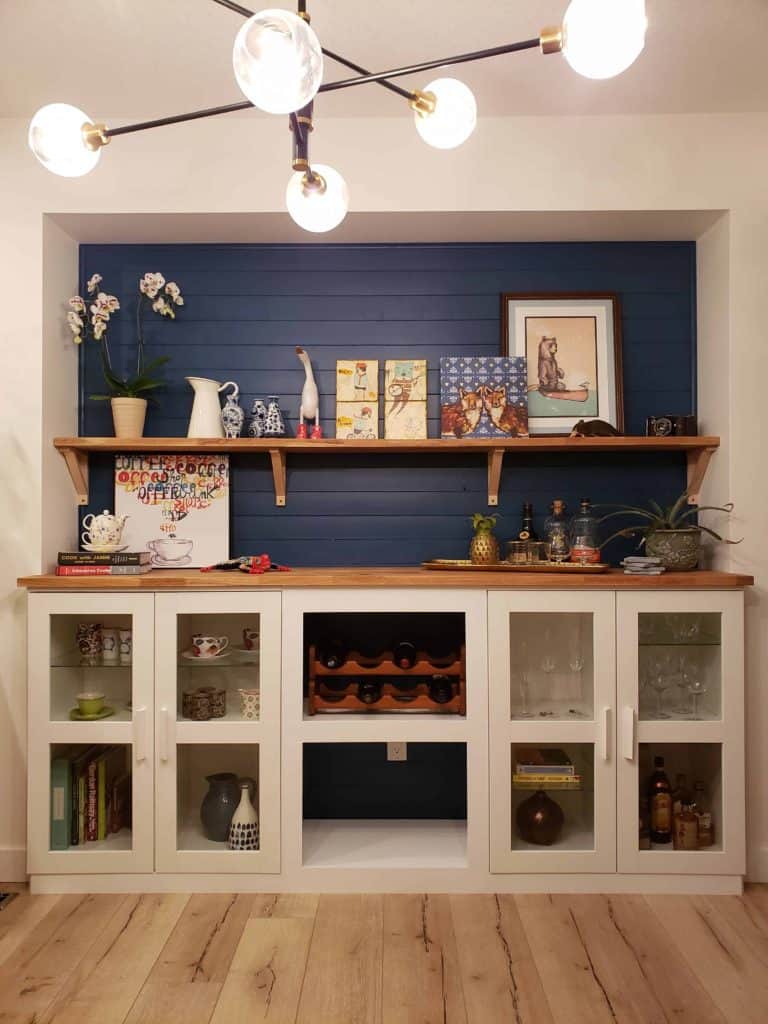
In the dining area there is a jut out between two framed mechanical stacks, and an overhead bulkhead. It is roughly 87″ wide, 12″ deep, and will make a perfect area for a home bar.
Like many of the projects we tackle at The Homestud, we will be incorporating some IKEA pieces into this build. We will be using 2 brimnes bookshelves with glass doors- the same ones we used when we built the custom farmhouse countertops.
I want to address one question I am constantly asked. “Why do you bother using IKEA pieces?” The major reason- budget and reproducibility. Hacking IKEA pieces allows me to keep the budget much lower than custom building everything myself. Further, I have lots of people that like to use our work as inspiration to improve their own homes, and 100% custom built pieces make that very difficult for the average DIYer.
The two brimnes bookcases will be separated by a built in open shelving unit. This will form the base of the home bar. The base will be topped with a solid oak butcher block countertop which will help warm up the entire home. The remaining portion of the butcher block will be used for a shelf overhead. To round out the entire design, we will use painted shiplap up the back wall behind the home bar.
The home bar build
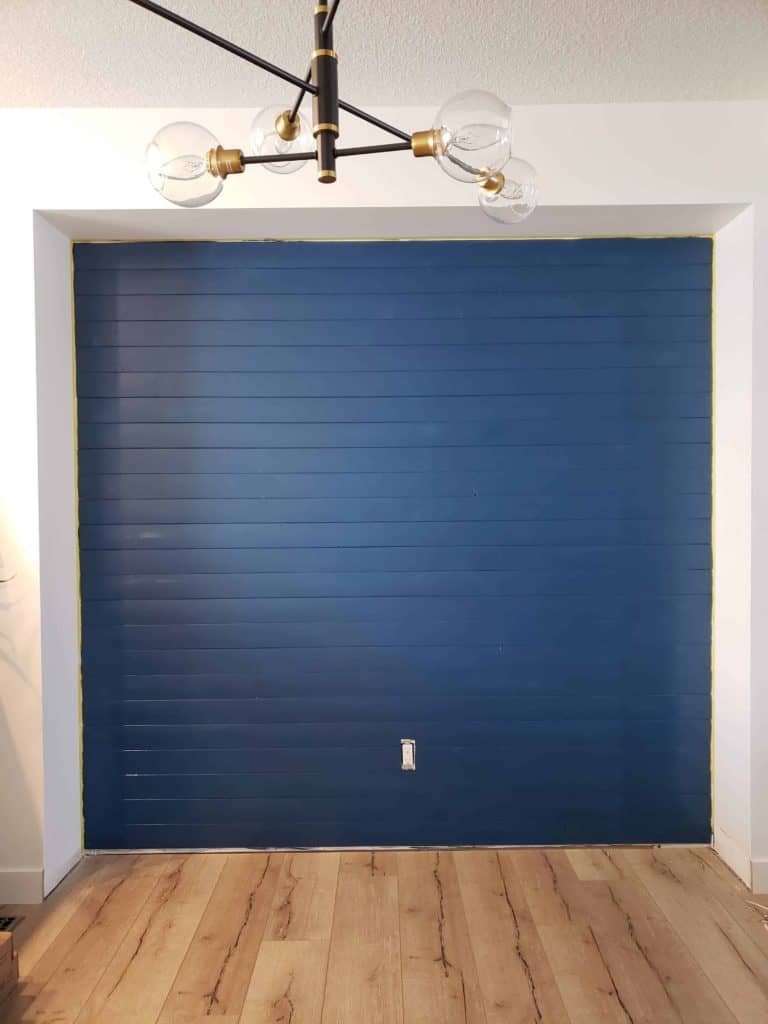
Installing the shiplap
In my part of the world (Edmonton, Canada), the cost of wood isn’t cheap. And with the increasing popularity of shiplap, this just further increases the cost. Our creative way to get shiplap and stick to the budget is to use tongue and groove pine boards. The beauty of this is we get the wood look at a fraction of the cost. The caveat, it’s not quite as wide as traditional shiplap.
I used a brad nailer with 1.5″ brad nails to install the shiplap. Before nailing the boards in place, I used my stud finder to mark out the locations of each stud so I knew the pine would be well secured. Once we had the shiplap up, it was primed and painted with a deep blue. The photo below is after the first coat of paint, but you get the idea.
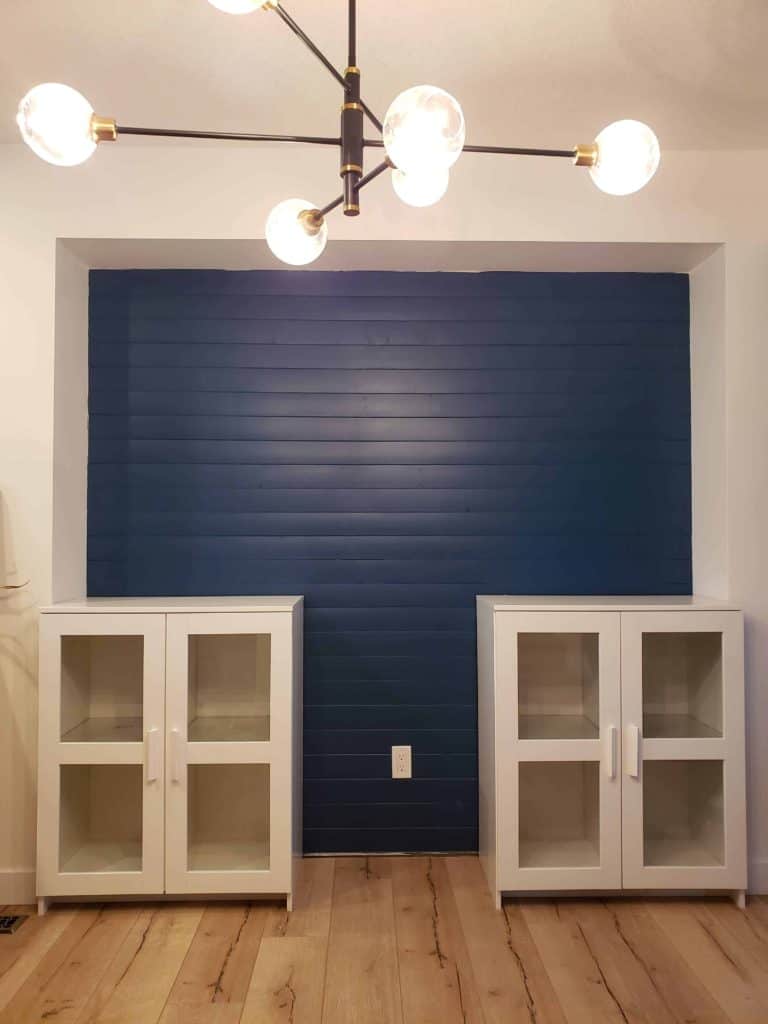
Build the brimnes
The downside of using IKEA pieces….building them. It’s not complicated, it just isn’t fun. But they need to get assembled before we can begin templating the butcher block countertop.
Once they are in place we can also start taking measurements for building the bookshelf that will fit in between.
Cut and install the countertop
This is by far the most difficult portion of this build- you only get one shot to cut the butcher block. If you made it this far without watching the video, I highly suggest you refer to the video to see exactly how I went about fitting the countertop.
I measured all of the cuts to leave a 3/4″ overhang around the entire base unit. This meant notching out each end to wrap around the mechanical stacks.
I started out by cutting the entire countertop down to the width I needed. Then I cut it to length. When I work with large pieces like this, I typically use my home made track saw (#2 on this list). This lets me use my standard circular saw.
From there it was time to template the corners and the notches at each end of the home bar. This took a few tries, each time removing just slightly more material to get the fit perfectly snug. I didn’t want to remove too much wood and leave an unsightly gap along the wall. Further, the corners are not exactly square making this even more difficult.
While I had the saws out, I also cut down the remaining portion of the butcher block to create the shelf for above the home bar. Although the butcher block was quite expensive, being able to use one piece for both the shelf and the countertop saved some money and really helped create a cohesive design.
Design and build the centre bookshelf
To finish off the base of the home bar, I planned to create open shelving for between the two brimnes cabinets. I wanted open shelving for a few reasons. First, it lets the awesome blue shiplap come through in the base, and second, we found some sweet antique teak wine racks that needed a home. This would be the perfect fit.
In order to create a cohesive look, the open shelving needed to mimic the look of the brimnes as best as possible.
To do this, I started out by creating a MDF (medium density fiberboard) shell. I cut everything to fit snug in the open space. I also cut a second base to lift the bottom shelf off the floor to the same height as the IKEA brimnes.
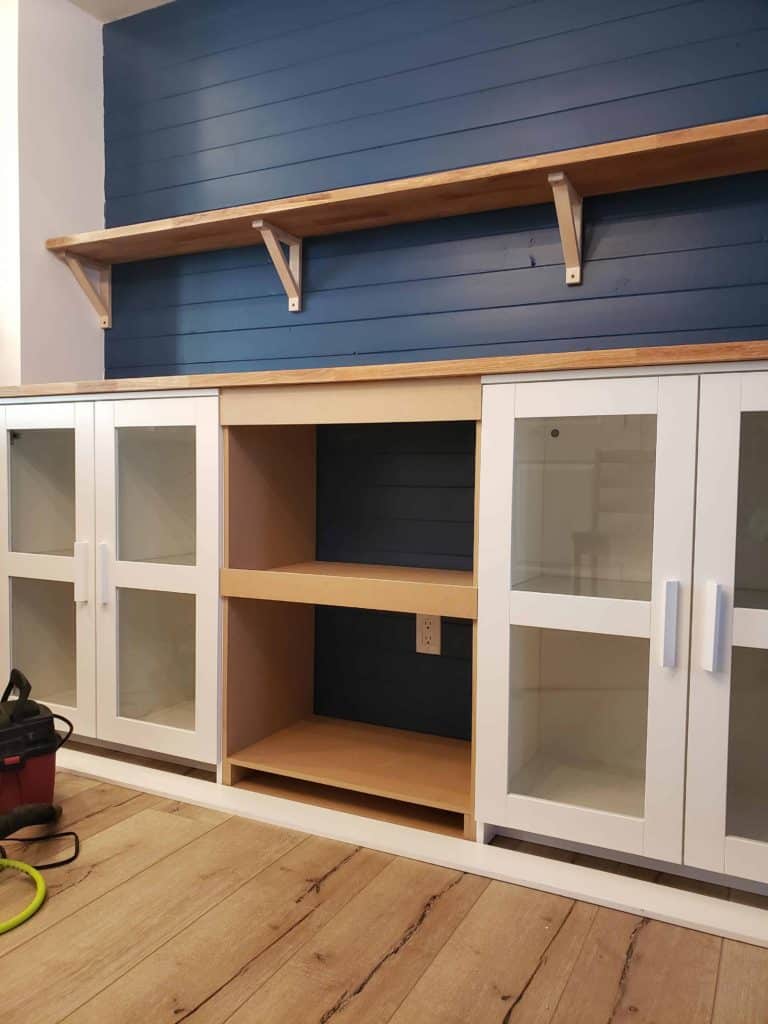
Now I just needed to trim out the face of the open shelving. In the photo above, you can see how this process started. Each horizontal frame piece was cut to the same width as the brimnes. Further, they were installed at the same height to give some continuity for the base of the home bar.
Below you can see the finished trim. To pull it all together, I added one long trim piece across the entire base making all 3 units look as though they are one.
Looking back at the design, I would make one change. That would be to thicken the base trim in the open shelving to match the brimnes a little better. Otherwise I am really happy with the overall design.
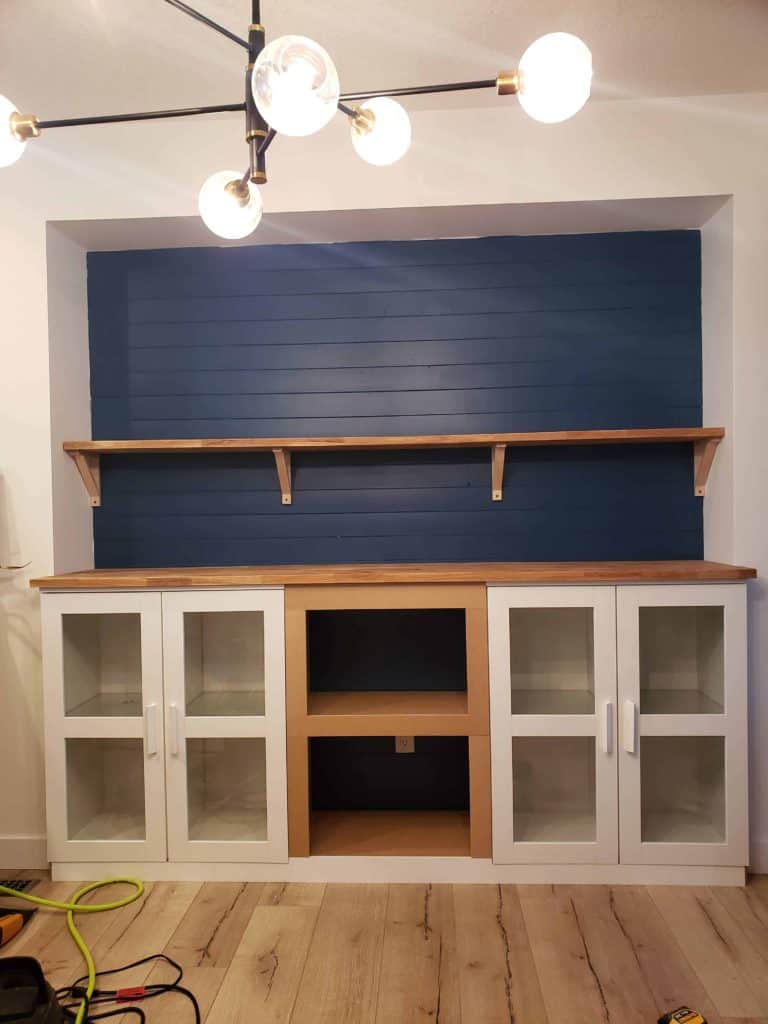
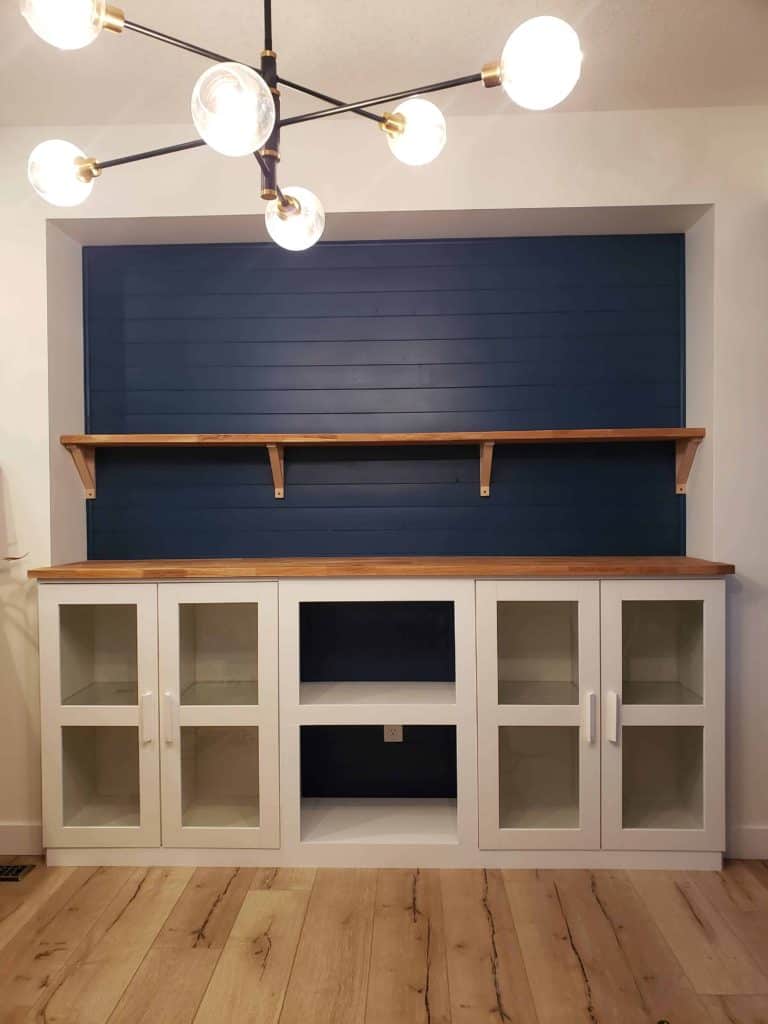
With the the open shelving unit built, it was time for priming. Then it was painted white to completely finish off the base of the home bar.
For this project I used a different approach when painting the MDF unit. I used a small high density foam roller. This gave me a buttery smooth finish to the paint job. Traditional rollers typically leave a slight texture to the surface, whereas the foam rollers do not. The best part is foam rollers are WAY cheaper, and you can buy contractor sized replacement packs at a fraction of the price of traditional rollers.
Add trim to the edge of the shiplap
The final step of the build was to clean up the edge where the shiplap meets the finished drywall. I used a simple inside corner round painted the same blue as the shiplap to give a beautiful finished edge all around the home bar.
This is a really simple step that makes a huge impact in the overall look. It’s small details like this that really make the difference. If I had left the edge as is, it would have drawn the eye away from the home bar because of the unfinished look. Now it all seamlessly blends together.
Staging the home bar
I don’t typically stage small projects like these, but I really wanted this surprise to have a big impact when she got home. After spending some time raiding her house, we managed to pull together a pretty cool final look.
Now her main floor has a true focal point from which she can continue personalizing her house.
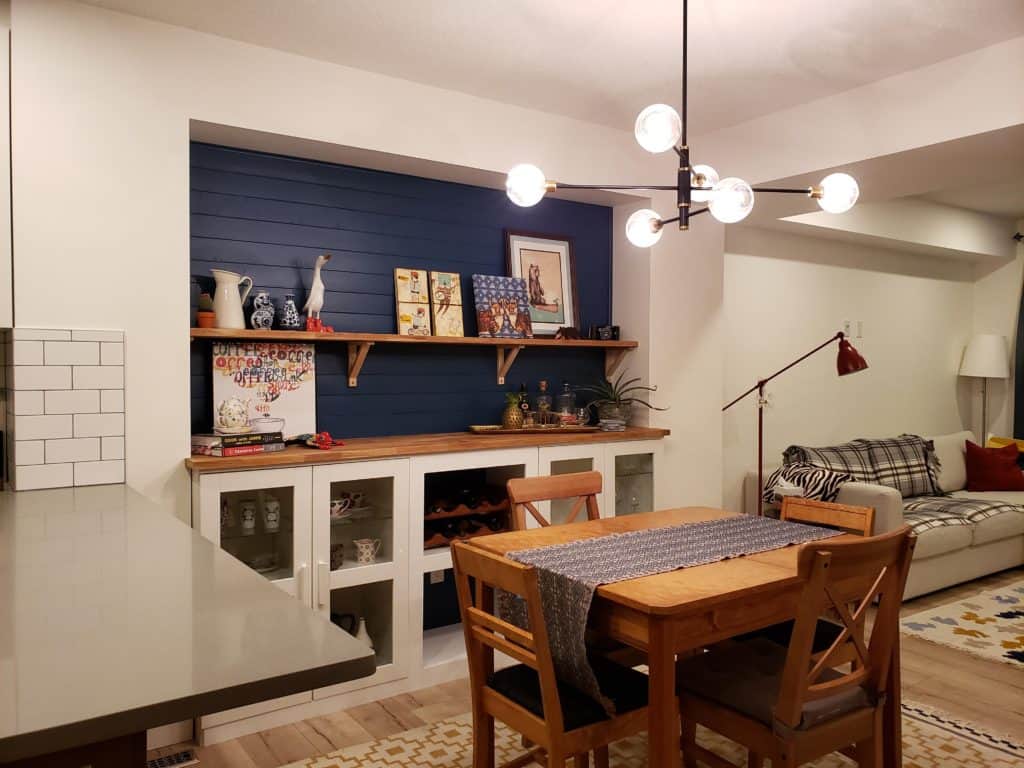
In the end we created a beautiful home bar area on a budget. I honestly believe it is small projects like this that truly make a house feel like a home and leave a lasting impression on friends and family.
I hope you enjoyed this project and it inspires you to get creating something amazing in your home. As always be sure to leave your feedback in the comments below, and subscribe to our Youtube channel for more great builds.
Stumbled on your website from Pinterest and have enjoyed several project posts so far, as we gain inspiration to DIY a basement dry bar. This bar turned out beautifully, and you’re friend is very lucky! And you’re a great writer too!
Did you paint the piece overall? How easy was it to match the cabinet paint of the MDF center to the brimnes cabinets…or did you paint the entire piece? Thinking about doing this and painting in the color iron ore but unsure how paint would hold up on these cabinets…