
A hydroponic system sounds a bit like technology from the future. But as the worlds population rises and mass production agriculture becomes unfit to meet these demands, hydroponic systems appear like they might be the answer. Commercially, these soilless growing systems consist of plants on stacked towers. They are ‘fed’ by liquid nutrients and nearly everything from lights, to moisture is computer controlled.

This is our current obsession at The Homestud. Winter showed up without much warning and once again gardening season came to end. But this year I was determined to extend the season by bringing it indoors and creating a DIY hydroponic system. We set out to create a DIY hydroponic system that anyone could recreate in their own home. There are several different types of hydroponic systems to choose from, however, for this project we chose to use a deep water culture system.
What is a deep water culture hydroponic system?
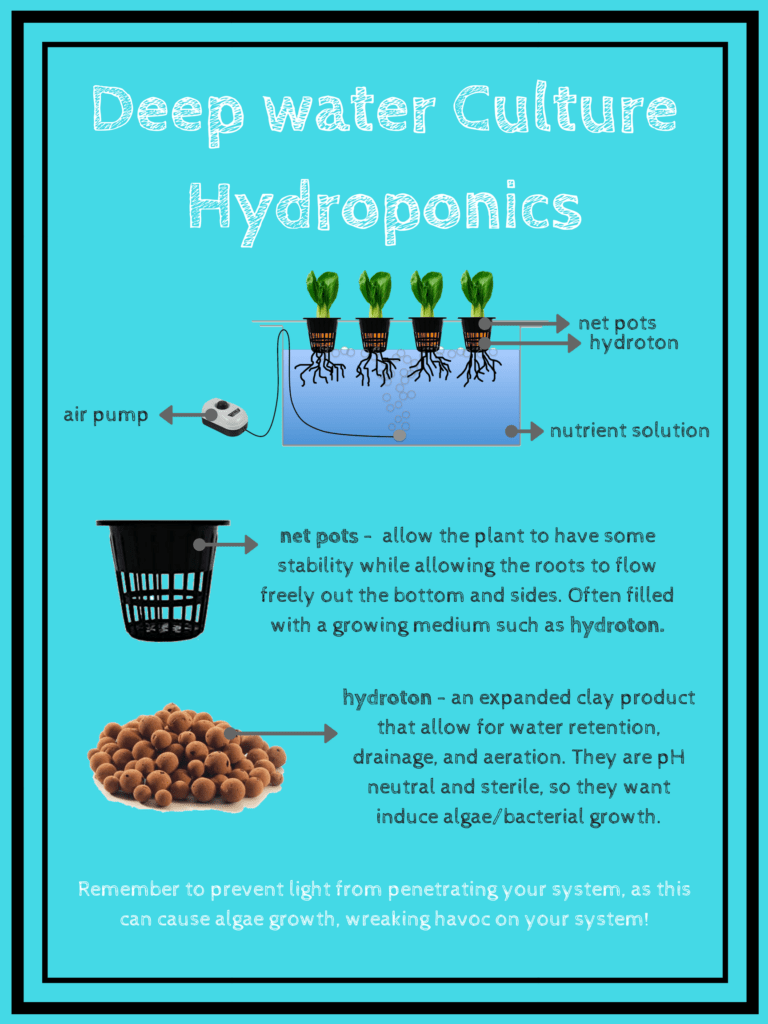
Before I get into the nitty-gritty of deep water culture systems, lets take a look at an overview of this hydroponic system. In a deep water culture system, the plants are grown in net pots with the roots suspended in a water reservoir containing a nutrient solution (the ‘feed’). An air pump oxygenates the nutrient solution, keeping the roots from drowning. If you are more of a visual learner, take a look at the diagram below.
The main components of a deep water hydroponic system:
- Oxygen. Because this is a soilless growing system and the roots are submerged in water, they will need access to air so the plant doesn’t drown. This is accomplished by adding an air pump connected to an air stone within the water reservoir.
- Water. It’s in the name so it must be critical. Just like any other growing system, plants require water to survive. In a deep water culture system, it would be like growing plants in soil while continuously watering them.
- Nutrients. When we grow our plants in soil they are surrounded by all of the nutrients and minerals needed for growth. Because this hydroponic system lacks any soil, we need to supplement with nutrients and minerals to help the plants grow.
What are the benefits of growing plants in a deep water hydroponics system?
The primary and most important benefit of this system is just how simple it is to start. Better yet, once it is started, it requires very little maintenance. You will find the plants grow significantly faster than in soil (sometimes in half the time). Finally, there are no expensive parts to worry about breaking or needing repair.
Are there any downsides to deep water culture?
Just like any hydroponic system, or growing method for that matter, there are downsides. In really small systems, it can be difficult to regulate pH and nutrient levels in the water. Depending on the location of your system, it can also be difficult to regulate temperature. However, some simple regular maintenance will help avoid these without much issue.
How to build a DIY hydroponic system:
Before you continue reading about the actual setup of this DIY hydroponic system, watch the video walking you through the process. The rest of the blog post goes into more details about the setup and the exact materials I used for this build.
Seed germination using rockwool
The first stage of creating a DIY hydroponic system is starting seedlings. This means starting seeds in a grow medium. In this case, I used rockwool or stonewool as it’s sometimes called. Rockwool is a growing medium made of basalt melted back into lava and poured into a spinner in a process similar to making cotton candy. It is one of the most commonly used substrates in hydroponic systems across the world due to its inert properties, sterile start, and unique capacity to maintain a great water/air ratio. I used 1.5 inch A-OK starter plugs by Grodan.
Add nutrients and adjust the pH
I started out by adding the nutrients to the water at roughly 1/5 the recommended concentration (an EC of about 200 µm/cm). I use this EC meter to check my electrical conductivity. We can use EC measurements, or TDS measurements to check the concentration of the nutrients.
Finally, adjust the pH to 5.7 (if needed). You will need to purchase a pH up/pH down kit to adjust the pH, and a pH meter, or some pH strips to actually measure the pH.
Soak the rockwool cubes
Immerse the rockwool in the pH balanced nutrient solution until all the rising bubbles are gone. The immersion time depends on the size of the rockwool block, smaller plugs like these only take around 10 seconds. This allows the water to infiltrate the tiny pores in the rockwool and prepare the substrate to be colonized by roots. Let the rockwool drain freely until water is no longer running out of it. DO NOT SQUEEZE. Air will re-enter the larger pores, creating the perfect balance between water retention and aeration.
Add the seeds
I added 2-3 seeds per cube. If several seeds germinate (this is great), simply choose the strongest seedling and clip the others. You can add a single seed per cube, however, most seed companies typically say only 75-80% of seeds will germinate.
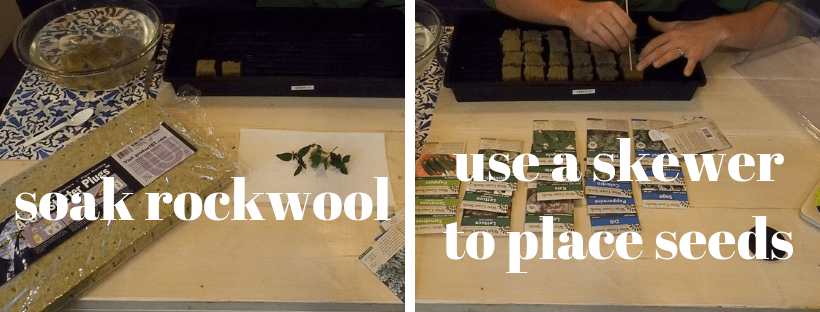
Something like a flat skewer will help push the seeds into the small 1.5″ A-OK rockwool plugs. Tear off a small piece from the corner and gently cover the seed hole. This helps maintain a humid environment directly surrounding the seed. I have found this can speed up germination. Pull back these covers around the 48 hour mark so the seedlings aren’t stuck in the plug.
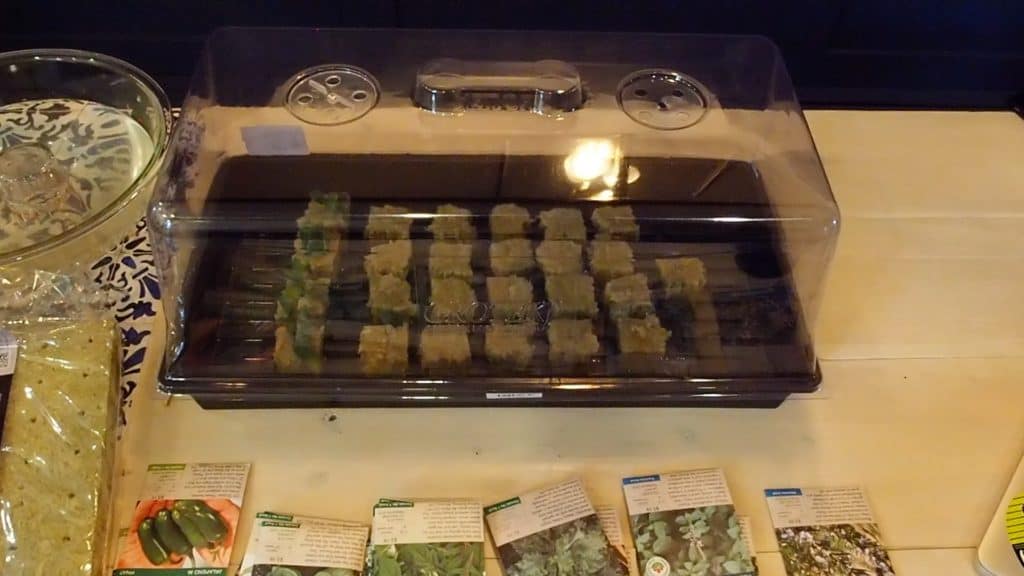
Place the seeded rockwool cubes in a seed starter tray with a clear covered dome. At this point, heat will do more than light to induce germination. You can purchase heat mats, or set the starter tray in a sunny window (this is what I do). I usually add a very small amount of water to the base of my tray as well, to help create a humid, warm environment.
Build the deep water culture containers
Start out by determining how large of a DIY hydroponic system you want to construct. Remember, large deep water hydroponic systems can become quite heavy if you choose a large container. I chose to go with a simple 5 gallon storage tote, which keeps it easy to transport, even when full.
An ideal deep water container:
- Deep enough (5-7 inches of room under the net pots). Although this also depends on what type of plants you are interested in growing. I used 3″ net pots, and my container is 10.75″ deep.
- As light free as possible. Light can induce algae growth, which can create havoc in a DIY hydroponic system. If you purchase clear containers, you will need to spray paint the outside to prevent light from entering.
- A medium shade of colour/or opaque. Under some circumstances, black containers can become very hot, leading to increased temperatures and growth problems.
Drill/cut holes for the net pots and air line
Next up, create holes in the top (lid) of the container. A hole saw will make your life easier. Tip: When using a hole saw, place a scrap piece of wood under the lid for support and run your drill in reverse. This makes for a cleaner cut through the plastic. If you don’t have a hole saw, drawing circles and cutting with a knife or scissors works well too.
Just remember to make the hole slightly smaller than the net pot- this allows the rim to keep the net pot from falling into the reservoir.
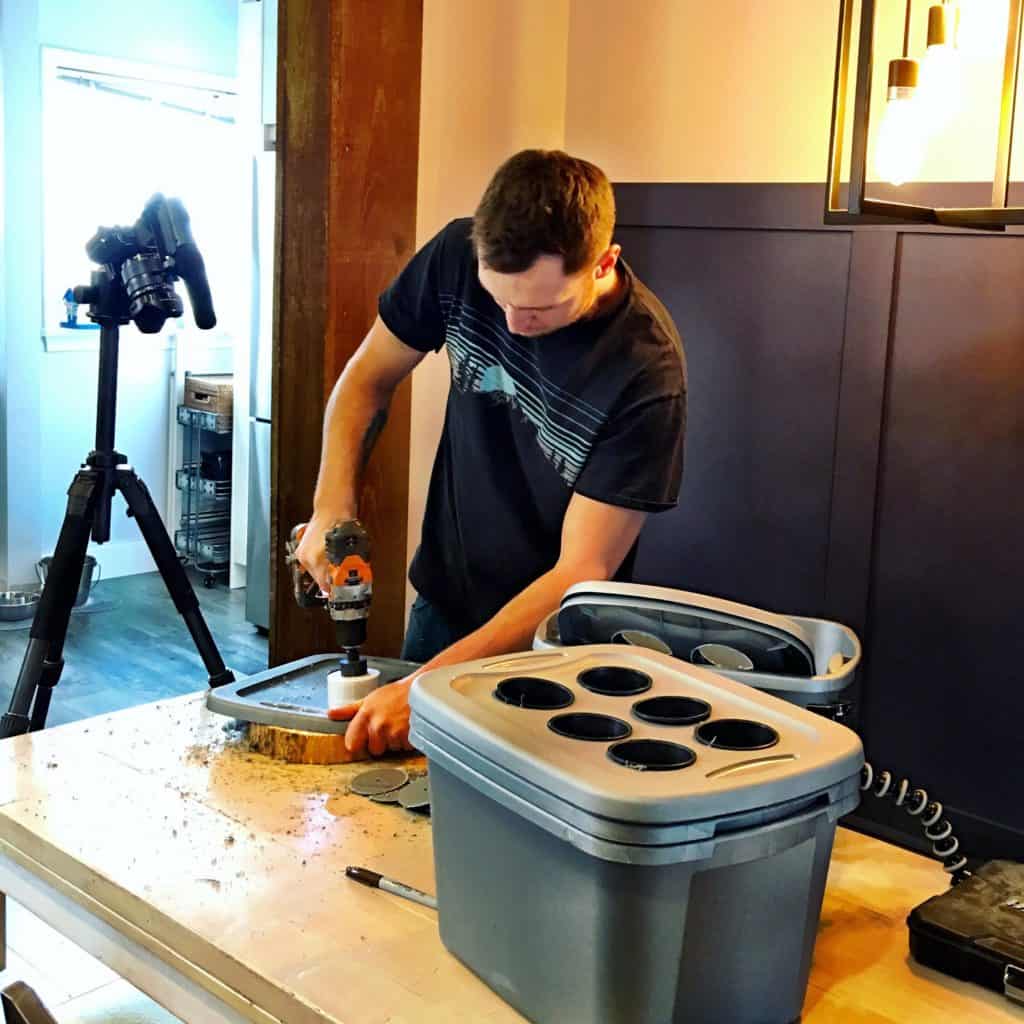
The last thing to do is drill a hole for the air line. The easiest way to do this is with a 1/4″ drill bit (the same size as the tubing). Check the containers before you drill as they may have a hole in or near the handle well (mine did). Therefore there is no need to drill another one.
Build/assemble your DIY hydroponic system
I wanted my grow area to look like a piece of furniture since it would be sitting it the main living area of the house. However, I still wanted it to be functional in case I wanted to control for moisture and humidity down the road. The main growing area is a wire shelving rack, which allows me to adjust the height of my shelves depending on the grow. The wire shelf is surrounded by a custom wood cabinet that I built (not part of this article). Lastly, I attached my lighting to the underside of each wire shelf.
Hydroponic Lighting
By no means will this be an extensive discussion about the different lighting setups available. I am just discussing the lighting setup for my DIY hydroponic system. In this build I chose to go with 36″ LED lights. There are several advantages to using LED lighting, when compared to fluorescent, metal halide, or high pressure sodium lights.
Advantages of LED lighting:
LED lights produce far less heat than the alternatives. This is crucial when controlling temperature and humidity are important. While some plants will tolerate high heat, others will burn up. LED grow lights can be placed closer to plants in confined areas with very little risk of heat damage.
The LED grow lights of today can rival the light production of alternative sources that use nearly twice the wattage, which adds up to major savings in energy cost. LED’s can come as all-in-one fixtures, which are easier to work with in tight spaces.
Disadvantages of LED lighting:
The first major hurdle is price. LED units are still quite expensive, especially when compared to fluorescent lights.
The second major downside for many years to LED’s was that they lacked blue light and red light wavelengths. This has somewhat been resolved with the availability of full spectrum LED light options.

What our brains perceive as natural, or white light from the sun is actually made up of all the colors of the rainbow. That being said, light has three major colors- red, blue, and green. When we look at the vast majority of plants we see the color green. This is because plants don’t absorb much green light, instead it reflects off of them back into our eyes, making them appear green. Leaves don’t typically appear blue or red, which means that they absorb those parts of the light spectrum and use them to grow.
Blue light – Blue photons drive photosynthesis and regulate the opening of stomata. Stomata are the tiny openings on leaves that control both the uptake of carbon dioxide and the loss of water vapor through transpiration. Generally, only a low intensity of blue is needed for fully functional photosynthesis. As a rule of them, plants grown in only blue light will be smaller with thicker and darker green leaves.
Red light – Opposite to blue light, plants grown under only red light have a stretched, elongated appearance, with flat, thin leaves. Red light is most important at flowering, where the pigment phytochrome (controls photomorphogenic responses in plants) mediates flowering. Therefore, plants grown indoors with 80 to 90 percent red light and 10 to 20 percent blue light are compact, with smaller leaves and shorter stems- a desirable appearance.
Learn more about the various options of hydroponic lighting and how the spectrum of light affects plant growth.
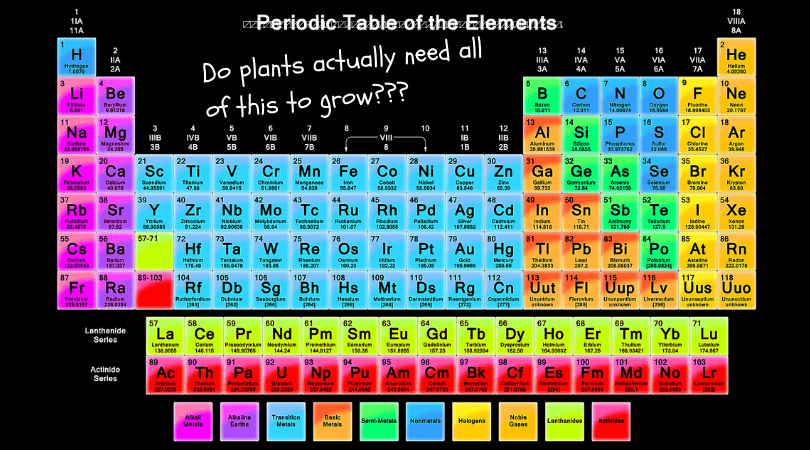
Hydroponic nutrients
This is a critical component of DIY hydroponic systems. Nutrients are the basis of any hydroponic system and it’s essential that plants are able to access all the elements required for growth. Carbon, hydrogen and oxygen are absorbed from both the water and air, while the rest of the nutrients must be dissolved in the nutrient solution.
Nitrogen is essential for leaf and stem growth, as well as overall size and vigor.
Phosphorus is necessary for photosynthesis, respiration, and energy storage.
Potassium regulates the opening and closing of stomata during photosynthesis, and regulating carbon dioxide uptake. It also triggers the activation of enzymes involved in sugar production, and is essential for the production of adenosine triphosphate (ATP, the energy source of plants).
Magnesium is the essential building block of chlorophyll, the central molecule involved in the absorption of light.
Calcium is essential to cell growth. It is one of the primary components responsible for holding cell walls together.
Sulfur is used during protein production and amino acids synthesis. Sulfur also helps with resistance to disease and seed formation.
Iron is crucial to plant health, even if it is in tiny amounts. Iron is involved in chlorophyll production, allowing the plant to breath, while giving it a healthy green color.
Manganese is critical to several plant processes including chloroplast formation, photosynthesis, nitrogen metabolism and enzyme production.
Zinc is a key constituent of many enzymes and proteins. It plays an important role in growth hormone production and internode elongation.
Copper activates some enzymes involved in lignin synthesis. It is also required during photosynthesis, plant respiration, and assists in the metabolism of carbohydrates and proteins.
Boron is necessary for cell division and plant growth.
Molybdenum is an essential component in two enzymes responsible for converting nitrate into nitrite (which is toxic), and then into ammonia before it is used to synthesize amino acids.
In this DIY hydroponic system, I opted to use Home & Garden’s Aqua flakes (A+B), because it is a simple dual part system that contains all of the essential nutrients required for growth. Further, it comes at a very reasonable price when compared to other nutrient systems. Their website also provides a nutrient calculator and feeding chart to get you started. Keep in mind some manufacturers often inflate the amount of nutrients that are actually needed ina hydroponic system. Start out by adding the nutrients at a lower concentration (~1000 µm/cm). It is much easier to add more nutrients than to remove. Further, if the nutrients are too concentrated, the plants may have already suffered from nutrient burn.
This is just meant to skim the surface of the nutrients required for plant growth. Learn more about the nutrients required, and how to fine tune the concentration in your DIY hydroponic system.
Add the nutrient solution to the deep water containers. The water level should be roughly level with the bottom of the net pots. You never want the growing medium or foliage submerged.
Air pump and air stones
As mentioned above, this is another crucial component of a DIY hydroponic system. It is responsible for continually making the nutrient solution available to the plants. Without aeration the plants are susceptible to drowning. I originally purchased a Zoic commercial air pump for this build, however, when it it arrived it was MUCH louder than expected. It also lacked the ability to adjust air pressure- something I missed when ordering. I ended up returning it for the EcoAir4 EcoPlus. Although the new unit is smaller in terms of air output, it still provides enough pressure to run my 4 air lines. In addition, this pump can dial in air pressure.
If you are looking to start with a single container (I would actually suggest this), EcoAir also manufacturers a smaller version of this same pump.
Connect the pump with a 1/4″ air line and an air stone at the other end. The air stone should be large enough to create bubbles across the entire surface of the container. Because I am using smaller containers for my deep water culture system, I am able to use smaller 1.6″ air stones. If you are using larger containers, I would suggest using either an air disk, or air cyclinder.
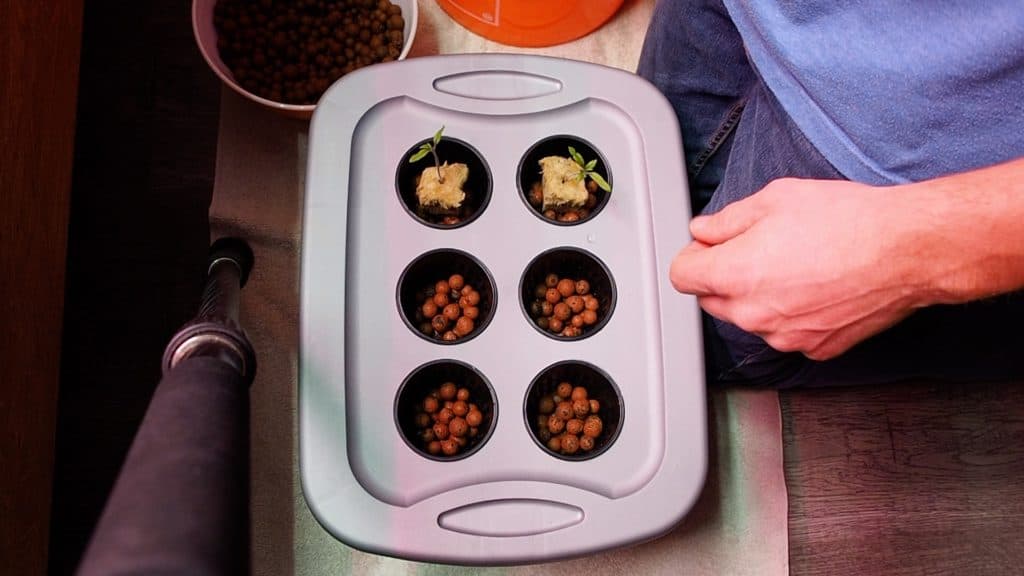
Transplant the seedlings
Once the seedlings grow large enough, transfer the rockwool cubes and seedlings to the net pots in your deep water culture system. Transfer the seedlings before the roots start poking out of the rockwool cubes. If you transfer after the roots are exposed, you run the risk of breaking the roots when transplanting.
Net pots are similar in shape to any regular plastic planting pot, however, they are filled with gaps and look more like a woven basket. This allows the plants roots to grow past the pot edges and extent into the water.
You will need to use another growing medium to support the rockwool cubes in the net pots. For this build I went with expanded clay pellets, in a product called hydroton. Hydroton allows for hydration and aeration, while remaining pH netural and sterile.
Cover the bottom of the net pots with a thin layer of hydroton and gently place the rockwool cube with seedling on top. Carefully surround the rockwool cube with more hydroton until it has filled the net pot.
At this point, the seedlings roots are still not in the water. Therefore, water the cubes (if needed) until the roots extend past the net pots and into the nutrient solution. Rockwool has great water retention so be sure not to over-water. A good rule of thumb is that you should not see water draining out the bottom of the rockwool cube (lift the lid to check this if you are unsure).
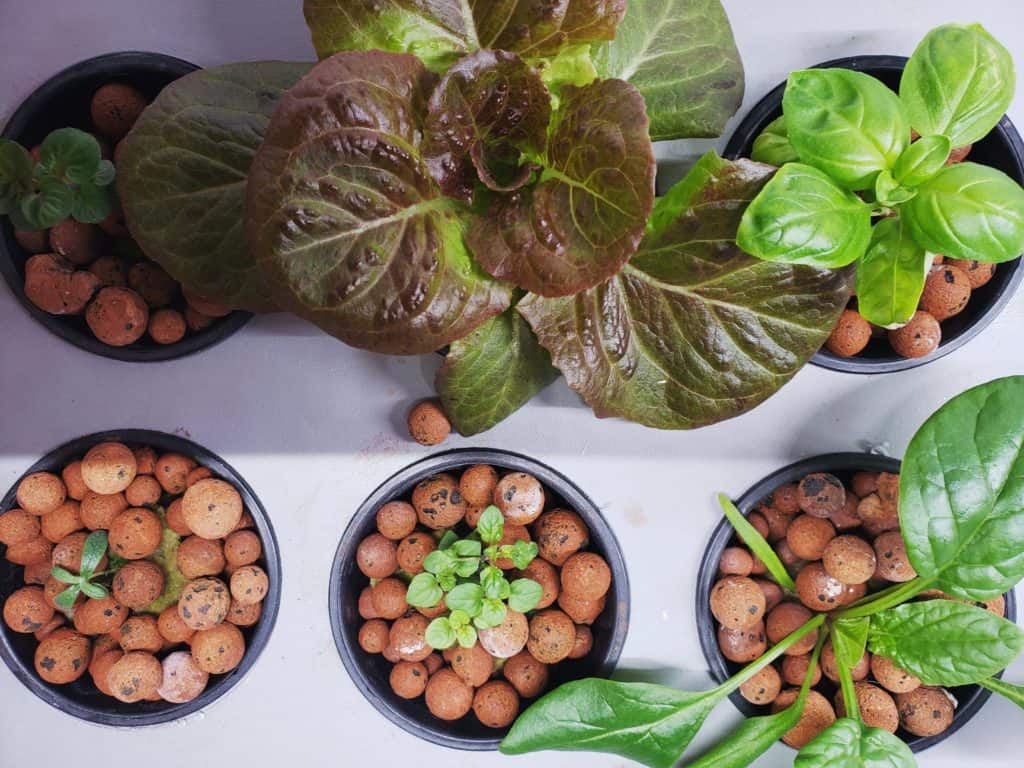
Enjoy your DIY hydroponic system
At this point you are completely set up and running, however, don’t just sit back and wait. Keep a close eye on your plants and water levels. As the plants get larger they will use more and more water. This is fine as you will be doing regular water changes every 2 weeks or so. Just be sure the water levels don’t get too low between changes. Once again I refer you to aqua flakes nutrient calculator and feeding chart for general guidelines. However, experimenting with nutrient concentration in your own setting will ultimately give the best results.
Once your plants are ready to eat, dig in and enjoy!
You may also enjoy:
How to mix the nutrients? Very important to know in DIY.
Good question! Each nutrient solution will have specific directions on how they should be mixed. For the ones I am using (Aqua Flakes), they specify a 15 minute gap between mixing solution A and solution B.