
In the 4th episode of our basement renovation series we tackled the bathroom vanity. As is our nature, we renovate in the name of sustainability. In this case, it means salvaging a solid wood vanity that’s in great shape. (Not actually the point of this post) but all that was needed was some sanding and a few coats of paint.
We originally planned to top our newly painted vanity with a stone countertop. A quick chat with my quartz guy and that plan went out the window. But I DIGRESS- back to the topic at hand. In order to stay within our budget, we opted to use an off-the-shelf laminate countertop. This meant cutting it to size and installing laminate countertop edge strips.
Start our by watching our video, and then follow the step-by-step instructions to guide you through the process:
Many times throughout renovations you will need to decide whether or not spending extra money is actually worth it. In our case, this is a basement bathroom that will only be used occasionally, thus not worth the added cost for stone countertops.
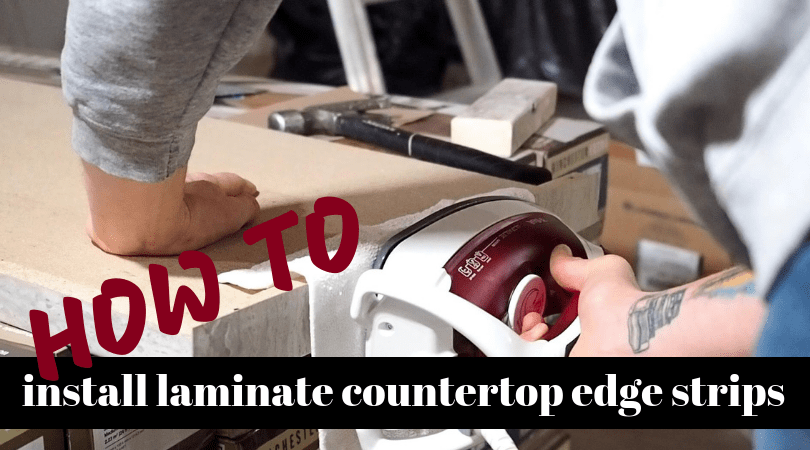
The downside to using off-the-shelf laminate counters means that you will have an unfinished edge if it’s open to the bathroom. Finishing that edge can seem like a challenge, but we are here to show you how to install laminate countertop edge strips. This seals the end of the particle board, as well as provides a finished look to the countertop.
Step 1: Cut your laminate countertop to size
Before you can finish any of the edges- you need to cut the countertop down to the correct size. I find it easiest to do this with a table saw.
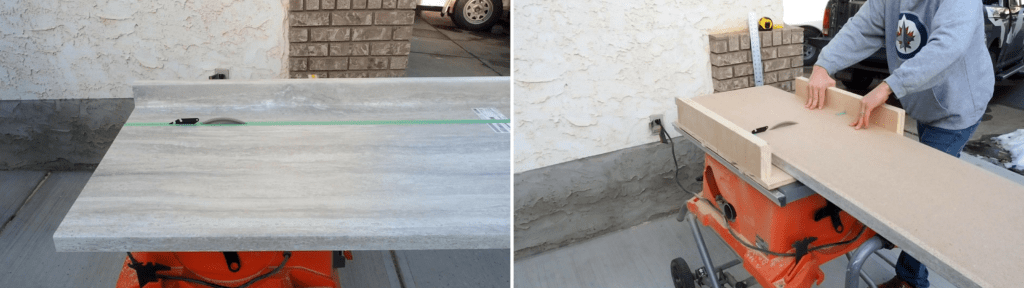
Make sure to use painters tape to protect the laminate surface from chipping during cutting. If you do not have access to a table saw, a circular saw also gets the job done. If you go that route, make sure to use a guide to keep your cut straight.
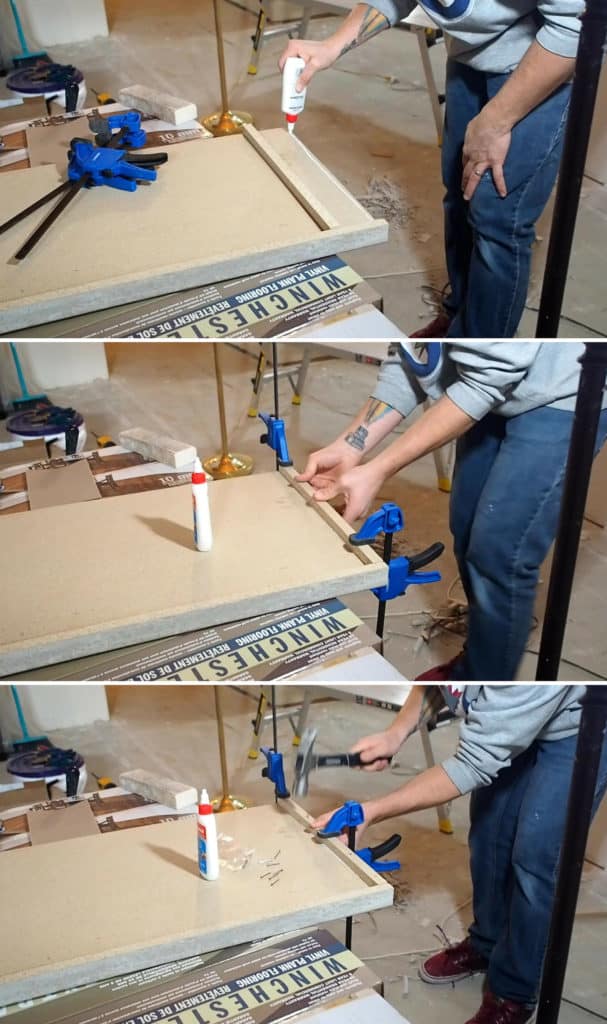
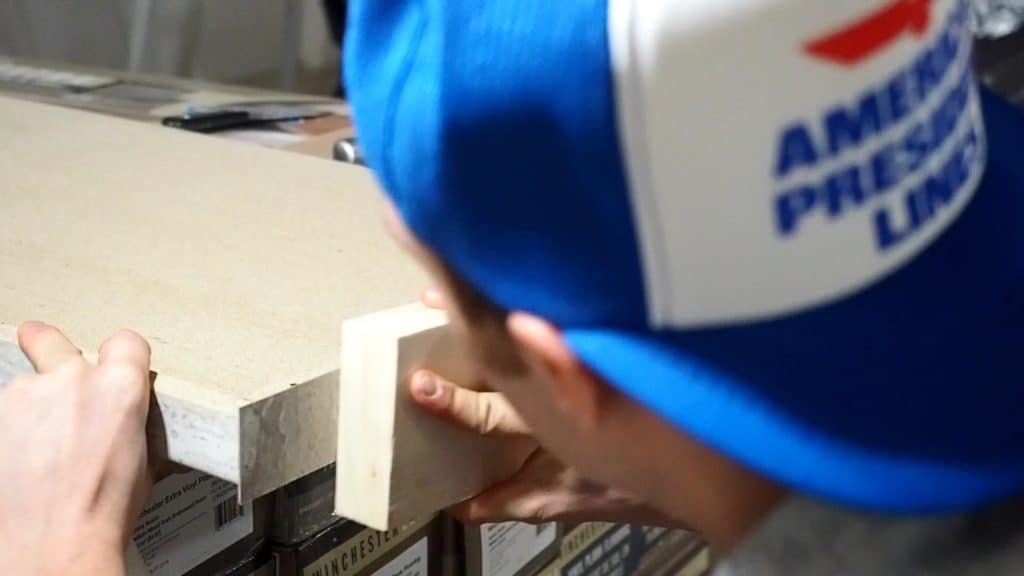
Step 2: Glue and nail the particle thickener strip
Start heating up your iron at this point. In order to melt the glue on the back of the edge strips, the iron will often need to be at the hottest setting (on modern irons). However, if you have an older flat bottom iron (no steam holes), these generally get far hotter and the wool setting will suffice.
While the iron is heating up, glue (with white wood glue) and nail the particle board trim piece in place. This creates a uniform thickness for the countertop edge. Use trigger clamps to hold the piece in place while nailing.
When you purchase a countertop off-the-shelf, don’t forget the edge strip kit. These are often just below or next to the countertops in the store.
Roughly trim your edge strip to size with scissors and test the fit.
Step 3: Glue (laminate) your edge strips
Give the previous step 15 minutes of so for the carpenters glue to harden.
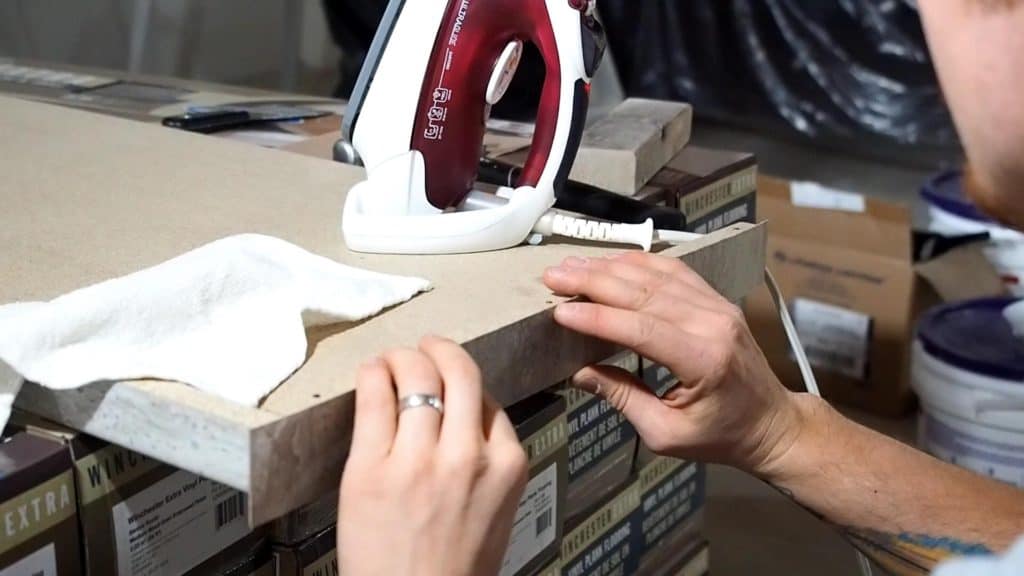
Place a scrap rag or dish cloth over the laminate edge strip. You do not want the iron to be in direct contact with the laminate edge strip. This will cause it to burn or mark.
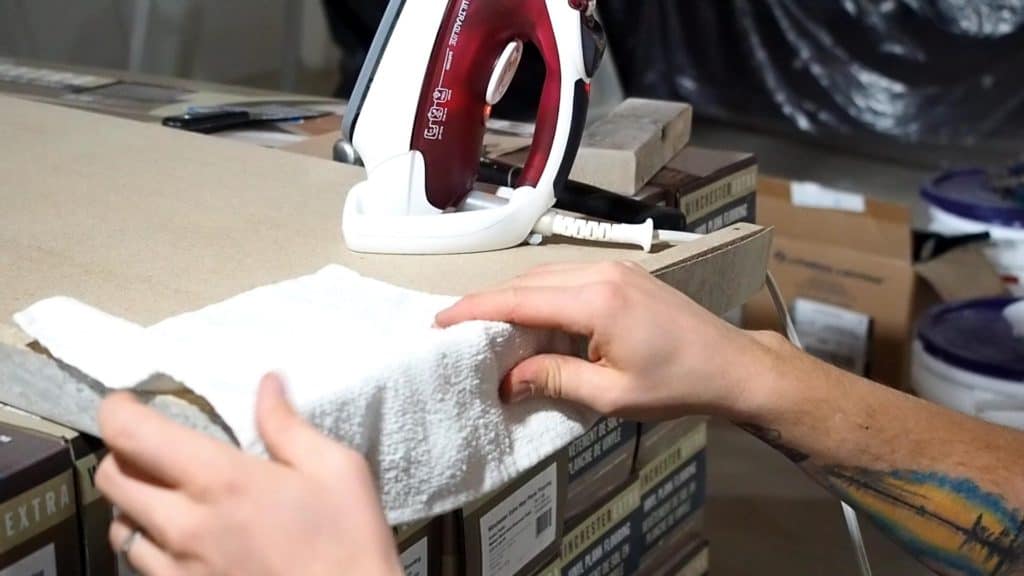
Place the iron on the rag over top the laminate edge strip for 15-20 seconds. The goal is to melt the glue on the back of the edge strip. Slowly move across the entire edge until it has completed bonded to the countertop.

Use a scrap piece of wood to push the edge backing glue into the particle board, ensuring an evenly bonded surface.
This process may need to be repeated a few times until the entire surface of the laminate edge strip is bonded to the countertop.
I typically let this cure overnight. However, I’m sure you would be fine to continue after a few hours.
Step 4: Trim and file the laminate edge strip
This is the most delicate and time consuming part of the process. You will notice in the picture above how the laminate edge strip sticks past every edge of my countertop. This excess needs to be trimmed back and filed level with the countertop surface for a finished look.
Start out by trimming the laminate with a SHARP utility blade. Go slowly to avoid chipping the laminate edge strip. In addition, be careful not to scratch the countertop surface.
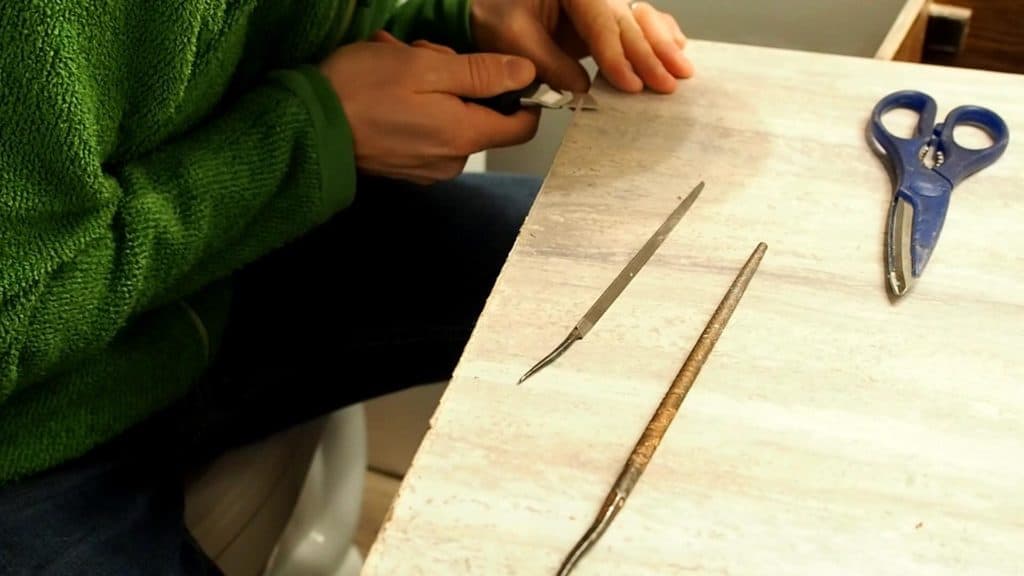
Once the excess is trimmed close to the countertop surface, it’s time to move onto filing. Pay close attention to this step in the video, as it will make or break the final look of your installation.
I find it easiest to start out with a rough round mill file. I find this moves easiest across the edge in the initial stages. Then progressively move onto wider, finer files as I slowly finish the joint between the edge strips I laminated and the countertop.

Repeat this process until you have completed all of the necessary edges. Make sure to flip the countertop over and do the bottom as well.
It’s as simple as that! If you are shying away from using an off-the-shelf countertop because of edge finishing, I encourage you to give this a try in your next project. Not only will save hundreds of dollars when compared to ordering a custom size, it is actually really easy and rewarding to do yourself.
You may also enjoy:
Thanks you for the article post. Really looking forward to read more.