
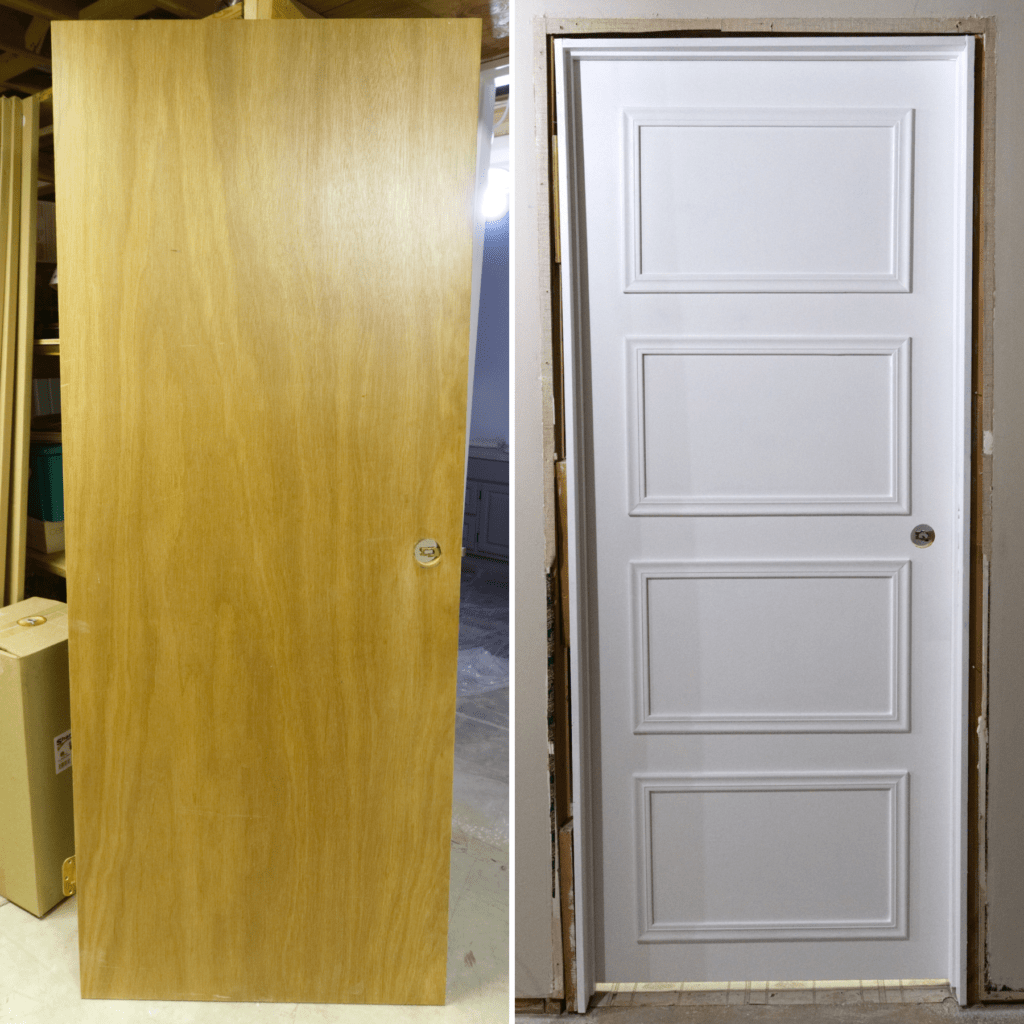
We are now 20 days into the basement renovation at the Beige Bungalow, and this weeks featured project is updating the interior doors. Currently we have some old hollow core slab style doors, 5 of them to be exact, and they are tired and dated looking.
Now we could easily just go pick up new doors at Home Depot or Lowes- but those will run anywhere from $50-200 per door, or maybe even more. However, there is nothing wrong with the current interior doors other than their dated look. Plus it seems like a waste to just add to the landfill.
So what’s the plan you ask!? Let me tell you. We are going to update the interior doors with the original mouldings to create the look of a raised panel door. During the basement demo we saved the oak door trim and baseboards. These will be our mouldings for updating interior doors. So like I said- this is pretty much a free project. Our only cost will be for new hardware to replace the brass door knobs with black levers (when we find ones we like).
Well okay, I guess technically there is also the cost of paint, sandpaper, brad nails…but I am going to assume anyone looking to tackle this project will already own this stuff. I’ll even venture a guess they probably have some paint lingering around that would work as well.
Alrighty, now that that’s out of the way, let’s dive into how to update your interior doors!
Before getting into the nitty gritty, start out by watching our video on the entire process:
1) Measure and mark your doors
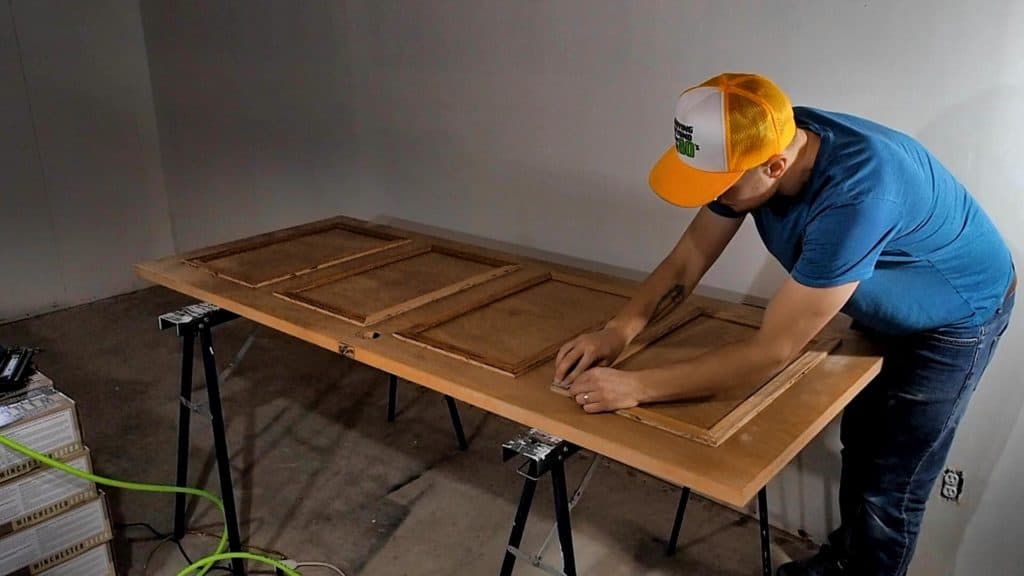
Begin by taking the door off the hinges, or at least out of the frame. It’s easiest if you can lay it on a work surface for measuring, marking, and attaching the mouldings.
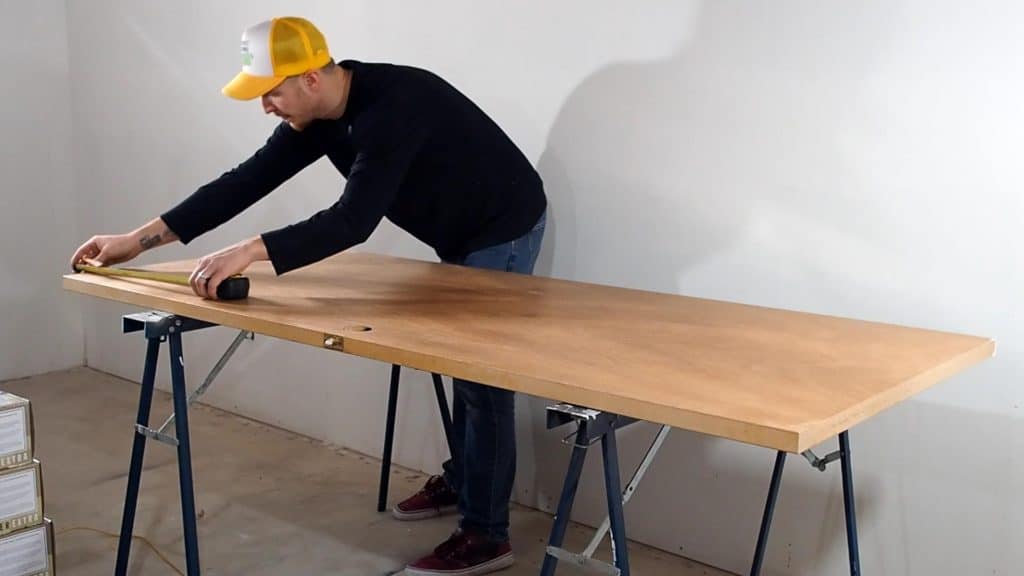
Determine the overall size of your door. In our case, we were working with 32″ x 80″ interior doors.
You also need to figure out what sort of style you are after. A very traditional look would be a vertical six panel door, however we wanted something a little more modern looking and opted to go with a horizontal 4 panel door.
A couple tips to help determine the design or style:
- Is the door knob hole centered or off-center? If the door knob is centered, symmetrical designs are more pleasing. However, if it is off-center, then asymmetrical designs look best.
- Maintain 4 inches of spacing between mouldings and edges. This not only looks the best (I do understand this is subjective, but most people find smaller gaps less appealing), but it also leaves enough room around the door knob for comfortable operation.
- More is less. Abstract and convoluted designs may catch your eye…but who wants a standard interior door to be a focal point…. These are not grand barn doors separating rooms, it’s an entry to a bathroom, storage room, and laundry room- not exactly highlights.
I used a tape measure and drywall T-square to mark the doors. And when I say “mark’, actually draw pencil lines on the doors. You will see why in a couple of steps. A combination square would also work here.
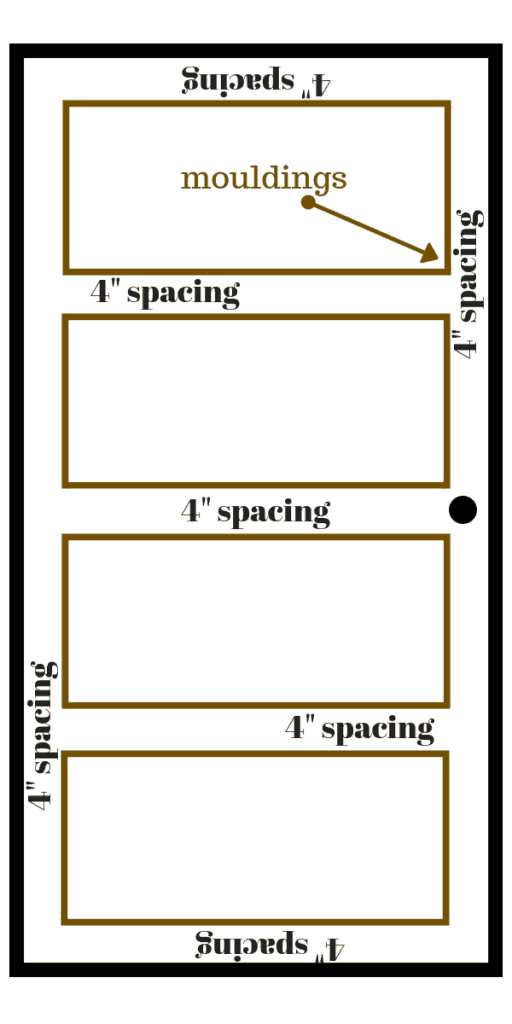
So yes….4″ spacing everywhere…I think you get the point. With that, we can now determine the size of our mouldings based off some easy math. The width of our door is 32″. Therefore 32″ – 4″ – 4″ = 24″ wide. Our rails (horizontal strips of moulding) will be 24″ long. The height of our door is 80″. Therefore 80″ – (4″ x 5) = 60″. We then take the 60″ and divide it by the number of panels: 60″/4 = 15″ tall styles. The styles (vertical strips of moulding) need to be 15″ long.
2) Trim and cut the rails and styles
As I mentioned earlier, we saved all of the existing trim from the basement to use for this project. However, the oak trim was just over 2.5 inches wide, and I only wanted the mouldings to be 1.5 inches wide. I used a table saw to rip the old mouldings down to this width. A quick tip if this is the route you will be taking: older mouldings typically have a specific pattern/design, so be sure to rip the same portion off each piece.
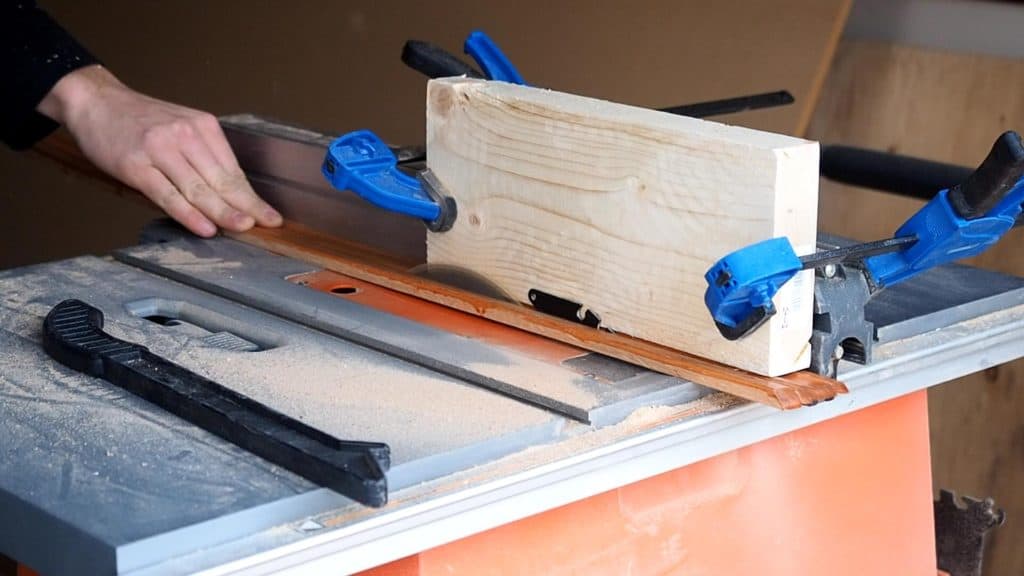
Use a scrap piece of wood clamped to the fence to keep the moulding tight to the table when cutting. This helps prevent lighter material from bouncing or lifting as it moves through the saw blade.
After all of the pieces are the desired width, move over to a miter saw and begin cutting the rails and styles. I would highly suggest cutting the mouldings with a 45 degree miter at each end. This not only helps keep it square when installing the trim, it gives it a professional look. If you are working with coved mouldings (like ours), then a 45 degree miter is a must in order for the pattern to line up.
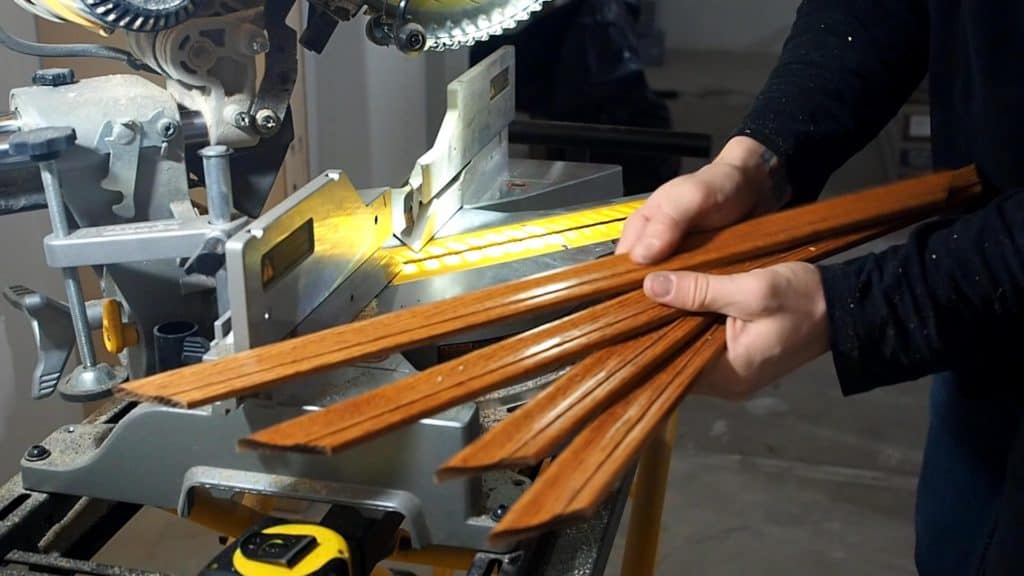
This is also a good time to mention that a project like this takes a surprising amount of moulding. We ended up using 129 feet of oak trim, and that was for only one side per door. If we had to go out and purchase this brand new, it would have come at a decent hit to the budget. And in some cases, it may actually be cheaper to purchase new doors.
3) Glue and nail mouldings
Now that all of the pieces are cut to size, it is time to attach them to the door.
Starting with the bottom rail, glue the moulding along the exact lines you marked out in step 1. Once it is in position, firmly fix it to the door using 18g brad nails (using a brad nailer).

From here glue (ONLY GLUE) the remaining rails and styles. Use a speed square to ensure each corner is perfectly square, and then firmly fix in place with the brad nailer.
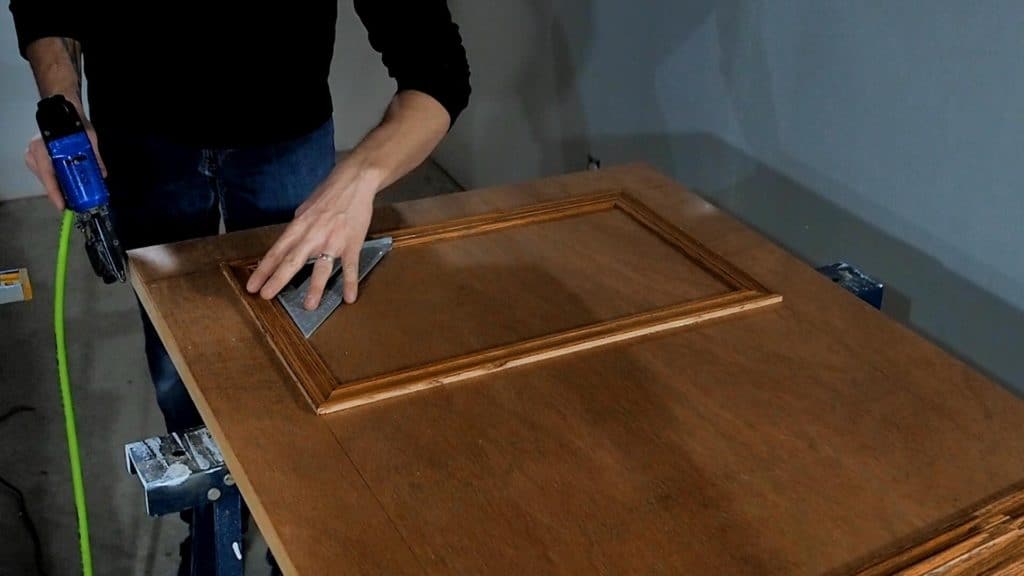
Repeat this process for each remaining ‘box’ on the door, as well as the rest of the doors you wish to tackle. This is a great section of the video to re-watch. You will see how I always start with a rail against my marked line, before completing the remaining 3 pieces of trim.
4) Sand mouldings
Because we reused older oak mouldings, they needed a good sanding before they could be primed and painted. Try and save some of the ‘wood dust’ as you are sanding for filling in any nail holes or spaces in the miter joints (if they exist). We have a great tutorial to help you make your own wood filler at home for free.
5) Prime and paint the trim (and doors if necessary)
The final step in this project is to prime and paint the doors. If you are using a moulding made from oak or any other wood with a deep grain, apply two coats of primer to help fill the wood grain before painting. Oak grain in particular loves to soak up paints or stain and show through in the final product.
After two coats of primer, we applied two coats of Benjamin Moore interior paint to finish it off.
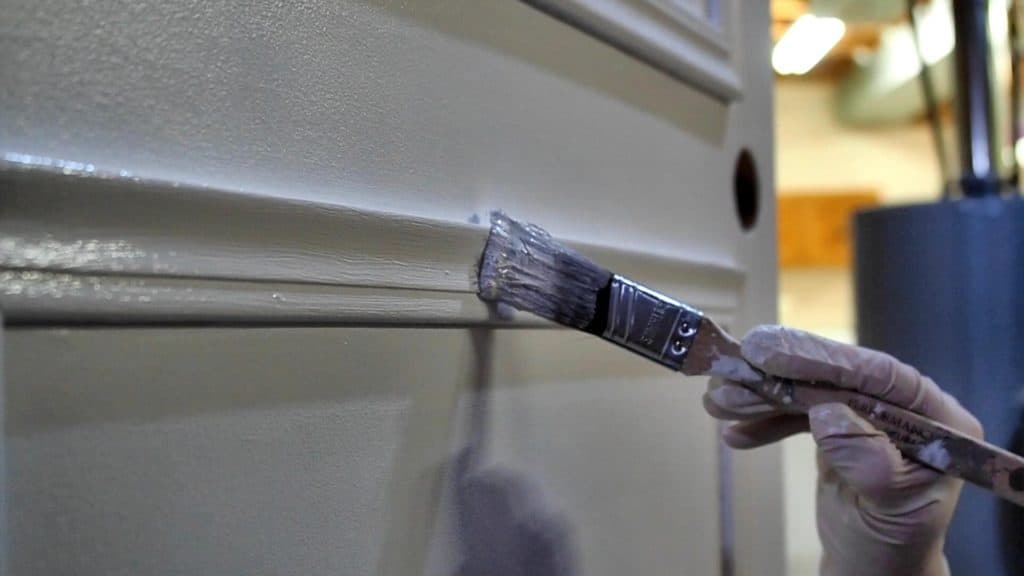
In the end, I am very happy with how this project turned out. This updated the interior doors without busting the renovation budget. The best part is if you never saw the before look, you would think they were brand new doors.
The last step will be to add (well find…) new hardware, and the doors will be complete. This checks of another project for the basement renovation and gets us one step closer to finishing.
Update: If you are looking for a more modern design when updating interior doors, check out our modern geometric hollow core door update at The Partridge house.
Be sure to join our community and subscribe on YouTube to stay up to date with our current projects and renovations.
You may also enjoy reading:
Great idea. I like that you reused what you had in the house. Too many people are caught up in ripping everything out and just trashing it. A lot of that material is still good stuff, it just needs new life.
This is such a great idea. We have these all over our house. Is it expensive to have to buy all of the wood to do this?
It could be expensive depending on your area and the type of wood used.
Just fyi–I’m doing something similar, but used sets of matching old picture frames I picked up at a thrift store. Some of the more ornate and thicker frames could easily mimic molding medallions as well. I’m planning to customize all my interior doors the same way. One has a dent/hole in it, and I’m going to consider covering that with a design. It’s really interesting, because in the end I’m going to have totally custom and unique doors that will be one-of-a-kind.
That’s a great idea! Thanks for posting about your DIY door makeover
Tracy could you possible post a photo of your finished door?
Next time I am at that location, I will snap a pic and update the article!
Thank you so very much for the information on how to plan out the door update!! I searched high and low for how to figure out the measurements and finally came across yours and I am so glad that I did! Your door turned out beautifully and I am excited to get started on mine thanks to your sharing! By the way~ I have a big old dog too~ a big hairy Newfi lol~ thanks again!!
For interior doors would you do both sides of the door or just the outside of the door seen when entering?