
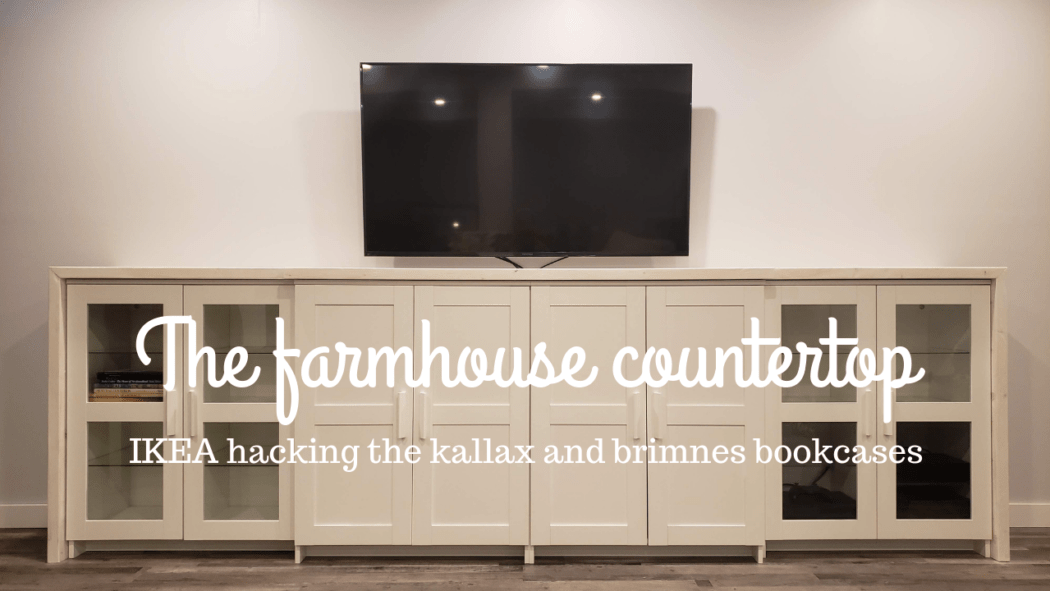
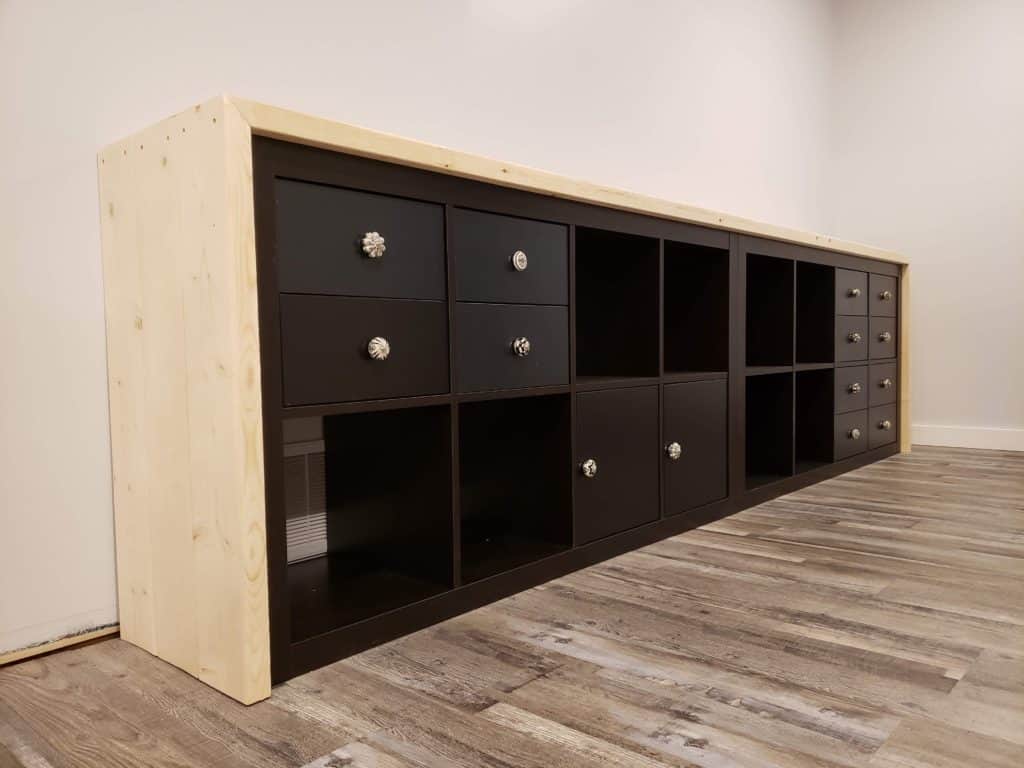
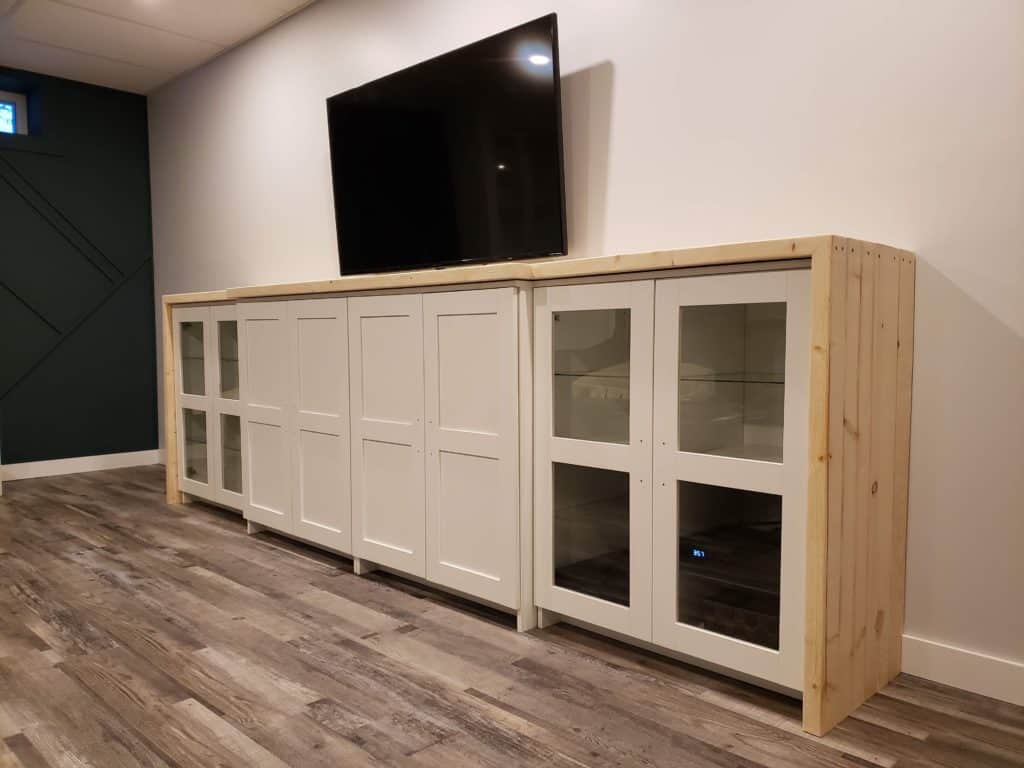
I really had no idea what to name this built, or this IKEA hack for that matter. Honestly, I still don’t. It’s sort of a countertop.. It resembles a farmhouse table.. so I’ll just stick with calling it the farmhouse countertop. If you think of a better name, seriously please comment down below!
Once again we are back with another IKEA hack. I feel like this is becoming a trend. Every renovation seems to have an IKEA hack.. or several. Anyways, I digress. I guess the cool part about this build is that it can really be applied to pretty much anything. By no means is it specific to IKEA (other than I fitted the farmhouse countertop to IKEA bookcases). This build could be used for any number of things- a sofa table, bar top, even a kitchen table if you wanted, with some minor modifications of course.
Materials:
- 2″x6″ lumber (I used a few different lengths)
- Pocket screws
- 3″ wood screws
- DIY wood filler
Project Tools:
- Kreg jig (check this thing out- awesome tool!)
- Miter saw
- Drills
- Tape measure
- Trigger clamps
As per usual with builds like this one, I have a complete video tutorial to help walk you through the steps. So before you keep on reading, sit back, relax, and enjoy! Oh and make sure you click that subscribe button!
Instructions: The farmhouse countertop IKEA hack
Step 1: Measure IKEA units and cut lumber
It would be pretty hard to know the length of your cuts without measuring, so start there.
A little tip– if you plan on mitering the corners as I did, leave yourself a little extra room. On the kallax units, I left myself 1/8″ extra in length which JUST fit during installation. For the brimnes units, I cut my lumber 1/4″ long and that was a much better fit. This is only for the top portion of the countertop. I cut the waterfall sides of the countertop to the exact proper height. Any longer could cause unwanted lifting.
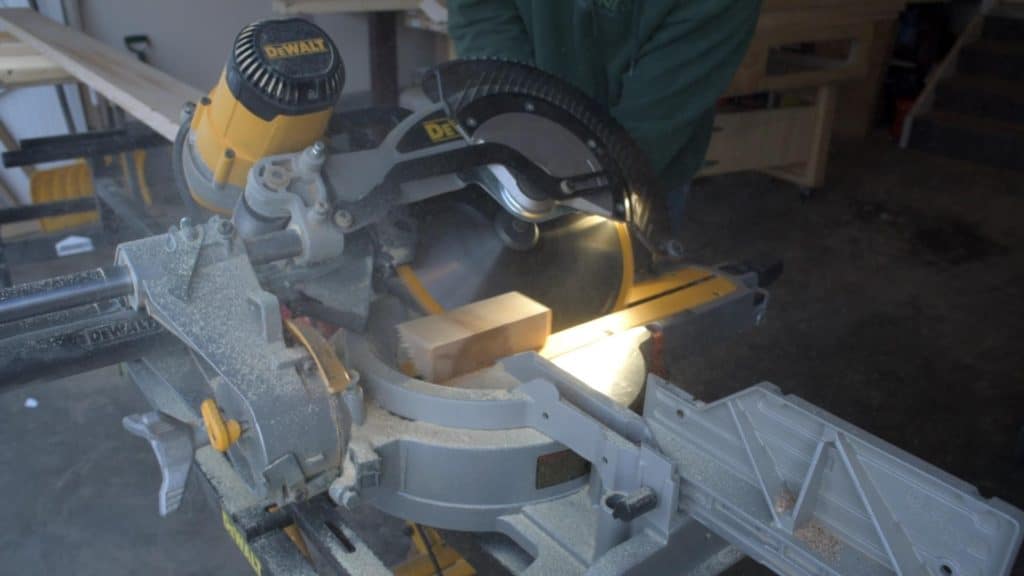
Top portion: Both ends of the 2×6’s need to be cut at a miter for the top part of the countertop. I chose to cut my miters individually (before joining the 2×6’s), however, in retrospect I should have cut all of the 2×6’s slightly long and cut one long miter (across all 2×6’s) after they were joined. I was lucky, but it could have turned out poorly if my measurements were off.

Waterfall portion: Repeat the exact same process as above. This time only one side needs to be mitered. The other end of the 2×6 is left flat as it will sit on the floor.
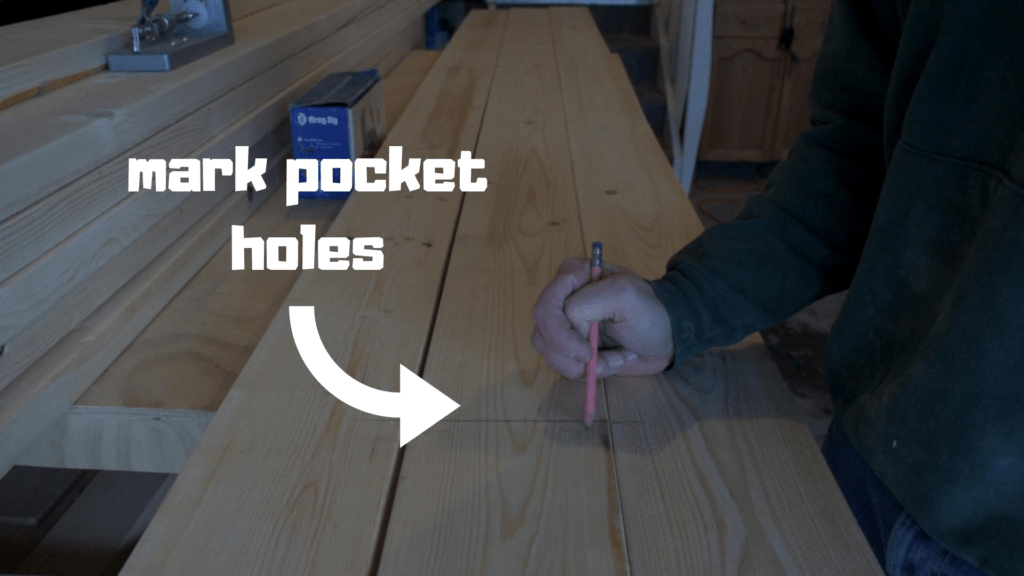
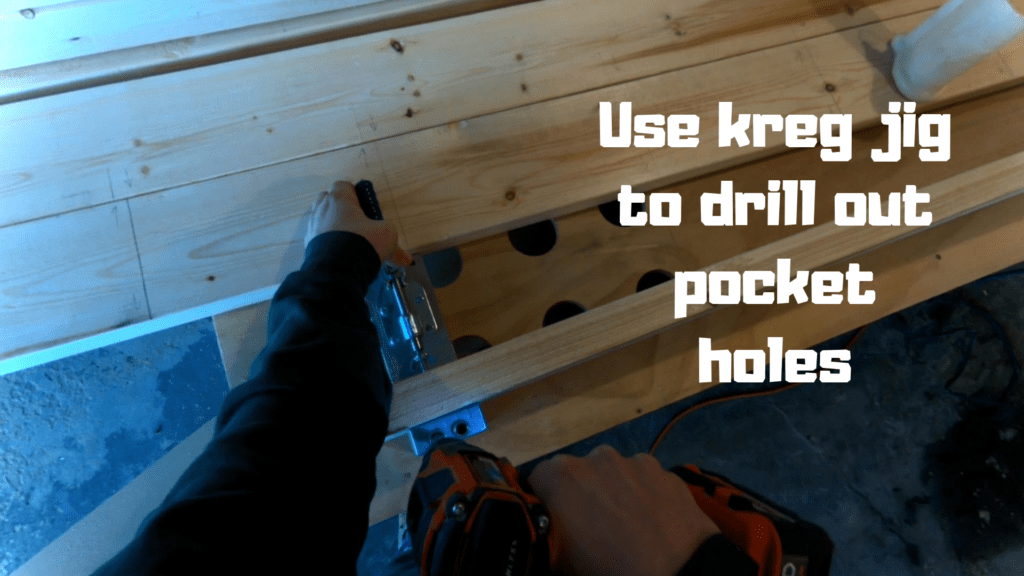
Step 2: Mark and create pocket holes
Line up the 2×6’s and mark out the location for the pocket holes. I typically offset the pocket holes by about 2″. This will help maintain the structural integrity of the wood.
There is A LOT of pocket holes to drill, so enjoy! Use a kreg jig for perfect pocket holes every time.
Step 3: Secure 2×6’s with pocket screws
I used trigger clamps to hold my 2×6’s tightly together, and on the same plane. Check out the YouTube video as it demonstrates how I do this a little better than words.
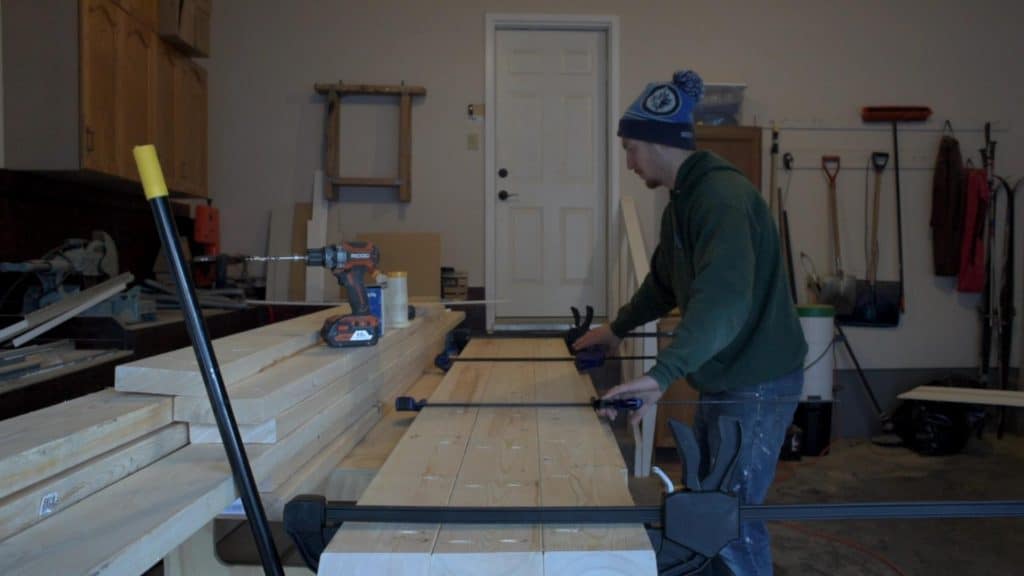
Normally I would use biscuit joints on the edge of the 2×6’s as well, but I had no biscuits left. It sounds like I’m talking about cookies ha! Joint biscuits are oval shaped pieces of wood that can be inserted into special joints (created by a biscuit joiner) to help keep several pieces of wood on the same plane. For the more stubborn assembly, I used a couple pieces of scrap wood and some extra clamps to pull everything tightly together.
Drive in the pocket screws.
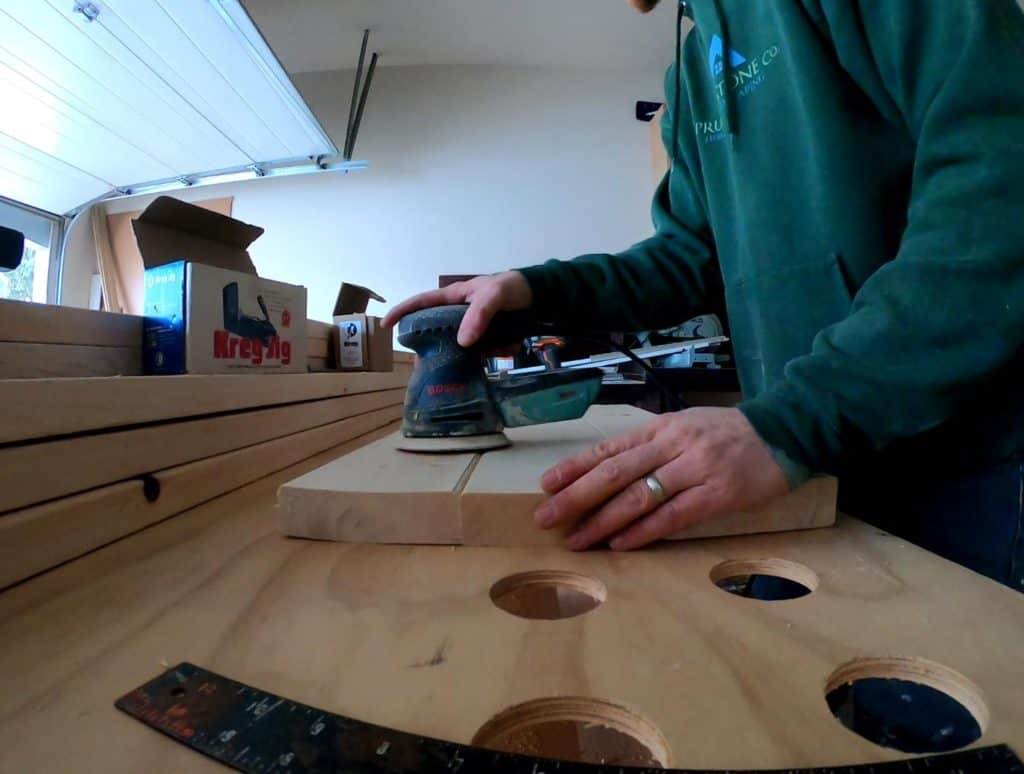
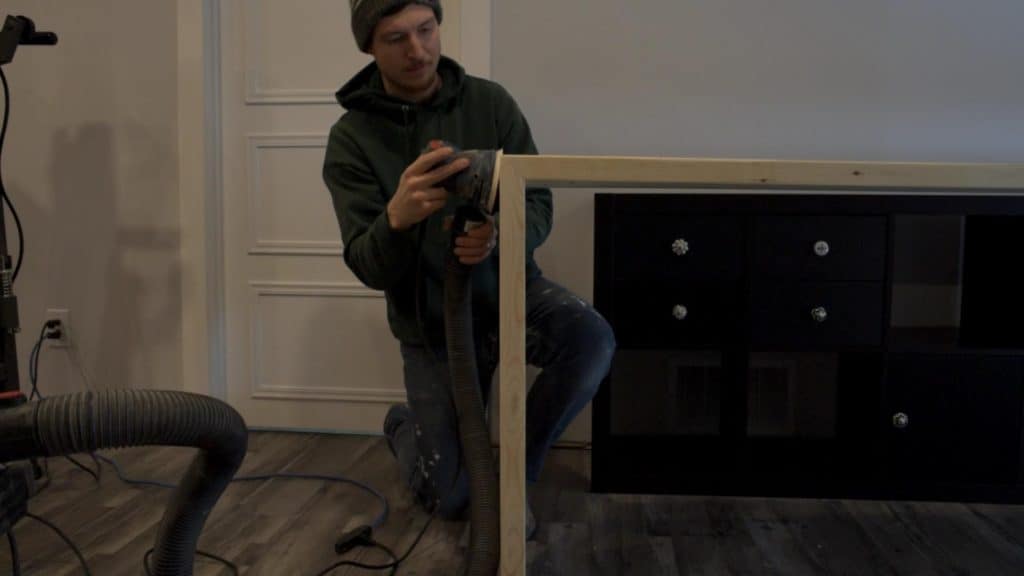
Step 4: Sand everything (first time)
At this point I gave everything a really good sanding. I wanted to smooth out any of the really large scuffs and gouges, but not all of the character. I didn’t want a perfectly smooth board. Remember these are meant to be more in tune with the farmhouse style.
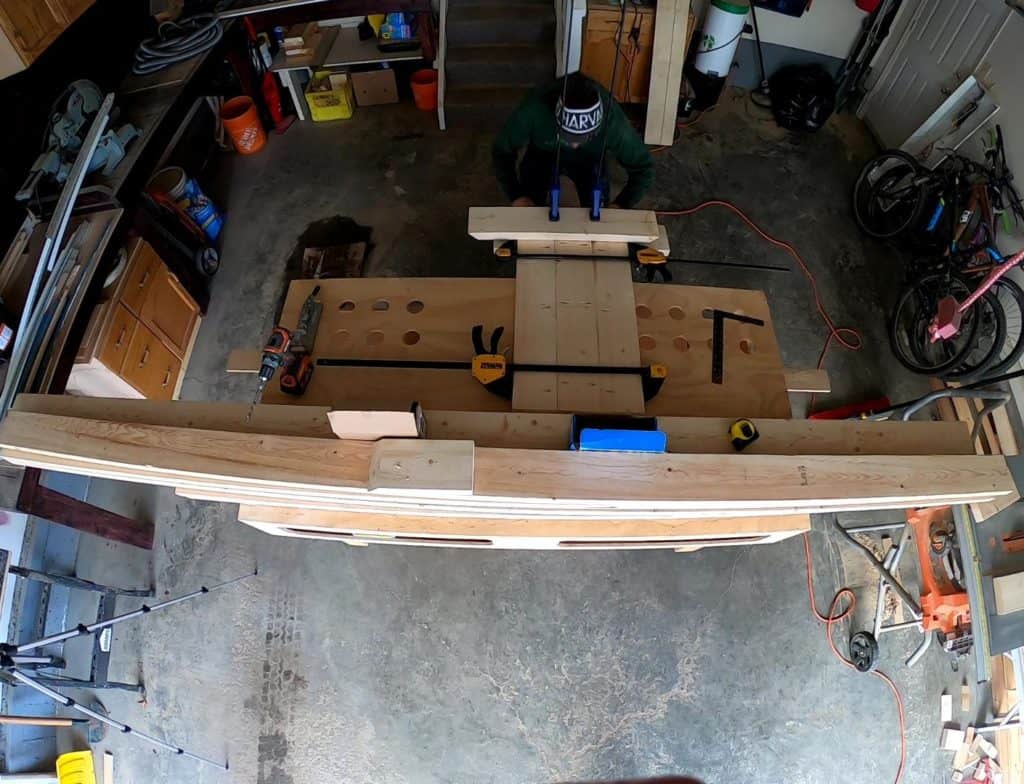
Step 5: Assemble the top and waterfall sides
I was quite nervous at this point…I had done a few earlier tests to see how mitering random 2×6’s would go, but this time it was for real. Thankfully, everything lined up and fit as perfectly as I could have hoped.
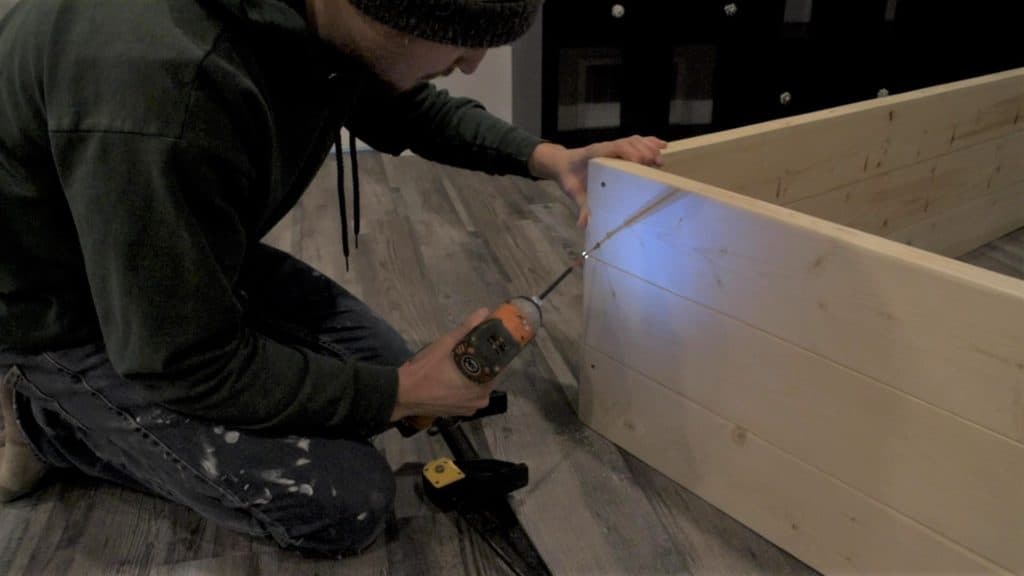
I started by pre-drilling holes at an angle through the mitered joint to prevent the wood from cracking. Then, using 3″ wood screws I slowly started pulling everything together. A word of caution here (watch video!)- don’t drive the first few screws in extremely tight. Why you ask? Well when two boards are pulled together on an angle such as this, they have a tendency to start sliding. See the picture below.
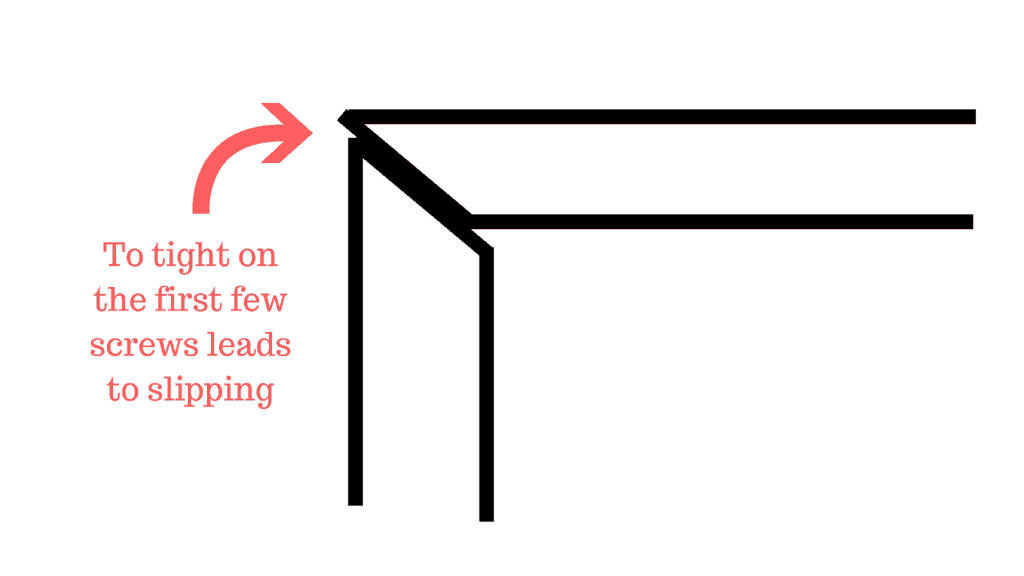
Instead, pull them snug (not TIGHT), then continue along the rest of the boards. Slowly but surely, move back through the screws tightening them further as you go. This will prevent the miter from slipping.
Step 6: Sand the miter joint

No matter how perfect the miter cuts are, there will still be some sanding to do. Sand the sharp miter cuts until they are smooth and even. The better the cut, the less sanding needed.
Step 7: Test fit
This might be sort of pointless because there really is no going back. But give it a test fit anyways.
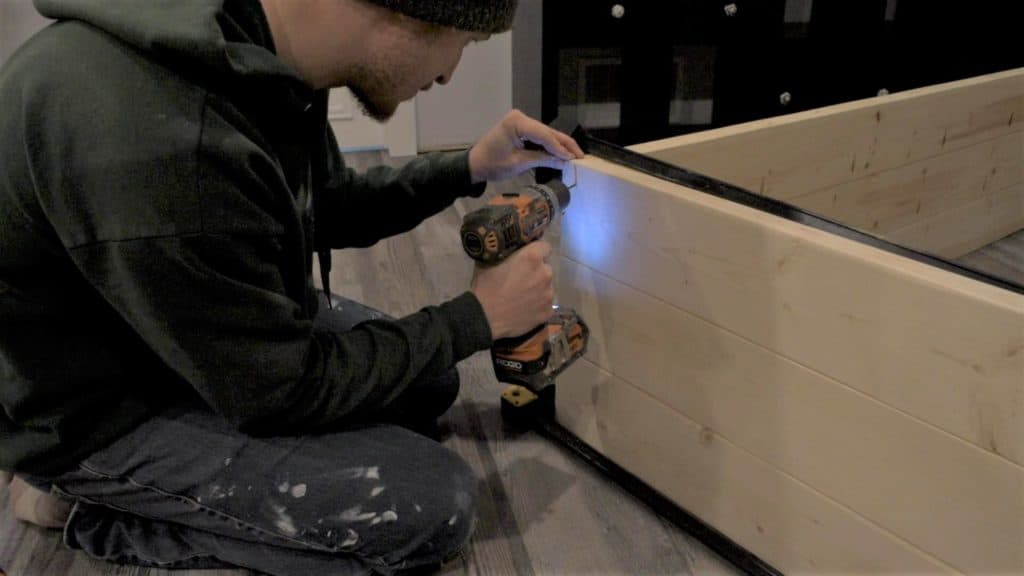
Step 8: Fill screw holes and any joints
Use wood filler to fill the screw holes. I always make my own wood filler using sawdust from the project I am working on. It’s incredibly easy.
Fill any small gaps in the mitered joint at this time as well. Try and scrape off any excess wood filler while working. This will save time sanding in the next step.
Step 9: Sand…yes, sand again
This time round it’s sanding the excess wood filler.
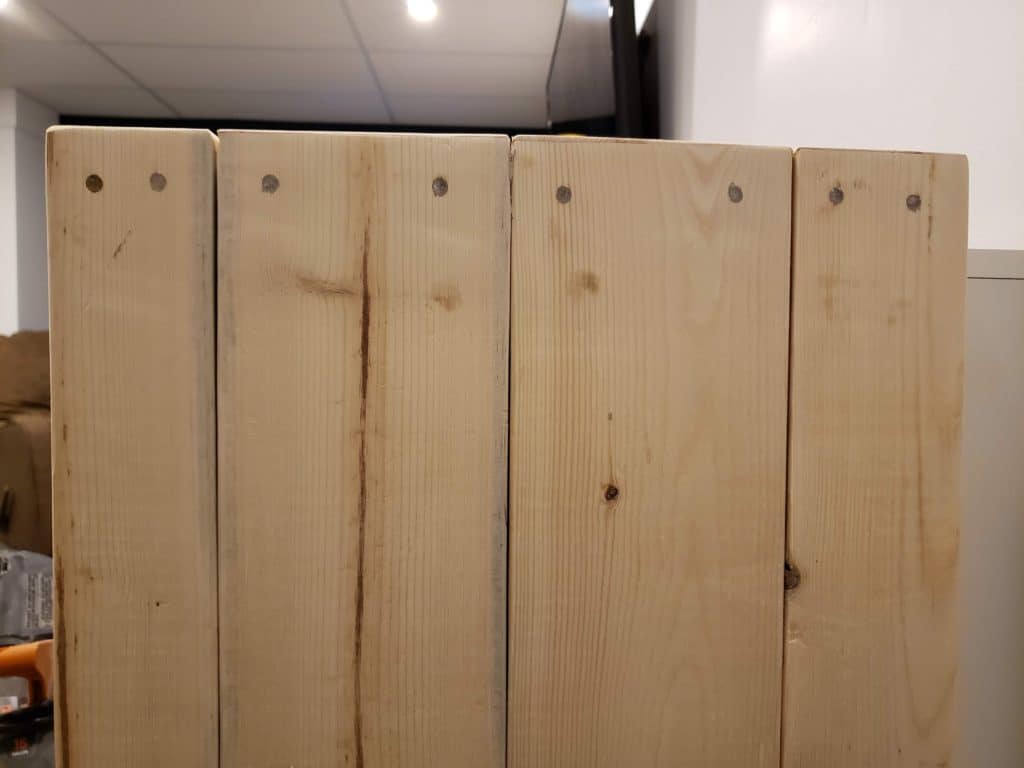
You may notice the screw holes are still visible after filling. You will notice they are slightly out of line or off kilter. This was all done purposefully to aid in the rough and tumble farmhouse look.
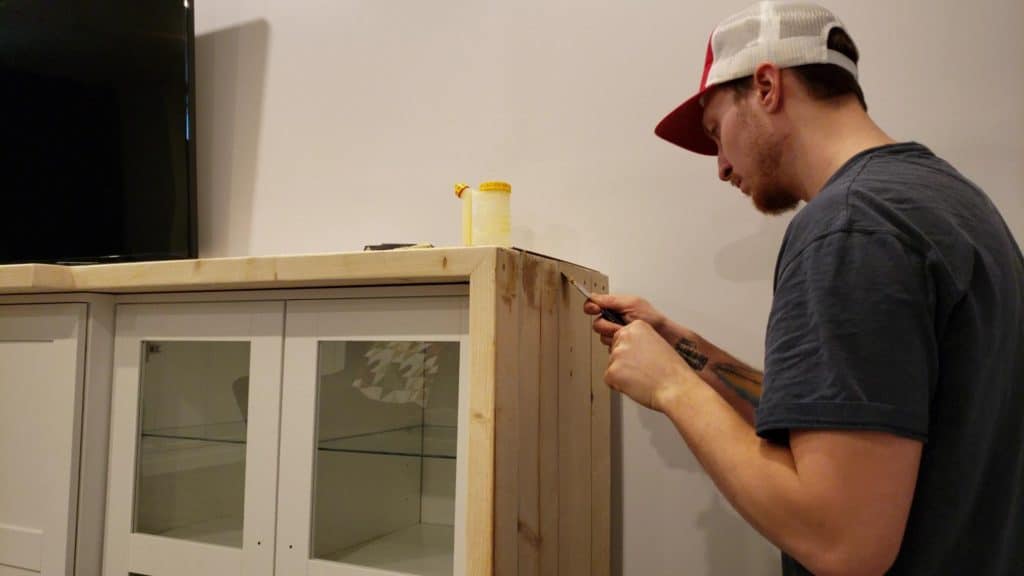
Step 10: Whitewash the countertop
We chose to go with a whitewash finish, however, that doesn’t mean you have to as well. Feel free to mix it up here and blend the finish to YOUR space. We wanted the soft white finish of white-washing to soften the overall look and help unify the space.
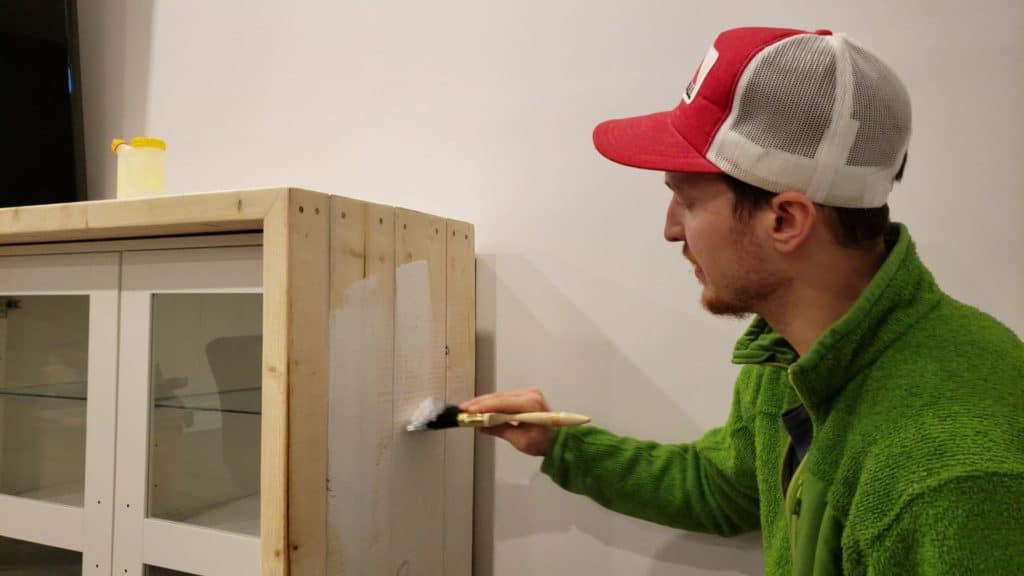
In the video, I talk about how I use I diluted solution of flat ceiling paint to make my whitewash. However, I want to make note that there are other ways to make whitewashes, including using salted water with hydrated lime. This second option gives a really nice weathered look, but it wasn’t quite what we were after for this project.
Step 11: Give it a light sand and finish with sealer
Depending on how you finish the countertop, it may need a slight sand before sealing. I used 220 grit sandpaper to lightly knock down any raised grain left from white-washing.
To finish off the project, I sealed it with a clear satin water based sealer. Going with a water based sealer maintains the color beneath. Oil based sealers often age with a yellowy hue to them, whereas water based sealants remain clear, maintaining the original desired look.
Can I order the countertop from you? This is exactly what I’m looking for but I don’t have the skills 😭 beautiful work!
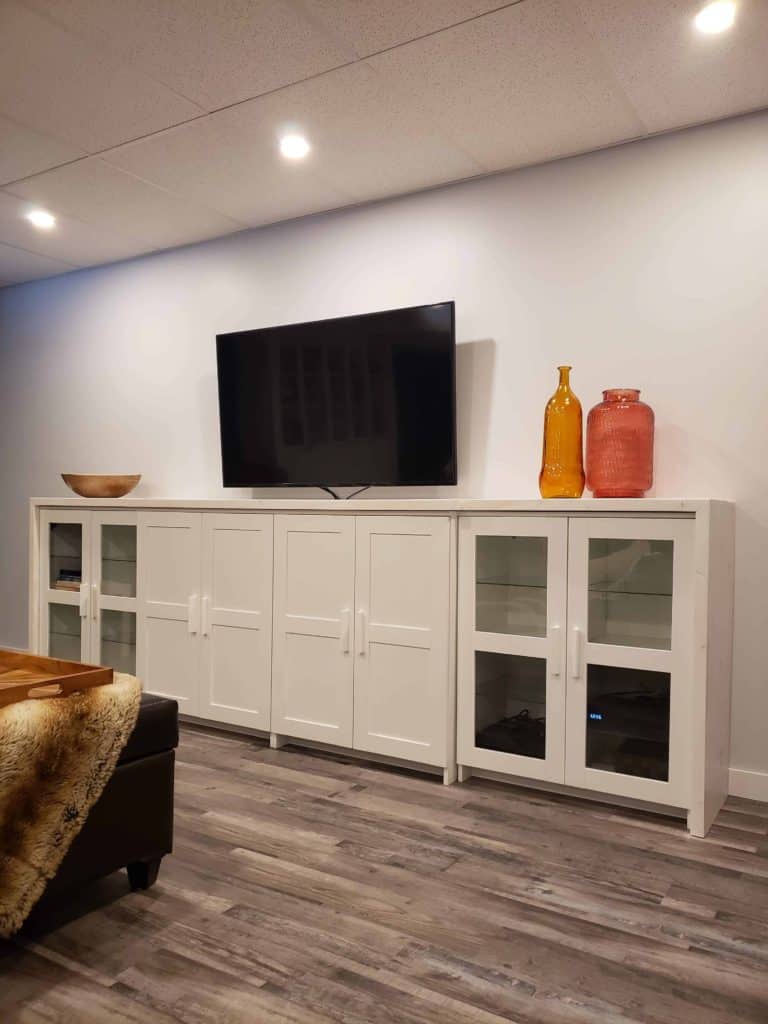
Can you tell me how you feel about the TV at that height? We’re looking at using Brimnes cabinets but are worried that the TV will be too high for comfortable viewing.
Please tell me how you like the tv that height for brimnes? We are doing something similar.
It’s not in my house – but the person who has it is quite happy!