
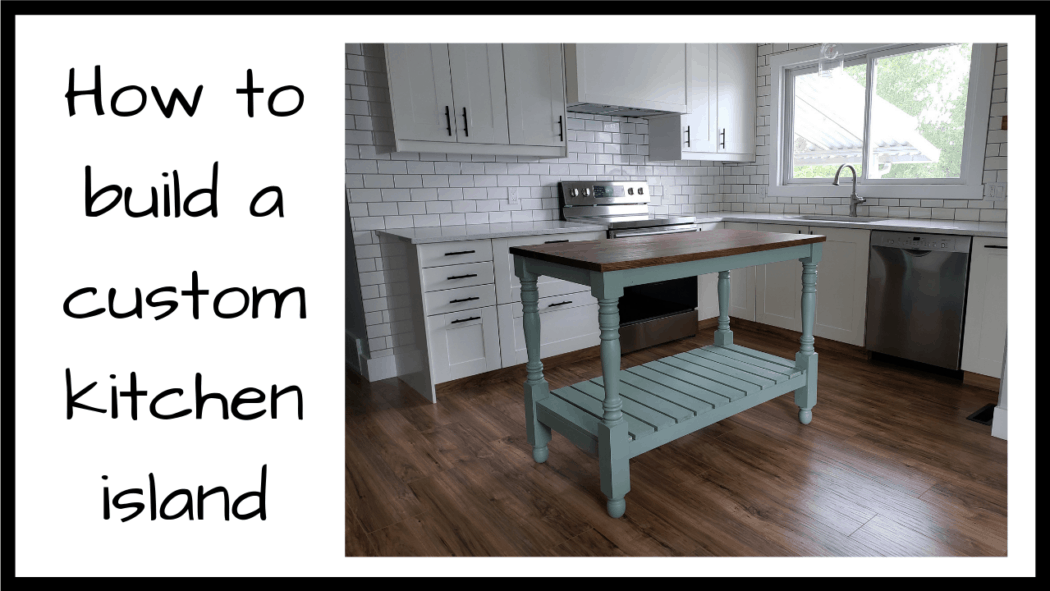
A butcher block island is a staple in any farmhouse kitchen. They can be customized to almost any style or taste, and they always look classy and timeless. Butcher block islands add warmth to fresh renovations and character to the space. The best part is they are incredibly easy to build yourself, without the need for expensive tools.
We decided that our most recent rehab project, Hilltop, would benefit from a custom butcher block island in the kitchen. In addition to providing some character, I was going to use the island as a way to add some color to the largely white space.
Butcher block island materials:
- butcher block
- 2×3″ dimensional lumber (this will be used for the skirt and lower shelf frame. If you prefer a thicker look, use 2×4″ lumber)
- 4 newel posts (these are great for the legs)
- 1×4″ lumber for the bottom shelf
- pocket screws
That’s it! It really is a short list of necessary materials in order to build a butcher block island.
Tools I used to complete the project:
With that out of the way, let’s dive into how to actually build your very own custom butcher block island.
How to a kitchen island:
Step 1: Cut the butcher block to size
This only needs to be done if the butcher block countertop you purchased is larger than it needs to be. In our case, I was going for a final size of 48″ long.
I used my circular saw and home made guide to make sure the cut was straight and square. As you can see in the photo below, I am not using an expensive track saw and guide. Click the link above to make your very own guide on a budget.
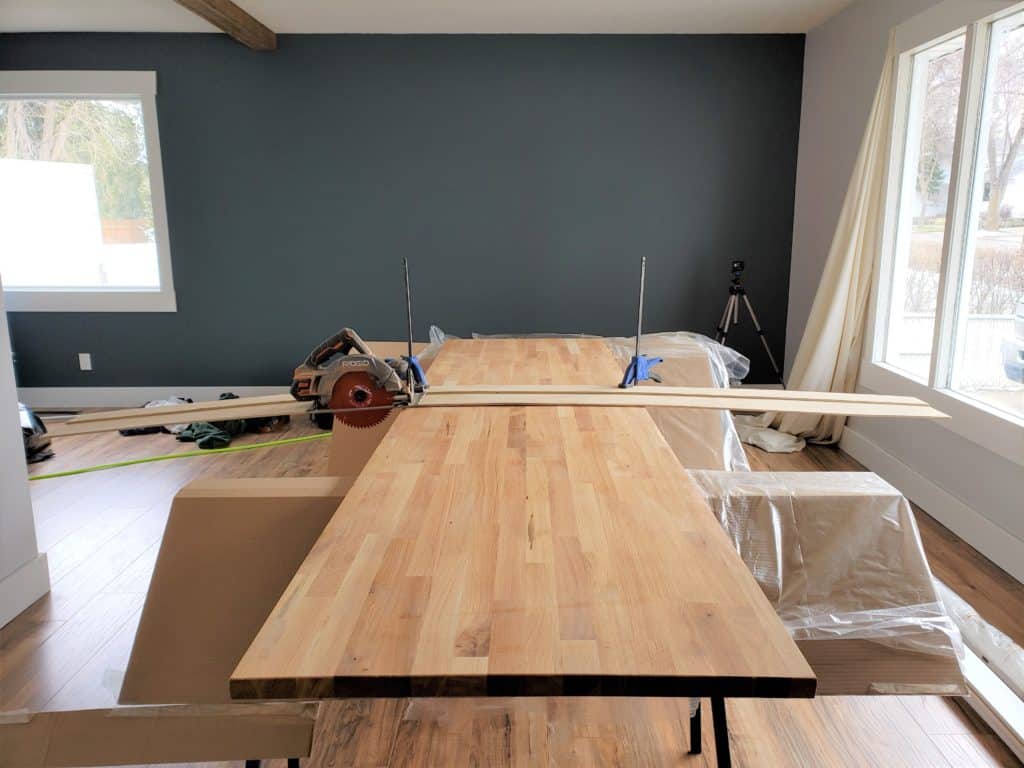
For this island, I didn’t need to cut the width of the butcher block because I bought countertop depth material (25″) and this was going to be the width of my island.
Step 2: Determine and cut the newel post legs to height
As I mentioned in the materials list above, I used newel posts for the legs of this kitchen island. If you are thinking, what in the world is a newel post, you aren’t alone! Newel posts are used when building handrails for staircases (thicker posts at the top and bottom). However, they also work great as legs for tables, island, carts, etc.
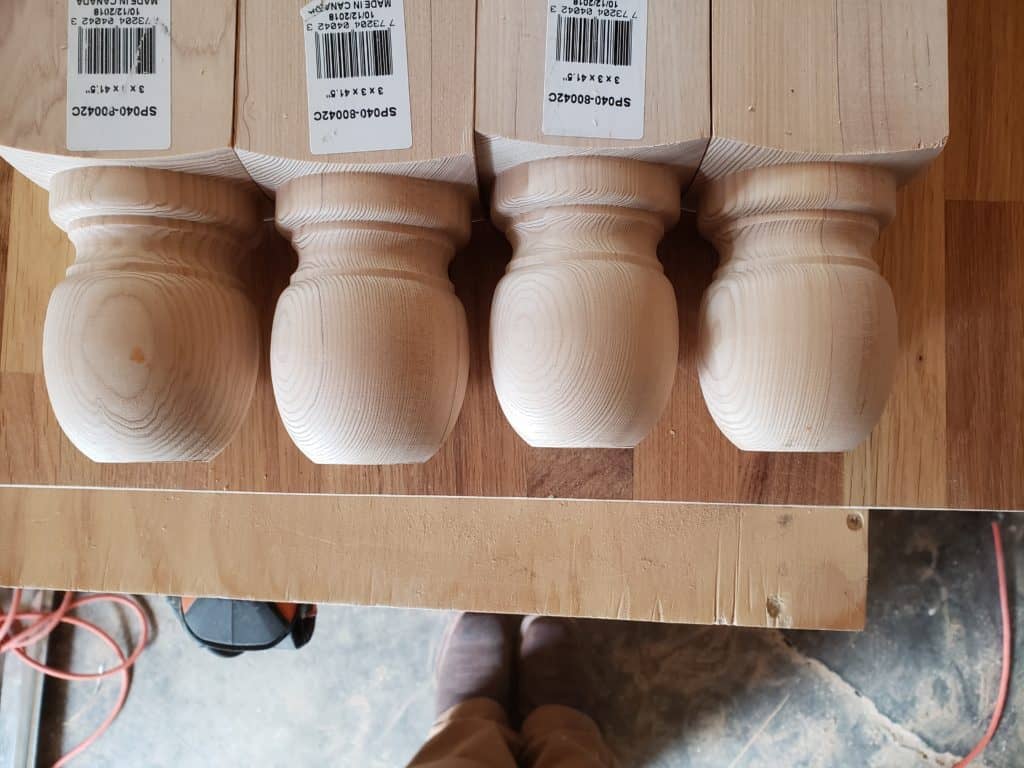
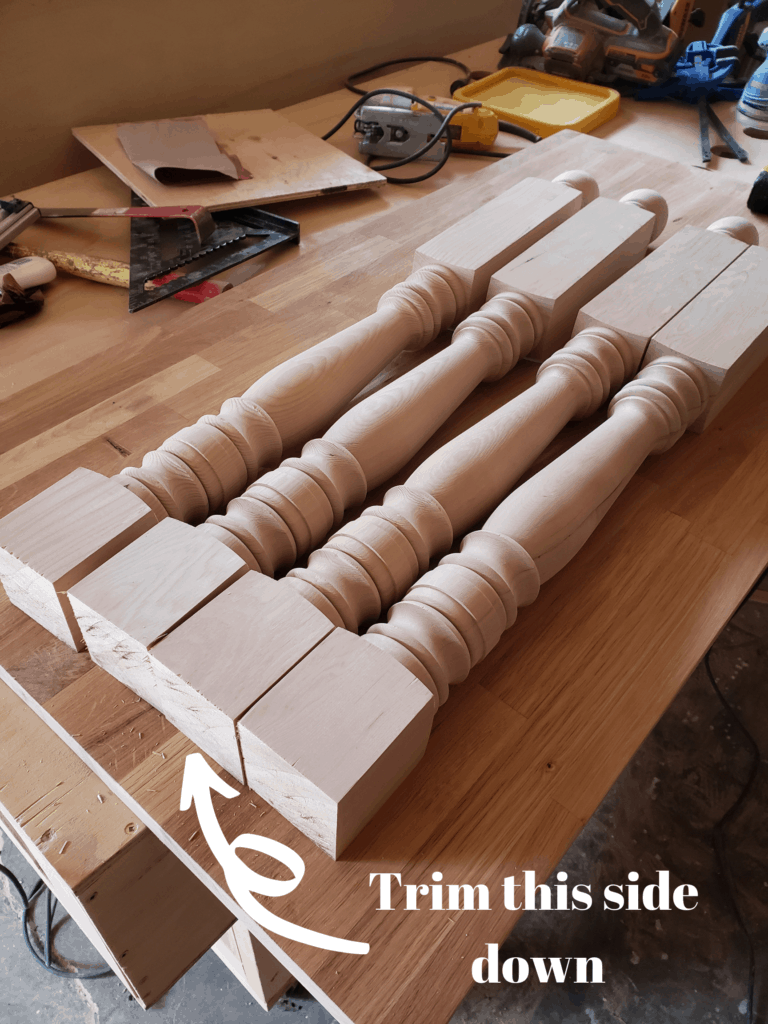
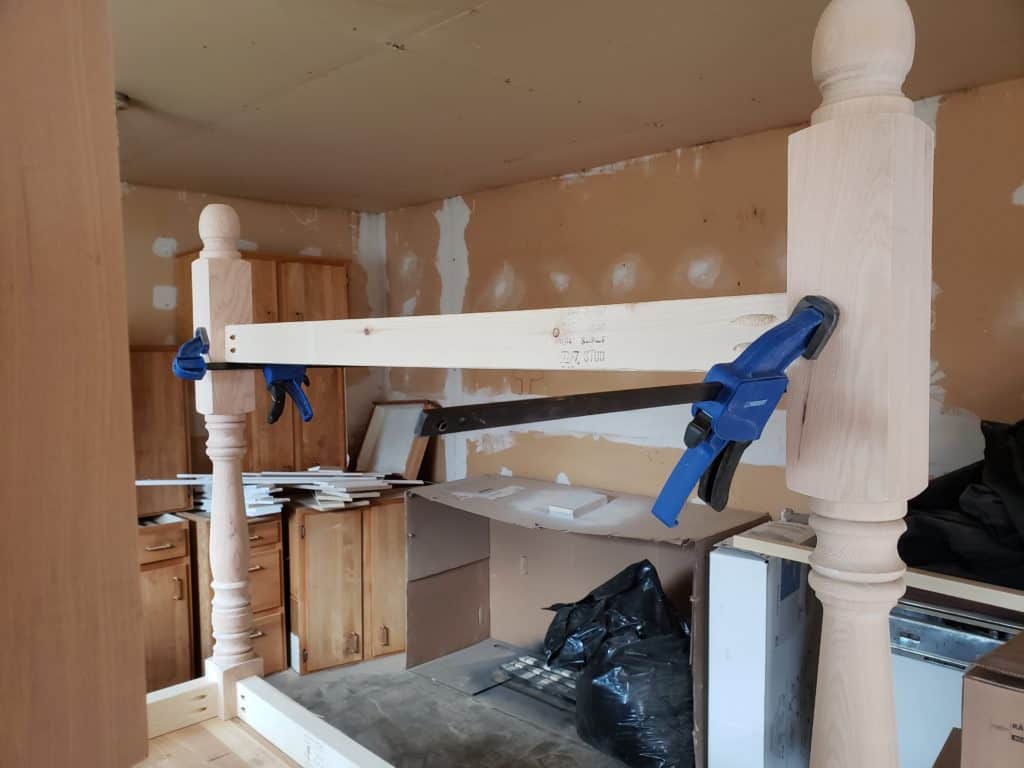
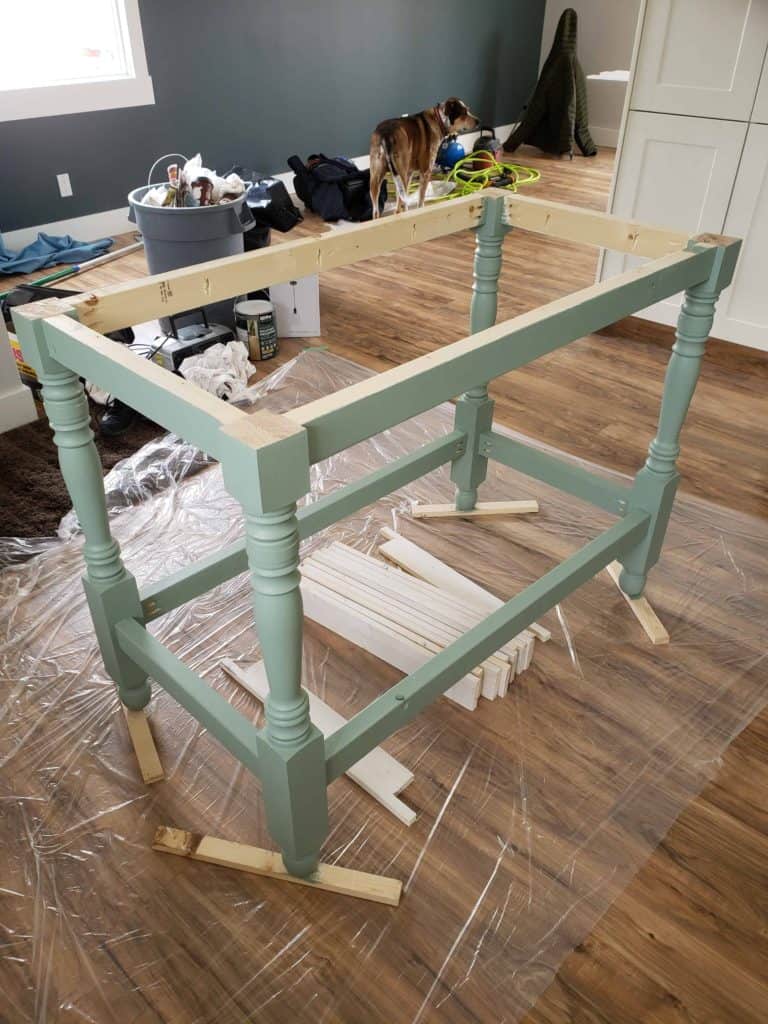
For this island, I wanted to flip the posts upside down and use the rounded portion for the bottom on the leg. I find the rounded feet give the island a slightly more traditional look, which was right in line with the design of the kitchen at Hilltop. However, I wanted to add some stability by trimming the very top just slightly (about 1/8″), to create a flattened portion (seen in the photo above).
On the reverse side, I cut the posts down to a final height of 34 3/4″. That means that after my butcher block top is added, the final height of the island will be 36″. This is typically standard height for kitchen countertops.
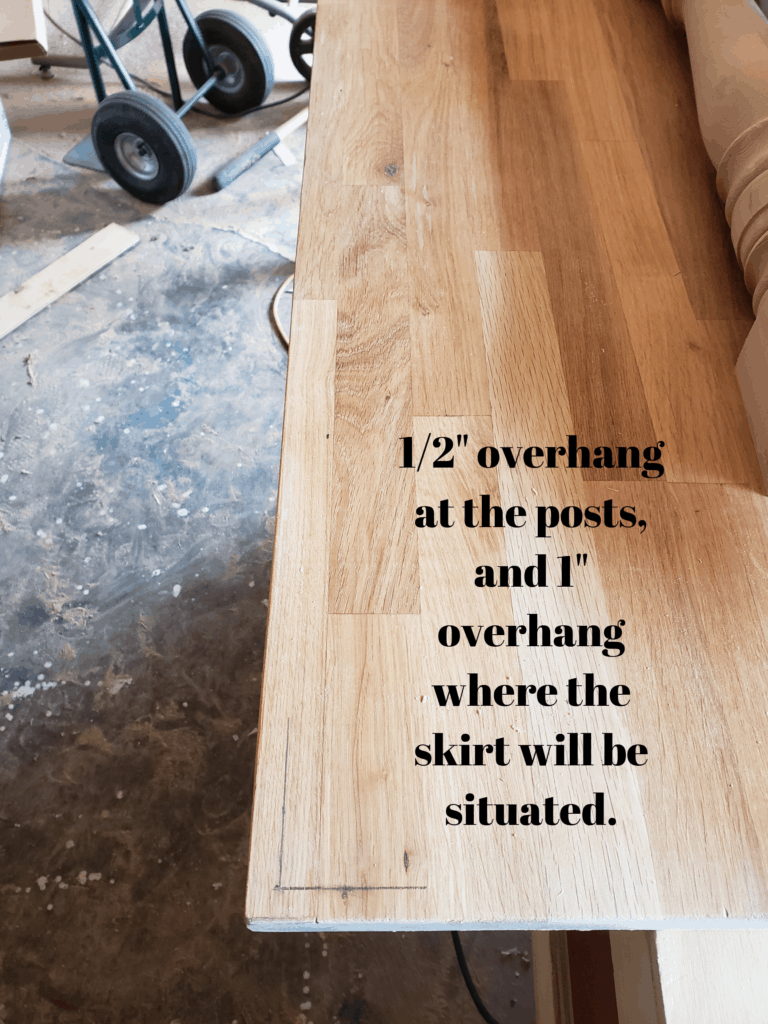
Step 3: Size up the skirt and countertop overhang
To match the stone countertops in the rest of the kitchen, I was aiming for 1/2″ of countertop overhang at the posts.
I rough fit the 2×3″s for the skirt before screwing everything together.
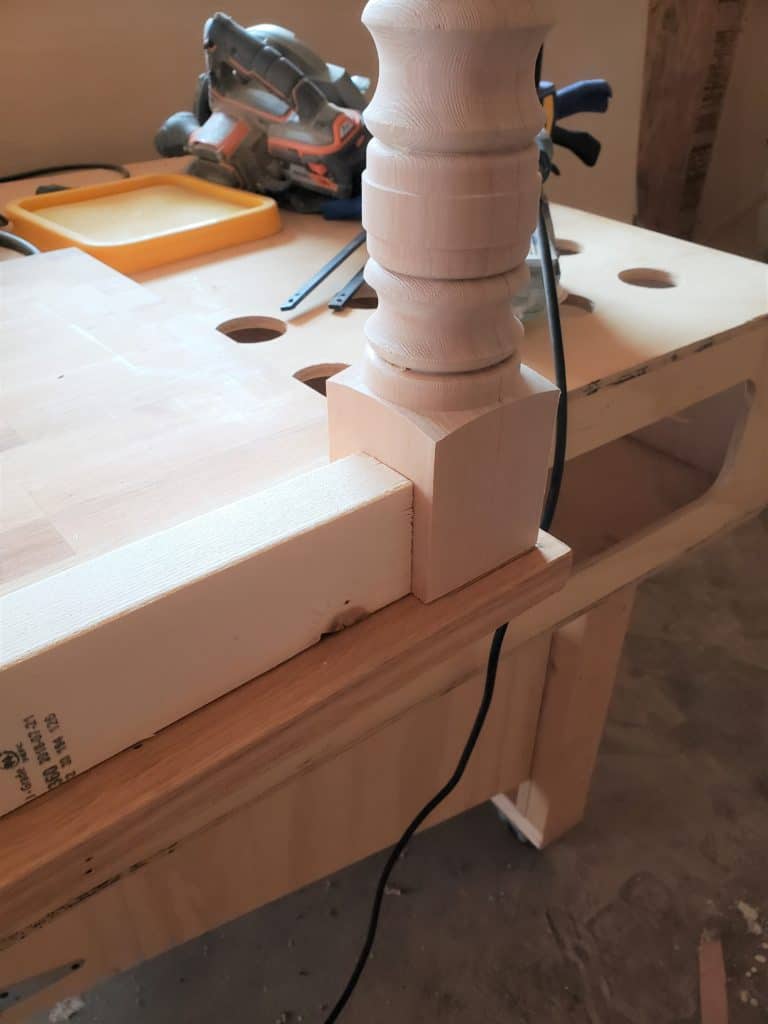
The skirt will eventually be attached to the legs with pocket screws and pilot holes from our kreg jig.
Once the fit has been determined, mark the bottom of the butcher on all four sides. This will make it easier when it comes time to join the skirting and the legs together.
Step 4: Cut 2×3″s for the skirting
This step involves some very basic math. It will be the overall length of the butcher block island, minus the width of both legs, minus the overhang.
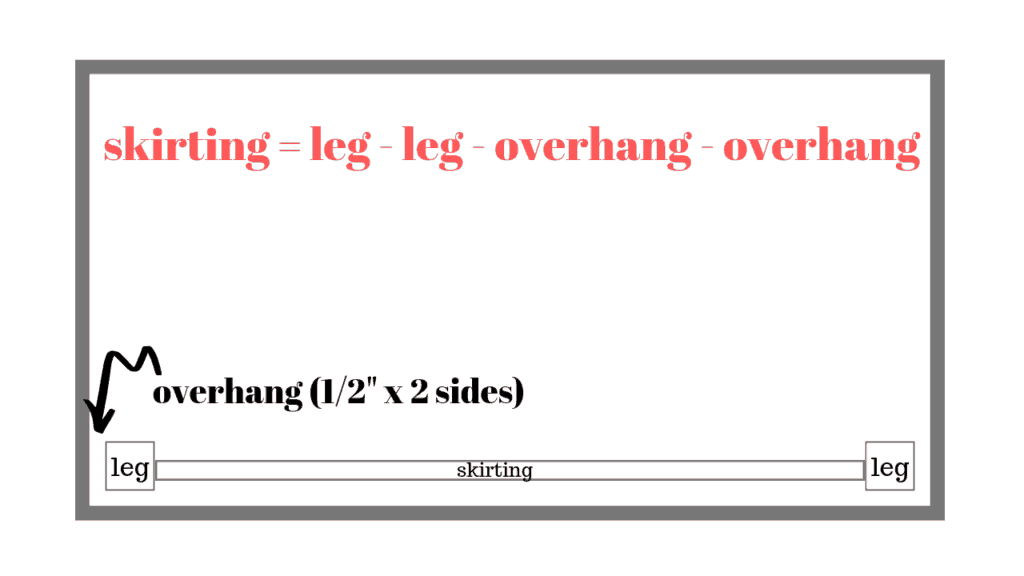
This same setup will be repeated for all 4 sides of the skirting. If you cut the butcher block square this should be a very simple process with the long sides measuring equally and the short sides measuring equally.
Step 5: Drill pocket holes and attach skirting to the newel post legs
This is where the kreg jig will make your life so much simpler and you won’t pull your hair out trying to drill angled pilot holes. The kreg jig also comes with a drill bit already setup to accept pocket screws with a washer head perfectly. Not only does this method hide the screws, but it firmly secures the two pieces of wood.
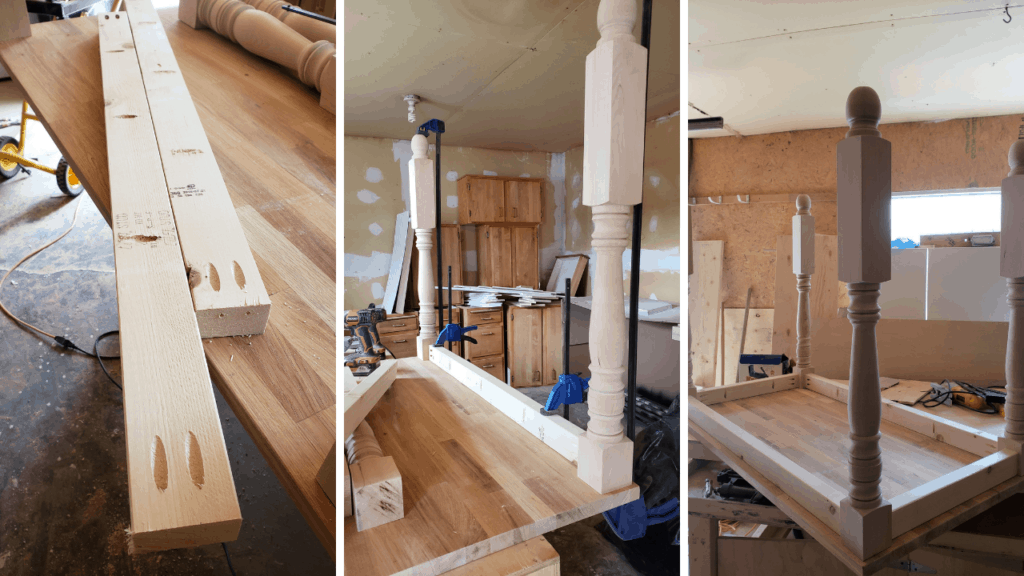
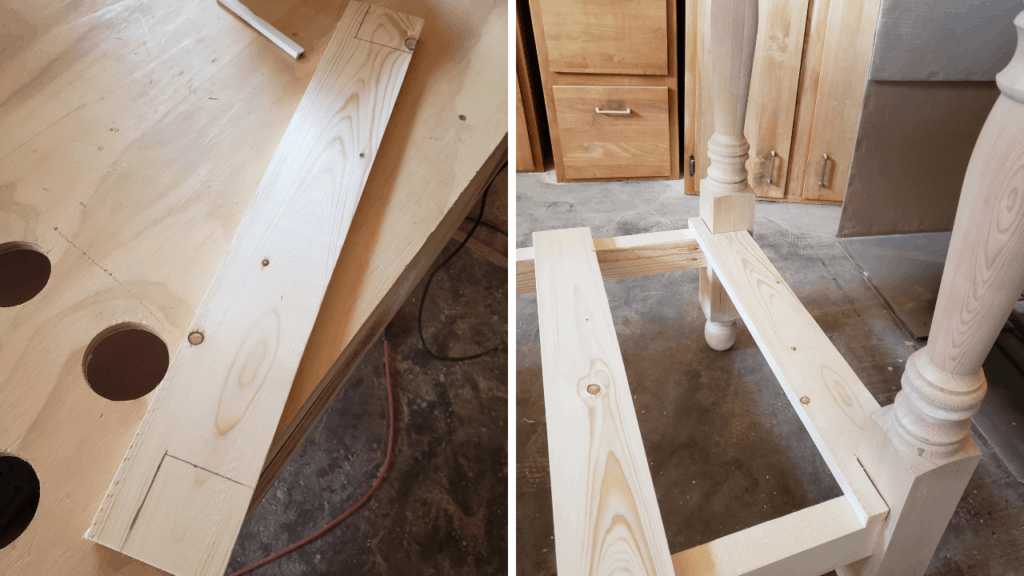
I drilled 2 pilot holes in the ends of the 2×3″s (far left photo above). These will be used to attach the skirting to the island legs. I clamped everything using trigger clamps to make sure it all fit together properly. This also doubles by pulling everything snug together before screwing (middle photo). Finally, work your way around the entire island attaching the skirting.
At this point in time, I also attached the skirting to the butcher block countertop using pocket screws every 12-14″. The butcher block will be removed later on before painting.
Step 6: Cut 2×3″s for lower shelf
This process is essentially identical to cutting the 2×3″s for the skirting. Cut the 2×3″s, drill the pilot holes with the kreg jig, and then screw them to the legs. This time, the pilot holes are only required at each end.
A quick tip if you are working alone- use trigger clamps mounted at the desired height to hold the 2×3″ in place while working. It’s like having an extra set of hands.
Repeat this process for all 4 sides and you will have a stable, custom butcher block island.
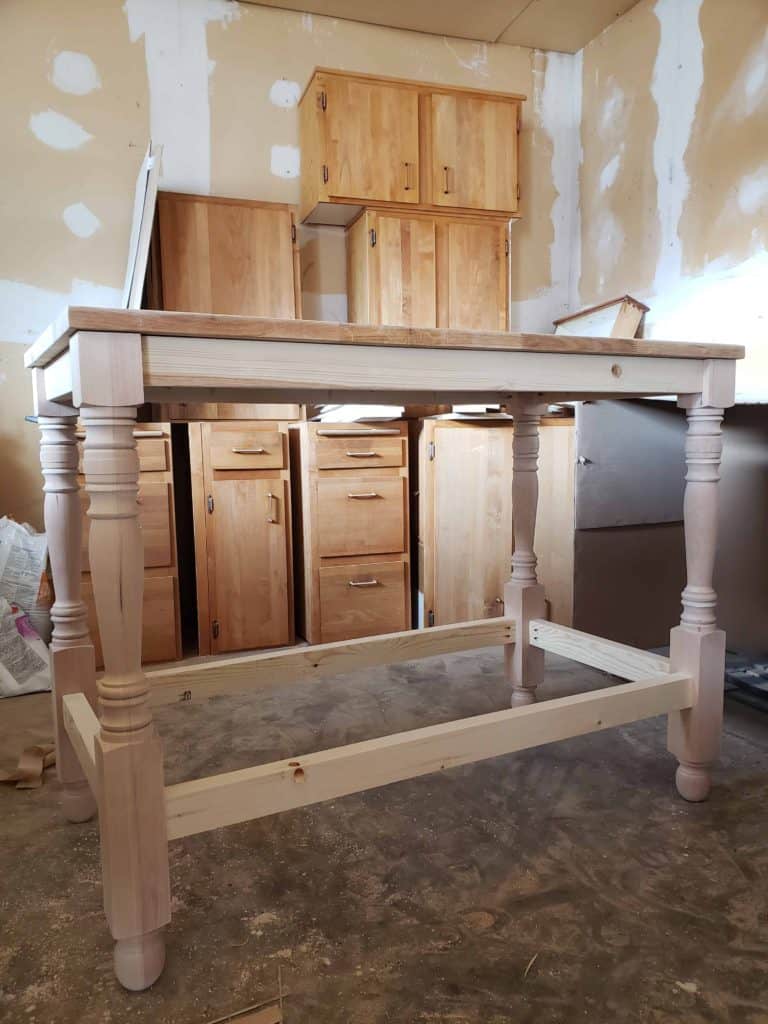
At this point you can take the project in whichever direction you choose. If you don’t plan on painting any of the lower framework, but rather staining, I would suggest using different lumber for the skirting and lower rails. I used basic spruce and wasn’t worried about it matching the hemlock legs. If I was going to stain the framework, I would have worked with matching lumber to ensure an even staining for the final result.
Step 7: Cut 1×4″s for the lower shelf
Sticking with the classic farmhouse style, I went with a slat style design for the lower shelf. This is as simple as cutting a bunch of 1×4″s to length and spacing them across the lower rail.
The one trick to this step is to start from the outside and work inward. The two outer slats need to be notched to accommodate the legs. By starting at the outer most edge, you will be guaranteed to use only full width pieces.
Continue cutting the rest of the slats. The lower shelf won’t be installed until after the entire framework has been painted.
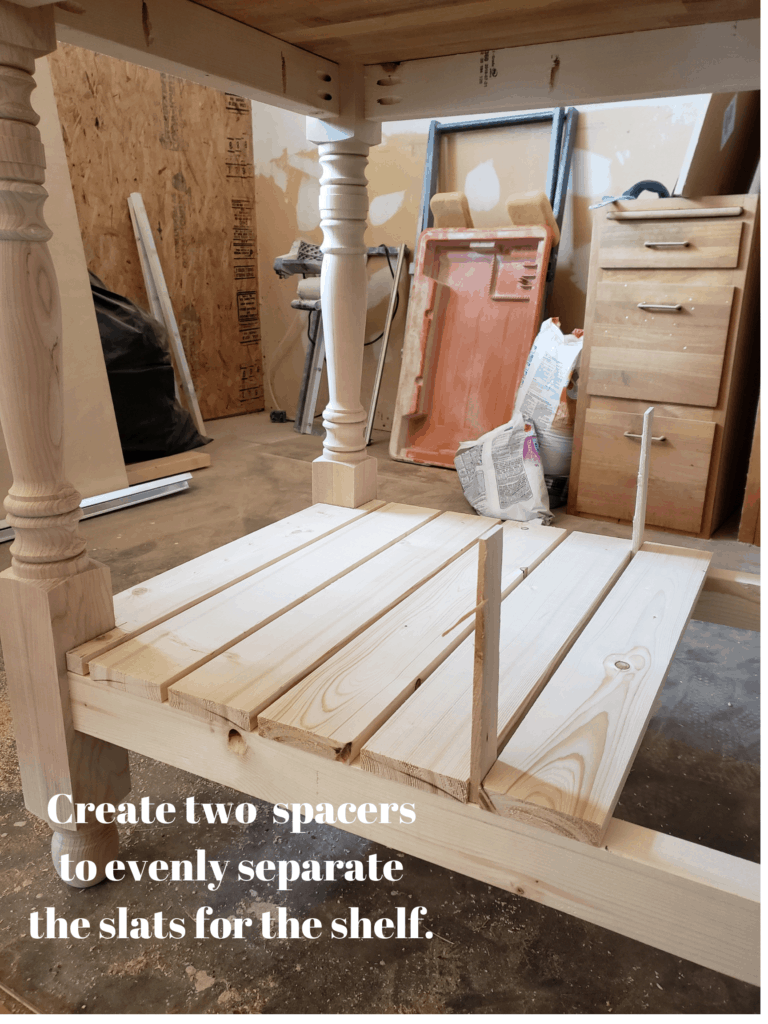
Use two spacers in order to evenly separate the lower slats of the shelf. You may get lucky like us and get away with using door shims, or you may need to create your own.
Step 8: Prime and paint the lower framework
Before starting this, I’d highly suggest removing the butcher block top. If you followed this build, it is only 10 screws to take it off.
I know there is some argument as to whether or not priming is actually needed with a lot of the paint+primer available today. However, with natural raw wood, I always take the time to fully prime before painting.
For this project I painted the island framework in a light shade of green. This is the just the right amount of pop and color to give the kitchen that extra bit of character.
Step 9: Reinstall and seal the butcher block island top
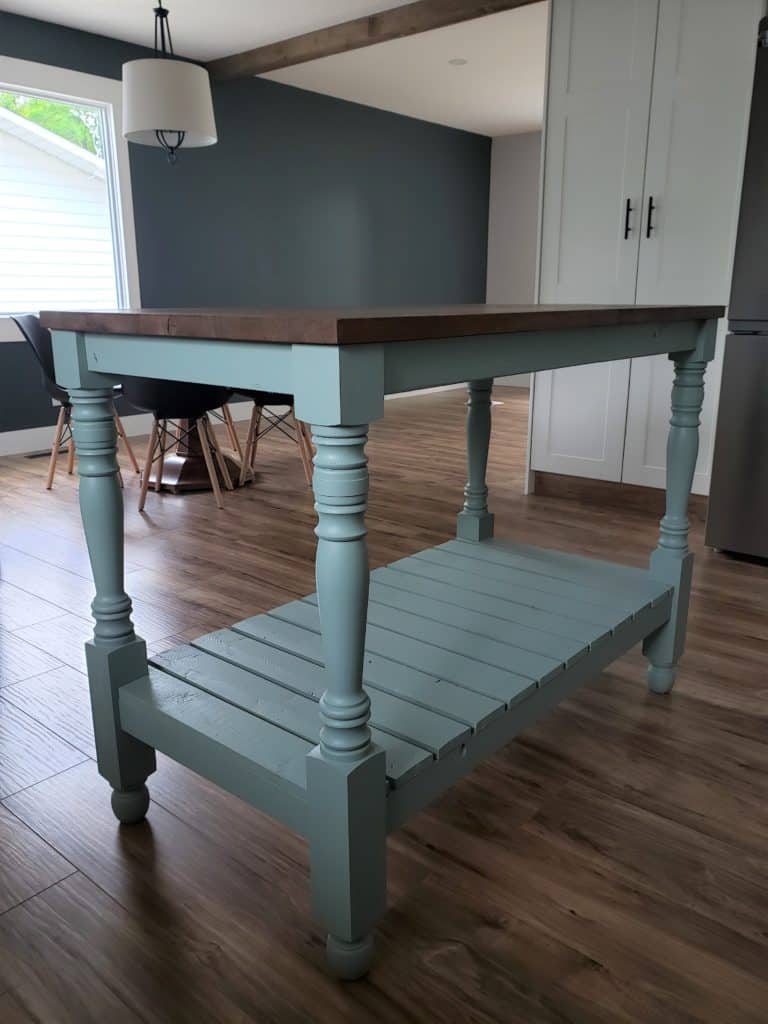
First, I stained the butcher block countertop to match the beams in the dining room, as well as the built in bookshelves in the kitchen. Once it was dry and I was satisfied with the color, it was time to seal. There is so many options for sealing butcher block. A common choice is basic mineral oil. This is a great choice for wood surfaces involved with food prep, but will need continual maintenance. I opted to go another route for the butcher block island at Hilltop, using a clear water based satin sealer. I chose this for a couple reasons- 1) this is not an island in my own home where I can maintain it, and 2) this sealer will take more abuse than basic mineral oil.
When I designed the main floor of Hilltop, I envisioned this kitchen island/dining room as a main gathering area for family and friends when entertaining. This means chip bowls, food drips, and drink spills. I wanted to leave the future homeowners with an island that will stand up to real world use, and not just a pretty piece of furniture that won’t last.
In the end, I love how the butcher block island turned out. It helps ground the brand new kitchen, providing some personality and character to the space.
As always, I love hearing about your projects and ideas! Have you built a kitchen island? Do you have any tips for our community? If so, be sure to leave a comment below!
How did you install the slats on the shelf
Love your island design! Could you tell me where you purchased your newel posts? Thanks!
I have an old cast iron farm house sink, do you think this build would be sturdy enough to hold the sink as is, or would you add another newel post in the middle of the long side. Obviously I wouldn’t put the table top on and build it to the dimensions of the sink. The sink is approximately 4 feet long and 2 foot deep.
Thankful for any suggestions or tips!