
Healthy soil is key to getting the most out of your backyard garden. Whether you are just starting to grow your own food or a seasoned veteran, performing a few simple soil tests can be the difference between beautiful red tomatoes and a plant that won’t even flower.
You can send a soil sample to a lab for an in depth soil test, giving you a detailed analysis of the nutrient levels and any deficiencies. This is very valuable information. However, this takes time, and isn’t always needed.
The best place to start is by learning about your soil’s texture, drainage, composition, pH, and mineral density. Believe it or not, there are a few easy soil tests you can perform at home.
Soil test 1) The squeeze test
This is perhaps the easiest place to begin your quest for perfect soil.
There are various compositions of soil. The first is classified as a clay based soil which is nutrient rich but typically slow draining. The second, sandy soil, is quick to drain but low in nutrients. Finally, loam heavy soils which are considered ideal. These are nutrient rich and retain moisture to create the perfect growing conditions.
To determine what type of soil you have, perform this soil test by squeezing a handful of soil into a ball and then poking it with your finger. If it crumbles you have some fantastic soil. If it stays in a hard ball, you have a clay based soil. Finally, if it won’t even form a ball, you have a sandy based soil. Luckily, there are several ways to improve your soil once you know what you are working with.
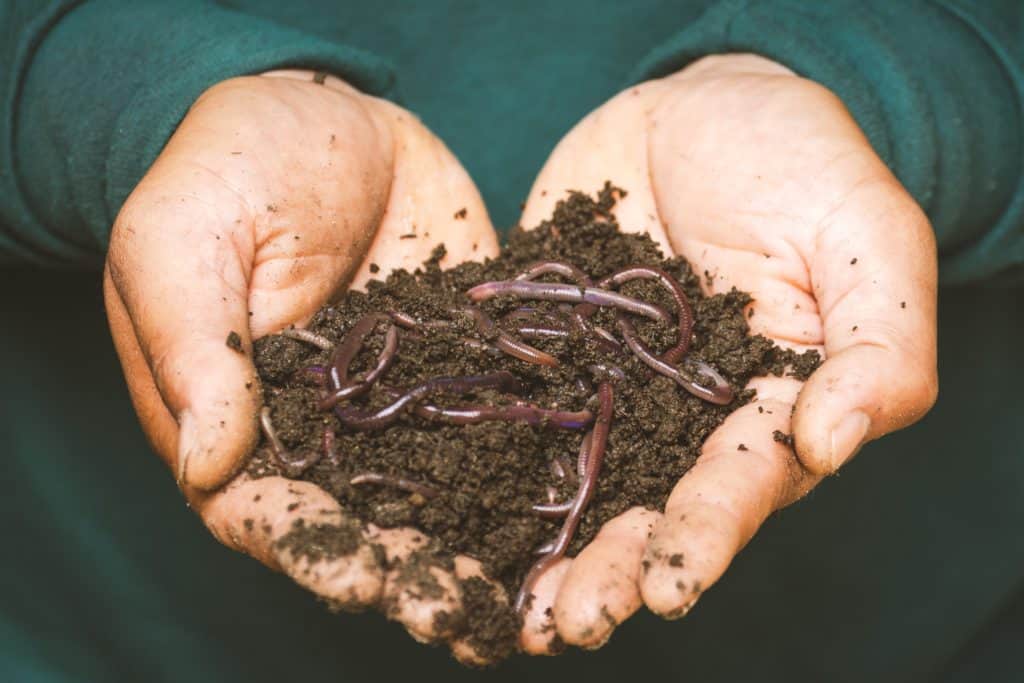
Soil test 2) Do you have worms?
Earthworms that is. Earthworms are a fantastic indicator of soil health. Lets dig into a little microbiology for a second.
Earthworms make it easier for plants to root out and grow by burrowing through the soil. Another benefit to this burrowing allows water and air to naturally move throughout the soil.
Earthworms increase the organic matter in soil by ingesting decaying plant matter for nutrition and recycling it into nutrients within the soil. The gut of the earthworm is full of beneficial microbes that help convert the nutrients into a form that is easily used and absorbed by plant roots. These microbes are also released into the soil increasing the level of nitrogen and phosphorus.
Finally, earthworms encourage a diverse population of microbes within the soil, including other beneficial bacteria, archaea, and fungi.
So how do we use earthworms for a soil test?
- Ensure the soil has warmed to at least 10 degrees Celsius (~50 degrees Farenheit), and is moist (but not soaking).
- Dig a hole in your soil one foot wide and one foot deep. Place this soil into a pot, onto a tarp, or on some cardboard.
- Begin sifting through the soil with your hands placing it back into the hole you dug. As you do this, count the earthworms as you go.
Hopefully you counted at least 10 worms. This simple soil test gives you a pretty good idea that your soil is in good shape. Fewer worms indicates there may not be enough organic matter in your soil. If this is the case, an addition of compost can get you moving along. Fewer earthworms can also indicate your soil pH is off preventing the proliferation of a healthy population of earthworms.
Soil test 3) pH test
The pH of soil indicates the level of acidity or alkalinity. pH is tested on a scale of 0 to 14, and soil should be in the 6 to 6.5 pH range. As the pH level rises, many nutrients decrease or become unavailable to plants, including phosphorus and iron. Alternatively, as pH levels drop, nutrient levels can even become toxic.
To conduct a pH soil test, you will need a pH meter. This will allow you to accurately test your soil, determining if any changes must be made.

Soil test 4) The drainage test
It is important to have properly draining soil. Too much moisture and the plants will drown, too dry and the plants will fry.
Much like the soil test for earthworms, this soil test involves getting your hands dirty.
- Dig a hole roughly one foot deep by 6 inches wide.
- Fill the hole with water and allow it to drain completely.
- Then, fill it with water again.
- Time how long it takes for the water to drain.
All of the water should drain in less than four hours. If it takes any longer, you have poorly draining soil.
These simple four soil tests will get you gardening in no time. However, before we move on there are a few other aspects of healthy soil we should discuss.
Soil test 5) Compaction
This is another dead simple test, and you won’t even need to get your hands dirty (though you are gardening…so shouldn’t you want to!).
Compacted soil prevents water and air movement, prevents earthworms from moving freely, and can even inhibit root development.
Insert a wire flag into the soil at various locations throughout your garden. Mark the point where the wire begins to bend at each location. Ideally, the wire should be easily inserted for 10-12 inches before bending. This means the soil is easily peneterable.
That’s all there is to it! Before this gardening season gets underway, take a few moments to perform these soil tests to get the most of your growing season.
Let us know the ways your test your soil in the comments below!
You might also enjoy:
No Comments