
Installing peel and stick wallpaper is one of the easiest ways to spice up a room in your house. Better yet, this hassle free project is a great way to get your feet wet in DIY projects.
So how easy is it to install peel and stick wallpaper? Easier than you might think.
If you aren’t interested in the written word and would prefer to watch a how-to video, you’re in luck!
How-to install peel and stick wallpaper:
With the video out of the way, let’s dive into a step-by-step instruction of how I install peel and stick wallpaper.
First a disclaimer, there are many ways of installing wallpaper. This is the method I use and find to be the best for consistency, look, and time to install.
The tools I use to install wallpaper:
- Small spreader (plastic)
- Large spreader/straight edge (metal)
- Small utility knife
- General utility blade
- Box level/Spirit level
Step 1: Make sure the wall is prepped properly
By this I mean, do not apply peel and stick wallpaper directly to “raw” drywall. Make sure the wall has been primed and painted. This allows the wallpaper to be re-positioned during install, as well as removed easily down the line.
Step 2: Mark out your walls
Start by marking out where your first sheet is going to hang. This gives a plumb reference line to hang the first row. Then make a small mark for each subsequent sheet needed for the remaining part of the wall.
This will tell you exactly how many rows of peel and stick wallpaper are needed, and lets you set out the first and last widths. I try and avoid applying any widths smaller than ~6 inches.
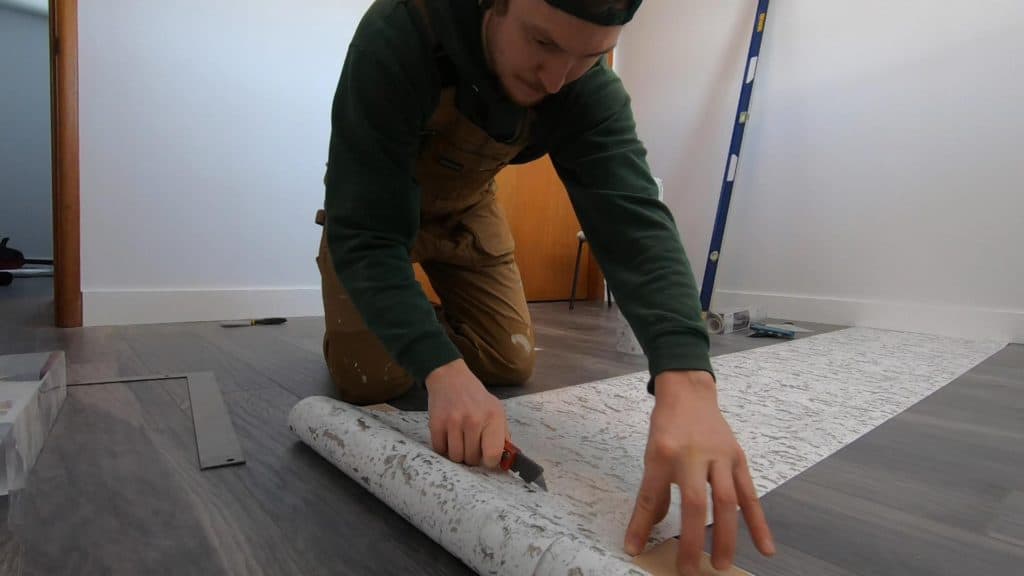
Step 3: Determine the length of peel and stick wallpaper needed
Measure from the top of the wall to the bottom and add a few inches for spillover (this will be cut off as waste later on). It is better to find out now if you are going to be short wallpaper, not halfway through the project.
Trim the peel and stick wallpaper to this length. This is also the time to determine if your wallpaper has a repeating pattern. In the case of repeating patterns, be sure to allow enough extra spillover so each row is properly aligned.
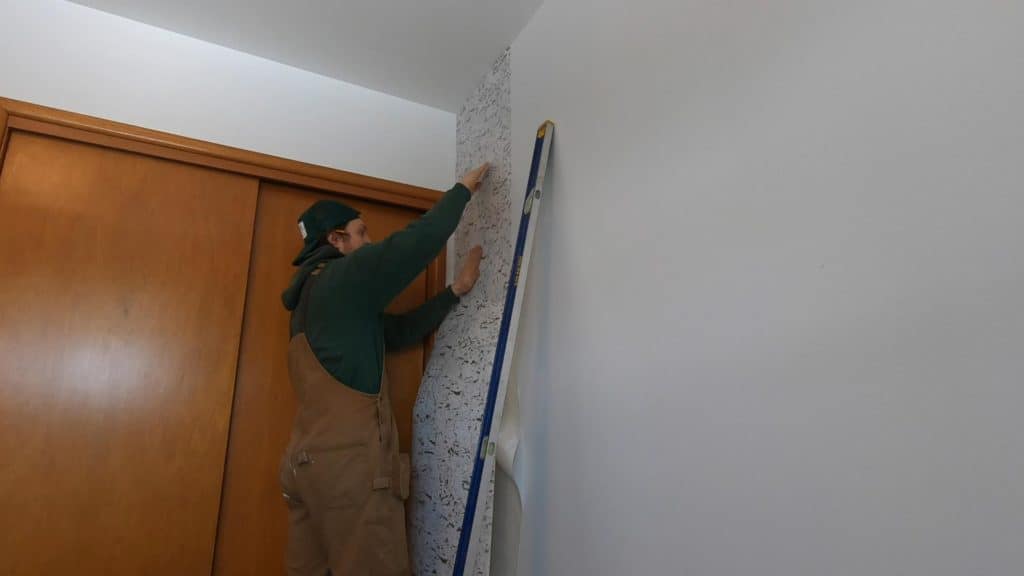
Step 4: Hang the first row of wallpaper
Too many people try and line up the wallpaper with the corner of the room. This is wrong. Corners aren’t typically perfectly square, and they are slightly rounded due to drywall putty. This makes creating a perfectly straight edge nearly impossible.
Instead focus on the open edge of the peel and stick wallpaper toward the center of the room. This is where a large level comes in handy to create the initial plumb reference line. Don’t worry if some of the wallpaper spills around the corner, onto the ceiling, or over the baseboard. This is actually a good thing. It will allow the wallpaper to be trimmed perfectly along each side of the wall.
Using the small flexible plastic spreader, work from the inside of the sheet toward the edges, ensuring all air bubbles are removed and no creases are present.
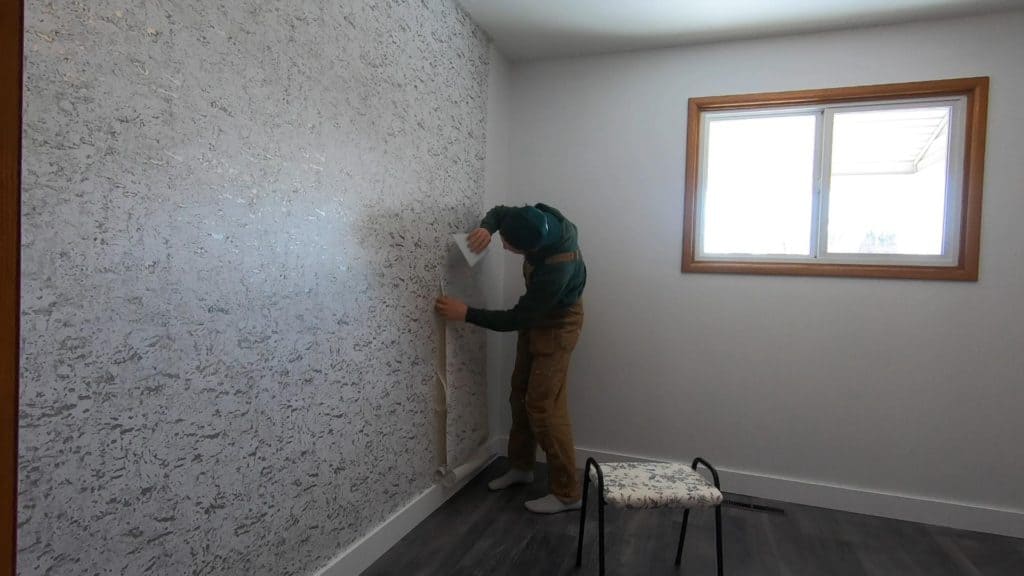
Step 5: Align the next piece of peel and stick wallpaper
Assuming the first piece of wallpaper went up nice and plumb, the rest will be a breeze. Align each subsequent piece of wallpaper and repeat the spreading process from the top of the wall to the bottom.
Remember to trim around any switches or outlets as you go. These need to be done in order to avoid any bubbling or creasing.
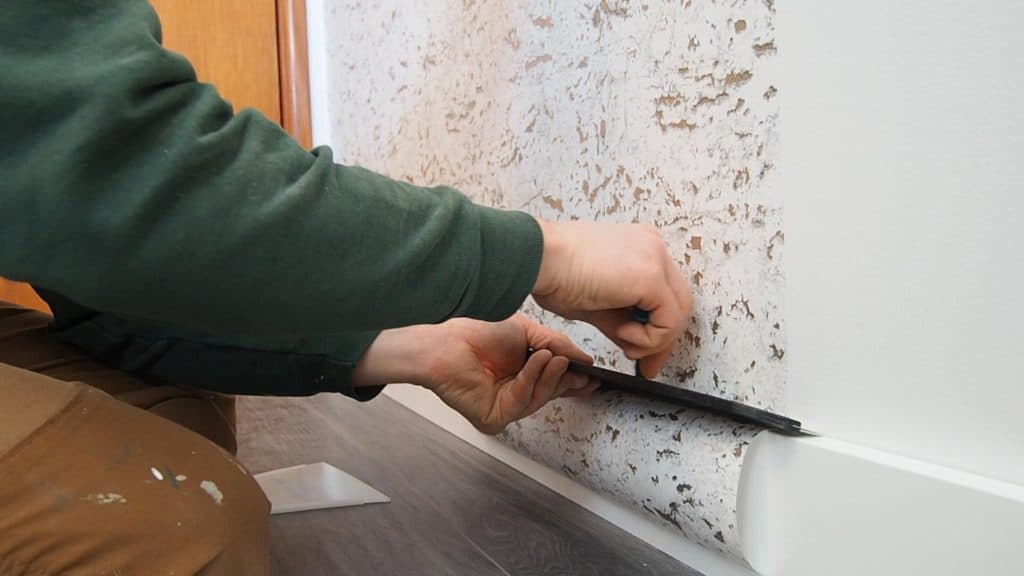
Step 6: Trim the excess wallpaper
Whether you choose to do this at the end or after each row of wallpaper is applied is up to you.
Using the long 23″ metal spreader as a straight edge, trim the excess wallpaper with the fine utility blade. The straight edge is flexible enough to conform to any of the slight imperfections in the wall. This gives the appearance of a perfectly straight trimmed edge, while simultaneously hugging every curve or bump in the wall.
Installing peel and stick wallpaper really is that easy. It’s affordable, quicker than painting, and can drastically improve any space in no time. If you ever decide you want a change, it’s as simple as pulling it off. No messing with soap and scrapers like traditionally wallpaper!
You might also enjoy:
No Comments