
This isn’t something I actually planned on writing, but after several requests from readers, here we go! The topic- creating a unique accent wall using painted MDF trim/millwork.
Let me start out by saying, thank you to everyone for their immense amount of interest in this project. When I first had the idea, I wasn’t quite sure exactly how it would turn out, but in the end, I am MORE than thrilled with the final result.
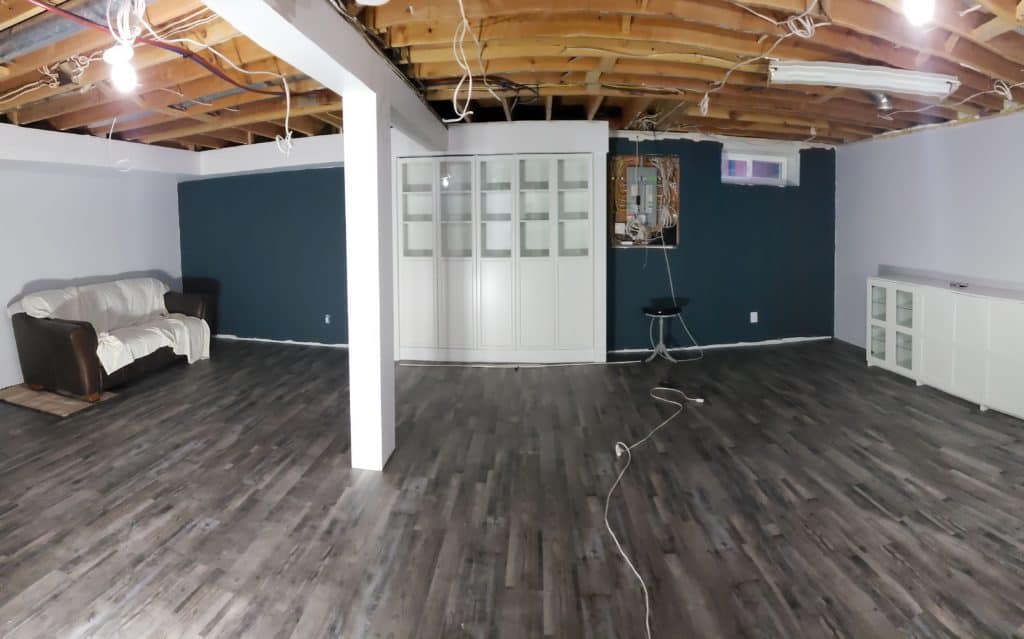
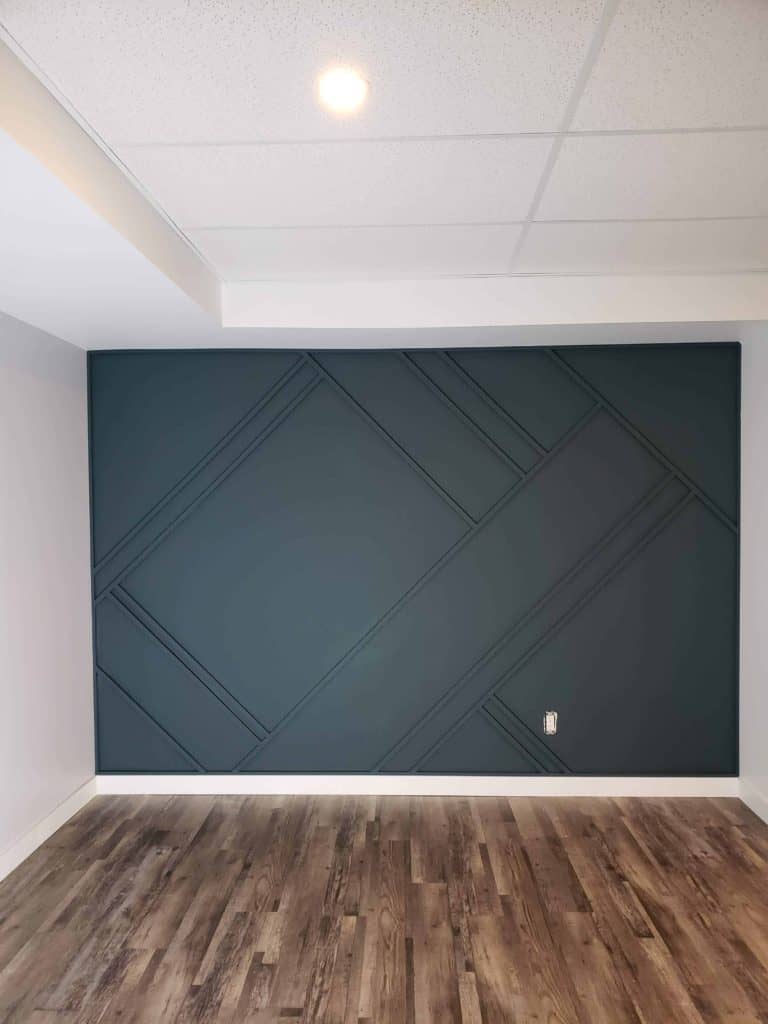
The goal was to create a unique, eye catching design/pattern that would contrast nicely with the built-in BILLY bookcases. It needed to be both bold as well as understated. It needed to be an accent wall, while blending into the space seamlessly. Was it possible? You tell me in the comments below!
Step 1: Choose the feature wall color
This may seem like an easy task, but let me assure you, picking the right paint color is never easy. I knew I wanted to go in the green tones, but not quite as far as forest green. I also didn’t want too much blue in the color, as this can come off turquoise.
After a trip to Benjamin Moore, we settled on Yorktowne Green. This is part of BM’s historical color palette, which by the way almost always produces the perfect color. If you are looking for a stately and timeless color, then I highly recommend starting your search with BM’s historical palette. This is by no means sponsored in any way by Benjamin Moore…just to be clear.
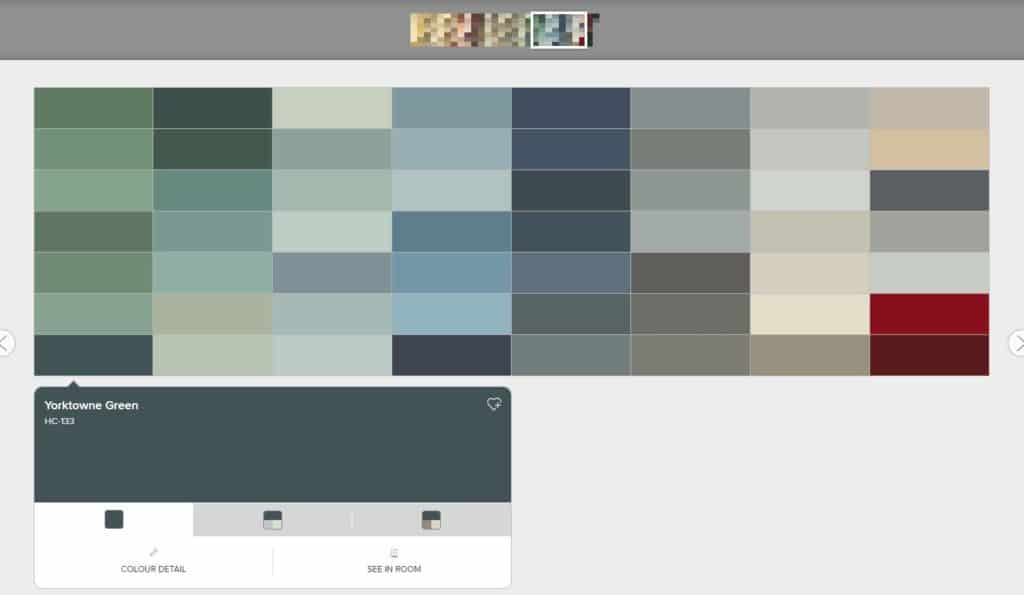
Another note about paint color- when you are working with dark colors, you want to choose a matte finish. Semi-gloss or even satin finishes can often look very shiny in darker colors. Before adding any millwork to the soon to be accent wall, I painted the entire wall with 2 coats of paint.
Step 2: Create the framework
I started out by creating the ‘back’ baseboard. This was the first piece of framework and sits behind the baseboard. I cut this piece exactly 1/2″ taller than the actual baseboards I installed (4″ piece of MDF for back baseboard). Therefore, once the baseboards were installed, you could still see 1/2″ of the MDF framework above.
From there I continued framing out the wall with 1/2″ x 1/2″ pieces of MDF (medium density fiberboard). This gives me a perfectly clean edge between the dark feature wall and surrounding walls, as well as an edge for the rest of the millwork to bump into.
I continued the framework around the entire section of wall. In addition to the ‘back’ baseboard, this meant one piece along each side, as well as under the bulkhead. I repeated this on the other section of wall to the right of the built-in BILLY bookcases. Now the entire accent wall has a 1/2″ by 1/2″ MDF frame.
Step 3: Cut and paint MDF pieces for the feature wall
I set up my table saw to rip 1″ wide pieces, and I ripped a whoooole lot of them. I was pretty sure I had a photo or video of this somewhere, but it turns out I don’t. So basically picture a whole pile of 8′ long MDF pieces that are 1″ wide. I then painted all of these Yorktowne green. You will notice a trend throughout the vast majority of my work- I always try and apply at least 2 coats of paint to trim before installing.
Step 4: Install the feature wall millwork
Now comes the fun part, watching it all come together. I’d like to tell you I had a grand design drawn out of exactly where each piece was going to sit and what size they needed to be cut, but in reality I had this:
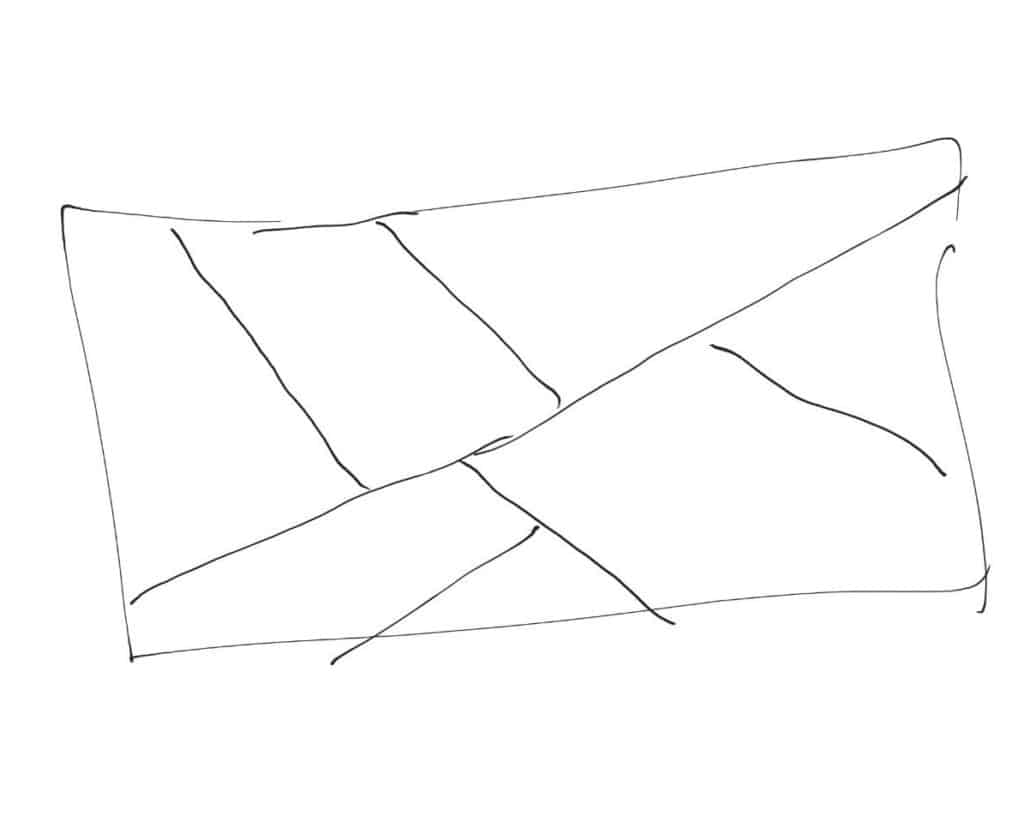
If you guessed a super rough sketch on my Note 9, you would be correct. I think the actual feature wall turned out a wee bit better.
Unfortunately, when it comes to a random pattern such as this, I think it’s best to go with the flow and trust your gut. I had a rough idea in mind of what I wanted the accent wall to look like and I rolled with it. All of the millwork was installed at a 45 degree angle from the floor. I did this for a couple of reasons, 1) it is a little more modern looking than standard horizontal trim, and 2) using the same angle throughout kept everything looking organized and not chaotic. You’ll notice how this is very different from the drawing above where everything is at random angles.
I used a brad nailer with 2″ brad nails in order to attach the actual MDF strips to the wall. I continually checked the distances between parallel trim pieces to ensure I was remaining at the correct angles, maintaining the same spacing. In addition, I used a speed square to verify my 45 degree joints, as well as 90 degree perpendicular joints. Keeping everything square and in line really helps pull the entire design together.
Step 5: Fill the nail holes and joints with drywall mud
In order to get that smooth buttery look without seams or nail holes, they all need to be filled. I find the best way to do this is with drywall mud/putty. It binds MDF extremely well, dries quickly, sands easily, and isn’t as annoying as caulk. As handy as putty knives are, your finger will be your best friend for this task.
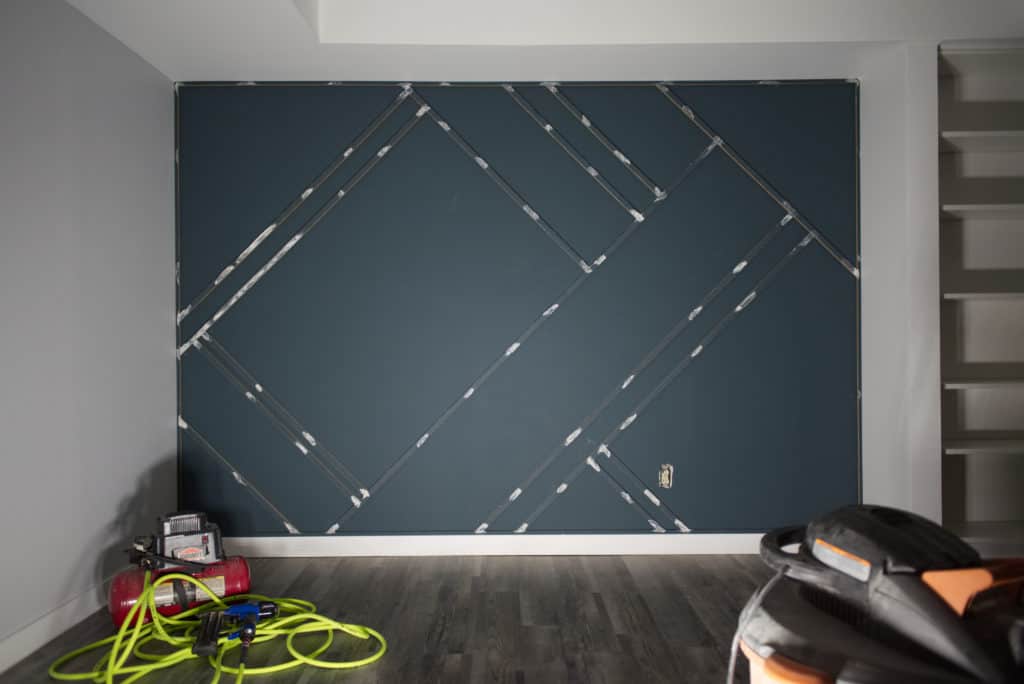
Once the mud has had a chance to dry, give it a light sand with 180 grit sandpaper (or something close to it). You shouldn’t need to sand so much that it starts taking the paint off. Just enough to create a smooth joint.
Step 6: Paint the feature wall…again
This time round, the painting is going to be far slower. I used a few different paint brushes here- a 1 1/2″ standard bristle and a fine tip artists brush worked the best. The fine tipped artist brush is necessary for the tight corners and getting in close to the white walls, whereas the standard bristle brush covered the rest of the accent wall. This will require two coats of paint to match the rest of the accent wall.

That about wraps this project up. It’s one of those projects that looks a lot more complicated than it really is. In the end I am over the moon with how the two accent walls turned out. Please leave your thoughts in the comments below!
Jeff, love the wall design. I’m curious though, do the corners collect dust? I’d like to do something like this in my two storey stairwell but don’t want to have to get up on a ladder every month to dust the corners. Thanks
p.s. love the color you chose as well.
Sorry, also meant to ask the size of the wall you did this on. Thanks
Hi Cleo- thanks for you interest. First of all, I think this would look great in a two-storey stairwell. As fas as dust collection goes, this wall hasn’t been up long enough to say for sure. We intentionally went with 45 degree angles with few horizontal pieces to try minimize dust collection. Our wall was 7 feet tall by 10 feet wide on one side of the built in Billy bookcases and 8 feet tall by 10 feel wide on the other. If you do go this route, I would suggest splurging on longer trim pieces to minimize joints. This helps keep the pieces square and in line without changes in angle. Good luck and I hope you let us know how it turns out!