

We are nearing the end of our first project at The Homestud. The Beige Bungalow is nearly complete, and today I want to focus on the master bathroom design so you too can have a hotel like suite in your own home.
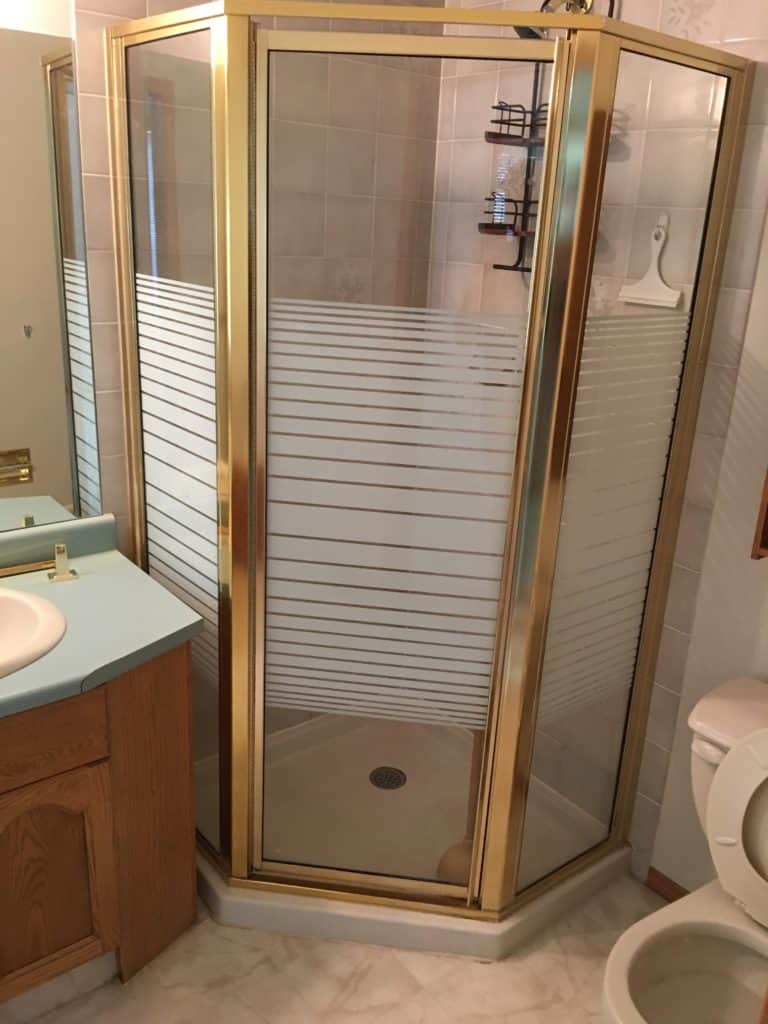
Similar to some of the other rooms in the house, the master bathroom received a MAJOR overhaul. We started with your typical 90’s master bathroom- oversize jet tub, plain double vanity, ugly corner shower, and the toilet.
The old master bathroom
Memm…ories…
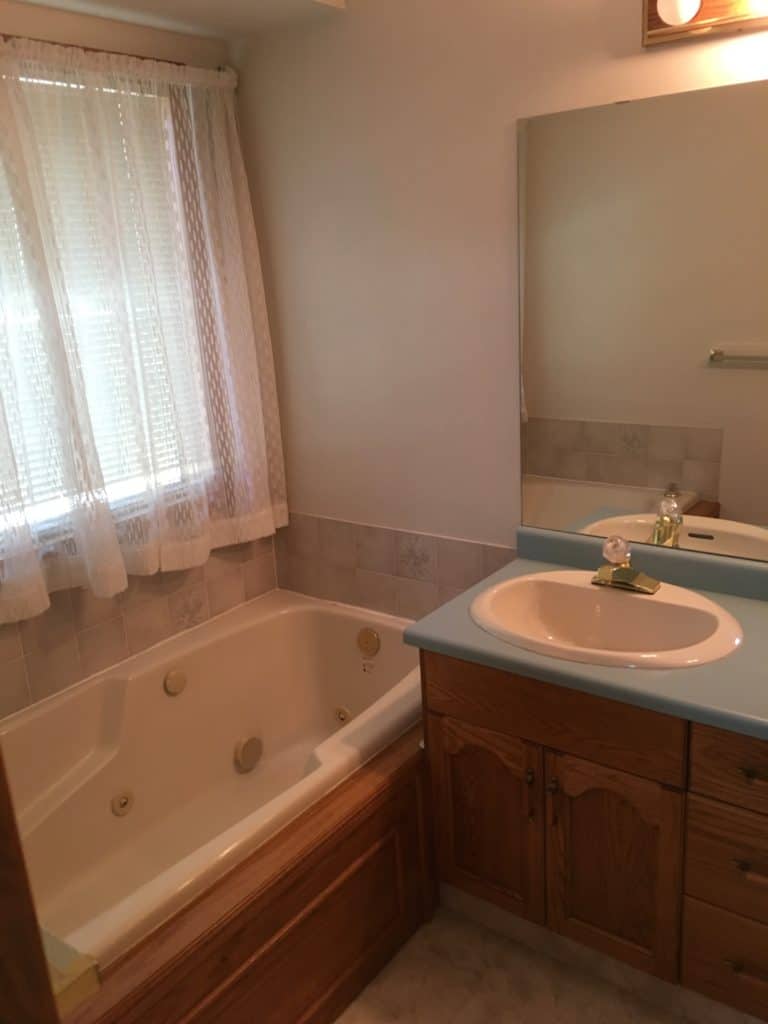
Just look at those curtains….
Gold is back right?! Maybe we should have salvaged the faucets and shower surround for later use.
Our first goal was to demo everything…and I mean everything. One thing to remember when demoing rooms like a master bathroom with possible moisture damage is to keep an eye out for black mold- if you start seeing a lot (~4 sq ft or more), it’s time to call in the professionals. Lucky for us, we were completely mold free and clear to keep on truckin’.
Master bathroom design
So what exactly was our new master bathroom design going to look like?
To begin, the double vanity was going to bump slightly to the left. A 60″ walk-in glass shower will sit in place of the old shower and toilet location. The toilet will now sit between the shower and vanity. The goal is to create a solid master bathroom layout that feels open and airy. Plus, with two other bathtubs in the house, we didn’t feel the master bathroom needed one as well. We wanted to create a spa like feeling where anyone would want to relax and unwind.
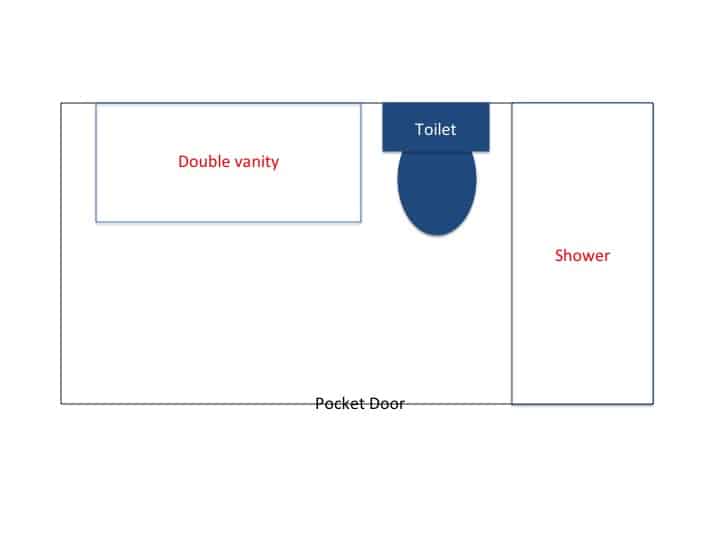
The key to a successful master bathroom layout is utilization the space effectively. Had there been more square footage in the bathroom, we likely would have included a tub, make-up vanity, or storage units. A well thought through layout will seamlessly blend in with a good master bathroom design.
Master bathroom construction
While I captured many before photos- I seem to be lacking in the area of progress photos for this portion of the renovation. Before we started putting everything back together, we needed to get some of the less exciting business out of the way. We added 1/4″ plywood to the subfloor to level it out with the rest of the house, all new plumbing was installed, and made some minor electrical changes to account for the shift in vanity location. It goes without saying that any mechanical changes should be completed by a licensed professional.
The shower setup
The master bathroom shower was water proofed with Schlueter’s KERDI system. I believe it is one of the best waterproofing systems on the market- plus their shower kit comes with everything you need to get the job done. Our kit came with the Schlueter membrane for the walls and base, corner seams, and around plumbing, as well as the pre-tapered shower base and curb. We also included a specific niche that recesses into the wall for holding soaps and shampoos.
A master bathroom design can look as beautiful as you would want, but without proper preparation it will eventually fail. Schlueter systems may be expensive but they are well worth the investment. I should also say that I am not affiliated or sponsored by them in any form, just a big fan of their products.
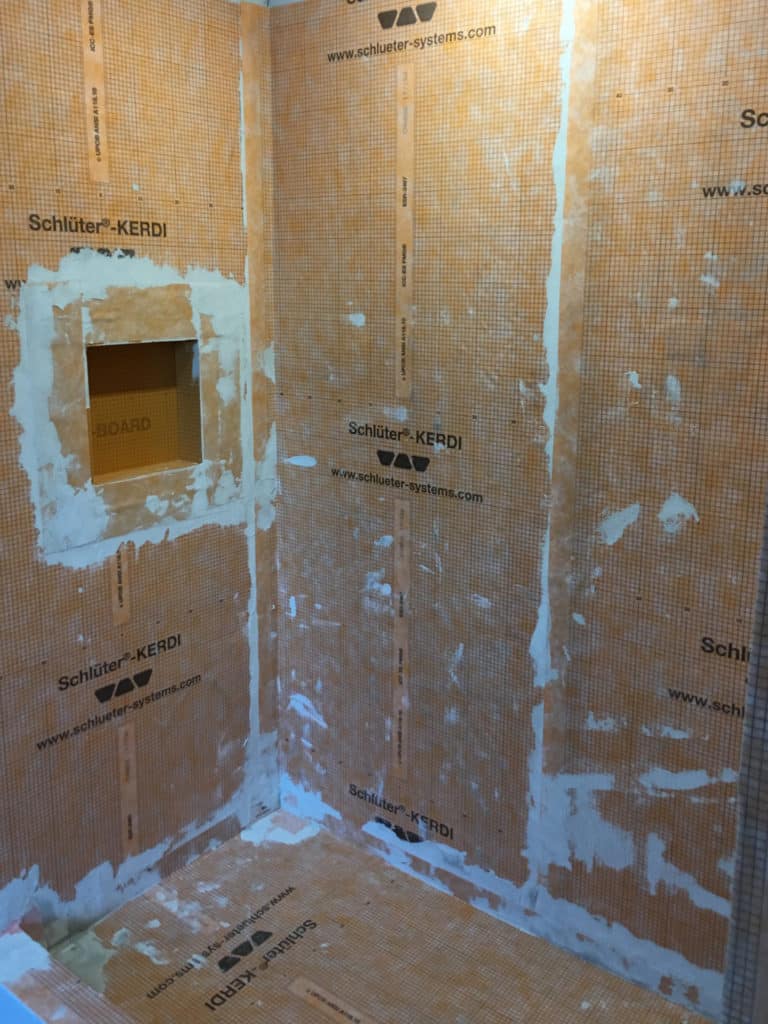
Give this time to setup and a thorough water test before moving on to tiling.
This is where master bathroom design intersects with construction. In the shower, we used a 12×24″ glossy Carrera look-alike ceramic tile for the walls. These were installed in a stacked vertical orientation to make the room feel taller and more spacious. This was finished off with a slate grey grout to really make the tiles pop.
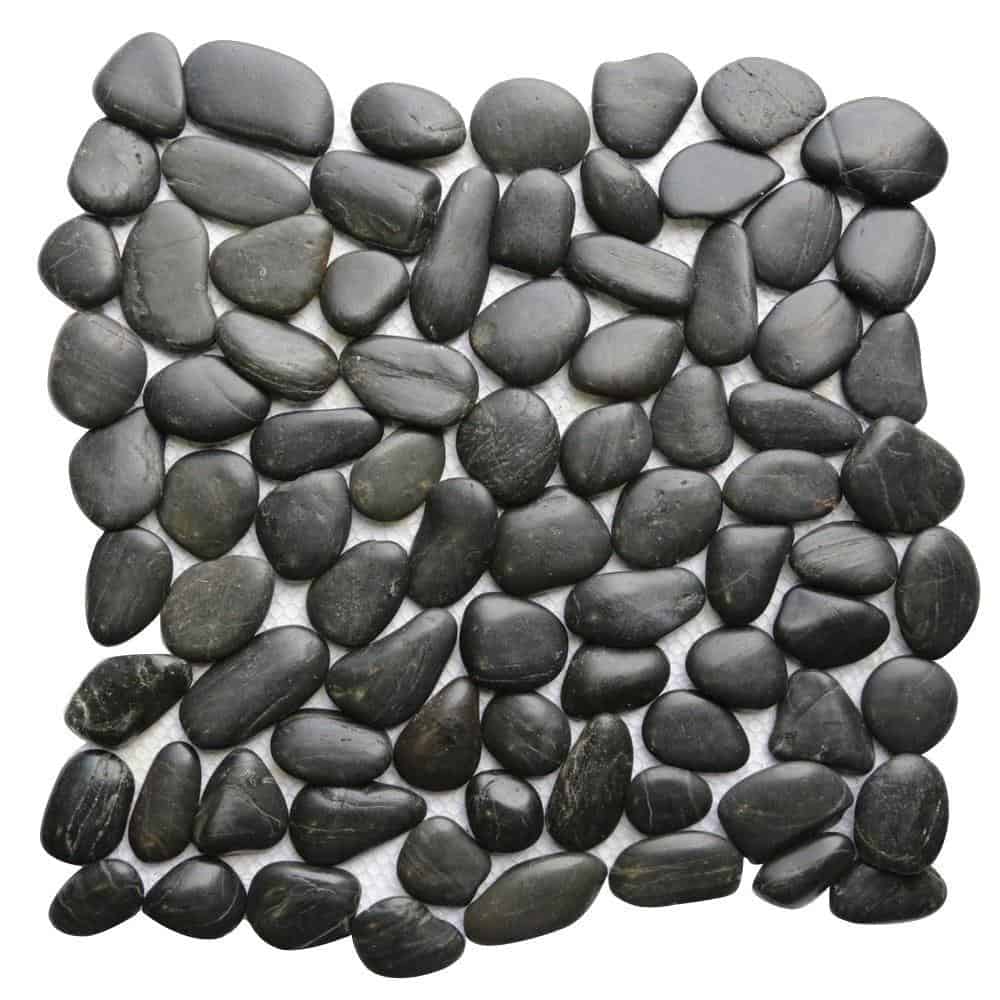
On the shower floor and curb front, I wanted to introduce some natural elements and went with black natural pebbles. In any master bathroom design, the shower floor is a great place to add some serious pop! These pebbles not only look great, but are like mini massages for your feet.
Master bathroom flooring
There are many flooring choices available when putting together a master bathroom design. Historically, the most commonly used flooring products are likely tile (more expensive) or roll vinyl (cheaper). However, today we have even more options.
In the master bathroom (as in the main bathroom) we went with vinyl flooring. However, this time I wanted to use a vinyl plank with a wood grain pattern. This adds another natural element to the overall bathroom design. I love vinyl floor for it’s waterproofness, ease of install (a few hours), and overall cost (cheaper than tile). Plus some vinyl options even look like a natural hardwood.
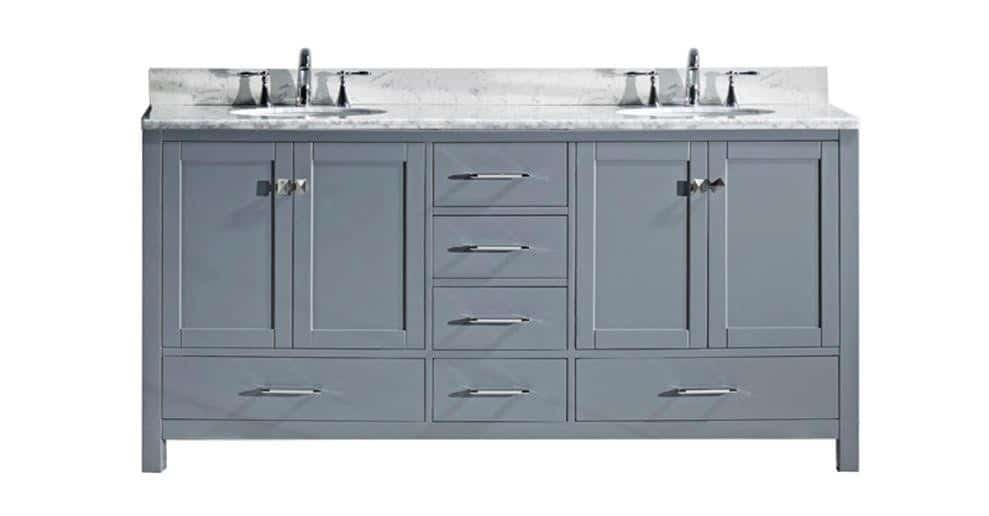
The vanity- here we go again…
The first thing any person would see in this master bathroom design was going to be the vanity. It is front and center as you walk through the door. Normally I hate picking vanities because everything I like costs thousands of dollars more than the budget will allow. However, this time it was fast and on budget! Thankfully we had some reinforcements for this install as the vanity weighed in at ~300 lbs. The new master bathroom was starting to come together.
Here is a progress shot of the master bathroom coming together:
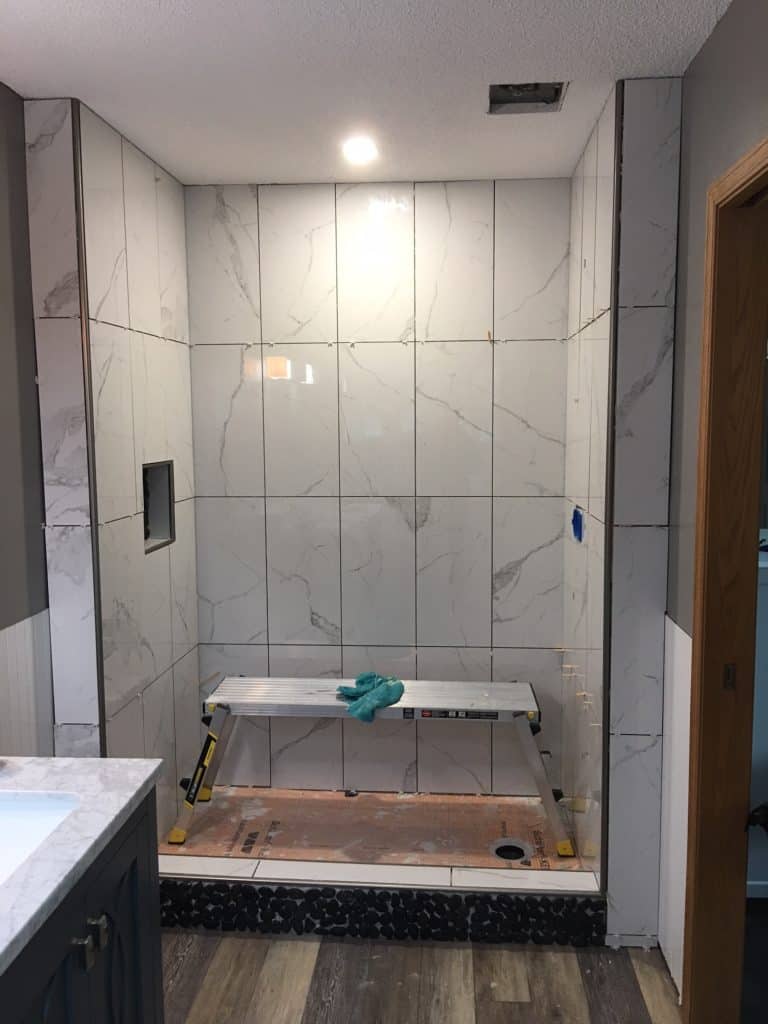
If you look closely you can also see a few other parts of the master bathroom design popping up. For example, the wainscoting was starting to be installed around all of the walls. I’ll be honest- there was some serious glue build up and drywall holes from where we ripped out the old Jacuzzi tub, which is what initially led to the idea of wainscoting. Yes it’s a little more expensive, but it saves a ton of time and adds oodles of character to the master bathroom design.
From this point on we were more or less in the finishing stages of the master bathroom renovation:
- The rest of the pebbled floor tile was installed
- We grouted everything (same colour as the kitchen backsplash)
- Faucets were installed on the vanity and in the shower
- Chair rail was added to the wainscoting
- Toiled was installed
- Last but not least, the shower glass went in.
The overall master bathroom design reveal!
The finishing touches are what really pulled the entire master bathroom design together.
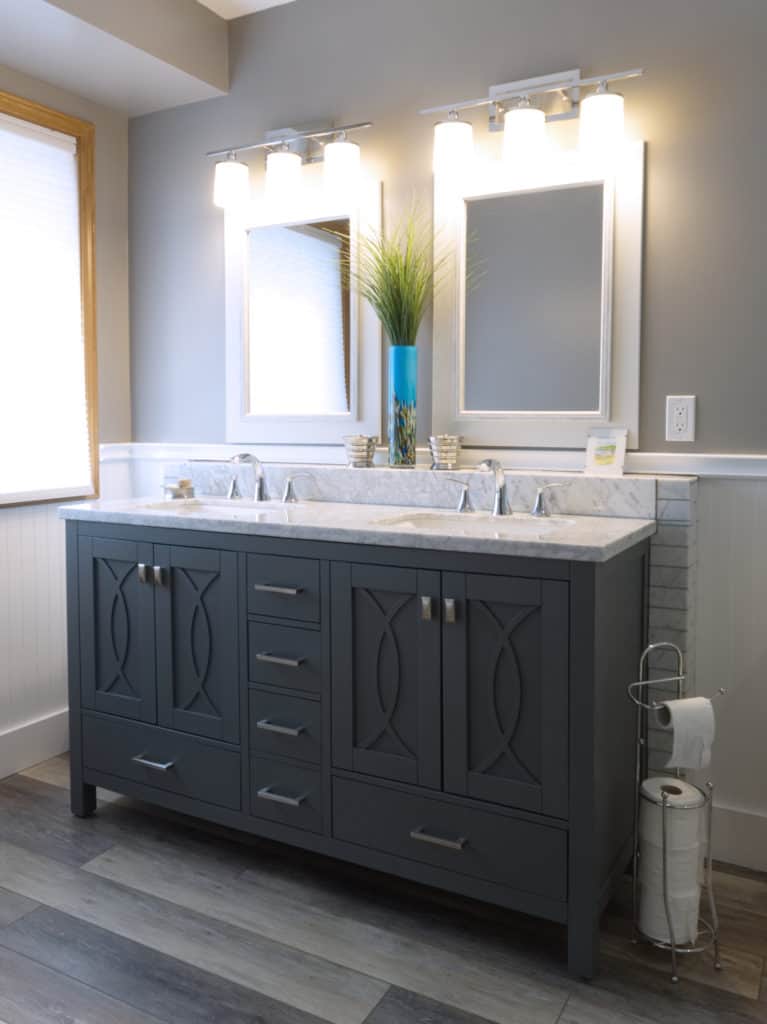
As soon as you pass through the master bathroom door you are greeted with a stunning double vanity and tiled surround. You may also notice how the vanity is pulled off the wall by 6″- this was to accommodate the plumbing (false wall) due to the open vanity base. In this case we needed to get creative as this was an exterior wall that sat directly above the foundation; meaning no access for our plumbing. With some creative thinking and good bathroom design work we were able to both hide the plumbing and create a built in shelf above the vanity. The false wall was finished in 2×4″ Carrara tile to compliment the larger rectangular tiles in the shower.
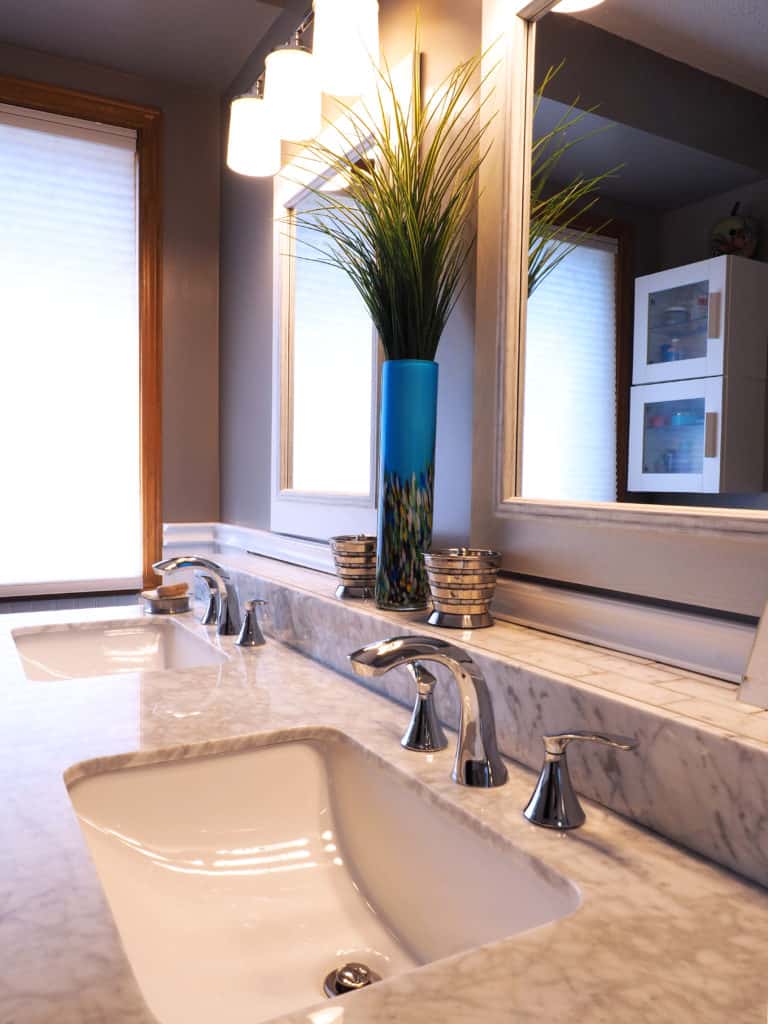
This photo gives you a better idea of how we incorporated the solid stone vanity backsplash with our smaller Carrera marble tiles. You can also see the clean minimalist faucets. We chose faucets that would compliment the set in the shower- all are finished in chrome, with clean, simple designs.
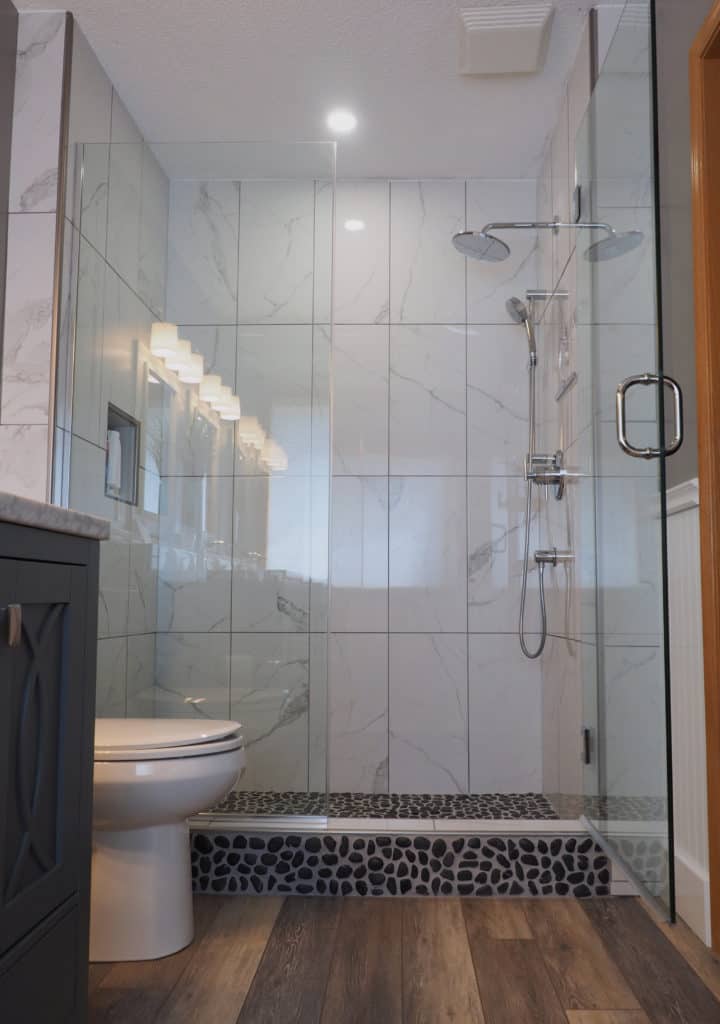
The beeeeautiful new walk-in shower is the true stunner of the renovated bathroom. It’s spacious, elegant, yet inviting. Walking on the pebble tiles instantly transports you to the edge of a river or lake where you can’t help but feel relaxed.
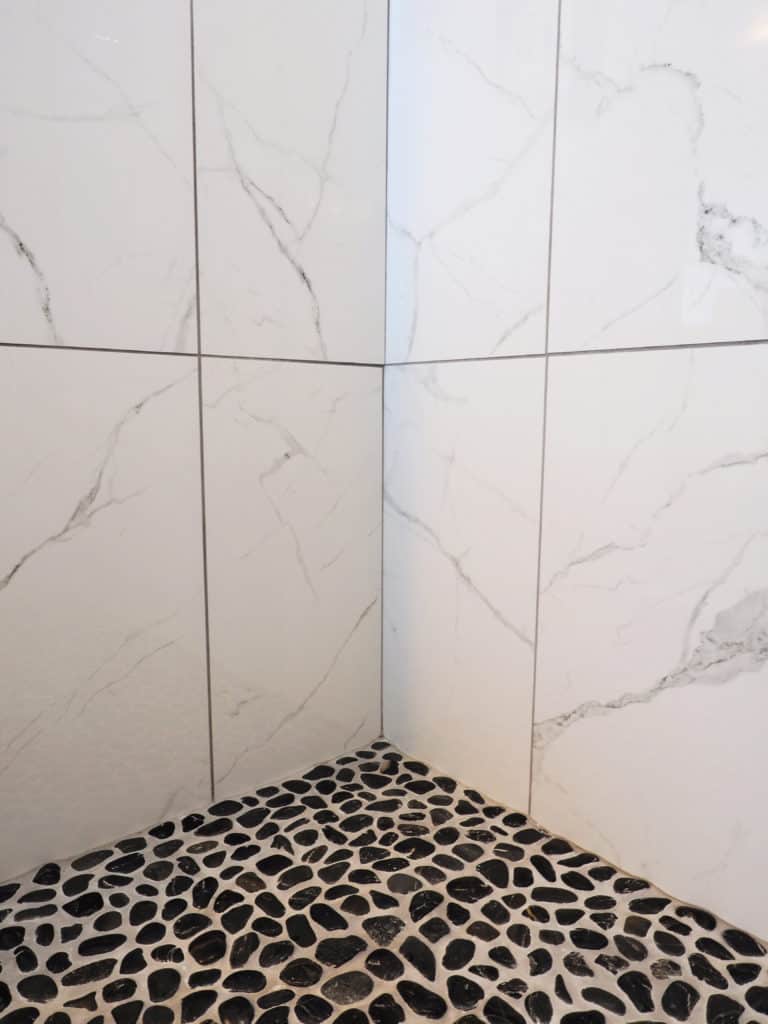
Grouting the pebble floor:
Above you can see the close up view of how our floor and wall tile fit together. I will be honest, grouting the rounded pebbles was an exercise in patience. If you are ever faced with such a task, I found the float helpful to spread the grout initially, but your fingers will definitely come in handy for the smaller gaps. Also, be prepared to wash, and wash, then wash some more, and then continue washing. The more you wash, the more grout you will wind up removing from between the pebbles. Then just stop when you are happy! You could also consider piping in the grout, which may speed up the process and result in less wasted grout.
Master bathroom design tips:
- Start by thinking about the overall master bathroom layout. The layout will often narrow down the theme of the design.
- Determine an overall theme for the bathroom design. By this I mean modern, farmhouse, mid-century, minimilist, etc.
- Choose elements that fit within this theme- tile type and color, vanity, flooring, etc.
- Add some natural elements for warmth. This doesn’t need to be real rock or wood. In a modern bathroom it can mean smooth Carrara marble.
- Add personal elements to prevent it from feeling like a magazine page.
What do you think of the end result? Is there anything you would change? We would love to hear from you in the comments section below!
What a dramatic change, it looks great!
With thanks! Valuable information!
Incredible change, love the double vanity unit! Trying to convince the other half that we should have one, will show her this!!
I’m having the shower done(taking the bathtub out) and also using 12×24 tiles, looking at your’s I see that you put them vertical and the walls look longer. Don’t you think? Was that the point? Or you just liked them that way. Your bathroom looks super.
Hi Aida – Great eye, and that is exactly why we went vertical with our shower tiles. It really draws the eyes up the wall giving the look of higher ceilings. Thanks for the comment and be sure to come back and fill us in on how your bathroom reno turned out!
I love the twofold vanity unit. I’m having the shower done and furthermore utilizing square tiles, taking a gander at your’s I see that you put them vertically and the dividers look longer. Wouldn’t you say? Was that the point? Or on the other hand, you simply preferred them as such. Your washroom looks super and I’m desirous.
Hi Nancy- our tiles are are 12×24” and we placed them vertically to try and draw the eye upward, making the room feel taller. Thanks for the compliments and good luck with your project!