
Long time, no write…talk…read.! Whatever it may be, it has been a while since we last posted. It is for good reason though! We opted to take a break over the holidays to spend time with family and friends, away from the hustle and bustle that are renovations. Further, we also ripped out the main floor bathroom at the Industrial Farmhouse. So, now we have two projects on the go, at two different houses, with two very different design styles. Anywho, enough rambling and back to the topic at hand- the fireplace at the Beige bungalow.
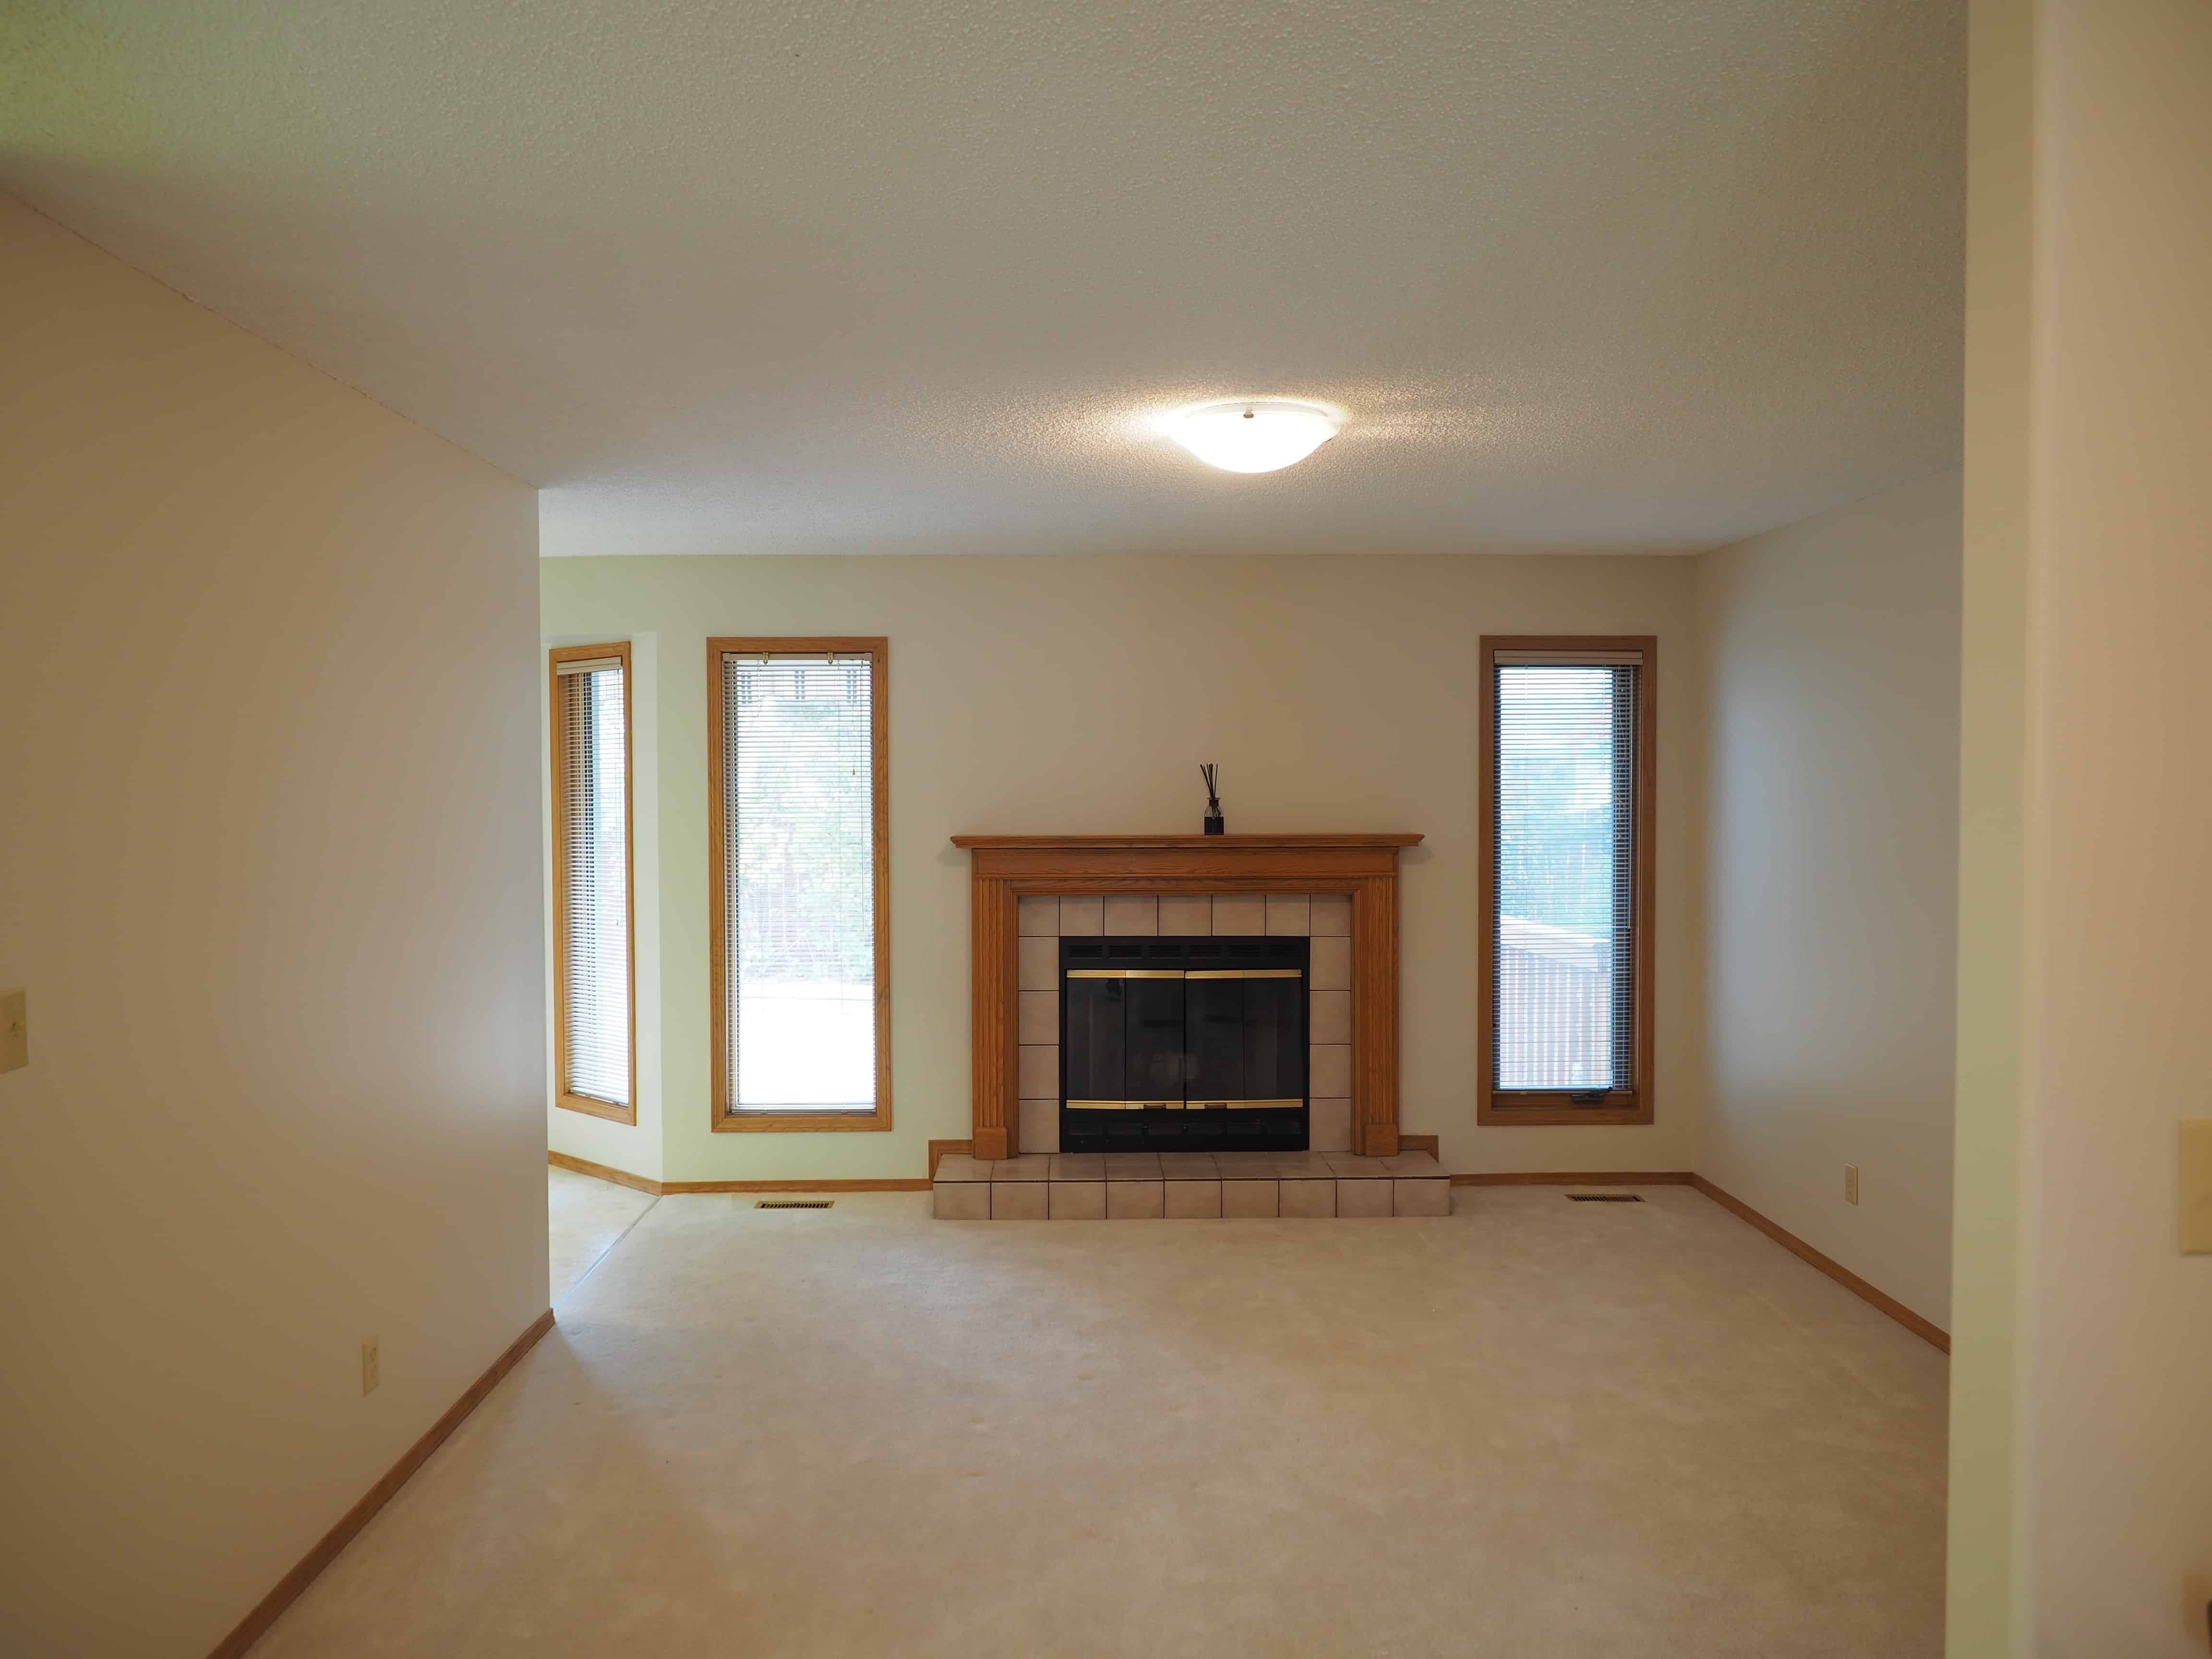
Originally the house contained a wood burning fireplace on the main floor. Nothing appeared wrong with it, but we were more interested in the simplicity and efficiency of a gas fireplace, never mind the potential insurance issues. This was one of the those projects that kept getting pushed off even though we knew it had to get done. Finally, the time had come. The family room and kitchen were nearing completion and the only thing standing in the way was the old wood fireplace.
This is what the fireplace looked like prior to starting:
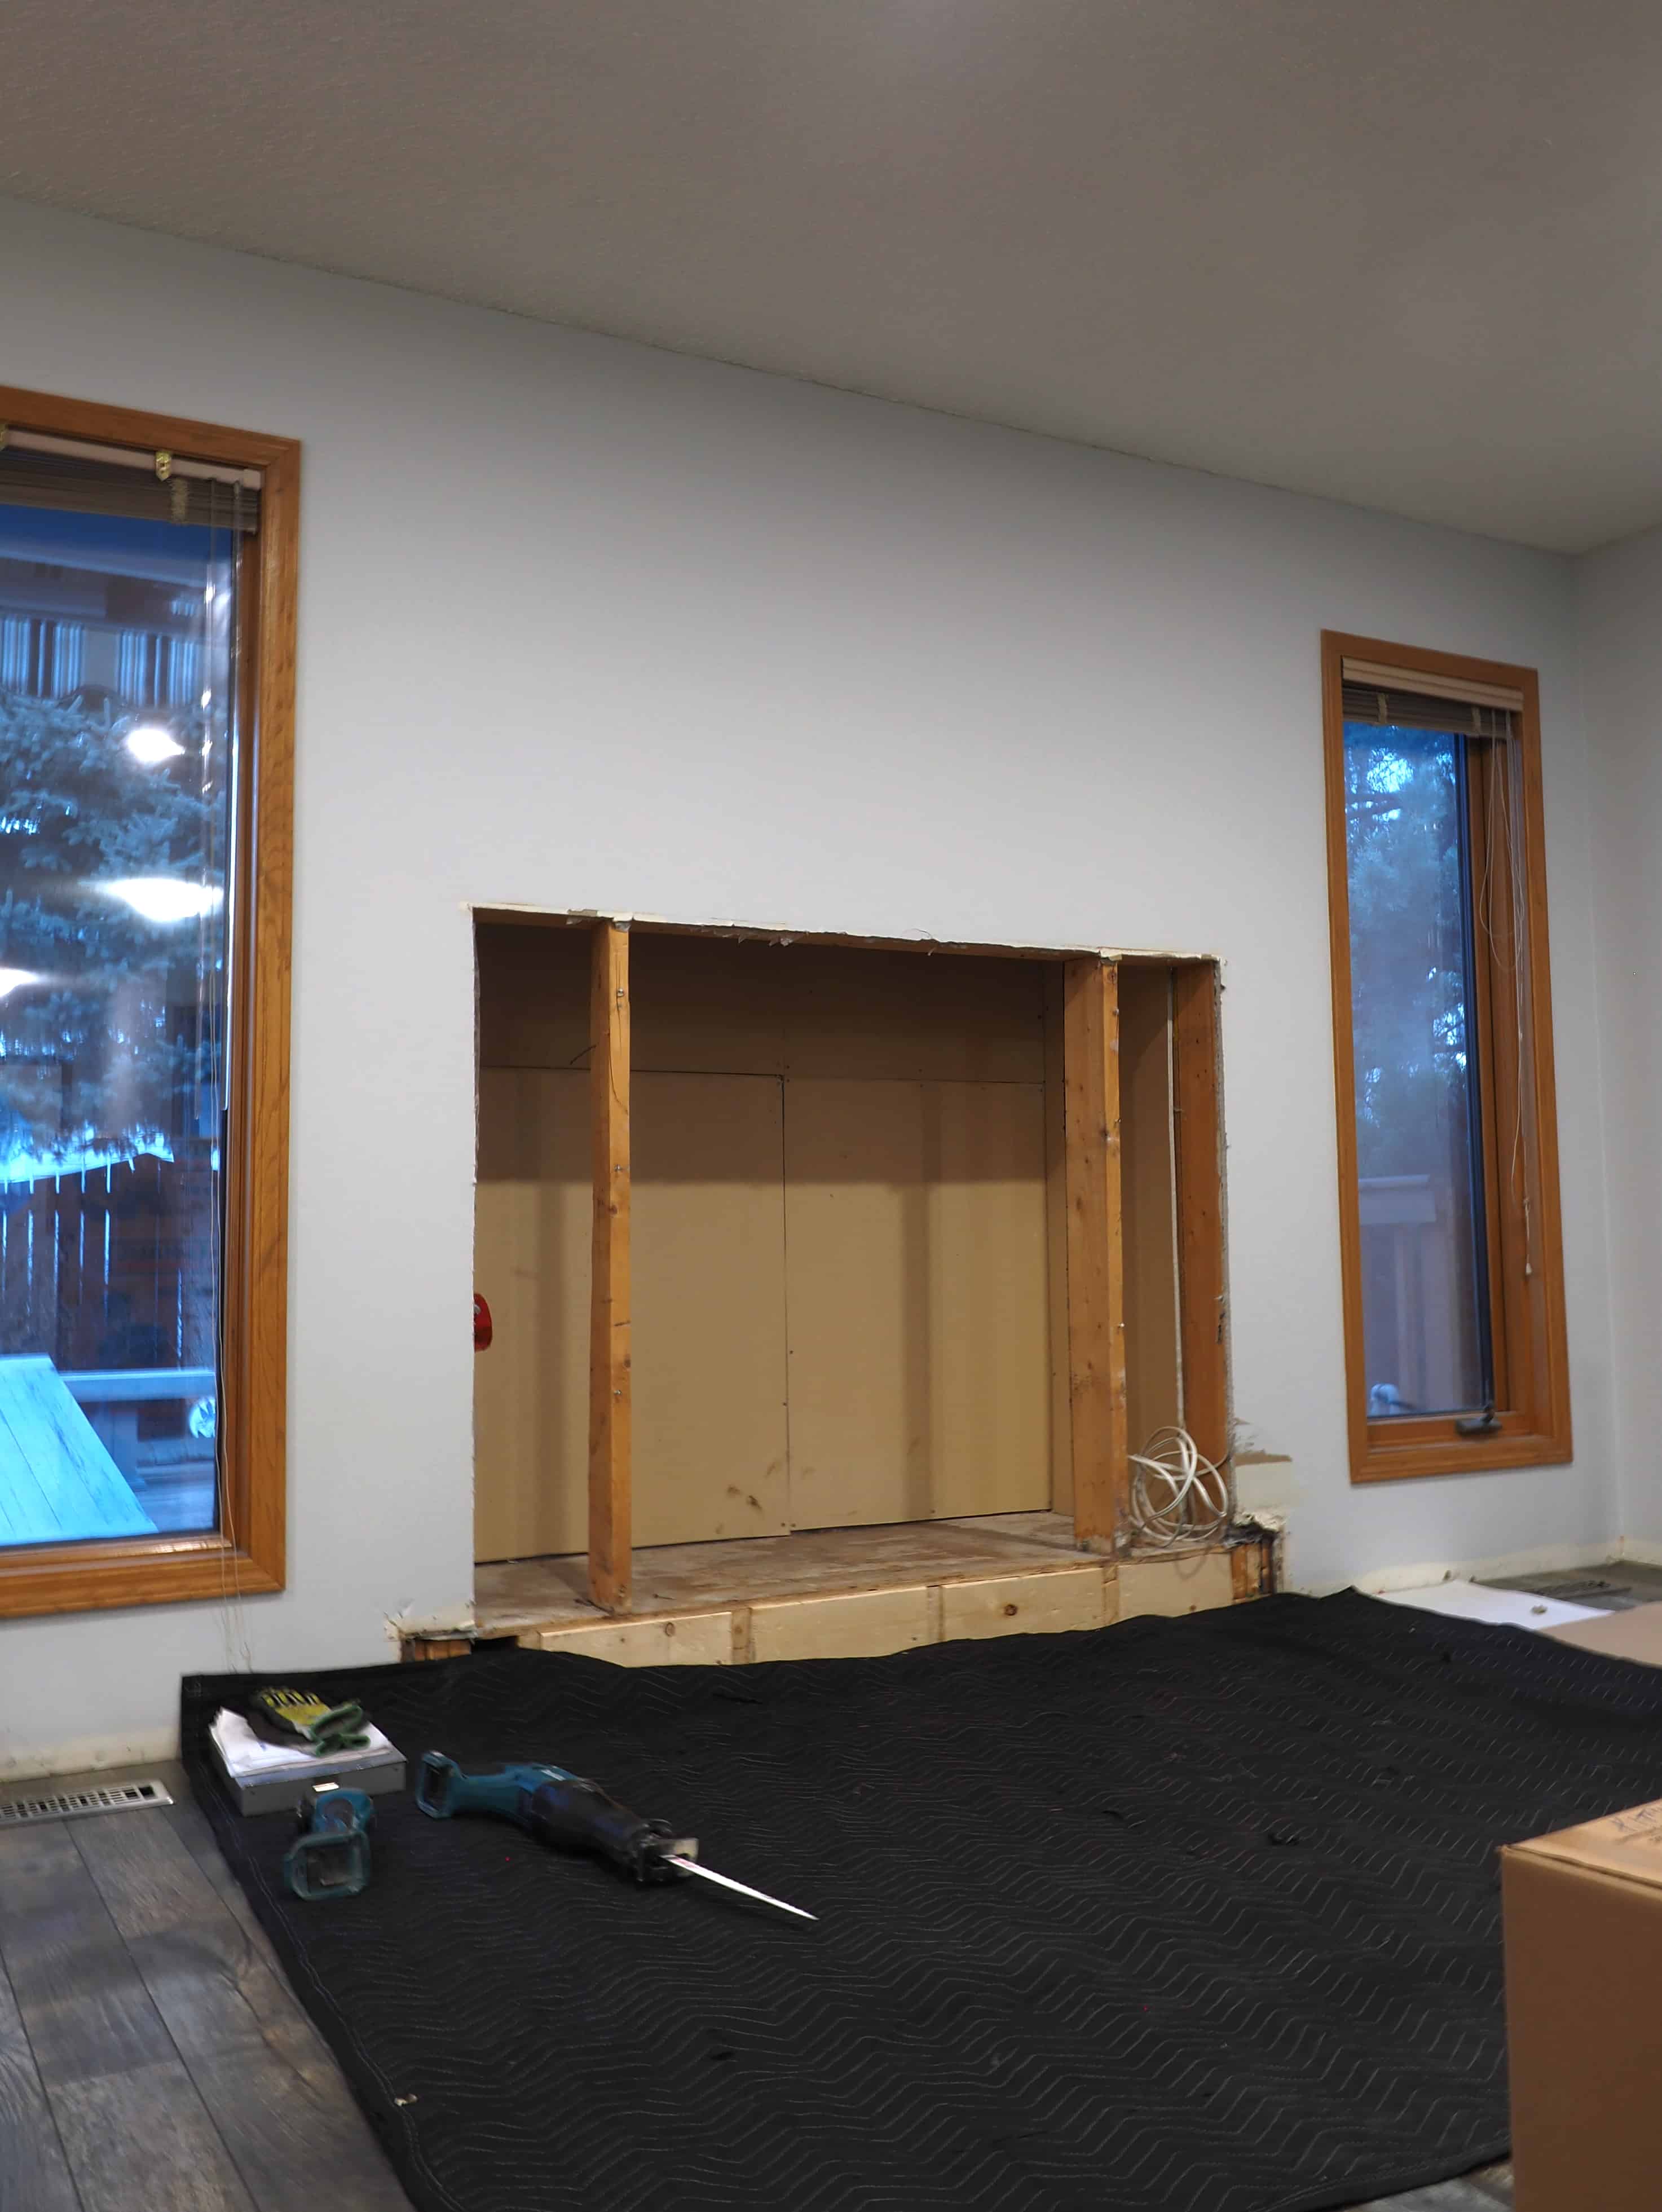
We had removed the facade earlier on during the demo process and all that was left was the last bit of drywall that needed removing. Once that was out, it opened up the chase giving us access to the chimney and flue. Removing the chimney and flue proved tougher than expected, but with a little persistence we got it done, and out came the fireplace. We also saved $600 dollars by doing it ourselves, as opposed to hiring out the removal. After that it was up to the roof to pull out the old flue and chimney. I have to say standing on a roof pulling a 20 foot section of pipe into the air is both fun and $h!t your pants scary. I wish I had a photo as I’m sure the look on my face also fell somewhere in between. Never the less, it all went off without a hitch.
Finally, a blank slate to begin reconstruction. This is where we passed the baton to our fireplace guys for the install.
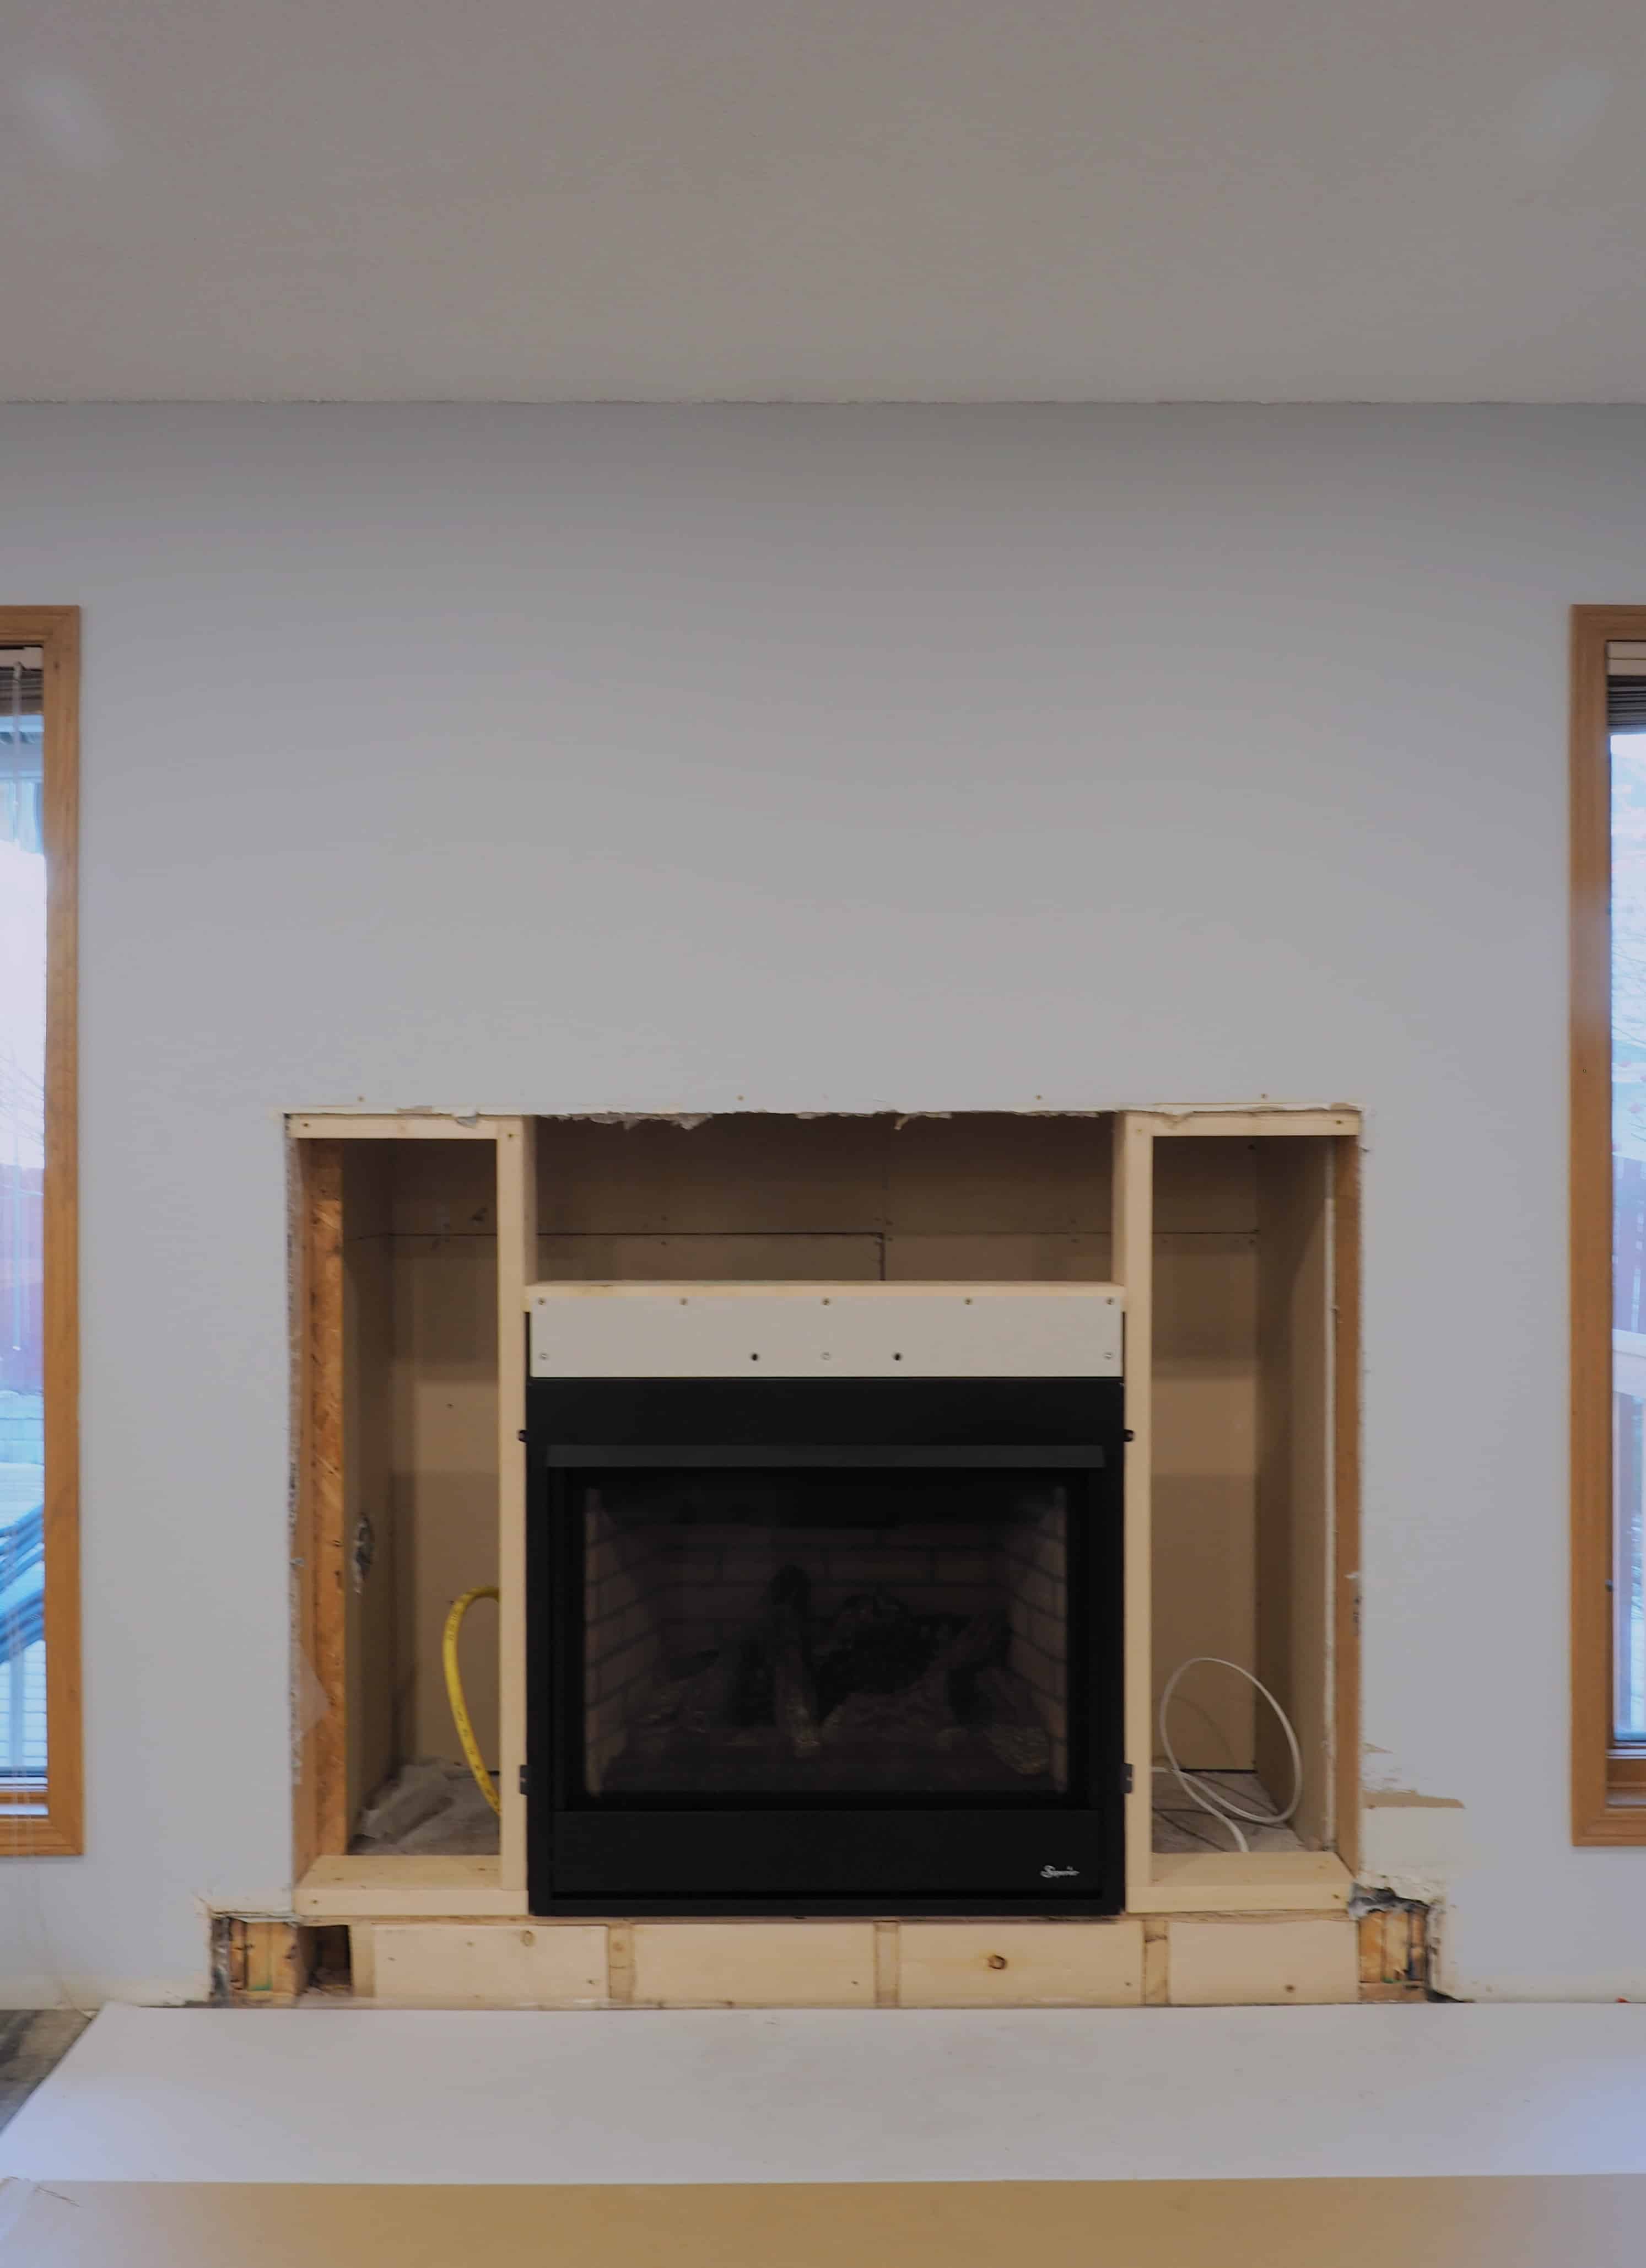
Less than half a day later, we had a brand new gas fireplace in place of the old wood burner. Nowadays there are countless options- even just the selection of gas fireplaces can be downright exhausting to compare. My suggestion is to avoid getting lost in the number of flame settings, fan settings, how bright the lights get, or the various patterns in the background. Instead, try to think about what you are actually going to use the fireplace for- more often than not a simpler version will do the job just fine and save you a pile of cash along the way. In our case we were looking for a fireplace that could be used as a secondary heat source to warm up a medium sized space (kitchen and family room) when needed. For this we went with a medium sized fireplace, with 3 flame and 3 light settings. The fan strength is auto-determined by the fireplace as needed. Not only would a larger fireplace have been overkill for heating, it would have also dominated the room aesthetically.
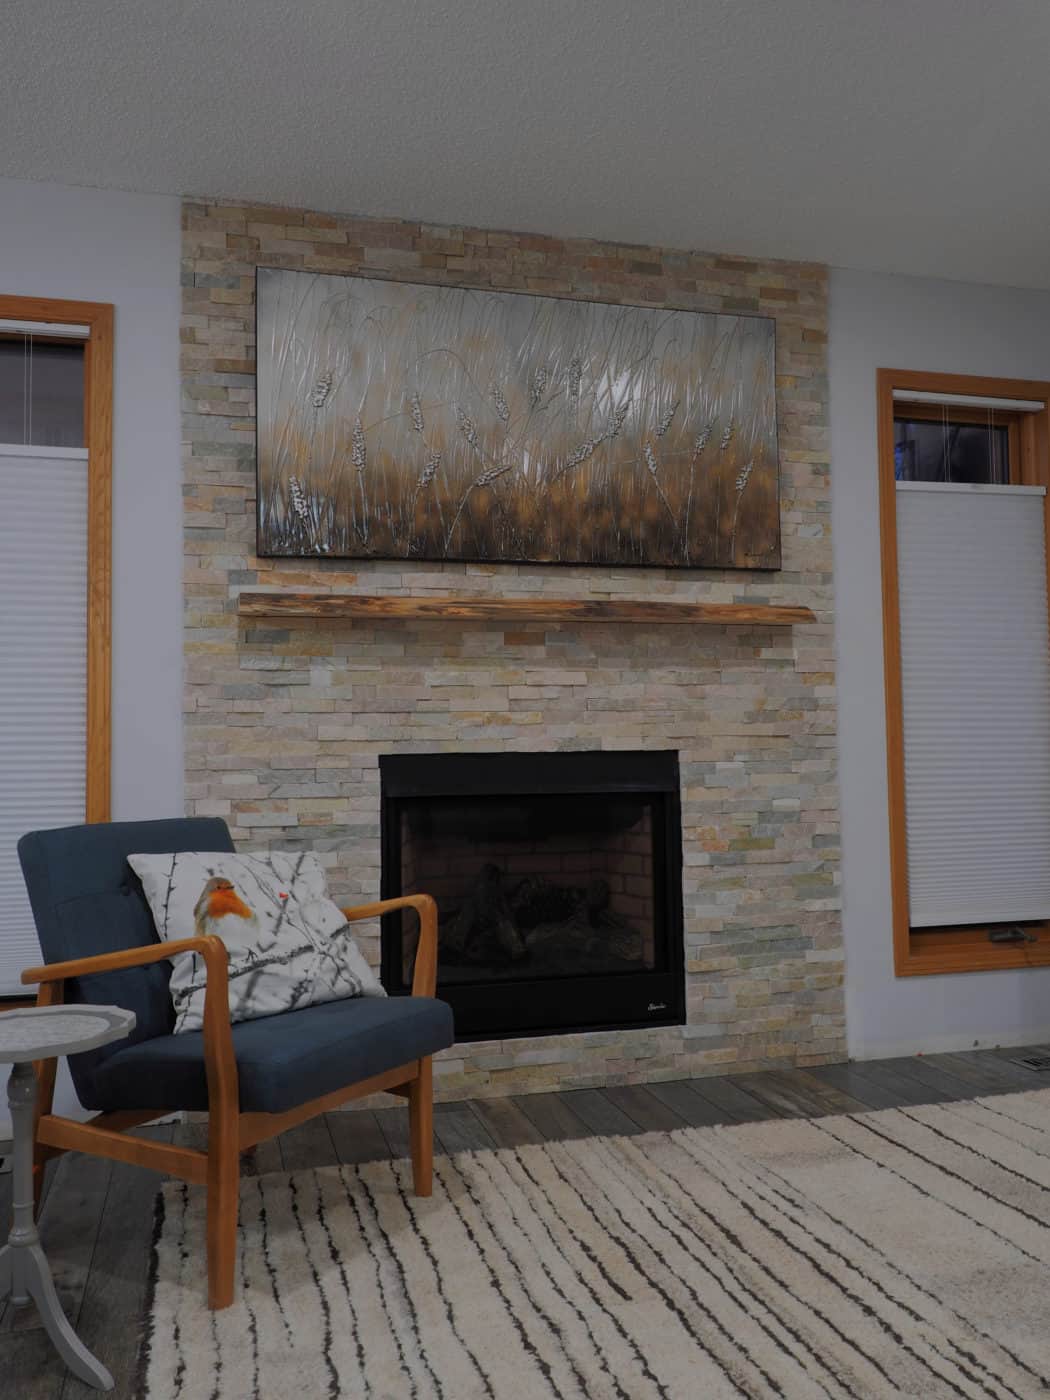
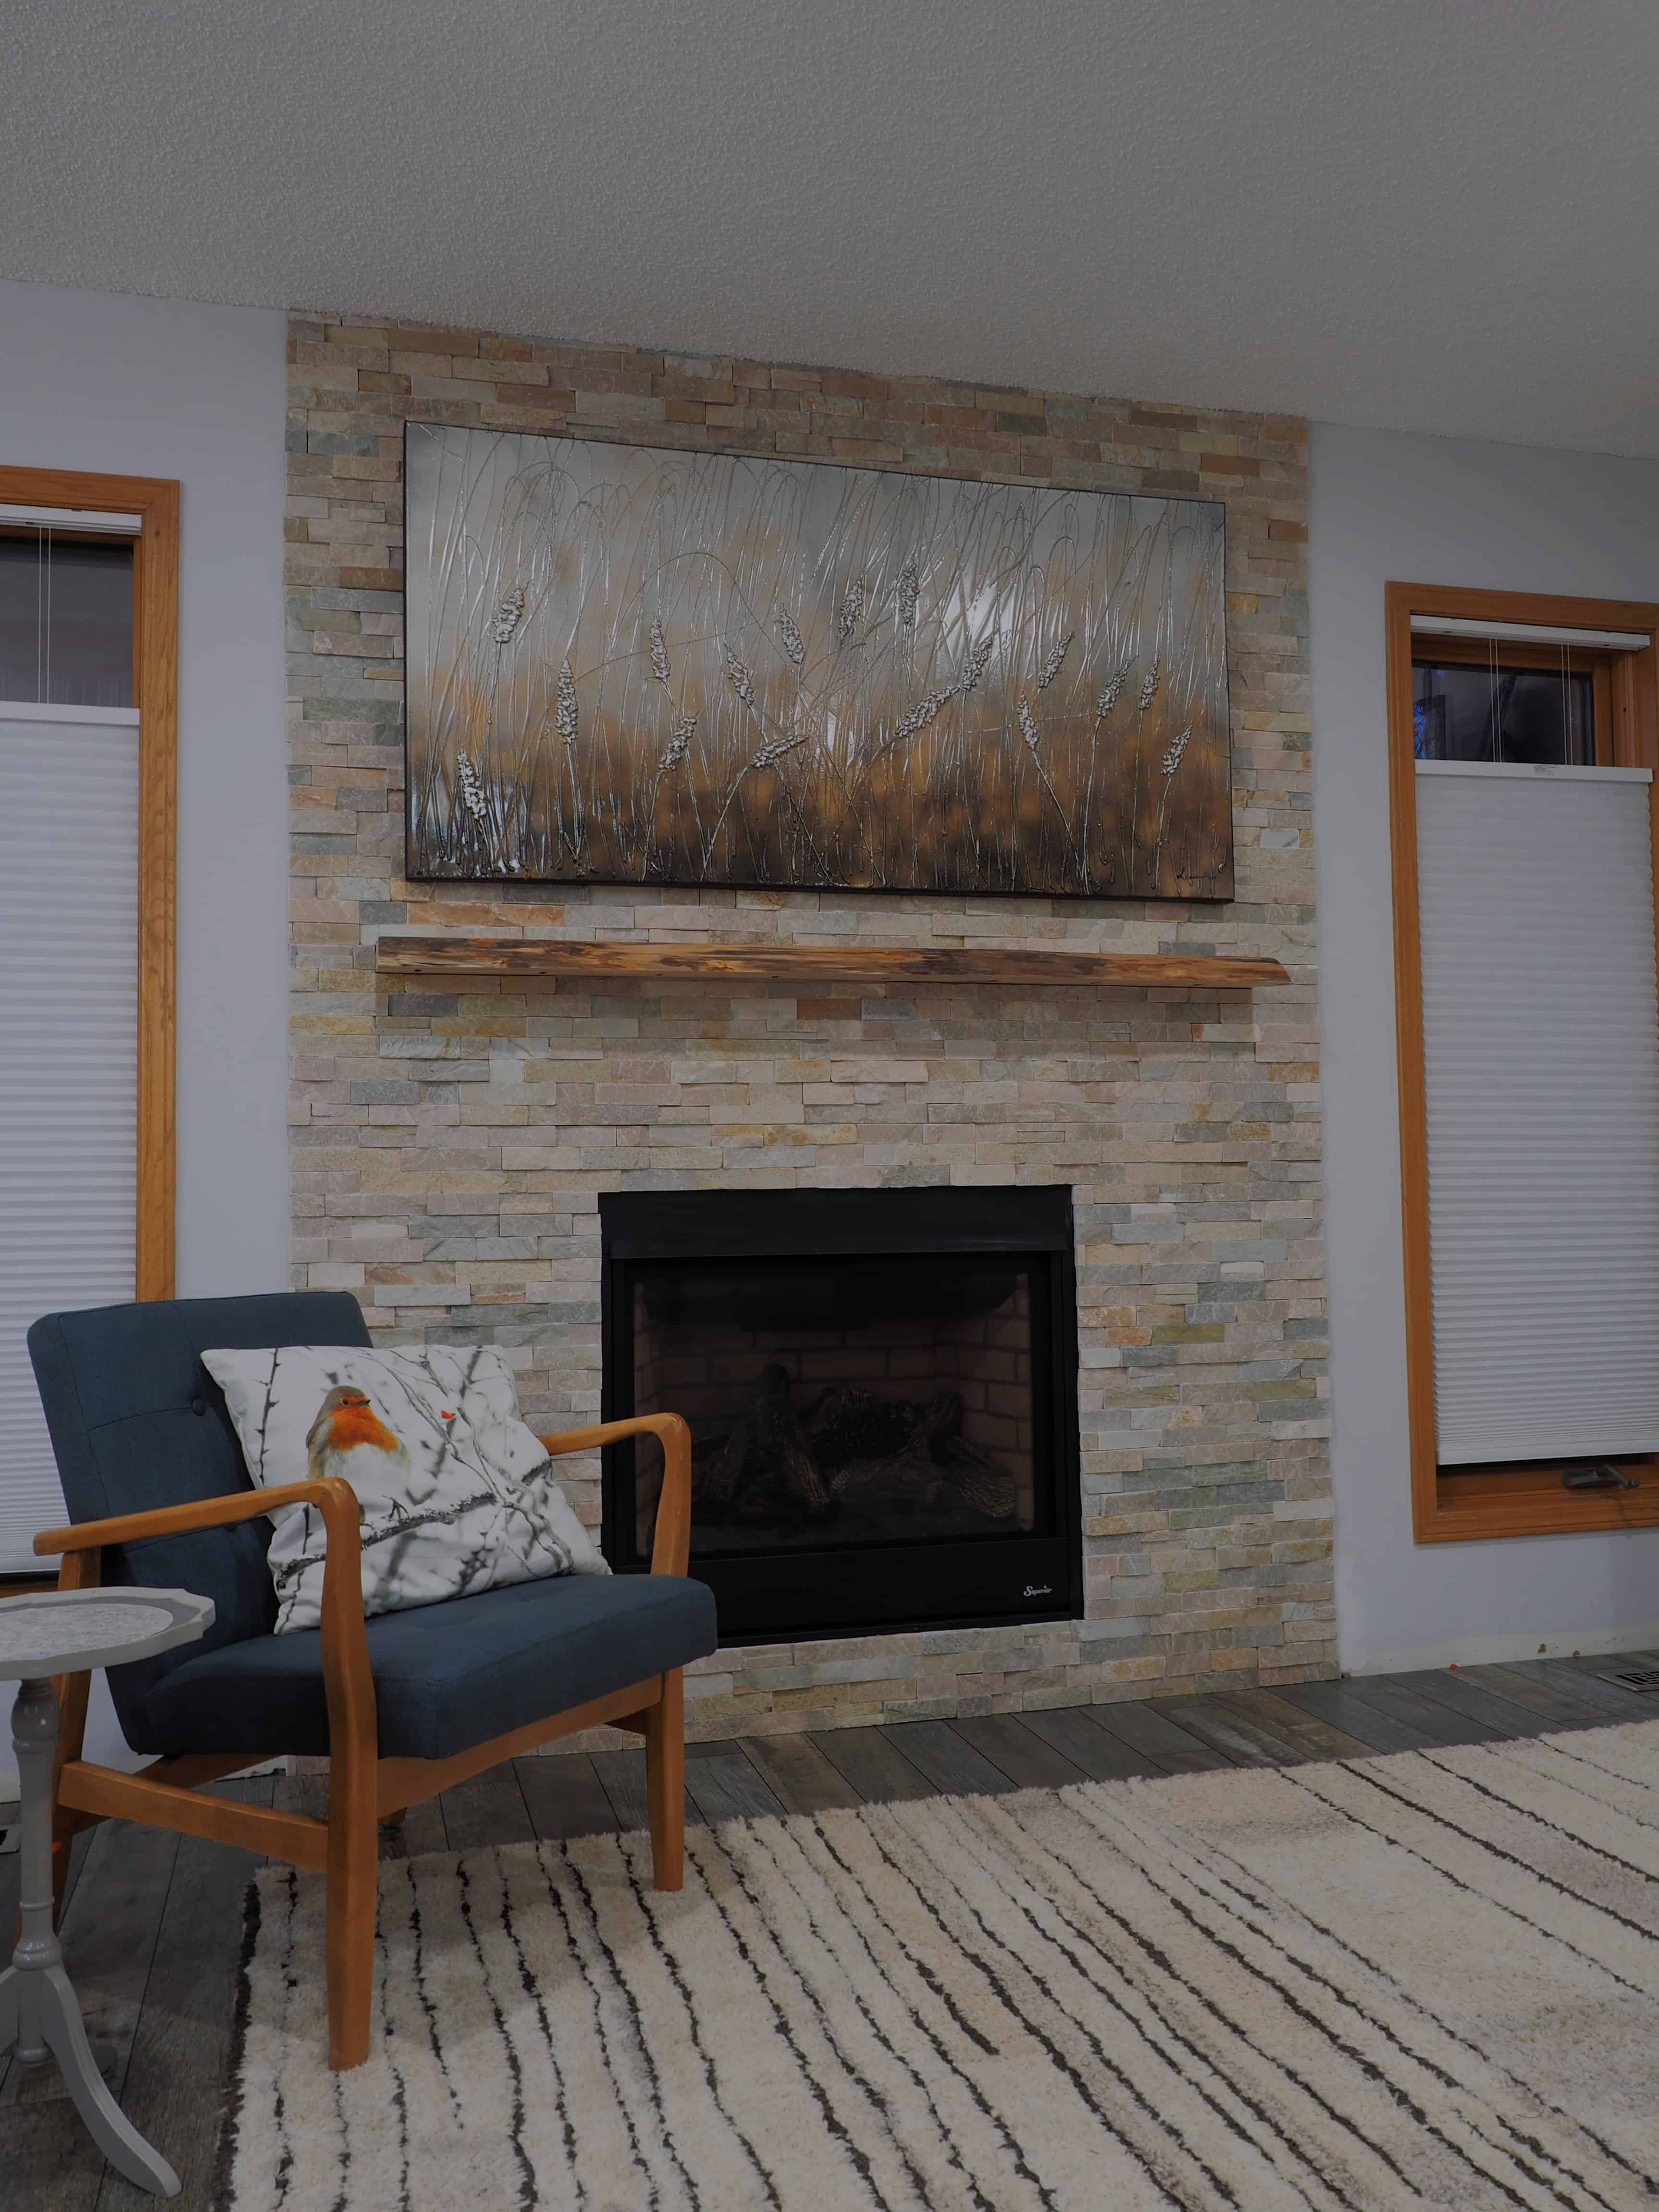
After finishing up the drywall, the last step was to install the surrounding stone and wood mantle. We ended up going with a live edge wood mantle as a focal point among the simple stack stone. For the stack stone, we chose a lighter colour to keep the room feeling open and airy. The browns and greys also help to start unifying the colour scheme of the main living area.
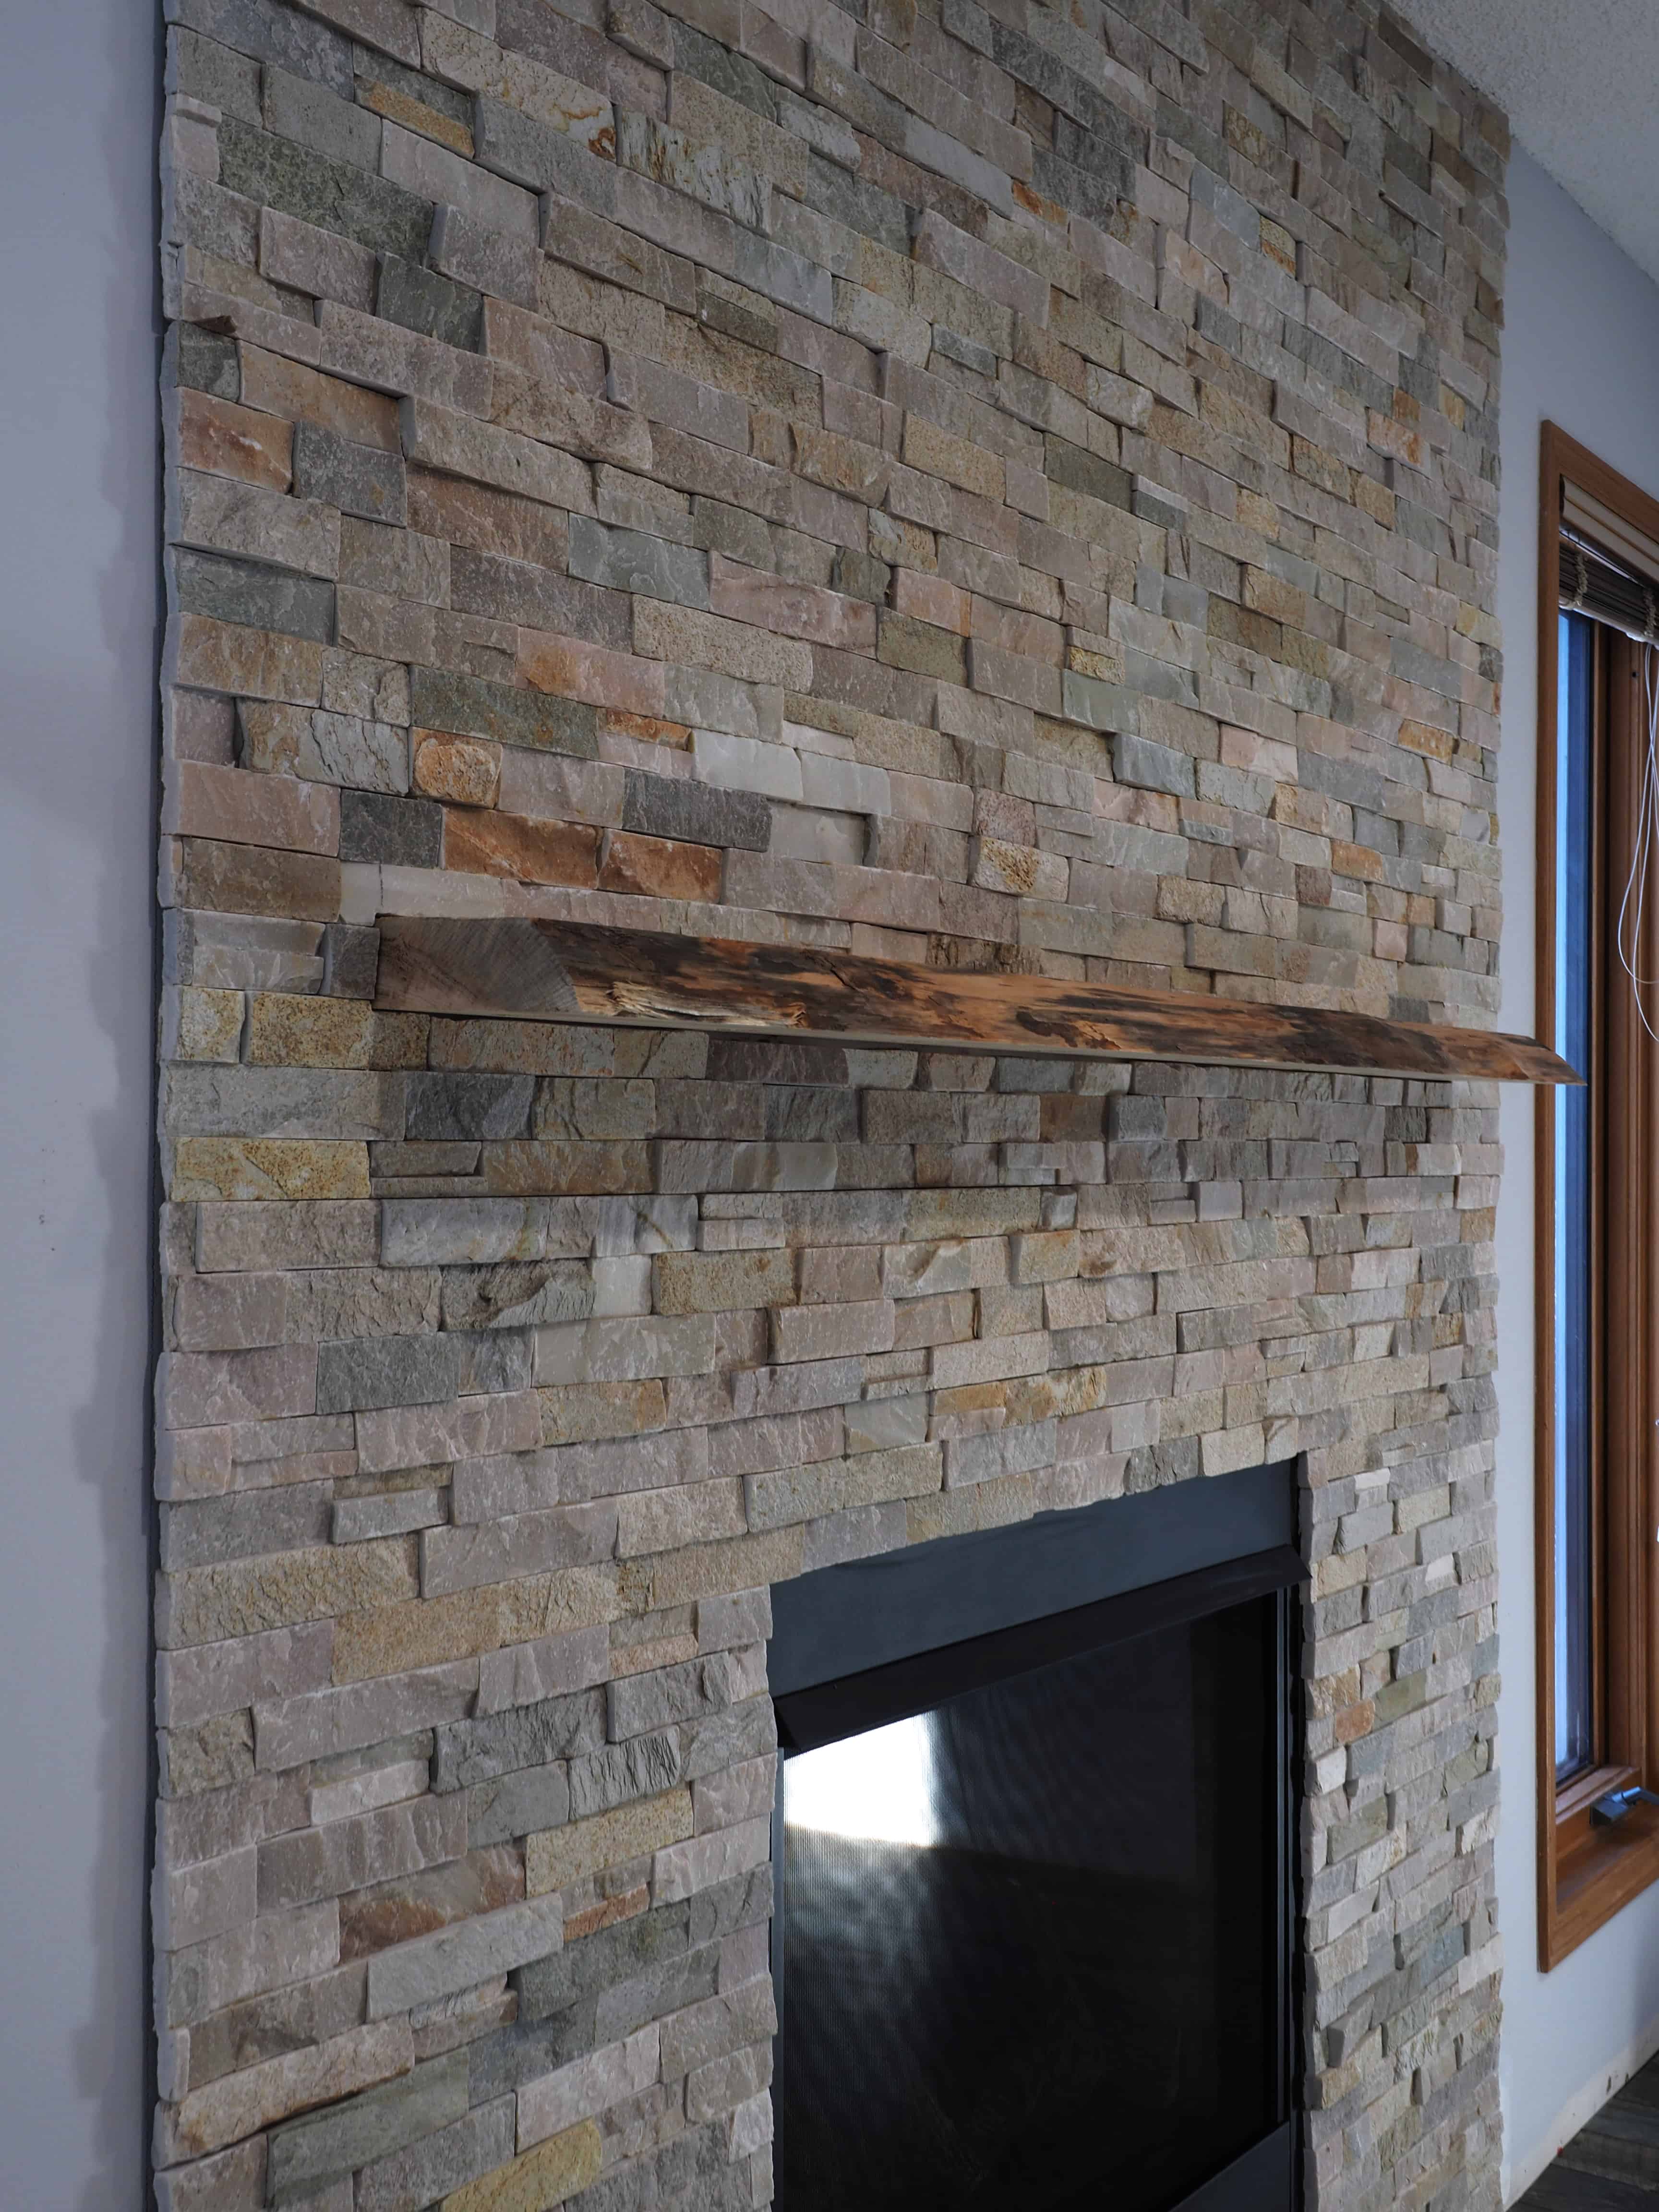
Here is a more complete view of the finished fireplace:

In the end, we are quite happy with how it all turned out. The floor to ceiling stone helps elevate the room, while the wood mantle helps give a cozy/homey feel to the space.
Of course, as with any project not everything is perfect the first time round. In this case we realized the paint colour on the back wall is too light causing the stone to look washed out. Next step will be to repaint the back wall the same colour as the kitchen island. Stay tuned to see the updated look!
No Comments