
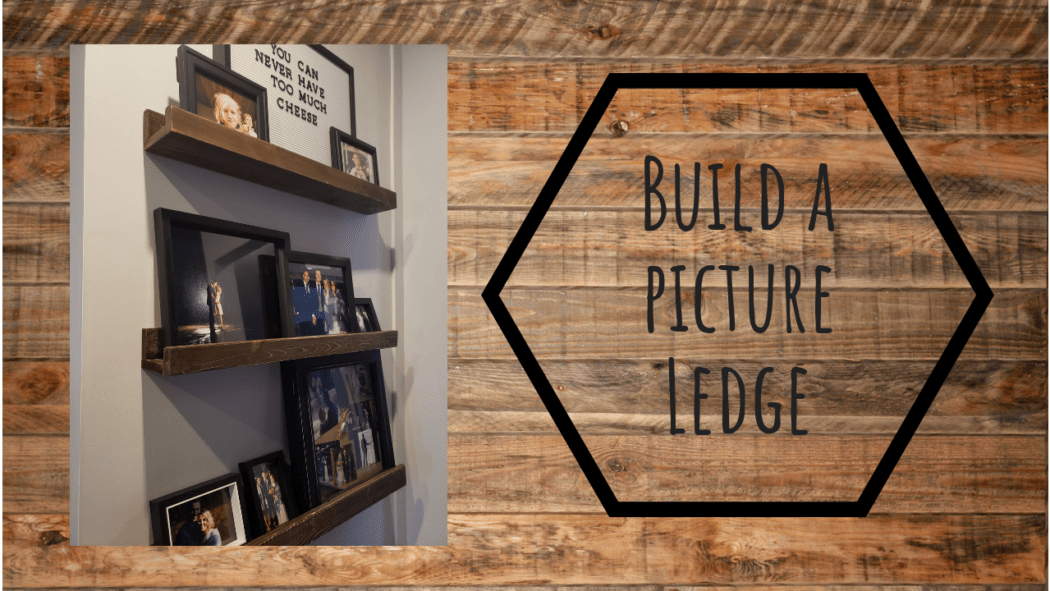
Is it a picture ledge? Or a picture rail? Or maybe it’s a picture shelf? Let’s just go with picture…thingamajigger. Honestly, I have heard these called so many different names, but for this article we are going to stick with picture ledge.
What is a picture ledge?
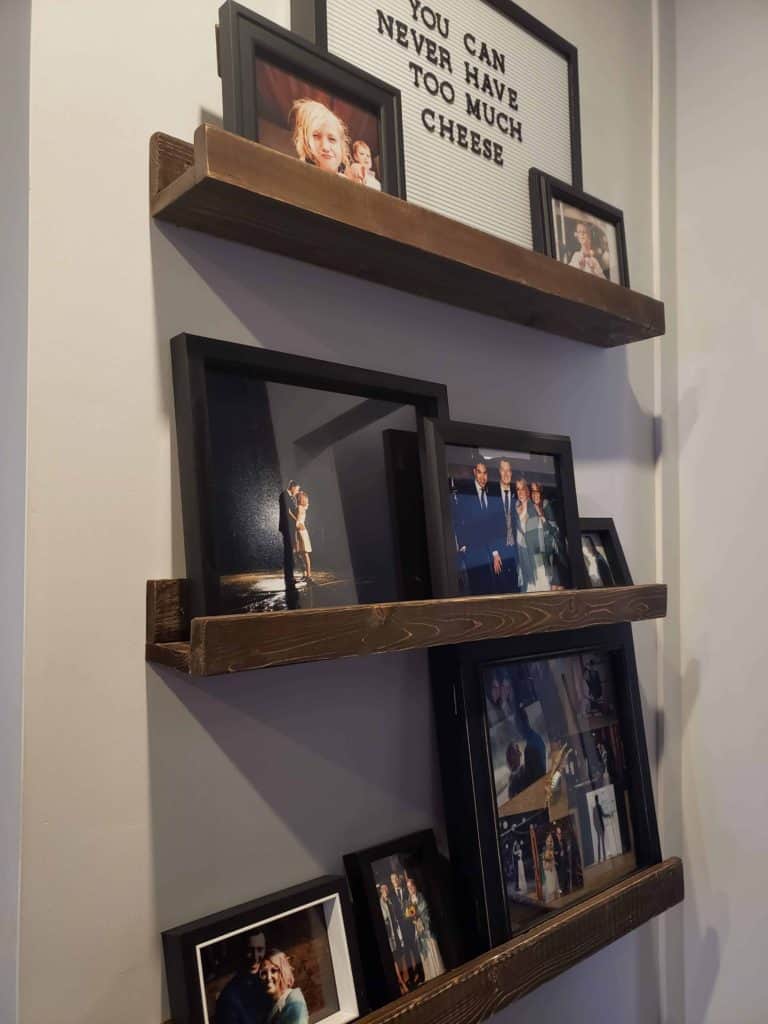
If you are here, I’m guessing you already know what a picture ledge actually is, and you have probably seen them around. But if not, fear not. A picture ledge is sort of like a thin shelf with a raised front lip to hold the pictures or art from sliding off the shelf as they are leaned against the wall.
Better yet – watch our video and learn how to build one for yourself:
Why build a picture ledge?
This is a great question! Honestly, there are tons of reasons why building a picture ledge is a great option.
- It’s different. Yes it’s that plain and simple. Sometimes its nice to mix things up a little and use a different method of displaying photos.
- It’s great for galleries that you constantly want to change, rearrange, or swap photos. This saves you from creating tons of holes in the wall.
- It lets you incorporate other items with your photos. Need a cool place for a travel souvenir? Why not set it on the picture ledge with some of your photos from the trip!
- I find it more engaging. This could just be a personal thing, but I find picture ledges more engaging than traditional hanging photos.
But none of that is meant to mean that using a picture ledge is better than hanging pictures on the wall, just different.
How to build a picture ledge:
Alrighty, lets dive into the actual reason you came to this page. How to go about building on of these things for yourself. Let me start by saying this is a great project for newcomers to woodworking. It does not require lots of experience or fancy tools. Plus it’s a project you get to see through to the finish rather quickly. I love projects like this, especially for newcomers to the hobby- it’s always helpful to see finished projects quickly.
1) Choose your material
Really this just means, choose the type of wood you want to use to build your picture ledges. I guess you could also build these out of metal or plastic, but for the purpose of this article we are concentrating on wood. For our project here at The Homestud, I chose inexpensive pine. Pine is a softwood that is easy to work with and typically quite inexpensive. A quick tip- I find pine takes up stains better than spruce so I would opt for this choice if both are options.
I made 3 shelves at 32″ in length. Two of the shelves were 4″ deep, while the third picture ledge was 5″ deep. The extra inch of depth was to account for a deep shadow box frame. When you are planning the depth of your picture ledges, it will help to have a rough idea the size and thickness of your picture frames.
2) Plan and make cuts
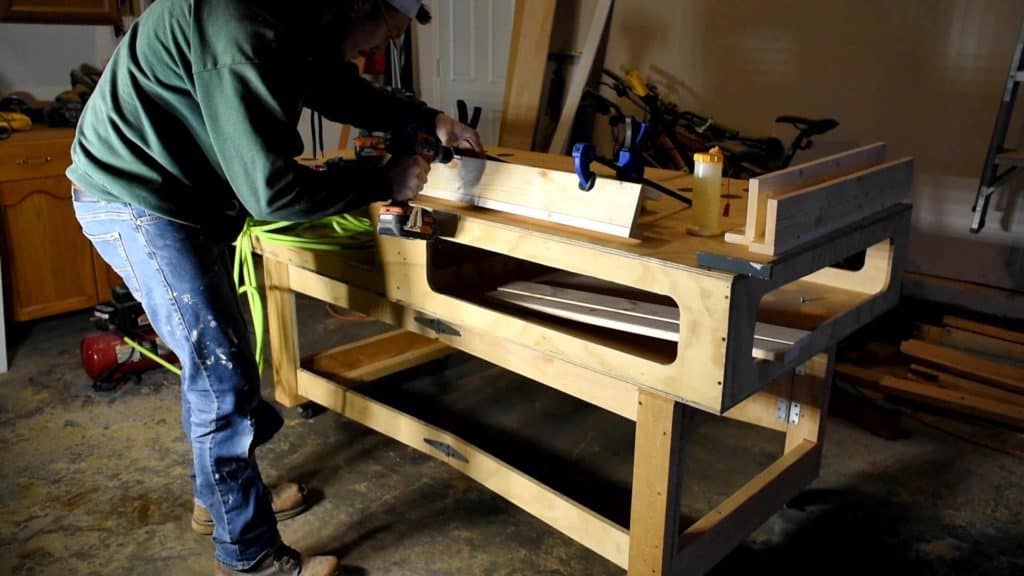
As mentioned above, my picture ledges were 32″ long. So I started by cutting all of my material to 32″ in length on my mitre saw.
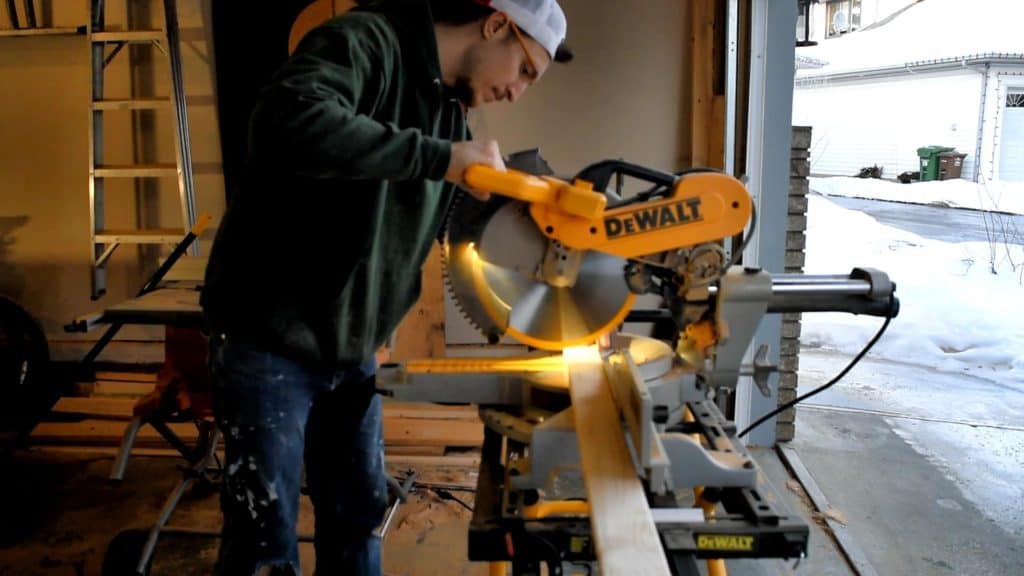
From there I needed to rip down (that simply means cutting the wood parallel to the grain). I bought 1″x6″ pine for my deepest picture ledge, and needed to rip this down to 5″.
That’s it for cutting- it’s really that easy!
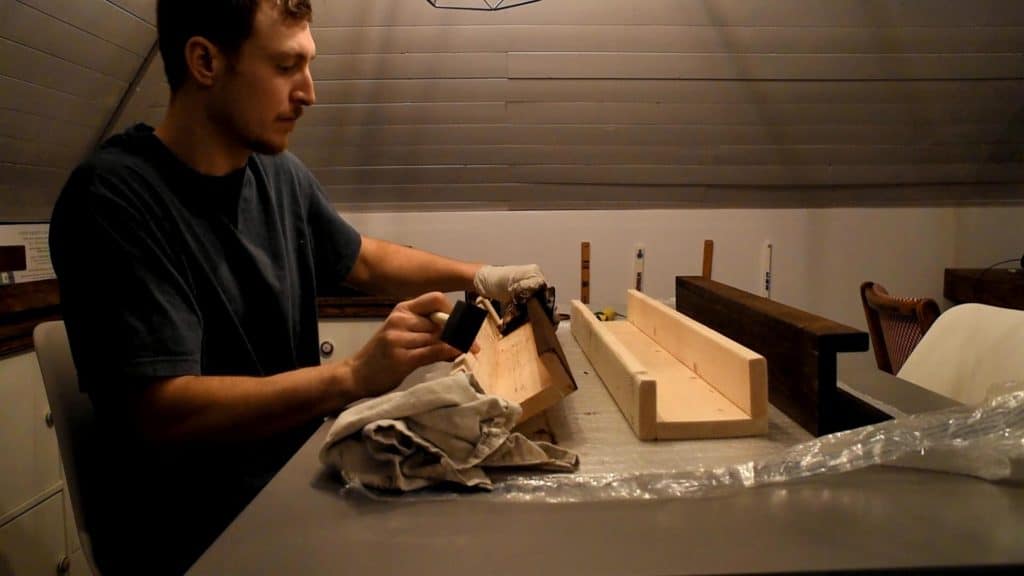
3) Assemble the front lip of the picture ledge
I didn’t want to see any screws in the front of my picture ledges, so I used wood glue and a brad nailer to attach my front lip. I could then use some homemade wood filler to fill the nail holes.
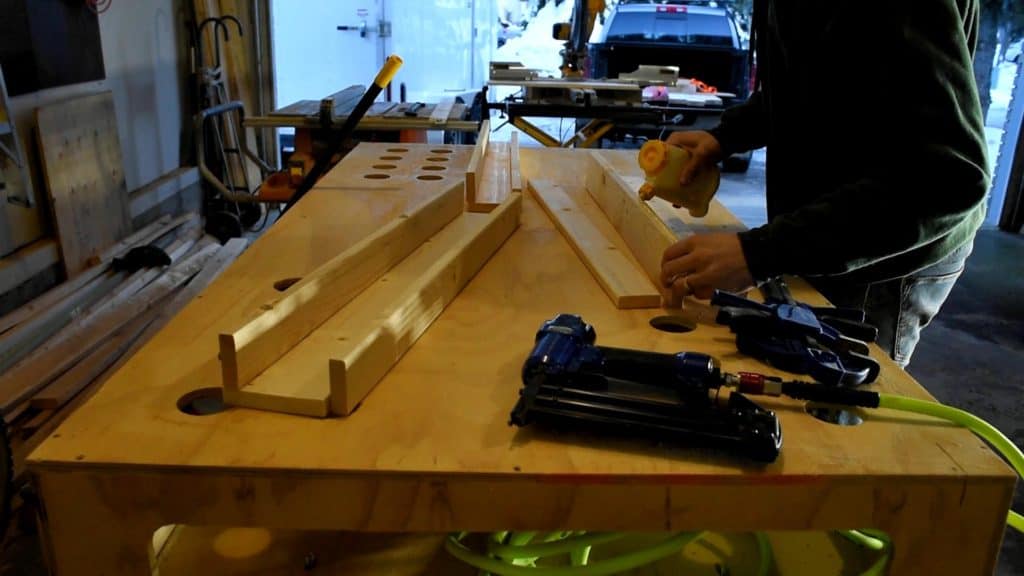
Spread wood glue across the edge of the picture ledge (refer to video for exact location). Use trigger clamps to hold the front lip in place while brad nailing the two pieces together.
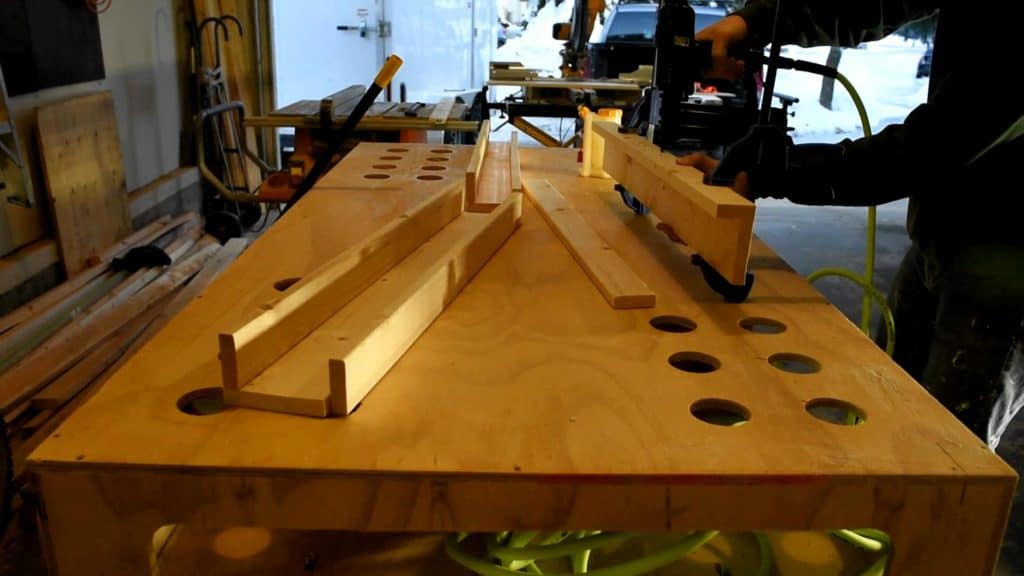
If you don’t have access to a brad nailer- screws will work just dandy. I would still add the wood glue for some added strength. And remember to always pre-drill your holes when using thin lumber and wood screws to avoid cracking and splitting the wood.
4) Assemble the back of the picture ledge
This is the joint that will largely be carrying the load on the picture shelf. For this step, I used glue and wood screws to bond the pieces together. Because of my design, this places the screws on the bottom of the picture ledge where they are out of sight.
Spread glue across the top of the picture ledge near the back edge (again refer to video). Use trigger clamps to hold the back portion and bottom piece of the picture rail together. While clamped, pre-drill holes for the wood screws. I added a screw every 8″ or so. Insert wood screws until the two pieces are secured together nice and tight. A 1 5/8″ screw is plenty long enough.
5) Sand everything until smoooooooth
Like what I did there ;). Okay okay, back to business. I used a random orbital sander for all of the edges and sanded the inside by hand. I used 120 grit sandpaper for this step. Again if you don’t have an orbital sander, just sand everything by hand. The result is often the same, it just requires a little more elbow grease.
A fun fact for you- sanding helps raise the grain of the wood allowing more stain to enter the pores, giving a more contrasty look when stained.
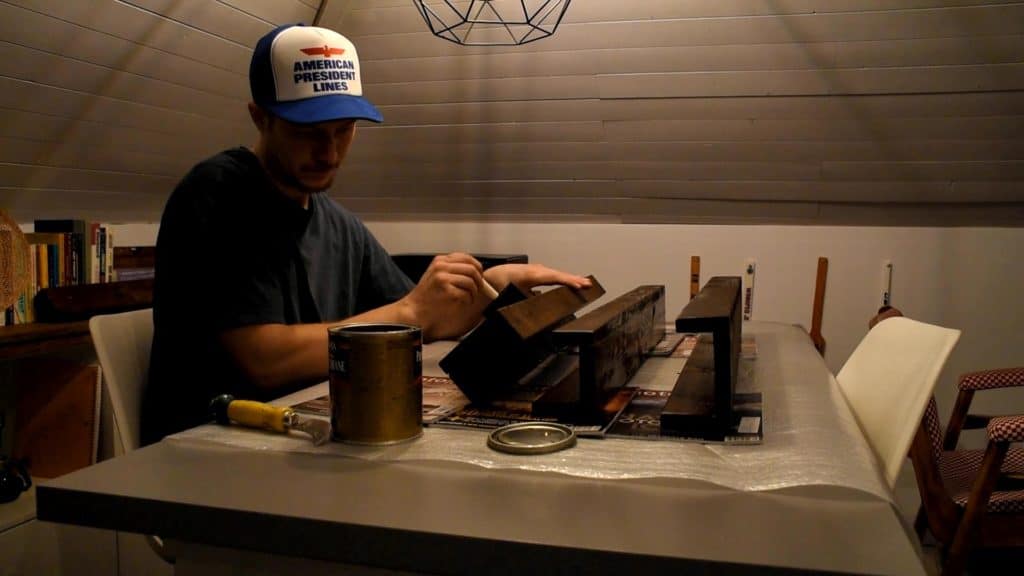
6) Stain the picture ledge
Pick the stain that best suits your decor. If you don’t want to stain the wood, feel free to skip to the next step. Always stain in the same direction of the grain. I used a foam brush to apply the stain, followed by a clean rag to wipe away excess stain.
If you are curious- I stained my picture ledges with a dark walnut varathane.
7) Seal the picture ledge
This is the final step! Apply a thin coat of polyurethane (or similar sealer) to the picture ledges. Let dry (preferably for a few hours, or better yet, overnight.
Once the first coat has set, give everything a light sand with a fine grit sandpaper. I used 320 grit. The goal is to remove the tacky finish of the polyurethane, not actually sand the wood.
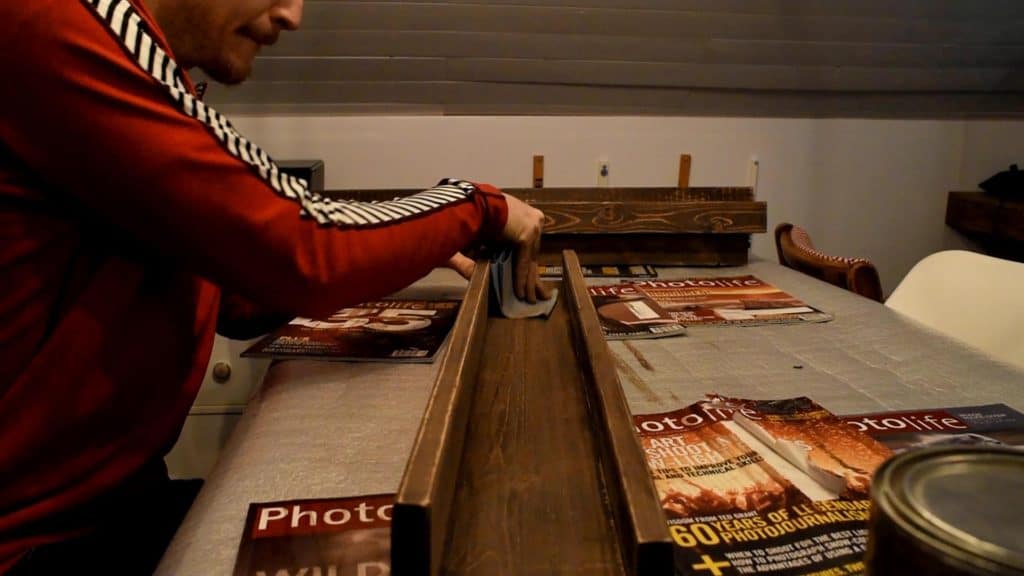
Apply a second coat of polyurethane, and repeat the sanding process once it has set.
Get ’em on the wall!
Hang the picture ledges on the wall. Use a stud finder to find at least one stud. If for some reason you can find a stud (is your home held up by magic!?), then you can probably get away with using drywall anchors. Should you do happen to only use drywall anchors- stick to lighter objects on the picture ledge.
To hang the picture ledges, drill a screw right through the back portion and into the wall. You won’t see these screws anyways as they will be covered by pictures!
That’s it, your done! Like I said, its quite a simple DIY project, and one that can be easily completed in a weekend. The hardest part is deciding what pictures you want to put on the picture ledge!
Be sure to leave a comment below, and let me know how your picture ledges turned out.
You may also be interested in:
No Comments