
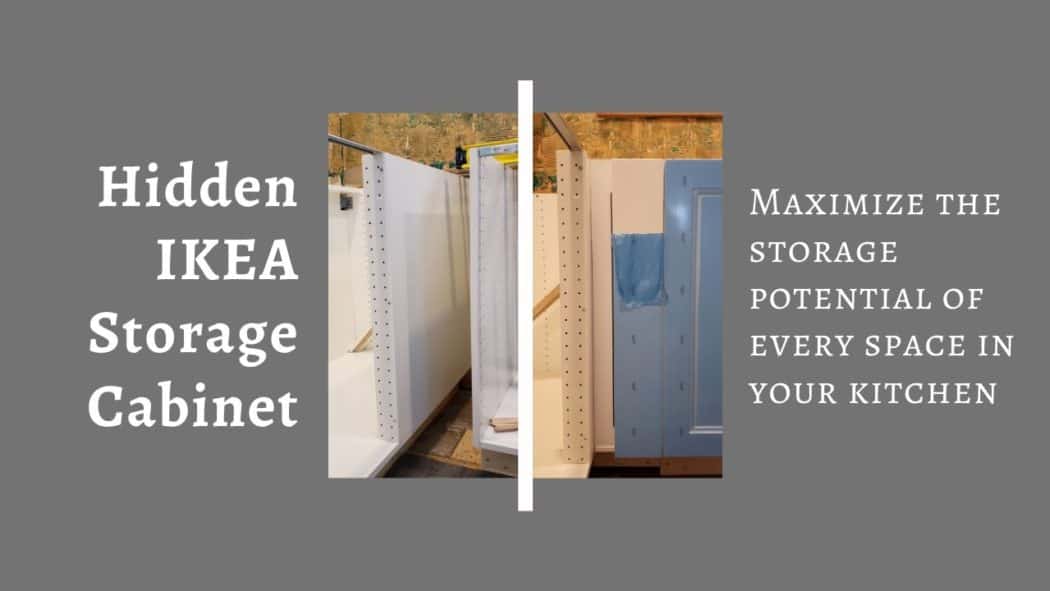
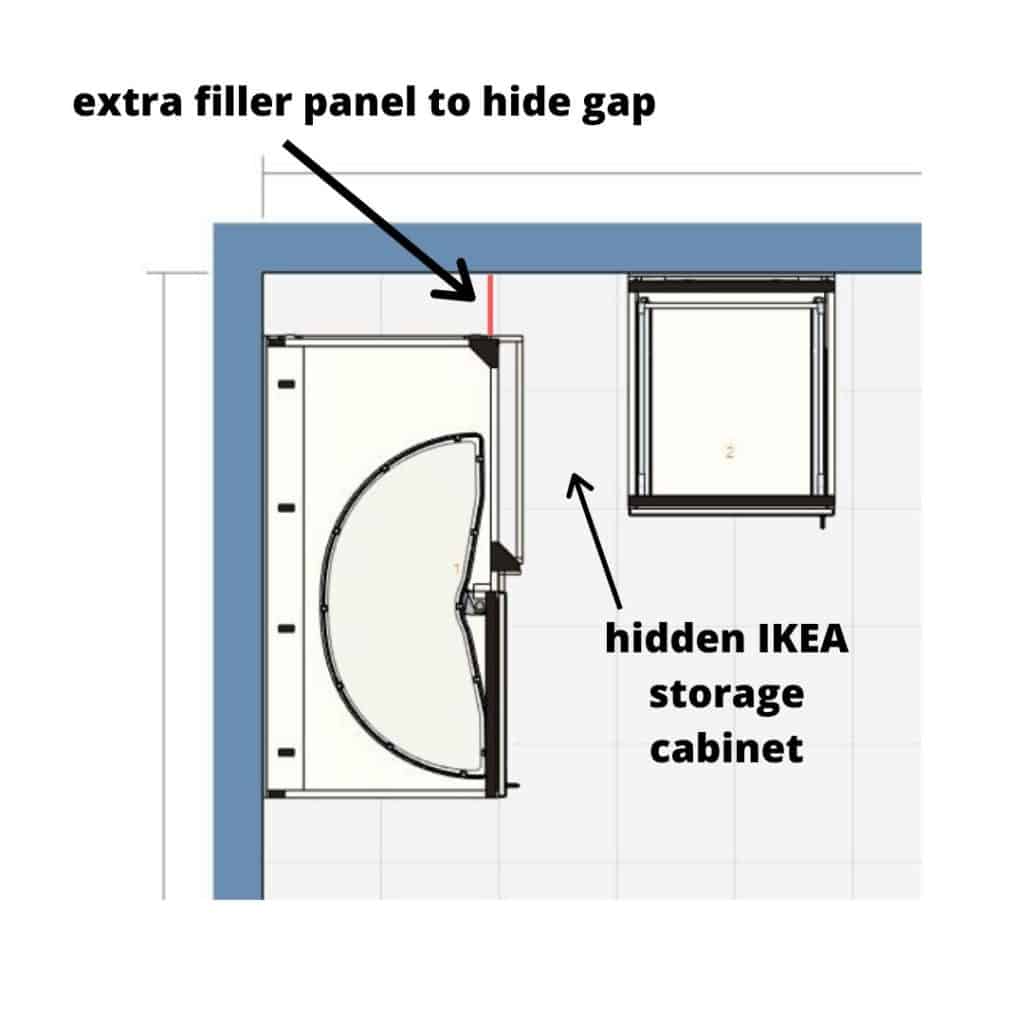
The hidden IKEA storage cabinet hack (it really needs a better name) is a trick we have used on more than one occasion to take advantage of those odd spaces that can pop up in IKEA designs.
It is no secret that we love IKEA kitchens. The vast majority of their cabinetry is built to last and the organizational options are unparalleled at the price point. However, you are stuck designing with their off-the-shelf sizes.
What do you do when you have a weird 6″, 8″ or even 10″ space that needs to be filled, but no standard cabinet will fit? The simple answer is cover it with a filler piece and move on. But this can waste valuable storage space. Instead, we will show you how to create a hidden IKEA storage cabinet that is perfect for storing cookie trays, muffin tins, or extra oven racks.
How to build the hidden IKEA storage cabinet
The materials you will need:
- Matching drawer front. Most often it will be a 5″x30″ drawer front. This will become the door of your hidden IKEA storage cabinet.
- Filler panel. You may very likely have enough left over from another filler panel. If not, you will need to purchase an extra one.
- Continuous hinge (sometimes referred to as a piano hinge)
- Single automatic magnetic latch
- A 2×4″ or plywood to create the base. This part varies depending on if you build your own toe kicks or purchase IKEA cabinet feet and toe kicks.
Step 1) Build the hidden storage cabinet base
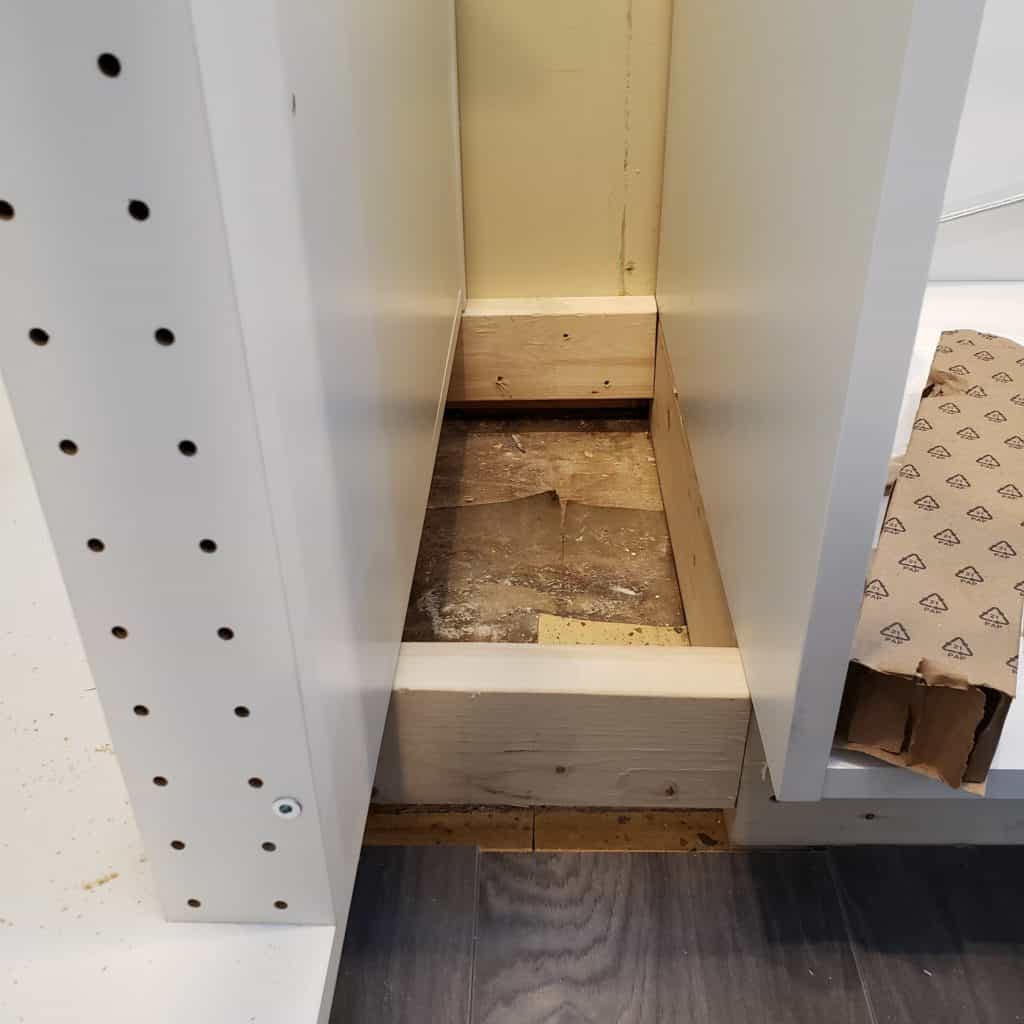
We always build toe kicks for our kitchens out of 2×6″ lumber rip-cut down to the correct height. This kitchen was no different. We then used 2×4″s for the toe kick of the hidden IKEA cabinet. They were easily screwed in to the kicks of the cabinet on each side and will be covered by the custom kick plate afterword.
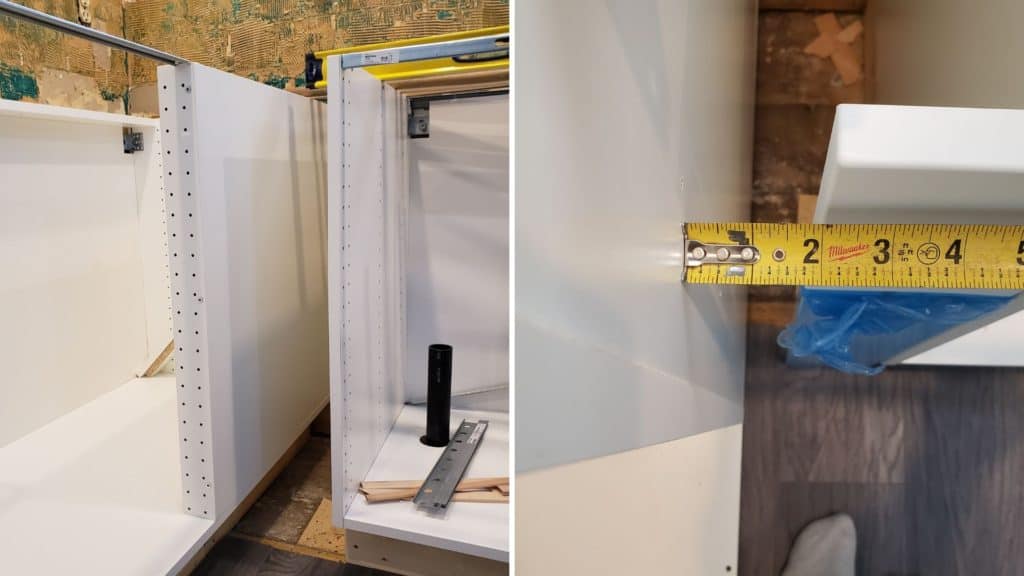
Step 2) Determine the width of your space
You should already have a pretty good idea about the size of the gap after completing your kitchen design in the IKEA home planner. This will tell you what size of drawer front is required.
These odd spaces almost always show up next to the sink or near the corners of designs. We often need to keep the sink centered under a window, or the range in a specific location. Thus leading to the odd sized gaps left in a design.
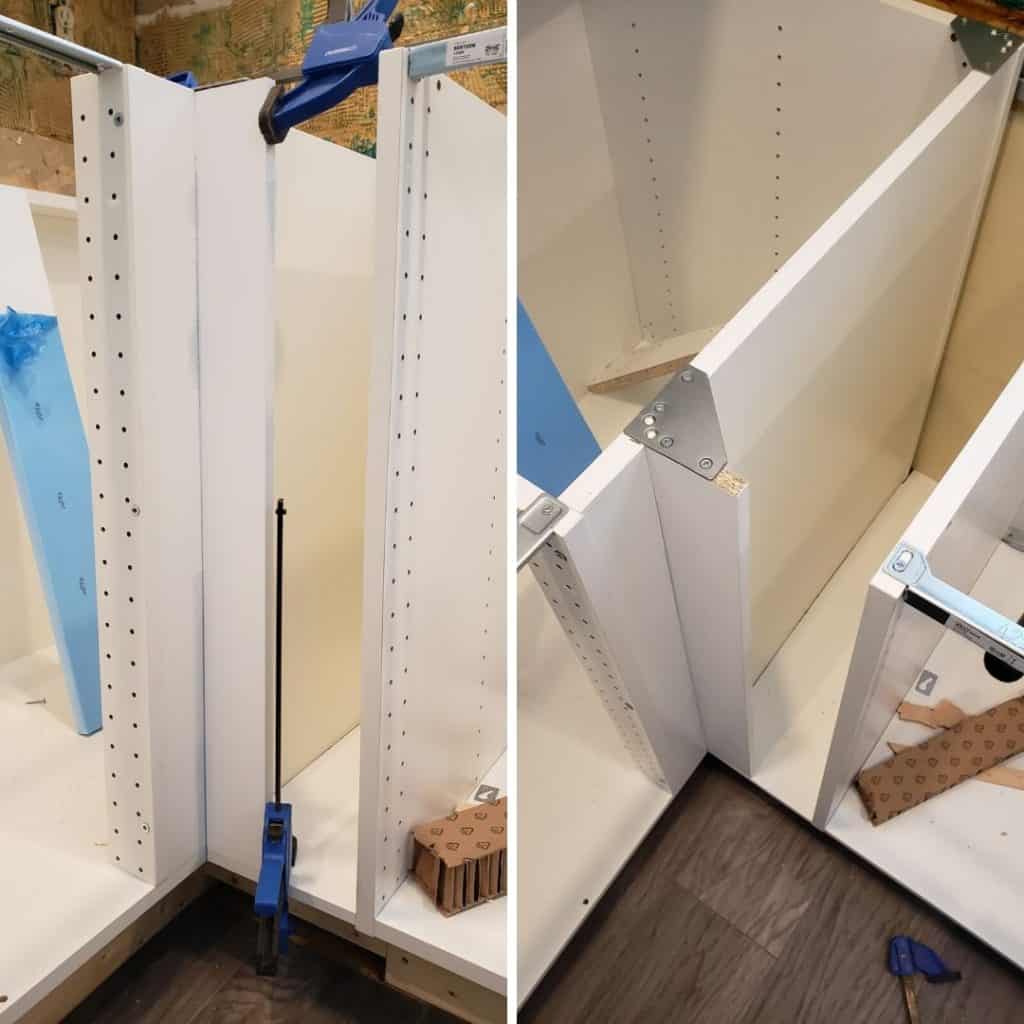
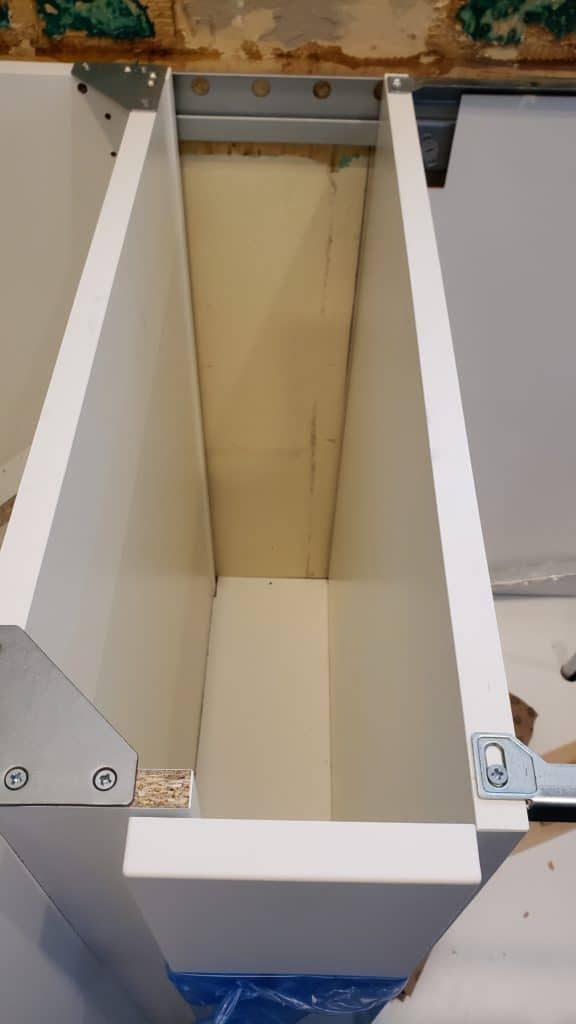
Above you can see our 5″ drawer front (left side). In the right photo, we are measuring the width of the uncovered space. This will be filled by our filler panel (step 4). The width of the entire opening will be used to make the base for the hidden cabinet.
Step 3) Create the base
Don’t expect it to be perfectly square! Seriously. I have installed many kitchens over the years in older homes, and they are almost never perfect square. This is especially true in the corners.
We use spacers to try and get as close as possible to a perfect 90 degree corner. Even then, expect to be around 1/8″ off. Our base measured 7″ wide at the front and 6 7/8″ wide at the back.
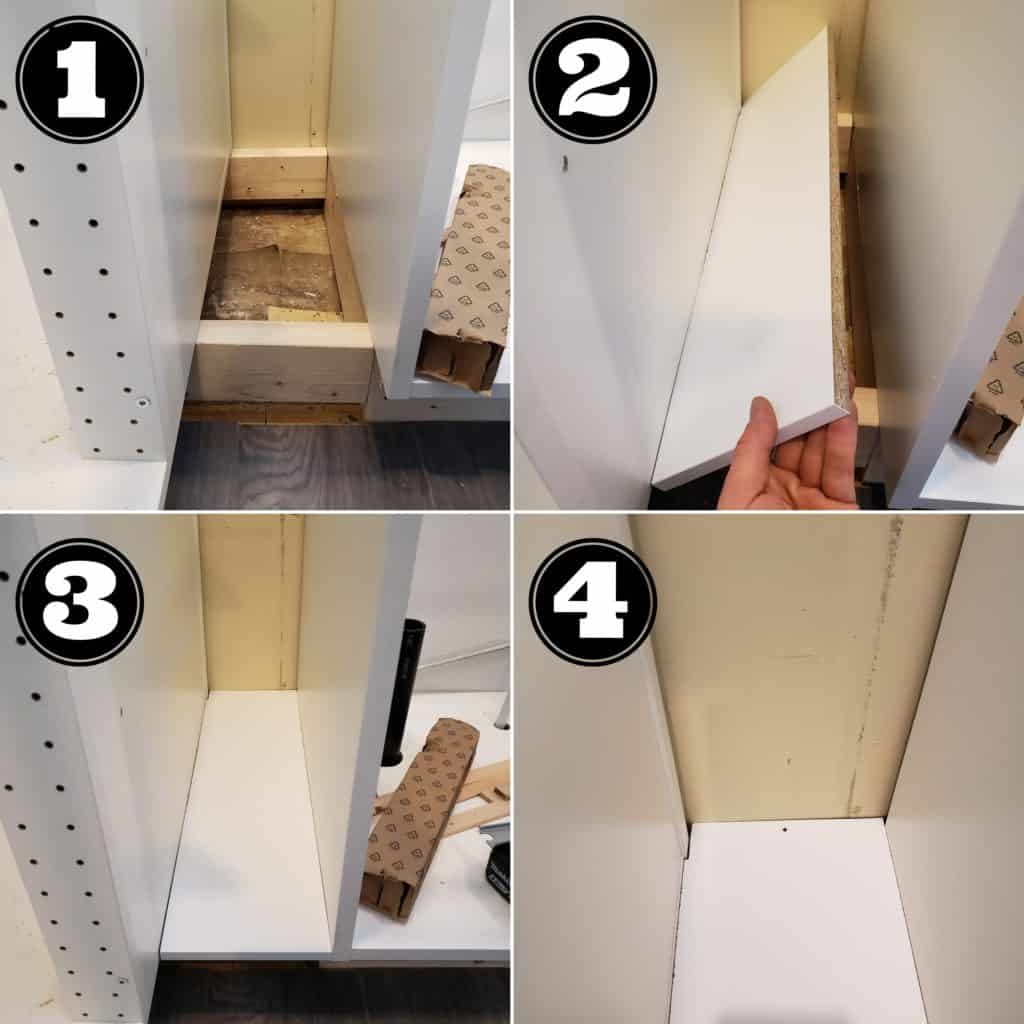
Cut the base out of filler panel. Try to make it as snug as possible without having to seriously force it into place. Too tight and you risk moving the cabinetry on either side. Ensure the front of of the base is even with the neighboring cabinet frames.
I typically make the bases tight enough that it won’t move on its own. Add a small screw in the very back to attach the new hidden storage cabinet base to the 2×4″ underneath. This screw won’t be seen once the countertops are installed.
Take note :
If you are working next to one of IKEA’s blind corner cabinets, create a small notch to bypass the blind corner cabinet frame (see photo #4 above).
There is one additional step if you had to pull the blind corner cabinet slightly away from the side wall in your design. Cut another section of filler panel to close off this gap to prevent anything from falling into the open space. This can be done the same way you would attach any filler piece.
If your open space is next to an appliance (most likely a range), you have three options.
- Use the side of the range as the side of the hidden IKEA storage cabinet.
- Use another filler panel as the cabinet side. For this option, brace the cabinet side to the base and the kitchen drywall.
- Build a complete cabinet box from sanded plywood and paint with color matched paint.
Step 4) Cut and attach the hinge mount
IKEA’s blind corner cabinets come with a piece that is normally installed in this location if they are to be butted up against standard cabinetry. However, it is only ~2 1/4″ wide which is typically too narrow for the IKEA hidden storage cabinet. It will also be slightly too tall once you have added the base.
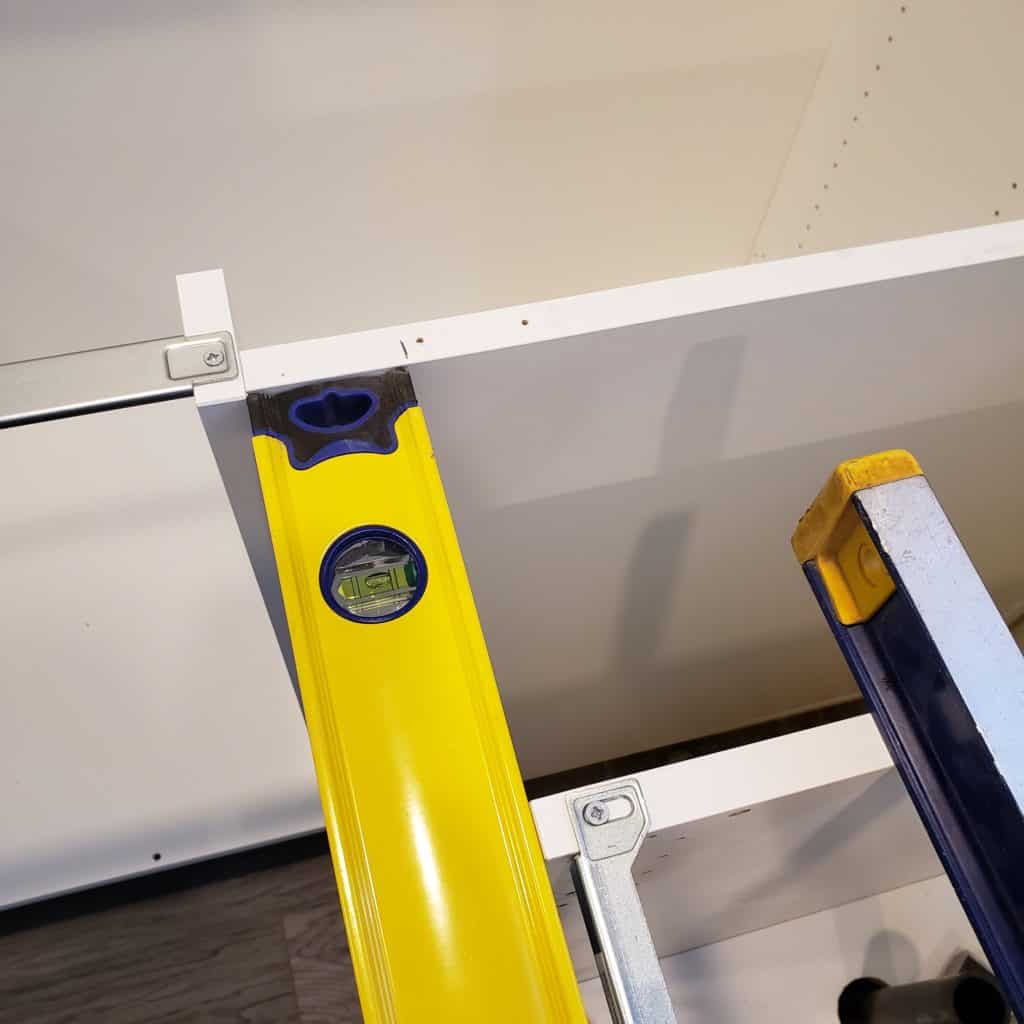
Start by determining where the hinge mount should be located. To do this, use a box level or anything dead straight to create a mark that is even with the neighboring cabinet.
Cut your filler panel to the correct height and width. The height will be measured from the base of the hidden storage cabinet to the top of the neighboring cabinet frame. The width, will be 1″ wider than the gap measured in step 2. The extra inch will serve as the hinge mount.
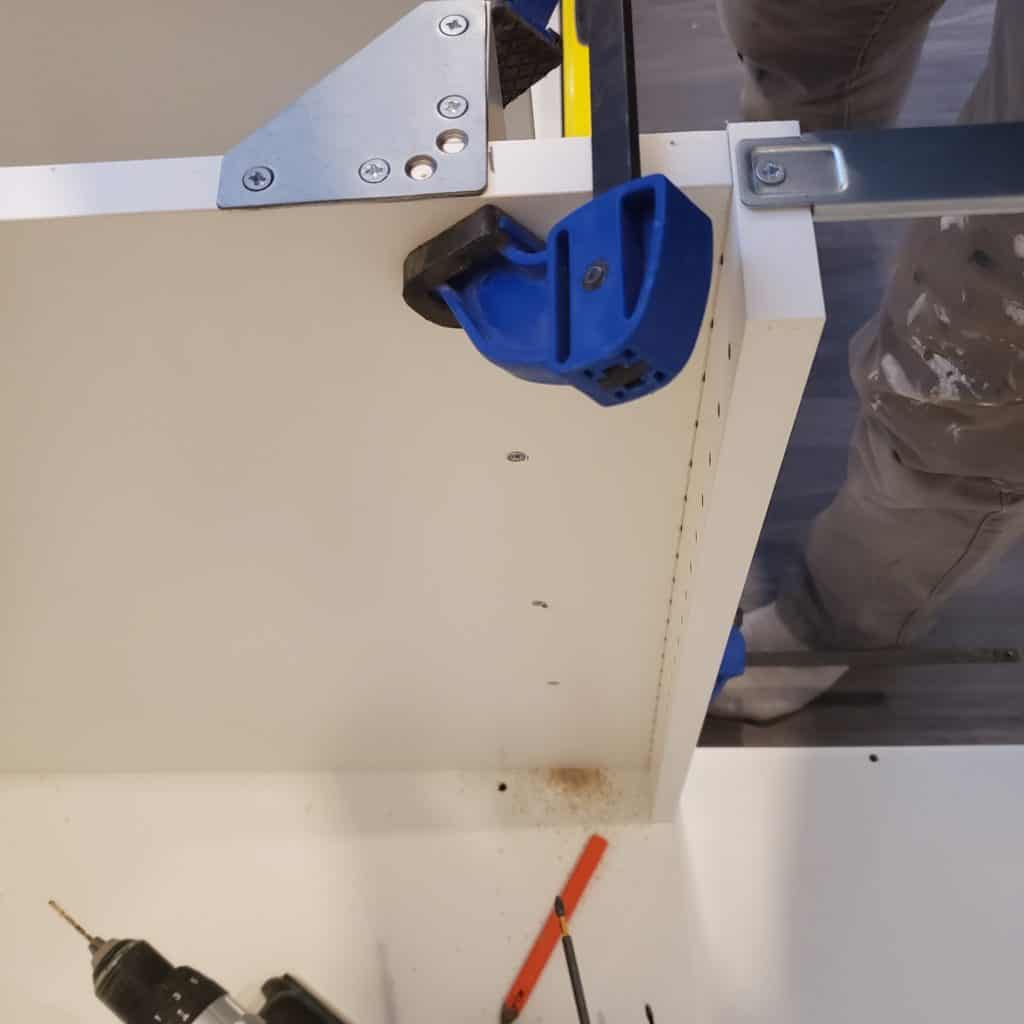
Use the angle bracket that came with the blind corner cabinet for attachment. The pre-drilled factory holes likely won’t line up and will require pre-drilling in the correct location.
To further brace the hinge mount, attach screws from inside the corner cabinet.
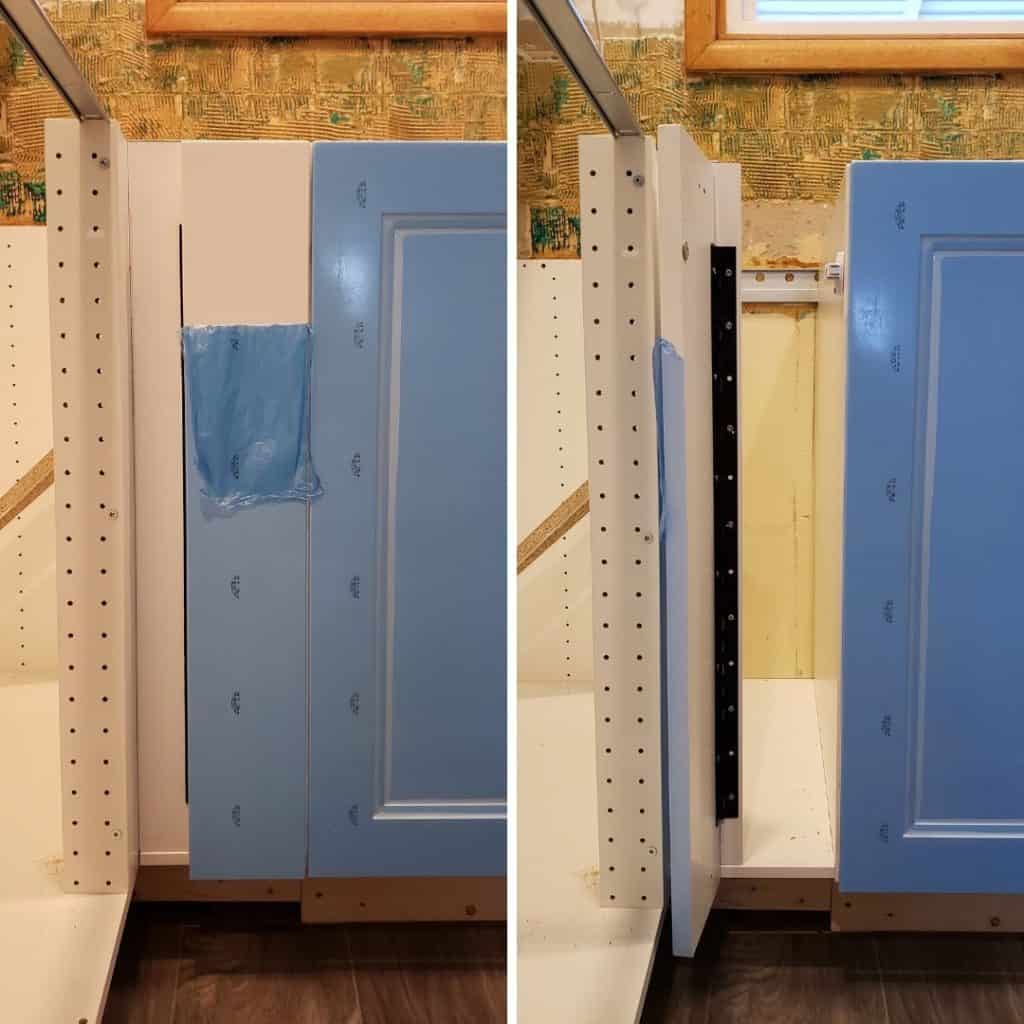
At this point, your hidden IKEA storage cabinet should look something like the photo below. Note, the drawer front is just sitting in place and not yet installed.
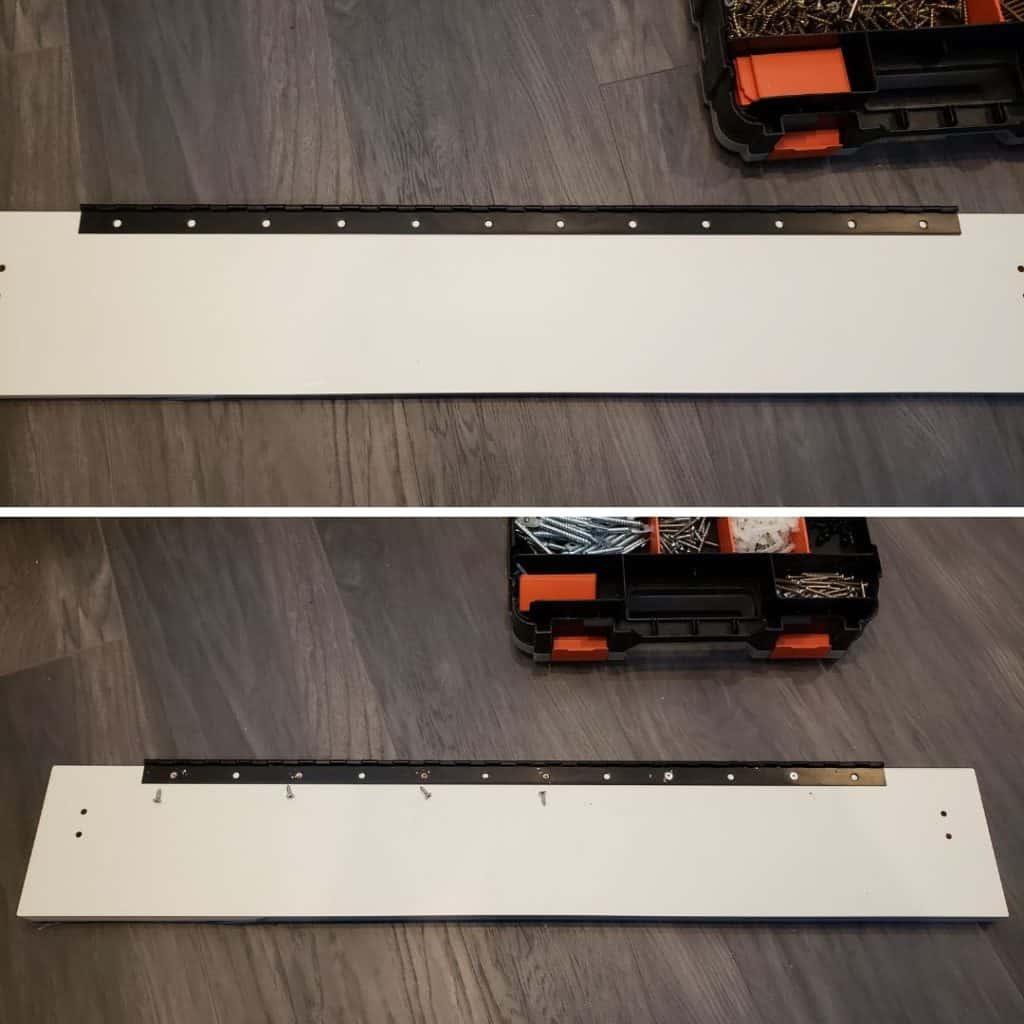
Step 5) Mount the continuous hinge to the drawer front
I went with a 24″ black continuous hinge to match the other accents within the kitchen. I centered the hinge on the drawer front with the spine hanging just off the edge. Add screws every second hole along the length of the hinge.
Step 6) Attach the drawer front to the hinge mount of the hidden storage cabinet
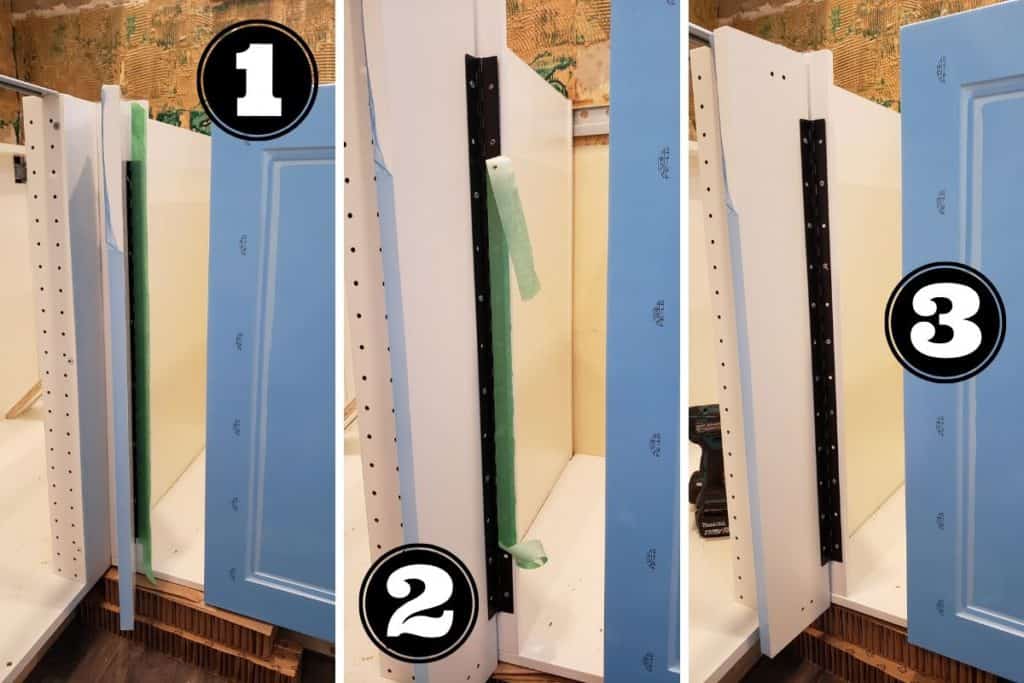
Use painters tap to hold the hinge in place while you determine the exact location to attach the hinge. You want the door to close perfectly even with the neighboring cabinet frame. Using a neighboring cabinet door can help with this process. Double check to make sure the hinge is plumb before attaching.
Attach the hinge to the hinge mount alternating every second hole along the hinge length. These should be across from the second set of holes that weren’t used to attach the hinge to the drawer front. The reason for this is so the screw heads don’t hinder the function of the hinge by bumping into one another.
Step 7) Mount the automatic magnetic latch

Align the drawer front for the hidden IKEA storage cabinet with the neighboring cabinet door and mark the location for the latch.
Attach the latch in place with the provided screws.
If you are installing this hidden cabinet next to an appliance and opted to go without the extra cabinet side, install this magnetic latch on the base.
Alternatively, if you wanted to add cabinet hardware to the front of the drawer, go ahead and skip this step. Just be aware that the hardware will likely limit the amount the drawer front can swing open, and may damage the door fronts on neighboring cabinets.
That is it! It is a fairly easy project to take advantage of what could be wasted space. The extra cost comes in around $85 dollars once you purchase the extra drawer front, filler panel (if you don’t have one), hinge, and latch.
If you didn’t want just an open cabinet, you could even go one step further and add specific cabinet organizers inside if the space is large enough. Give it a try in your next kitchen design. Or if you are planning a renovation and would like to work with us, head over to Homestud Studios and get your design ordered today!
You might also enjoy:
Looks great. I’ve done the same but find it much easier to take a cabinet and cut it to the desired size before assembling it. This is especially useful if any shelves are gonna be used.
Hi. I’d love to see this done in a video.