
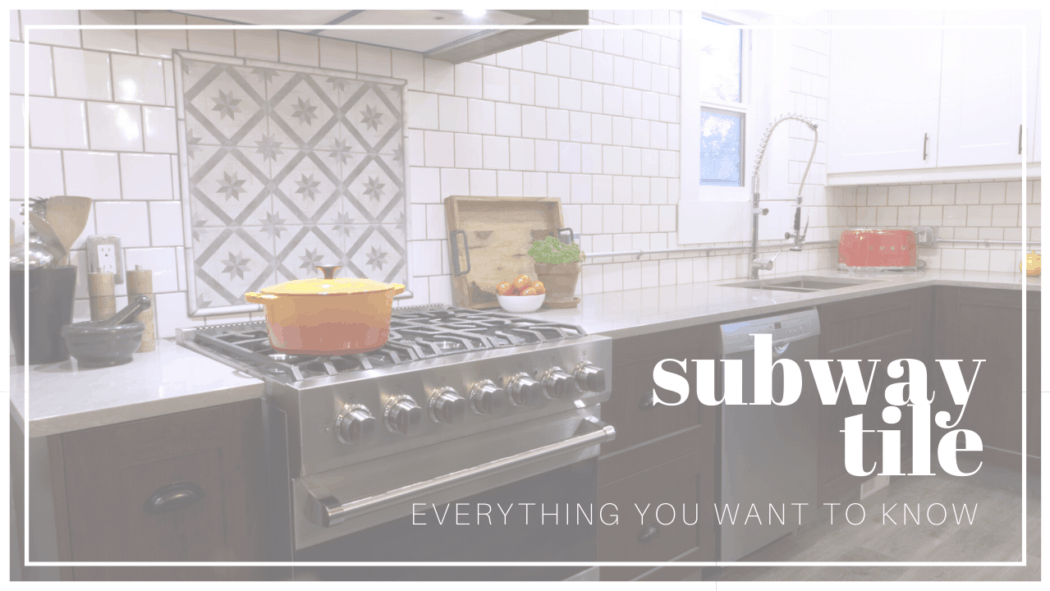
There is something about a white subway tile backsplash. Most likely you immediately think about those ubiquitous, affordable, 3×6 inch white ceramic tiles. Well what if I told you, there is far more to this timeless design trend!
White subway tile originated in the well…you guessed it…the subway. Specifically in the tunnels beneath Manhattan. They made the tunnels bright and comforting, and most of all, easy to clean. From there, white subway tile seems to have migrated across North America into thousands of bars, kitchens, and bathrooms, largely due to those same properties.
Classic subway tile dimensions
For most, the 3×6 inch white subway tile is considered to be the classic dimension. In general this is true, however nowadays subway tile has come to mean a whole lot more. The genre of subway tile has grown immensely to include virtually any size of white glazed ceramic tile (rectangular or square). In addition, you can purchase colored options, as well as tiles in a variety of materials including glass and stone.
When it comes to a subway tile backsplash, our last few houses stuck to the classic 3×6 inch pattern. It looks timeless and helps make the space feel more open. Although not a harden fast rule, stick with smaller dimensions for a kitchen backsplash. Larger formats are better suited to bathroom walls and tub surrounds.
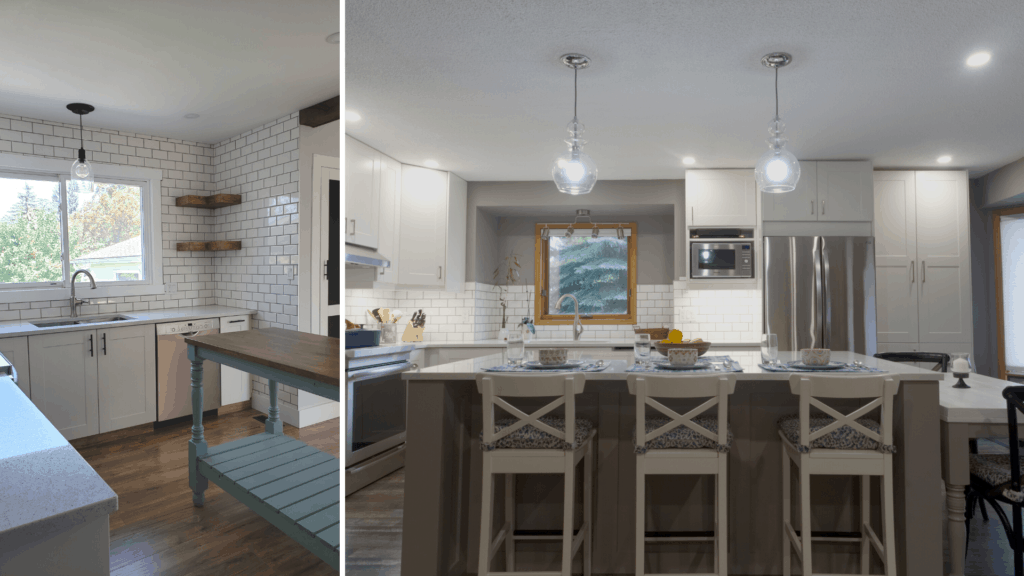
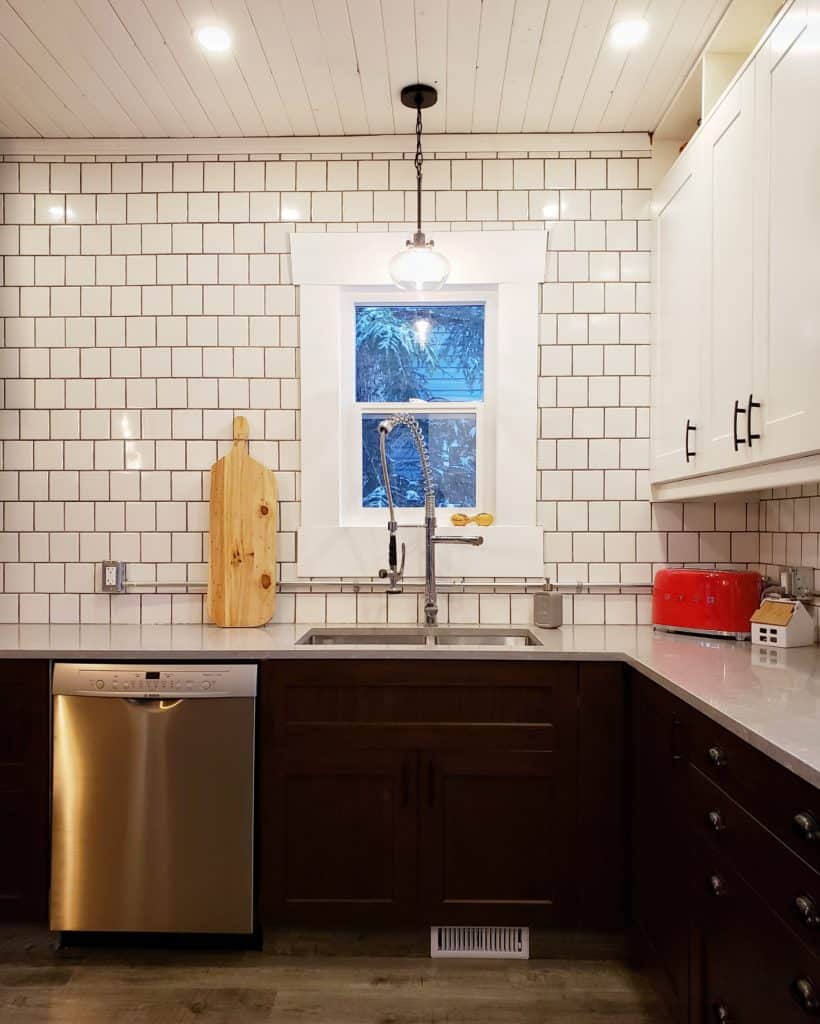
In my kitchen I used square 4×4 inch for the subway tile backsplash. We wanted the clean lines of a white subway tile but not the classic 3×6 inch look. In this design, we bricked the pattern due to the rather large wall we were covering. We avoided stacking the square tile because in abundance it can give the impression of a pizzeria or butcher shop.
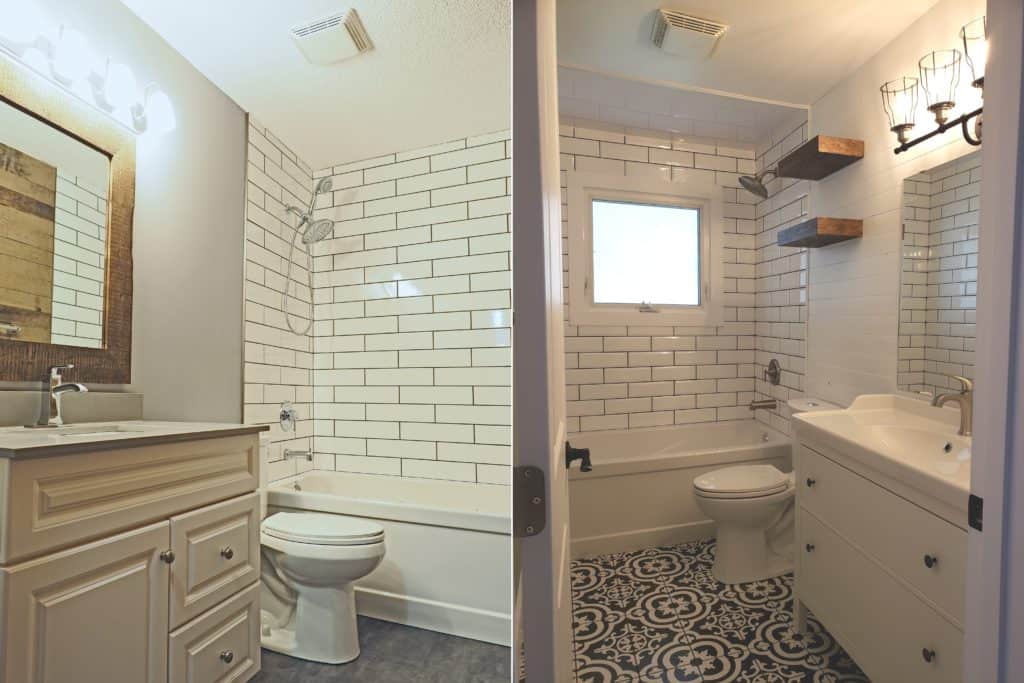
In these two tub surrounds, large subway tile (4×12 inch) was used to make the space feel clean and airy. The extra bevel on the subway tile at Hilltop (right side) adds a little extra flair and elegance to the classic design.
Types of subway tile
As mentioned above, subway tile also consists of glass and stone varieties. Interestingly, the original subway tile below Manhattan was actually a thin white glass tile.
The most common subway tile- glazed ceramic, comes in three main finishes:
- Glossy: These are shiny, reflect lots of light, and the most common type of subway tile backsplash seen in design.
- Matte: This finish reflects far less light and is seen more in colored or patterned tiles.
- Flat: Unless you are shopping at specific tile shops, finding flat subway tile may actually be quite difficult. It is the least commonly used, especially in a kitchen.
Subway tile patterns are endless
Most people immediately picture subway tile laid in a standard brick pattern. However, there are far more options than that. You can stack them (horizontal or vertical) and create herringbone or chevron patterns. The folks over at Remodelista have composed a glossary of tile patterns.
Keep in mind the size, color, material, and pattern will have a huge impact on the overall kitchen. For that classic timeless look, standard 3×6 inch tile will do just fine. However, it won’t look so great in a bohemian or mid-century design. Some of our favorite kitchens with a subway tile backsplash can be found at the end of this article.
Cutting subway tile
There are so many ways to cut tiles nowadays, ranging from wet saws, tile cutters/snappers, grinders with diamond blades, to special glass tile cutters. The best choice comes down to which tile you settle on.
When I am working with standard ceramic tile, I prefer to use both a wet saw and a grinder with a diamond blade. The wet saw makes perfect straight cuts every time and is great for repetitive cuts. However, it does not work so well for cutting anything rounded (think around tub valves, handles, heads, etc). This is where a grinder with a diamond cutting wheel comes in real handy.
Joint sizing/Grout lines
Is there a right choice? Well yes and no… Grout lines should typically be greater than 1/16 inch. Luckily, most standard white subway tile is uniform making installation straightforward. Some tile manufacturers even include a slightly raised bump on each edge for consistent spacing. These can be directly stacked, leaving roughly 1/16 to 1/8 inch grout line, or stacked with tile spacers to give slightly wider joints.
If the tile you have chosen is handmade/non-uniform, you are in for a challenge. A slightly larger grout line will make the tiles look more uniform in nature, and a drystack (no space) will look more like zellige tiles. I know that sounds like a totally made up word, but it actually refers to one of the most on trend designs in tile for 2019. Zellige tiles are hand made so no two tiles will ever look identical. The process results in slightly different widths, thicknesses, and hues. Take a look at the photo below.
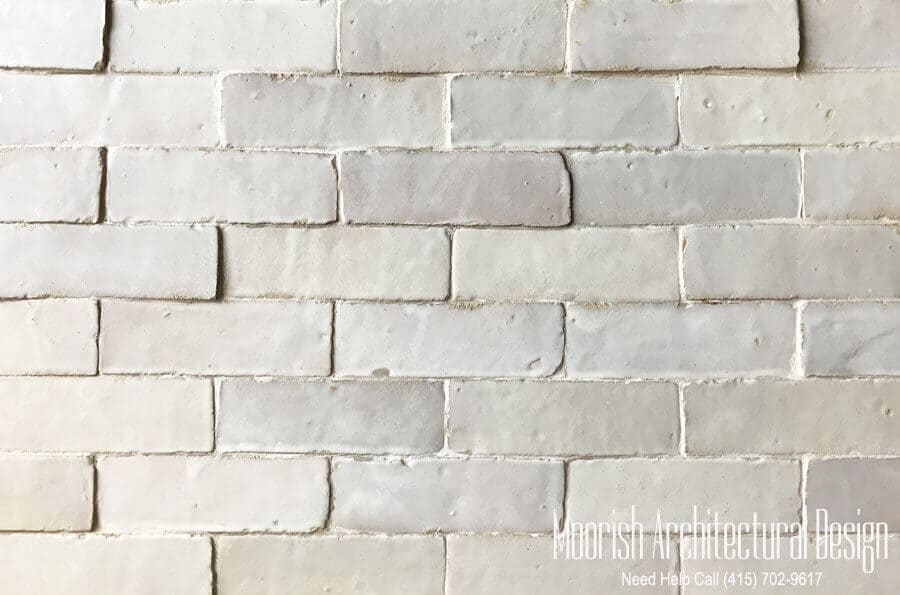
You are probably wondering why I am even mentioning these tiles in a post about white subway tile. They seem worlds apart. But in fact zellige can be considered the ancestor of subway tile, as this was the first method of creating white tiles that could be laid in a brick pattern.
This is not a style for perfectionists! No two tiles are alike, giving this version of subway tile an old-world imperfect charm.
Choose your grout carefully
After spending hours agonizing over your backsplash tile, grout can be an afterthought. However, grout color can affect the design and functionality. Further, there is more than one type of grout depending on the joint spacing and type of tile.
Sanded grout
This is the most standard type of grout used in tile installations. Sanded grout is used on all tiles except those that are easily scratched (stone and some glass). In addition, sanded grout should be used when spacing is larger than 1/8 inch.
Unsanded grout
As you might have guessed, unsanded grout is for tiles that are easily scratched and spacing smaller than 1/8 inch.
Epoxy grout
Unlike the cement based grout already discussed, epoxy grout is made from epoxy resins and a filler powder. It is extremely durable and nearly stain proof. This may sound great, but epoxy grout is substantially more expensive and much harder to work with. Not something recommended for weekend warriors!
Grout color
Just like a kitchen backsplash, grout color is subjective and can completely change the look of your subway tile.
Here are a few tips to guide you:
- Light grout colors can make light colored tile look seamless. For example, a white subway tile backsplash with white grout can look almost like a uniform surface. However, this will make the pattern almost disappear.
- Light grout will accentuate the pattern in dark or colored tile
- Light colors can be difficult to clean even if the grout is sealed with a grout sealer. Think spaghetti sauce on white grout in between white subway tile….not so good.
- Dark grout accentuates the pattern of white subway tile. This is the ‘old New York look’.
- Darker grout is harder to perfect and can exemplify flaws if you are a novice at grouting.
The cost of a subway tile backsplash
This might be one of the first popular designs to not cost a fortune! In fact, it is the exact opposite, subway tile is one of the cheapest options available. Even better, it is one of those trends that never seems to go out of style.
For the DIYers out there, generic subway tile from the hardware stores are only 29 cents a piece for 3×6 and 4×4 inch tiles (in my neck of the woods). That rings up under $3/square foot! Prices will only go up from there for professional installation costs and more unique tile. Installation costs will also vary widely depending on the chosen pattern, location, and time required.
8 subway tile backsplash ideas to get you started
Industrial farmhouse
I have to kick this list off with our kitchen backsplash! I love the 4×4 inch tile run all the way to the ceiling. The exposed electrical conduit and industrial faucet help round out our industrial farmhouse design.
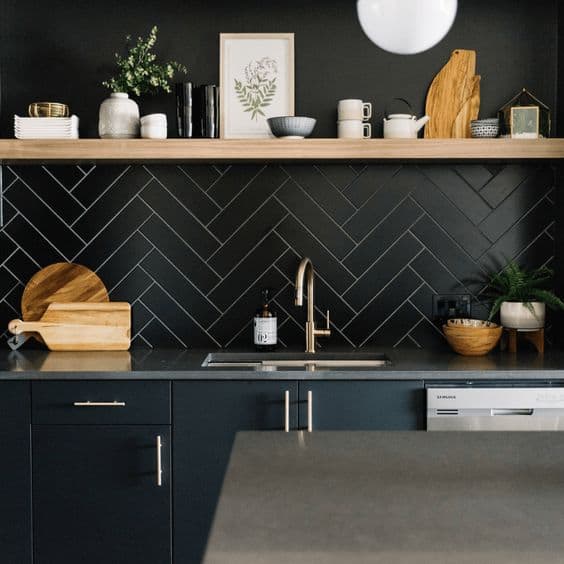
Divine black and white
I have an obsession with black and white kitchens balanced with a touch of wood grain. The subway tile backsplash adds to the overall elegance and character.

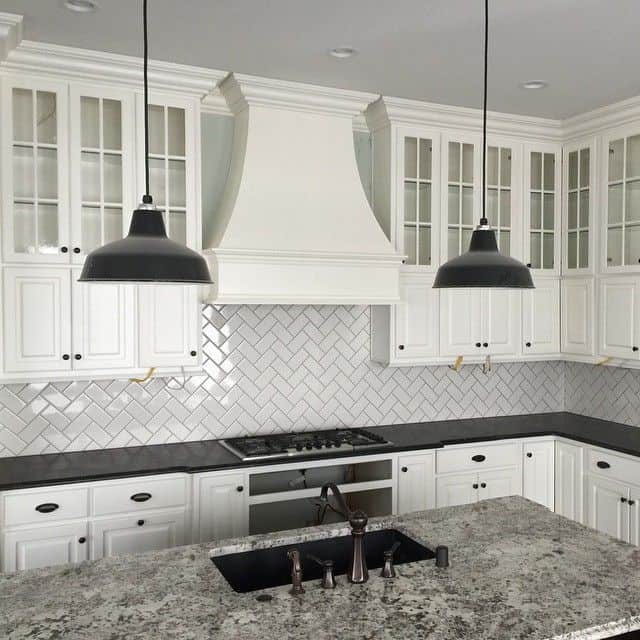
French country herringbone
Switch up the pattern for a whole new look. I also like that they used simple countertops next to the herringbone tile to avoid a clash of patterns.
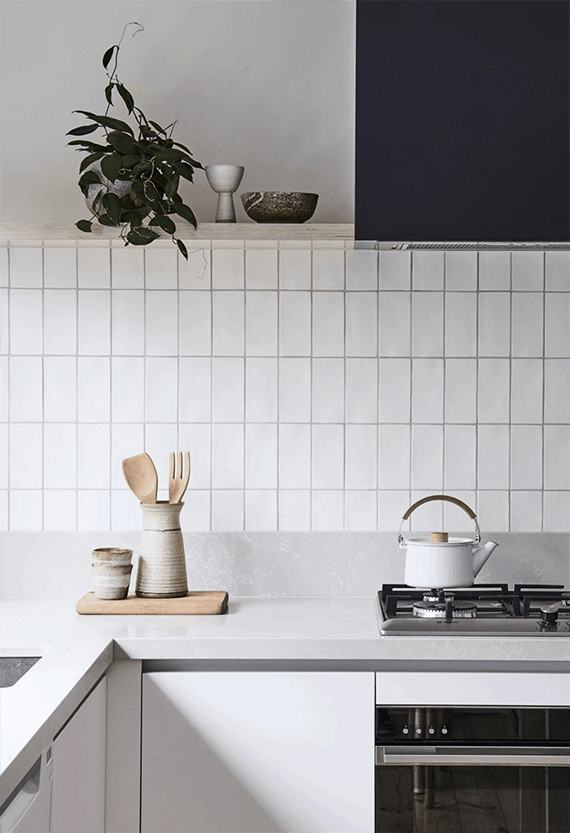
Bespoke vertical stack
A minimalist bespoke kitchen backsplash. A simple rotation and you get a whole new look.
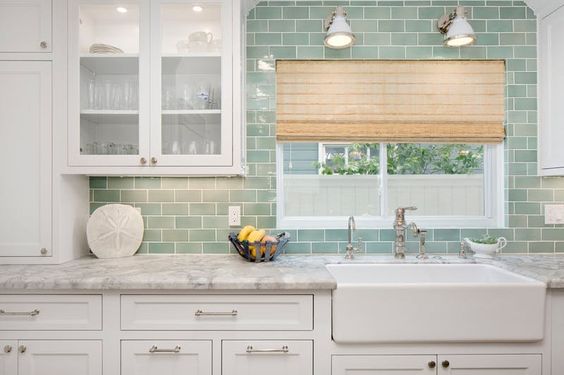
Laid back beachy in sea foam
It takes serious courage to throw in colored tile. This is not an easy change if the design doesn’t turn out well. In this case, the sea foam green is spot on!
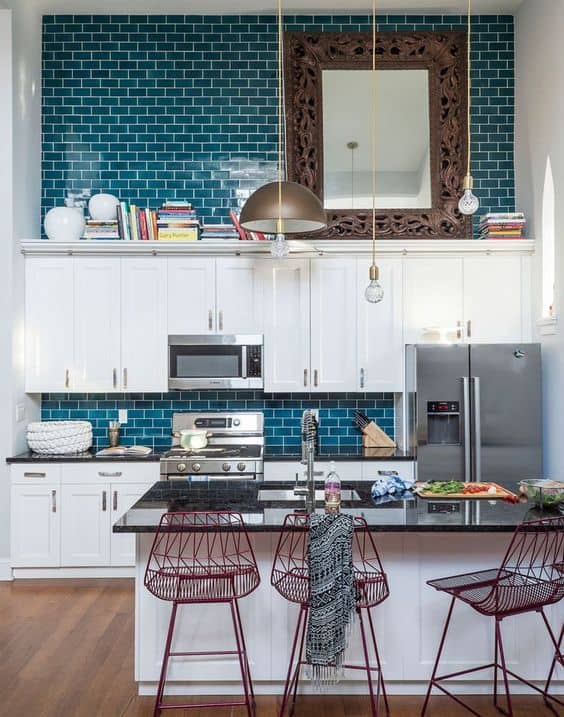
A summerhouse
Open, airy, and just feels like home. The long blue skinny subway tile backsplash paired with the butcher block island gives a feeling of cool and comfortable.

Black and bold
It would be interesting to see the complete kitchen, but the snapshot looks rich and luxurious.
Can you say ceiling height
The ceiling height is bananas and I love that they drew attention to it with colored tile!
This all being said, if you are thinking of tackling your first ever DIY tile job, go with subway tile. It is forgiving in comparison to other tile options and can still look great when not 100% perfect!
Some other posts you may enjoy:
Great article, just what I was looking for.