
Well the day finally came- we completed the Beige Bungalow!
Just over a year ago, we took possession of the Beige Bungalow. She wasn’t pretty, just dated. But overall the house was well kept and good boned. What we did know is that it was going to provide a great foundation for a complete home renovation.
Overall, we heavily renovated the kitchen, family room, master and main bathrooms, the basement, and landscaping. Smaller updates were completed on the living and dining rooms, bedrooms, and basement bathroom. In the end, we repainted every wall in the house, laid roughly 3400 square feet of flooring, and installed nearly 500 linear feet of trim. We even squeezed in a few custom IKEA hacks, a custom kitchen island, and completely brand new landscaping in the front and back yards.
Over the last few months our community has grown substantially and the majority of you weren’t around for the first round of reno’s last winter. So I figured what the heck- let’s write a complete recap of the entire reno process at The Beige Bungalow.
I also thought it would be the perfect time to take some time to give you all an insight into how my brain works during renovations. I don’t know if this is how everyone thinks, or if it’s even the right way, but it’s what works for me. Maybe it’ll help point you in the right direction, maybe it won’t help you at all. What I do know is that you will need to figure out what works specifically for you, and the only way to determine that is by getting started!
So with that- let’s START!
The Kitchen
How many times have you heard the saying, ‘the kitchen is the heart of home’. I got news for ya, it’s because it’s true! Every house I have ever considered for renovations (or for my family) had to pass the kitchen inspection. I didn’t care that it looked nice, it just had to have good flow with the rest of the house.
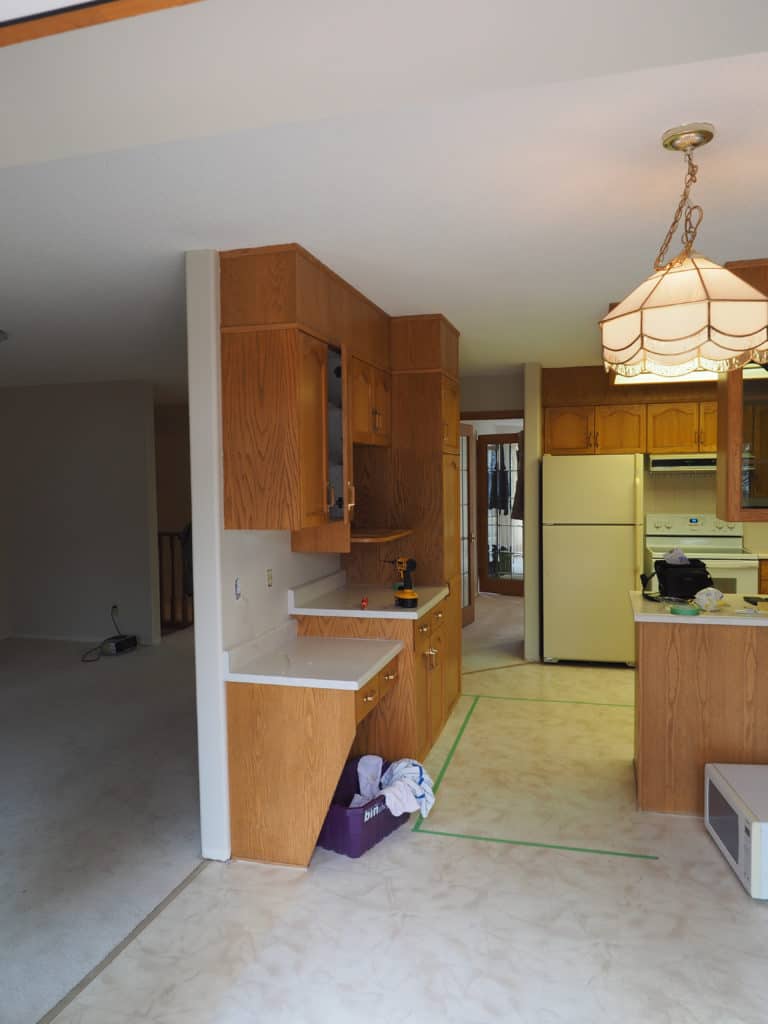
Yes! Believe it or not, that dated kitchen above was exactly what we were looking for. It was perfect!
I am not going to get into the nitty gritty details about planning the kitchen renovation, you can find those here. What I want to discuss, is the WHY this was the perfect choice for renovating.
So why did I like this kitchen so much?
- The kitchen is not the first thing you see when you enter the house.
- It was at the back of the house with great access to the back yard. This is especially important if you love entertaining. We also planned for completely new landscaping that would take advantage of this access.
- The wall you see dividing the linoleum and the carpet can be easily removed without structural work. This let’s me create an open concept with the family room, while leaving some division with the formal dining room and living room.*
*Before I get emails or comments hating on number 3, let me provide some context to that statement. I am in by no means against open concept living spaces (I have one in my house). What I am against, is the open concept spaces that have ZERO definition to them, making them look like giant caverns. If we were to knock out both walls in this kitchen, that is exactly what we would have wound up with.
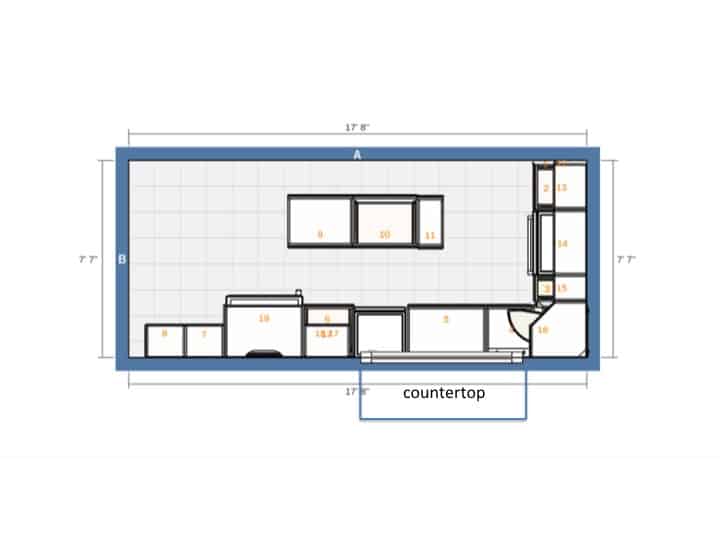
My initial design process is always pretty darn unscientific- I just visualize the finished space. This is what I would consider the hardest part for most people. If you are someone who struggles seeing a finished result before the initial hammer has even been swung, fear not. There is amazing software out there to help with this. In fact, I’m pretty sure this is exactly why 3D rendering was generated. Once I have an idea for the space, then I pull out the tape measure and start getting some exact numbers down on paper. This is especially important if you are dealing with standard off-the-shelf-cabinet sizes, such as those from IKEA.
Before hating on IKEA cabinets, please check out these two articles about IKEA. I LOVE their cabinetry, but their planning service…uhhh not so much.
Those who know me, know I am always extremely open and honest with what I think about a product or service. But, and this is a big BUT, you need to take a few extra steps with IKEA cabinetry in order to get that custom kitchen look. And it is often these steps that bump up the price.
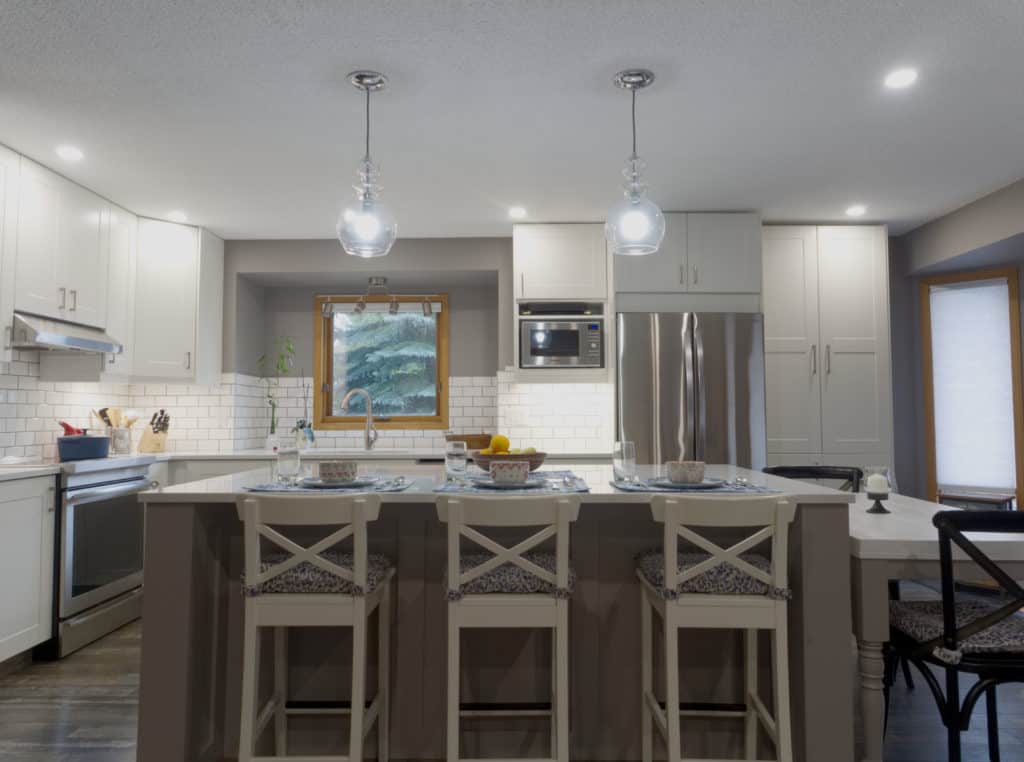
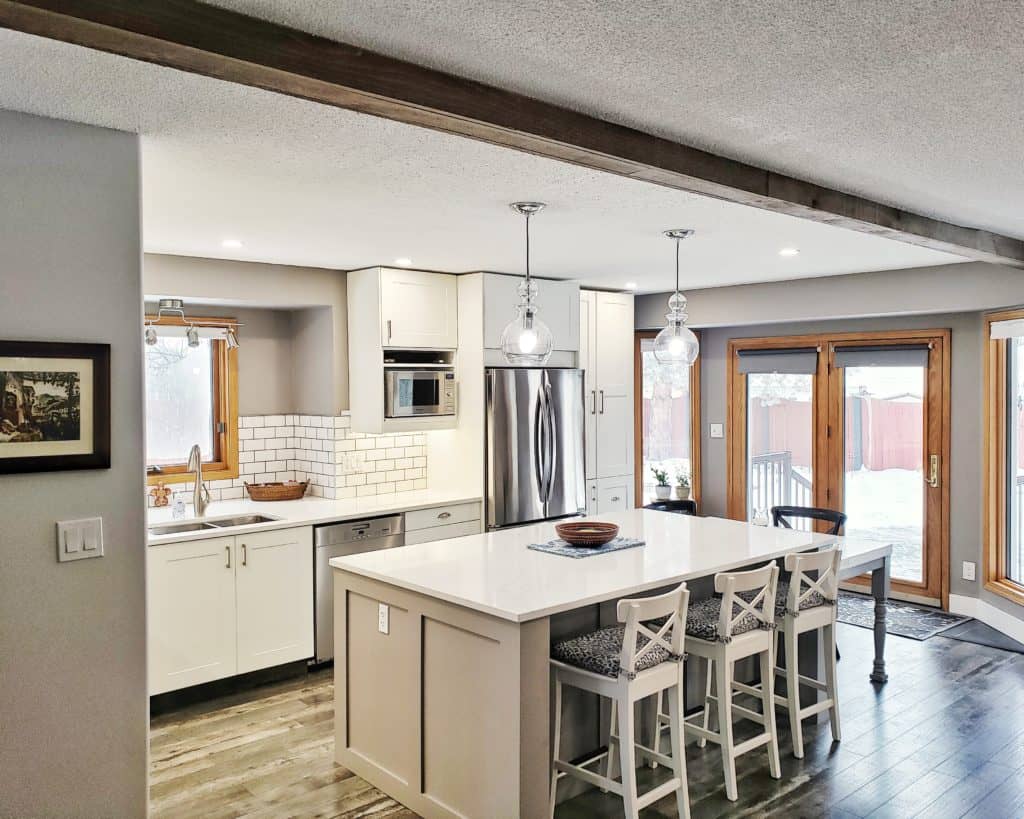
Some of the important steps we took to make this a truly classic kitchen, was the custom island, including cabinetry end panels, and deco strips to cover the undercab lighting. Be sure to check out the cabinetry installation, and the final walk through of the Beige Bungalow kitchen.
The Master Bathroom
Wooof…uhhh….blahh…those sounds or at least something very similar came out of my mouth when I first walked into the master bath. I am not a huge fan of 30 year old jetted tubs…just think about what sits in those lines. Also, check out those curtains. sexy!
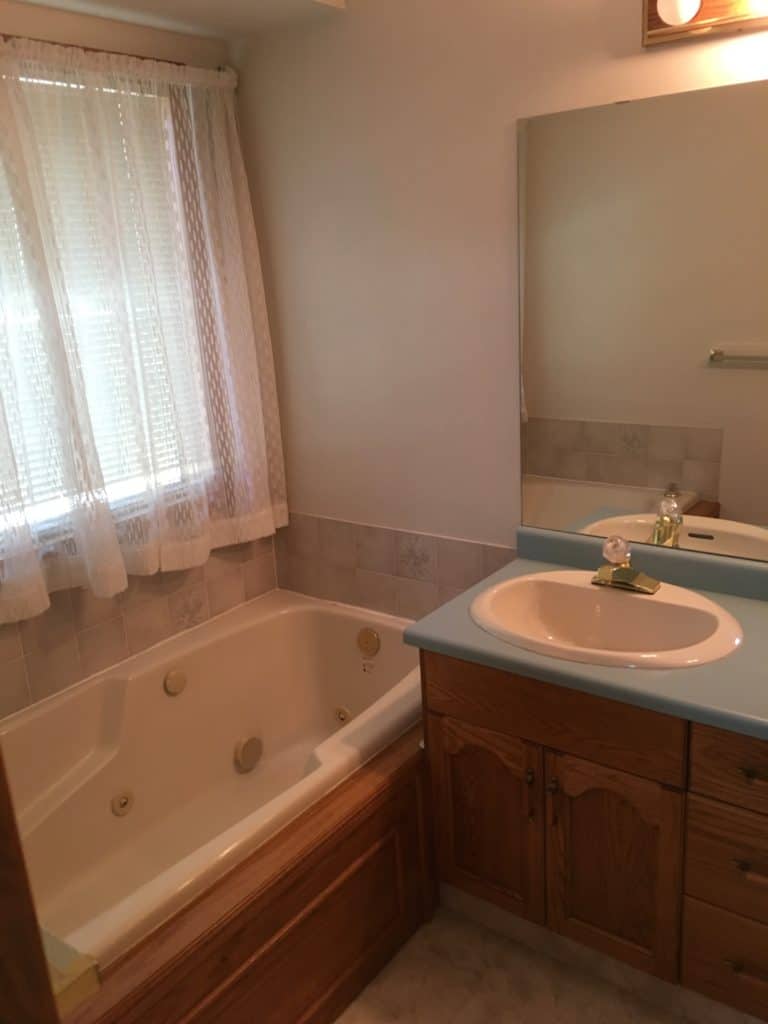
After my initial reaction, my reno brain kicked into gear and I started judging the space past it’s surface flaws. It had a good sized footprint with room for a double vanity and large walk-in shower. It just needed re-configuring.
The first major decision in this room was the remove the jetted tub. I have a love hate relationship with tubs in master bathrooms. On one hand, I don’t think they are needed at all IF there is another tub in the house (preferably near the remaining bedrooms). On the other hand, if you have the space to add a bathtub to the master bathroom, then go for it! Just be sure you have the space, don’t try squeezing in a free floating tub just because you think you need it. More often than not, a large walk-in shower is a much better feature, especially during resale.
We opted for a large 60″ walk-in shower where the original shower and toilet were located.
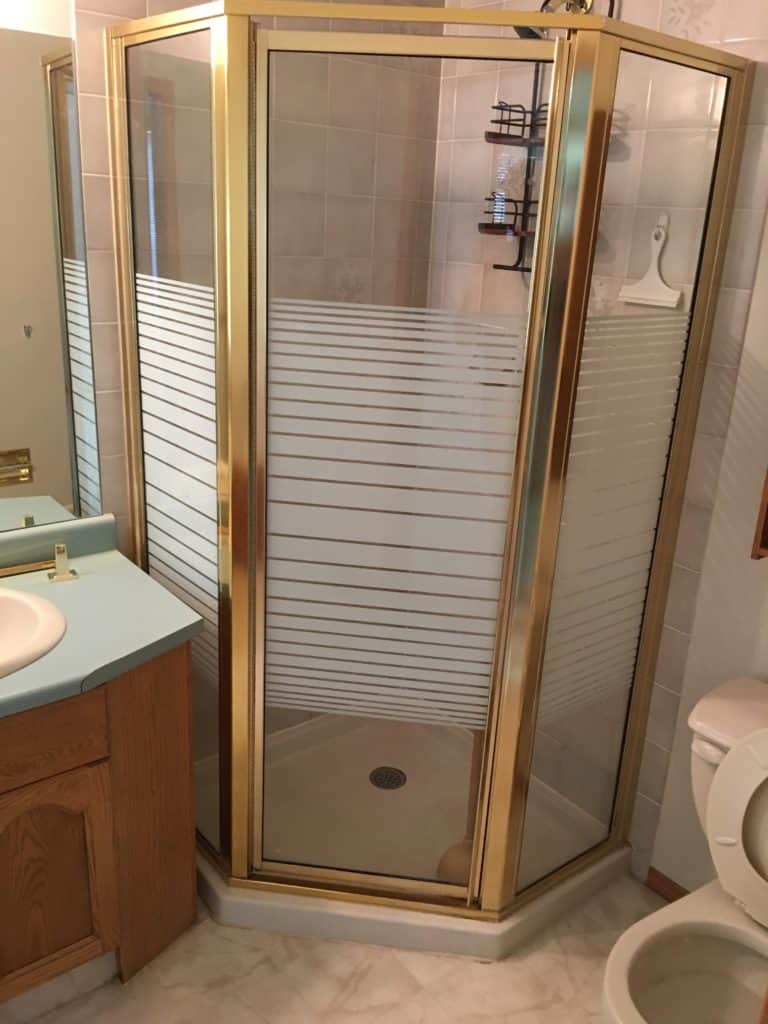
The toilet was relocated and the new double vanity was moved closer to the window.
There are some rooms in a house that need to stand out, and the master bath is one of them. I really wanted to make the master bath pop and feel like a high end hotel suite. To do this, I used glossy stone finishes, large slabs of glass, and high end finishes. However, I never design without considering function as well, and this master bath is seriously functional.
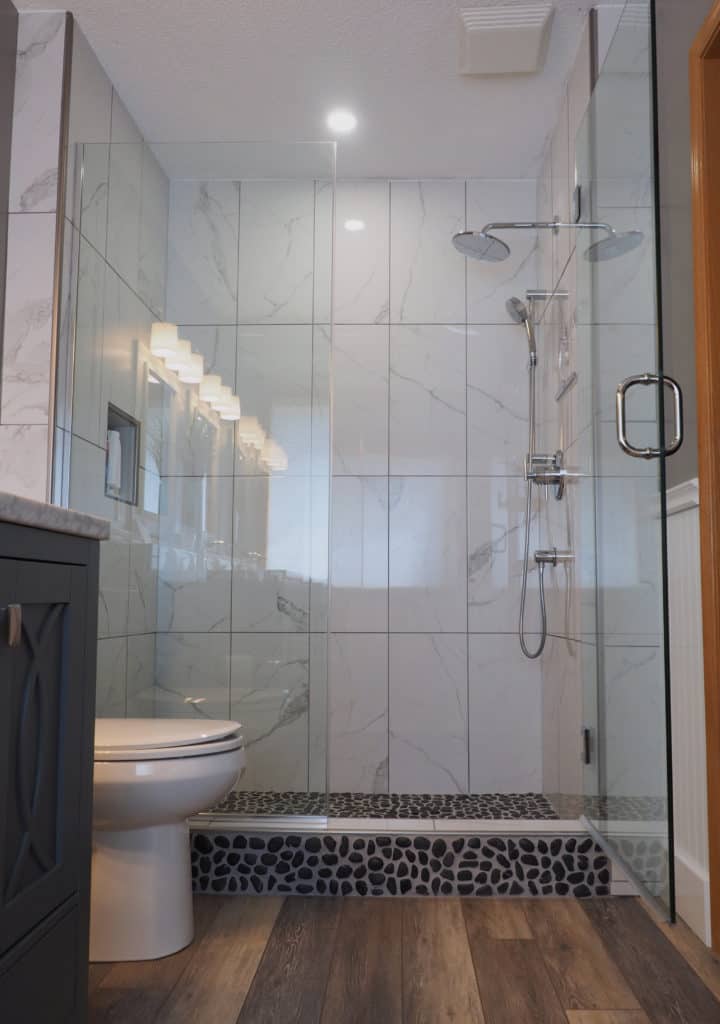
Stacking the tile vertically gives a modern feel, while the contrasting black stone base and curb keep the design from feeling too cold. This is also the time to spring for nice shower fixtures. This set from Grohe is made of solid stainless steel, and the rough-in valve is built from solid brass.
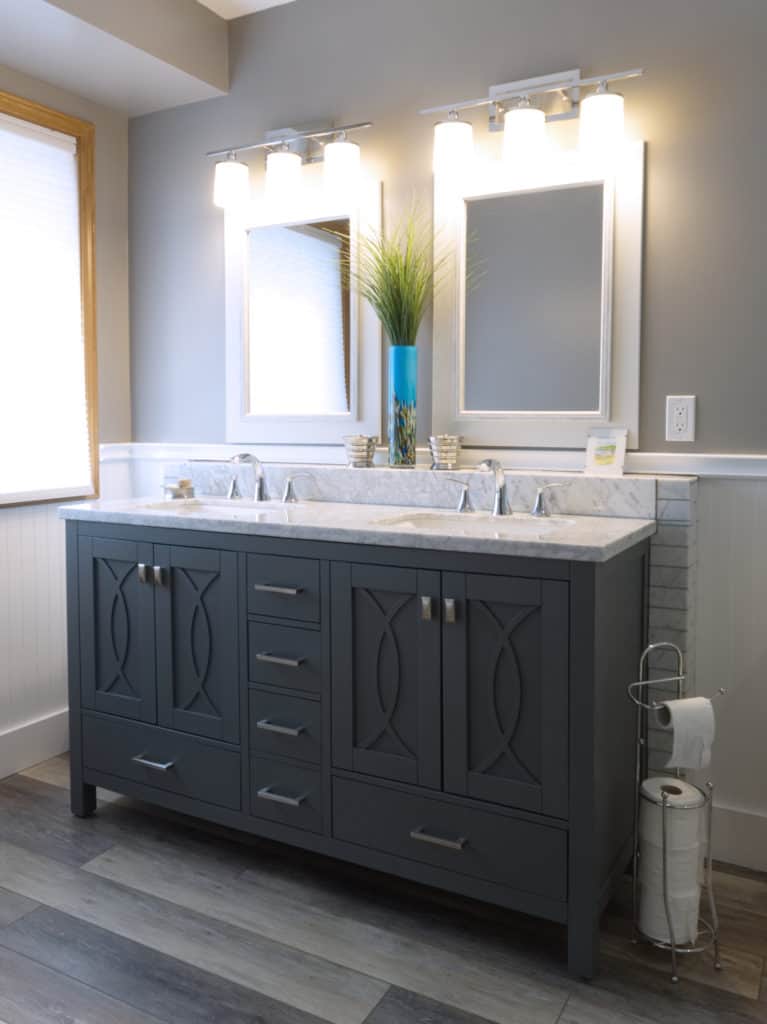
We chose a double vanity in a dark grey tone with a marble countertop. Again keeping with the modern vibes, while maintaining an inviting and warm feel. The false wall behind the vanity makes for a nice ledge, and it was finished with 2×4″ marble tiles to match those on the walls of the shower.
To finish the design, we added white wainscoting around the lower half of the room with a grey-brown paint above (Escarpment from Benjamin Moore). This color is great if you want to pull browns and greys without falling too much into one palette or the other.
And by the way, if you don’t have a good location for the toilet paper holder, consider a free standing one instead! Dive into the full post to see the complete renovation step-by-step.
The basement
Most of you joined the community and started following us as we renovated the basement at the Beige Bungalow. For those of you who haven’t seen much of the basement renovation, I’ll make sure to link to the various blog posts along the way. And we have videos for a lot of the small basement projects to help or inspire you to get your DIY on!
We had a ton of fun with the basement renovation. Originally, the layout was poor, the ceiling was low, and the beige…ah yes…how the beige continued everywhere. There was also an overwhelming love for wall sconces.
The goal:
- Relocate the so-called basement bedroom to a more suitable place.
- Create a media/lounging focused area.
- Incorporate a games area. We still had a nice banquet style bench my Dad had built, as well as an antique table, and wanted to incorporate these into the design.
- Add some unique features/built-ins to define the space.
The first thing we did, was demo the interior walls and frame out the new ones. This was a relatively simple process. We chose the new wall locations largely based on where the supporting posts were located. There is no blog post on framing, so have a watch of the video below.
Then it was time for drywalling and mudding and sanding and mudding and sanding and mudding and sanding…I think you get the point. Obviously, there is a lot of downtime during this process so I was able to knock out the basement bathroom refresh and get a start on the custom built-in bookcases.
Built-in BILLY’s
The custom BILLY built-ins ranked as probably my favorite project in the entire house. We took basic IKEA billy bookcases and created a unique set of built-ins. Again, I am not going to get into the actual build itself, read that here. What I do want to explain is why we needed them or wanted them in the first place.
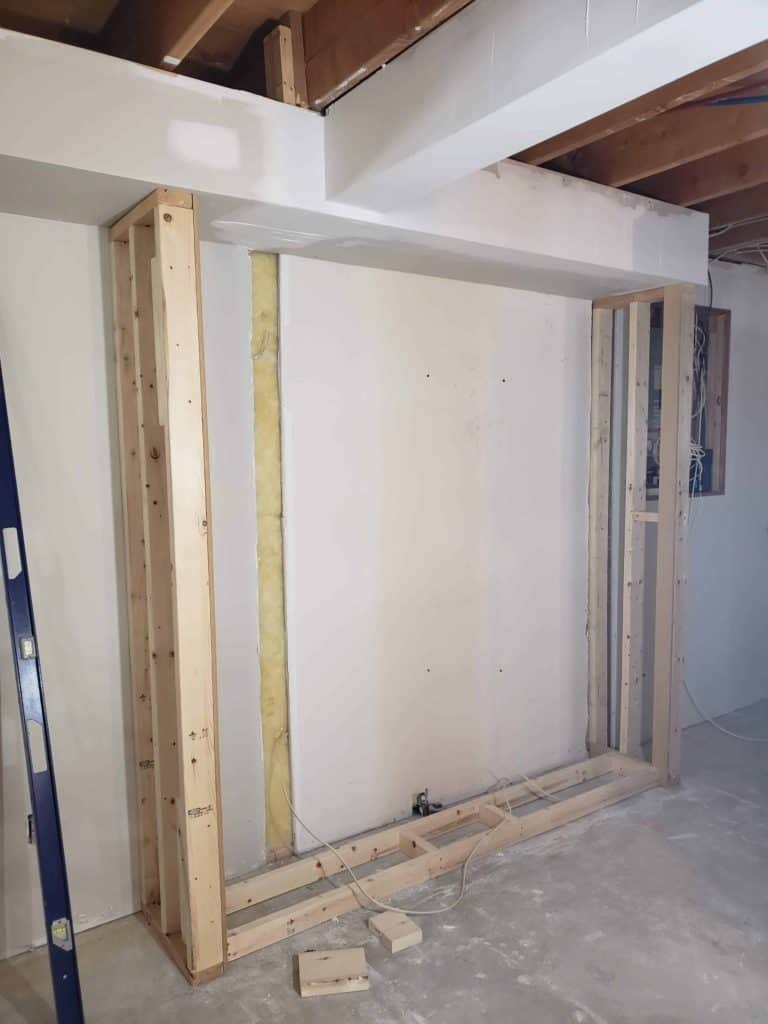
See that little gap in drywall? That’s where one of the interior walls used to be. Well it turns out that when the basement was originally framed and finished, they didn’t bother to line up the framing, which left an offset of about 1.5 inches. Option one, rebuild the wall. Option 2, use the built-ins to disguise the shift in wall framing. We needed to build them off the wall anyways to maintain access to the kitchen sink drain clean out.
The second reason was to provide some definition between the media and games spaces. Remember above when I said I don’t love large undefined spaces. The same goes for the basement. The built-in provides tons of storage and a great way to break up the spaces without actually creating a wall.
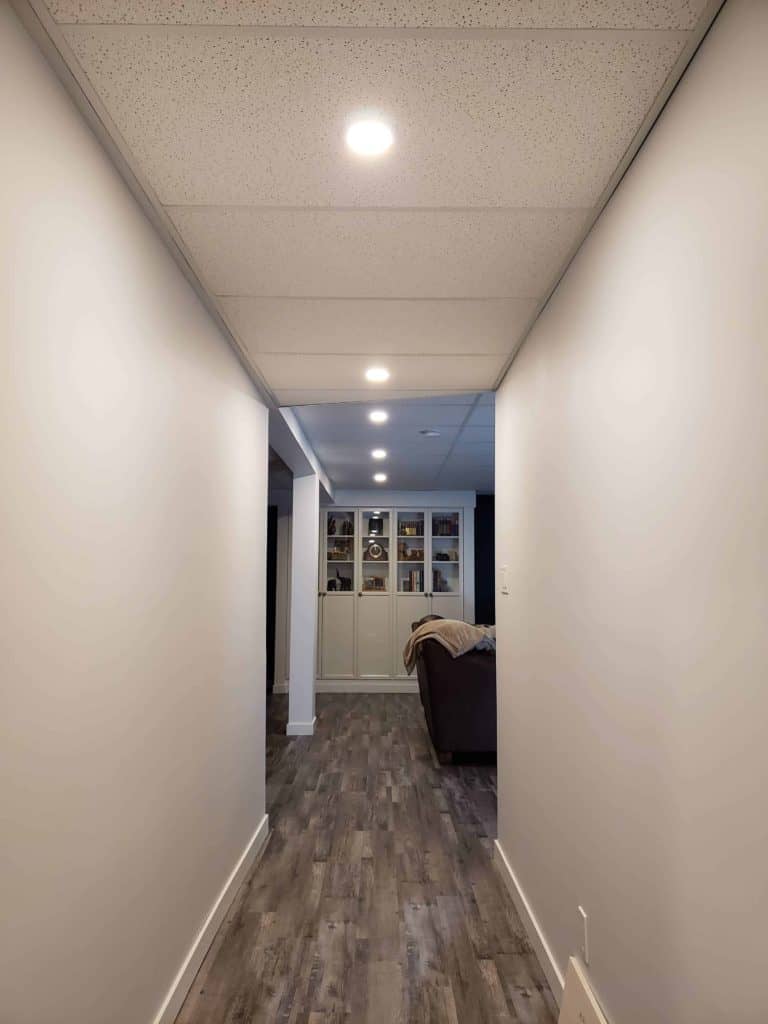
I also want to take a moment and point out how we wired our recessed lighting. The LED pot lights run from the basement stairs all the way to the built-in, giving a unique pull to the room as soon as you enter the basement.
The final reason we wanted the built-in BILLY bookcase was to divide the long wall at the back of the basement. Even if the framing had been in line, we still would have needed something to break up the space and the wall. Paired with the feature walls we created, it really becomes the focal point of the basement.
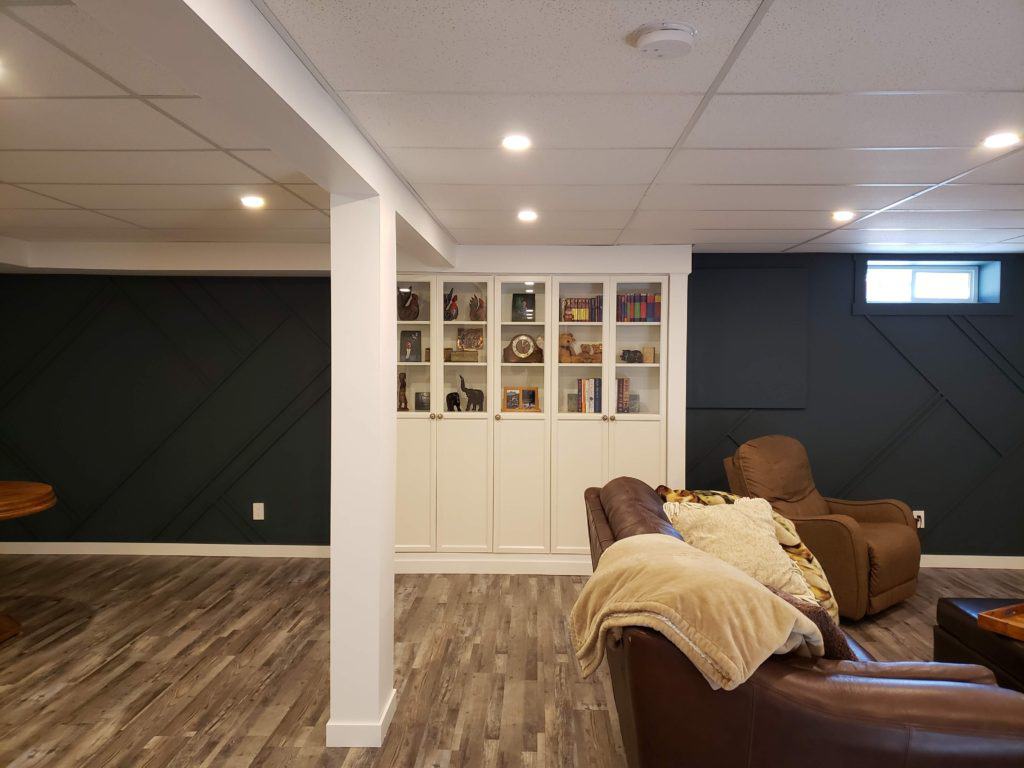
The feature wall
This project turned out even better than I had envisioned. The plan from the very beginning was to create some sort of feature wall. We batted around different ideas including wood planks, vertical slats, horizontal slats, board and batten; there really was quite a few ideas. However, I wanted to create something I had never seen before. In the end, we took traditional board and batten and threw out the rules. Out with the symmetrical vertical and horizontal trim, and in with asymmetrical 45 degree trim pieces. This was paired with a bold green (Yorktowne green from BM) to really make them pop.
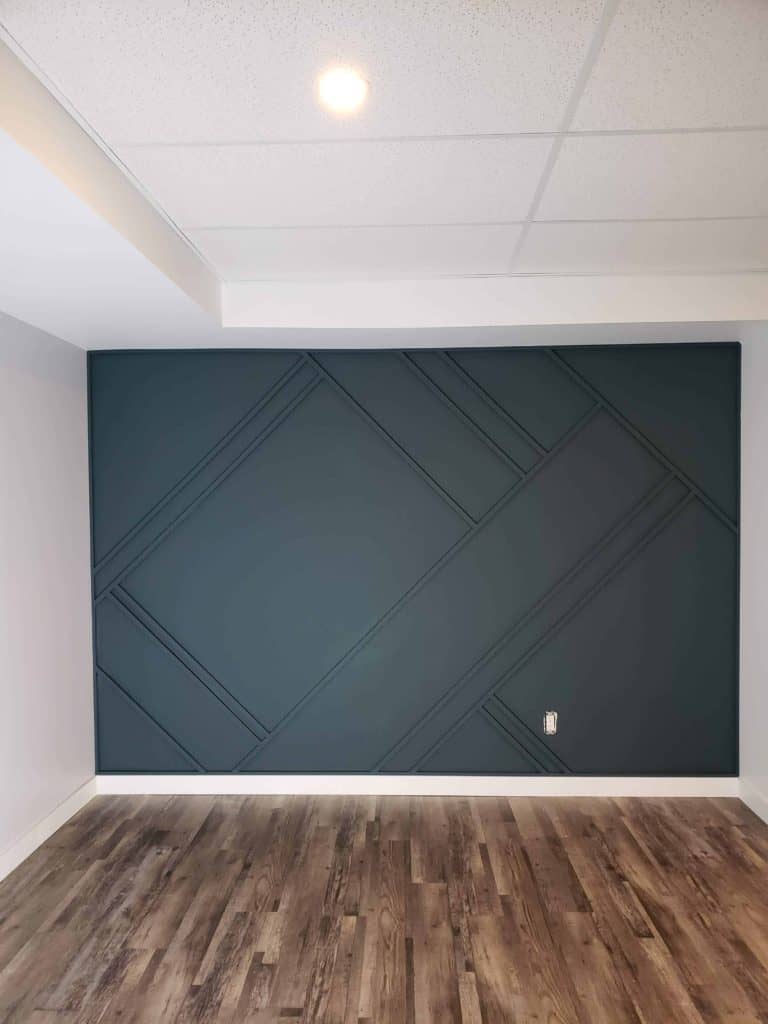
We added the feature wall on each side of the built-in bookcase creating a long focal point unifying the basement. So even though the areas are defined, the entire basement space is unified.
With the overwhelmingly positive response to this wall from our Instagram followers, we created an entire post dedicated to help you re-create it for yourself.
To finish off the rest of the basement, we gave the bathroom a face lift reusing as much of the existing material as we could. We added a drop ceiling, luxury vinyl plank floors, and a few more IKEA hacks. I love drop ceilings because they leave access to all of the guts of the main floor (think electrical, plumbing, gas, etc), making changes down the road very easy. Vinyl floors are great for a basement as they are water resistant and extremely durable. And finally, a few farmhouse style countertops transformed some existing IKEA pieces.
Landscaping
To top off the renovation, both the front and back yards received complete makeovers. This may seem inconsequential compared to the indoor remodeling, but it’s far more important than you might think.
The front yard
The front yard was well…abysmal- some half dead shrubs, junipers that smelt of a litter box, and absolutely no curb appeal. The only path forward was to rip everything out and start from scratch.
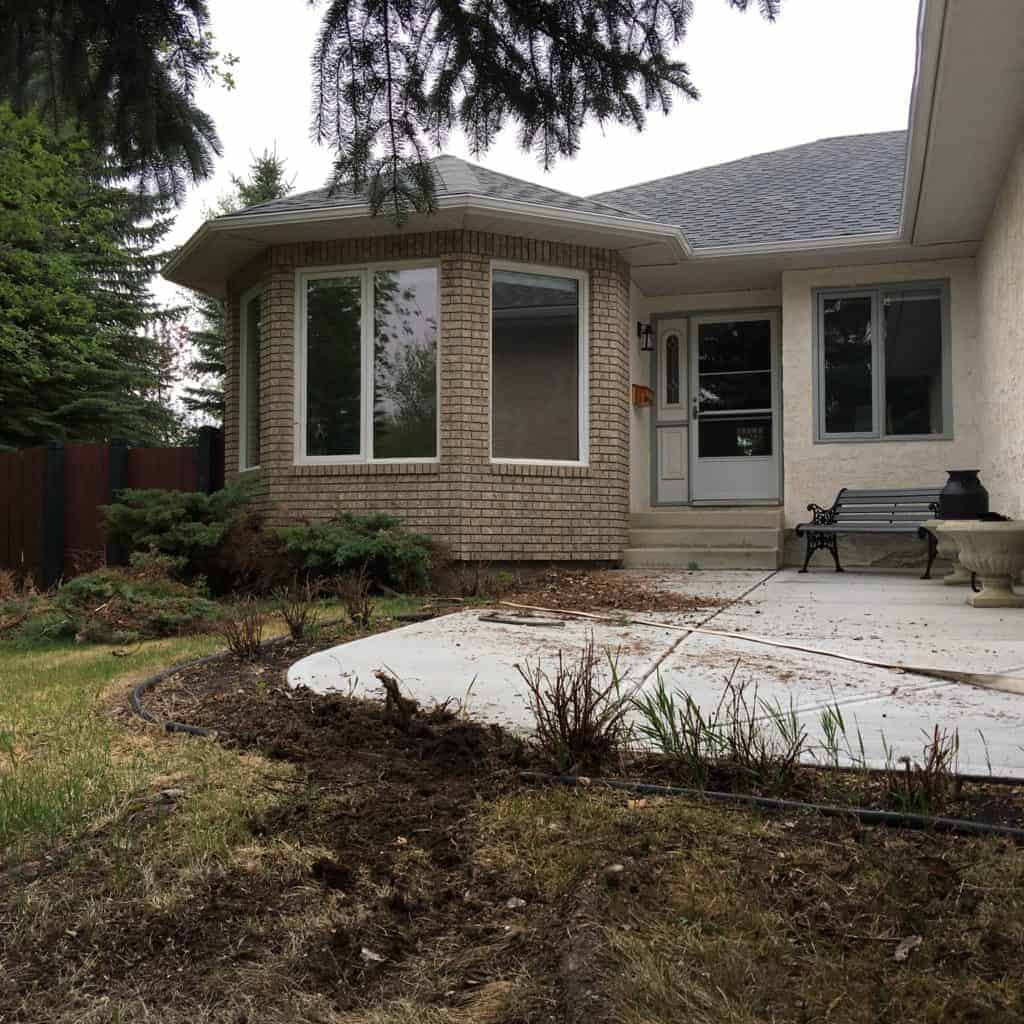
I won’t dive into the design process. It was rather simple and to put it bluntly, we needed to increase the curb appeal and refresh the front yard. Some mulch, a dry rock bed, a few planters and some nice perennials finished off the space!
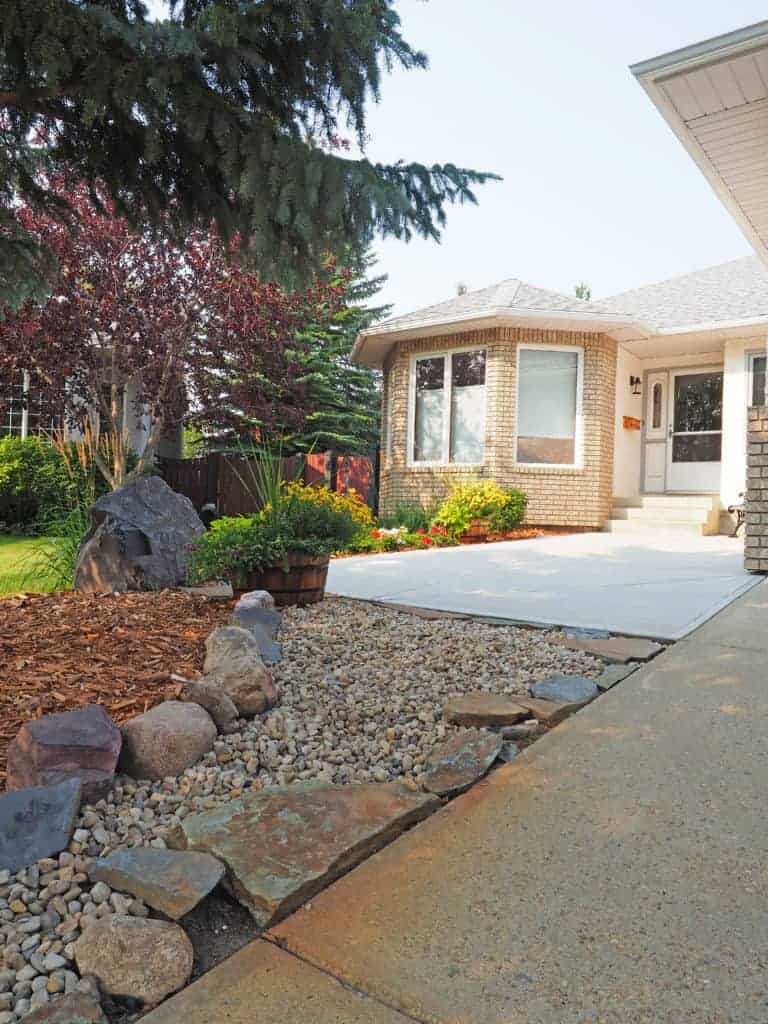
When choosing plants, think long and hard about how much work you want. For example, topiary shrubs may look nice and fancy, but they are extremely labor intensive. The plant still grows after all…
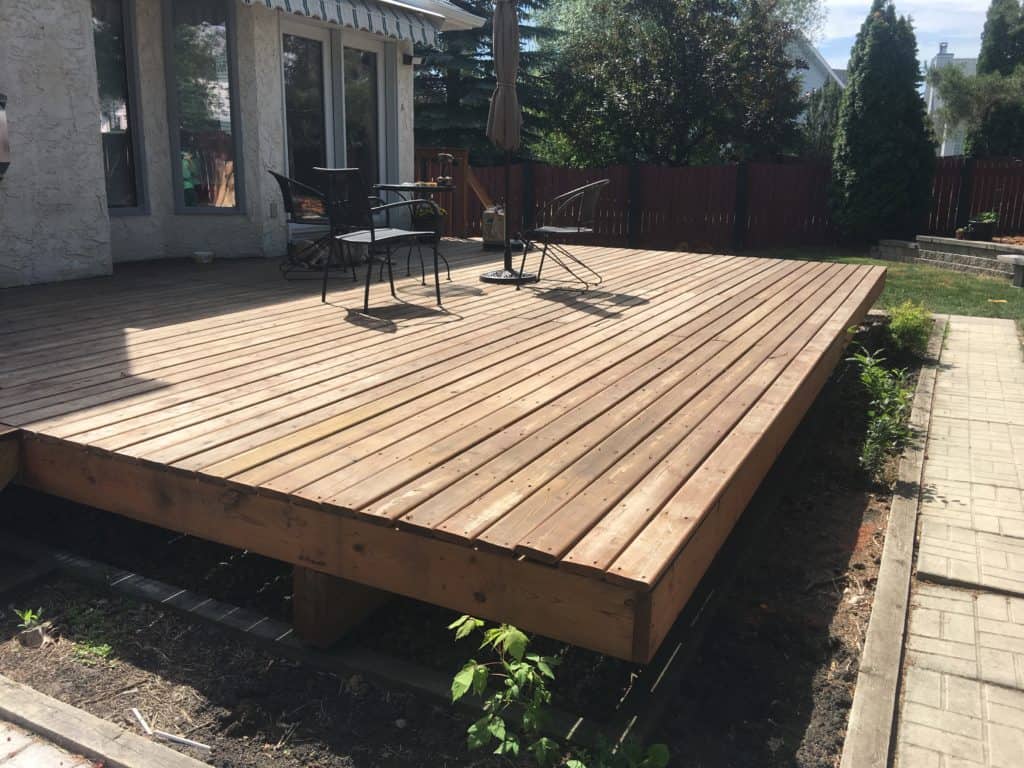
The back yard
This is where the major overhaul occurred. At first glance the back yard looked alright, with a massive 400 sq/ft deck, lots of yard space, and a long retaining wall. But then you dive in a little closer and see the hundreds of uneven patio stones, the floppy unsafe deck, and loads of divided wasted space.
The plan
Remove the deck and replace with a ground level patio. Remove the hundreds of 24″ x 24″ patio blocks around the yard. The adds: a designated area for a fire pit, raised beds for a vegetable garden. Add several additional retaining walls for perennial gardens and patio edging. Add a new set of stairs with a small landing and appropriate hand rails. As you can see it’s a lot of add’s.
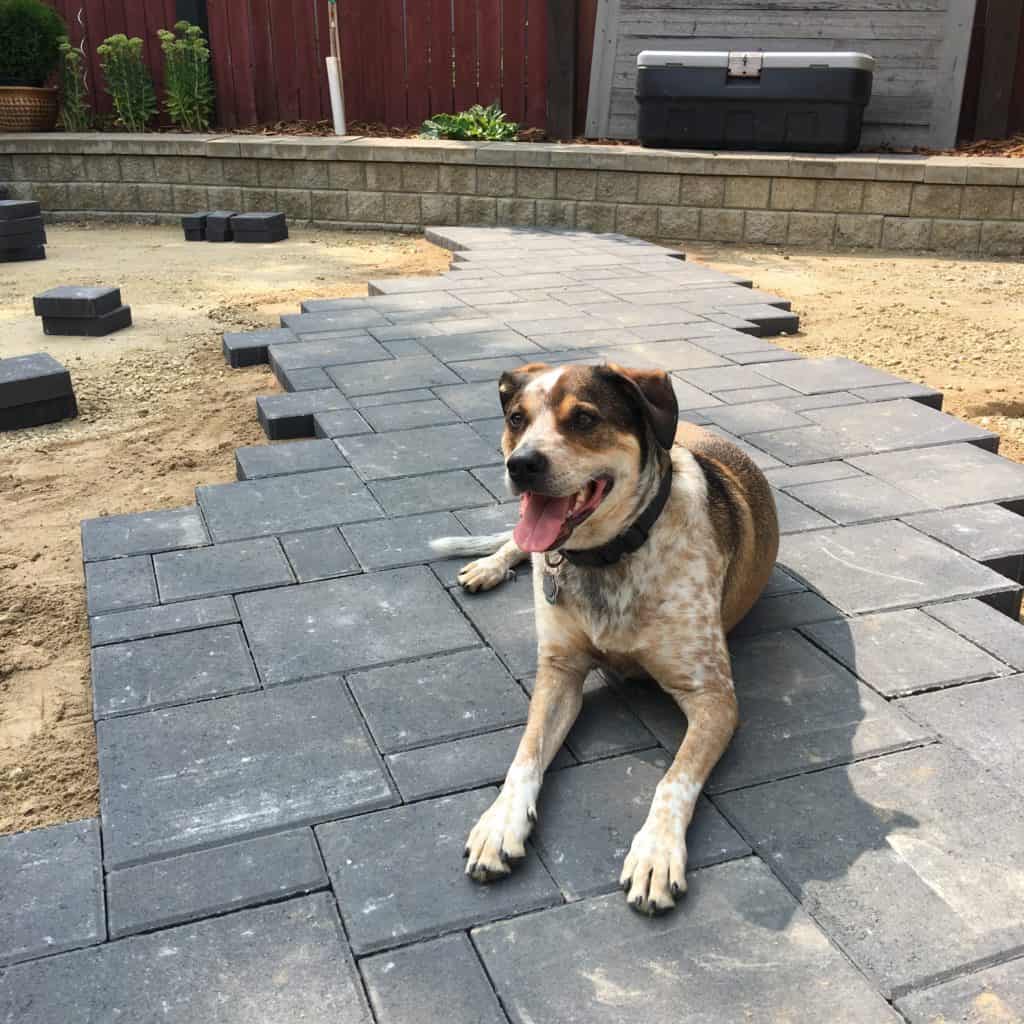
At least someone was happy with the new patio getting installed. He happily lounged out every time a new section was laid.
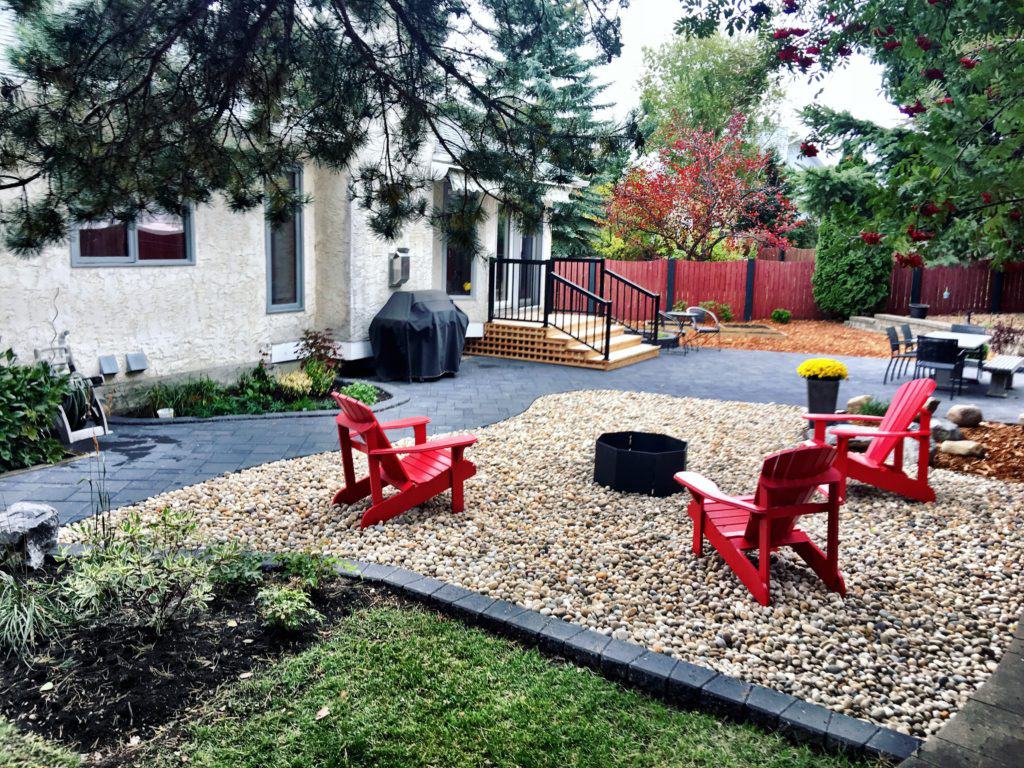
Ultimately, we wound up with a ~480 square foot patio, a 250 square foot fire pit covered with river rock, 5 raised garden beds giving about 130 square feet of vegetable garden growing, and what felt like 100 yards of cedar mulch to finish it all off.
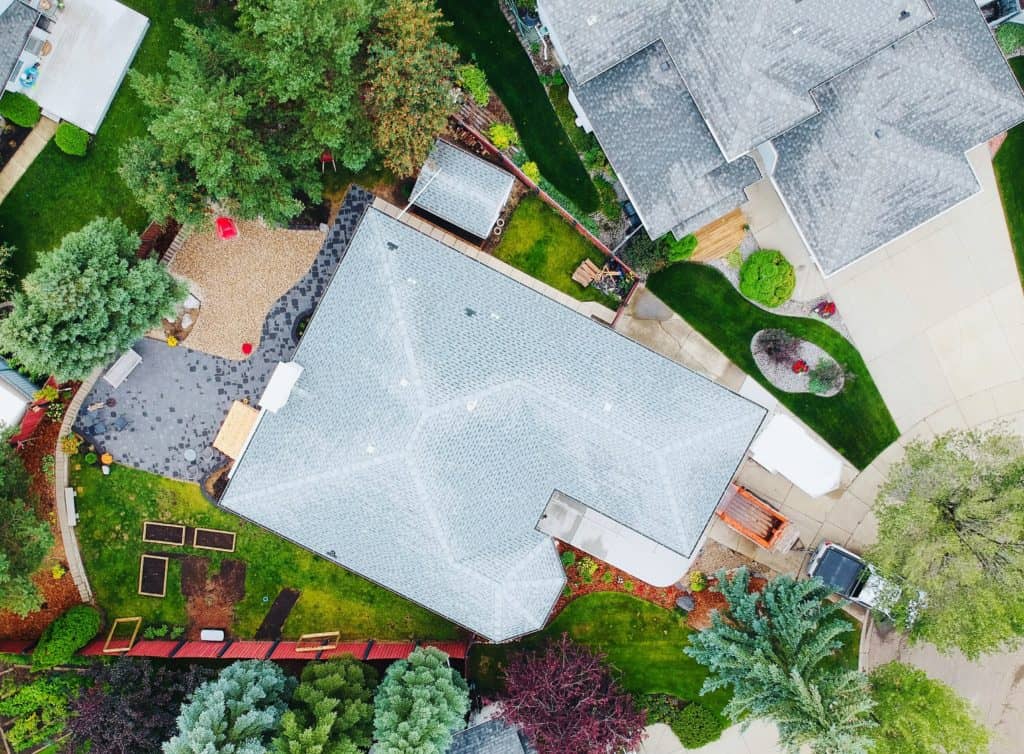
The photo above gives you a different perspective as we continued on the back yard project.
That pretty well wraps up the Beige Bungalow. It was a blast renovating this house from top to bottom, inside and out! The best part is we have officially lined up the next project, so stay tuned!
Hi
We are truly thinking about using the Ikea products for our kitchen
We have a few questions for you
How is it holding up with two kids and a dog?
Do you still think the color is the same from day one?
Thank you
Hi Carl,
Hopefully I can give you some insight! So far we have had ZERO issues with any part of our IKEA cabinetry. The finish has held up strong to dings and dents, washing, kids playing. They have been great. Colours have not faded or changed in any way from the day they were installed. In fact, when we finish cleaning, you would be hard pressed to tell the kitchens are already a few years old. Good luck with your project and if you have any other questions, feel free to ask!